Appearance
Mercado Pago Settings
Mercado Pago is a leading payment platform, making it the perfect choice for businesses operating in Latin America. By connecting Mercado Pago to FluentCart, you can securely accept a wide variety of local payment methods, including Credit Cards, Pix, Boleto, OXXO, and Bank Transfers.
This guide will walk you through the entire process of connecting your Mercado Pago account to FluentCart.
Step 1: Activate Mercado Pago in FluentCart
First, you need to enable Mercado Pago as a payment method in your store.
- From your WordPress dashboard, navigate to FluentCart Pro > Settings.
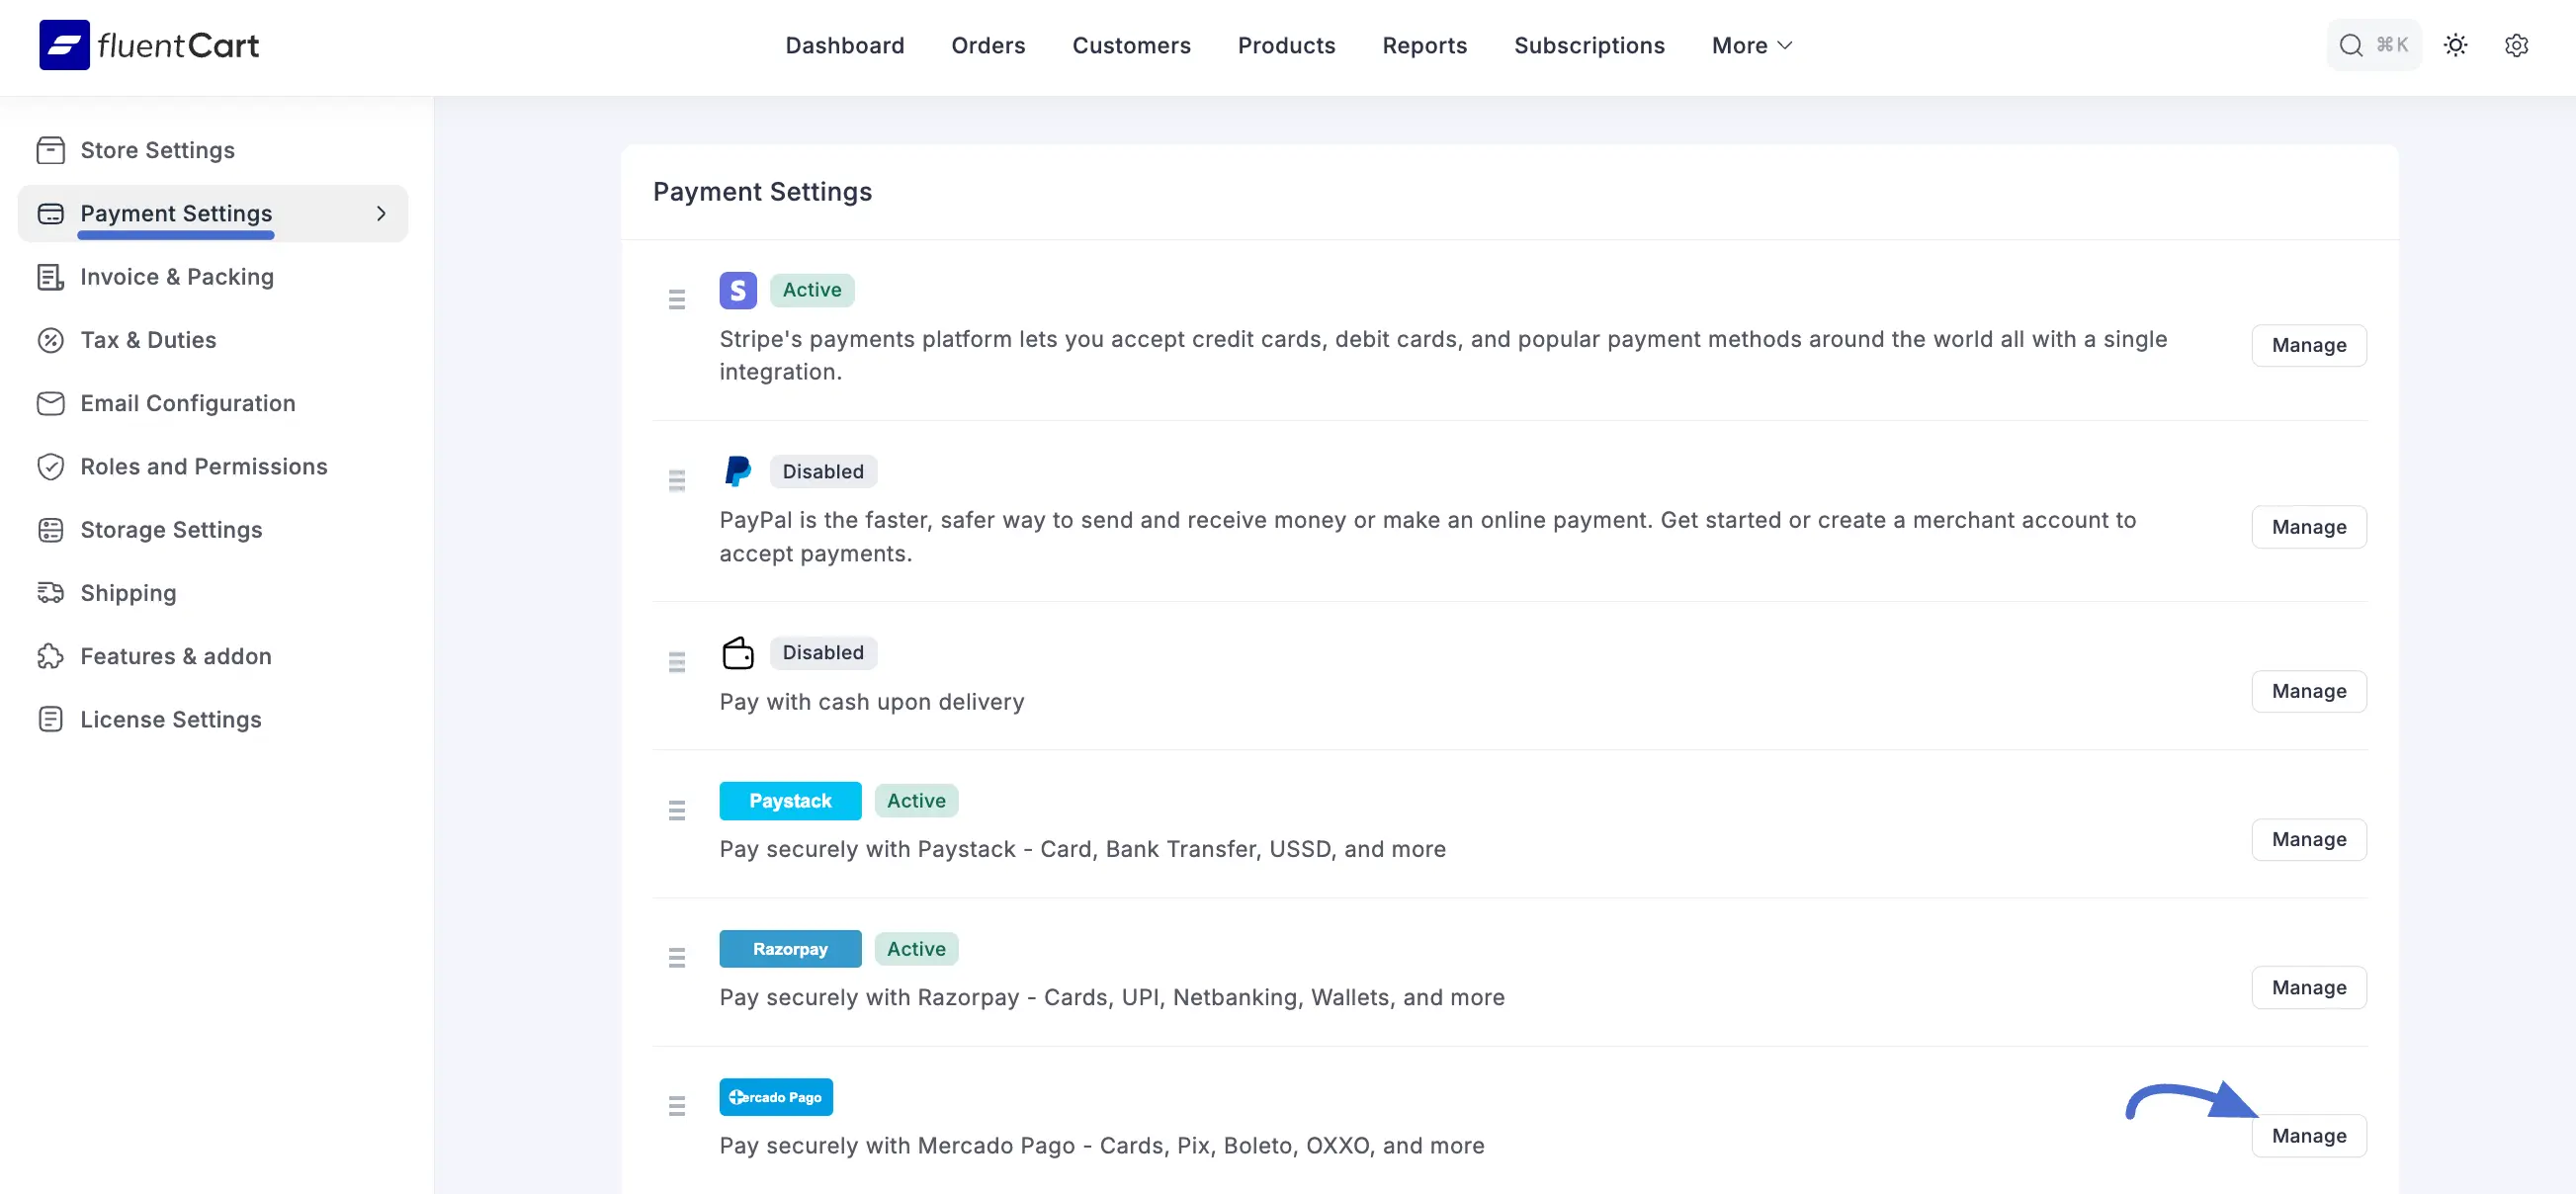
- Click on the Payment Settings tab.
- Find Mercado Pago in the list of available gateways and click the Manage button.
- If the addon is not yet installed, click the Install & Activate button to begin the setup.
Step 2: Configure Mercado Pago Settings
Once activated, you need to provide your API credentials to sync your store with your Mercado Pago account.
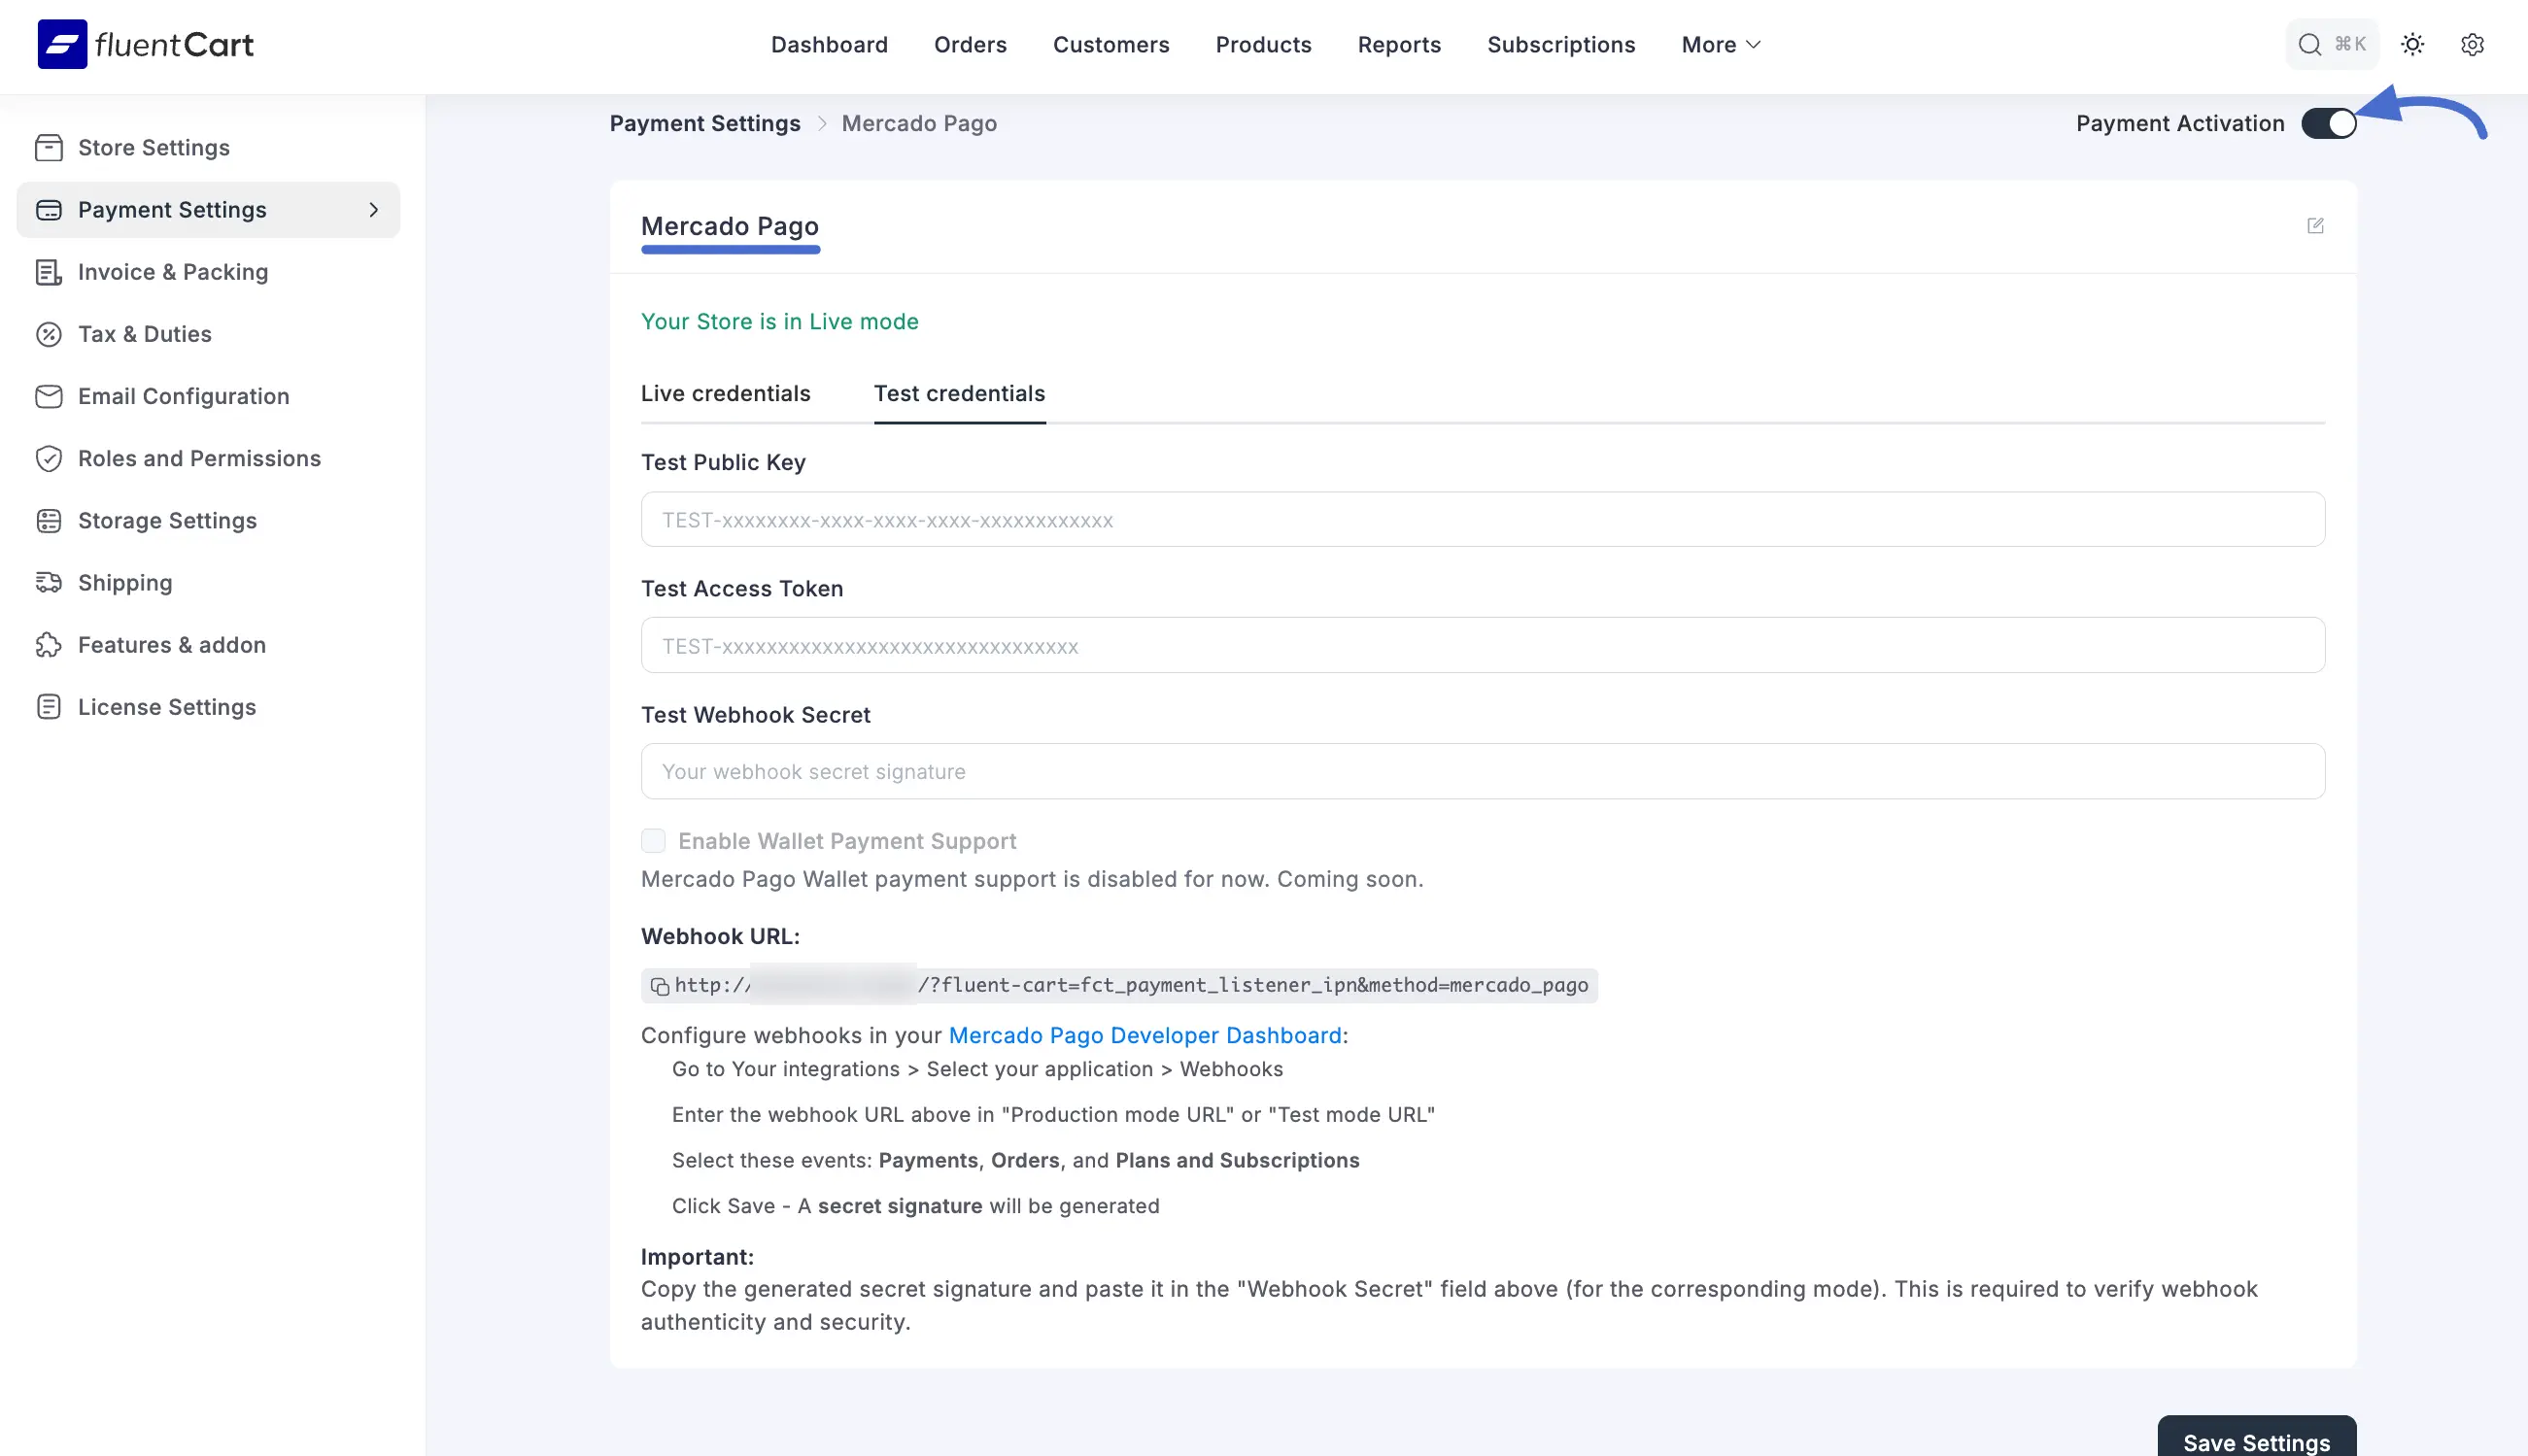
- Enable the gateway by toggling the Payment Activation switch at the top right.
- Choose your credential mode:
- Test credentials: Select this tab to test your checkout flow without processing real money.
- Live credentials: Select this tab when you are ready to accept real payments from your customers.
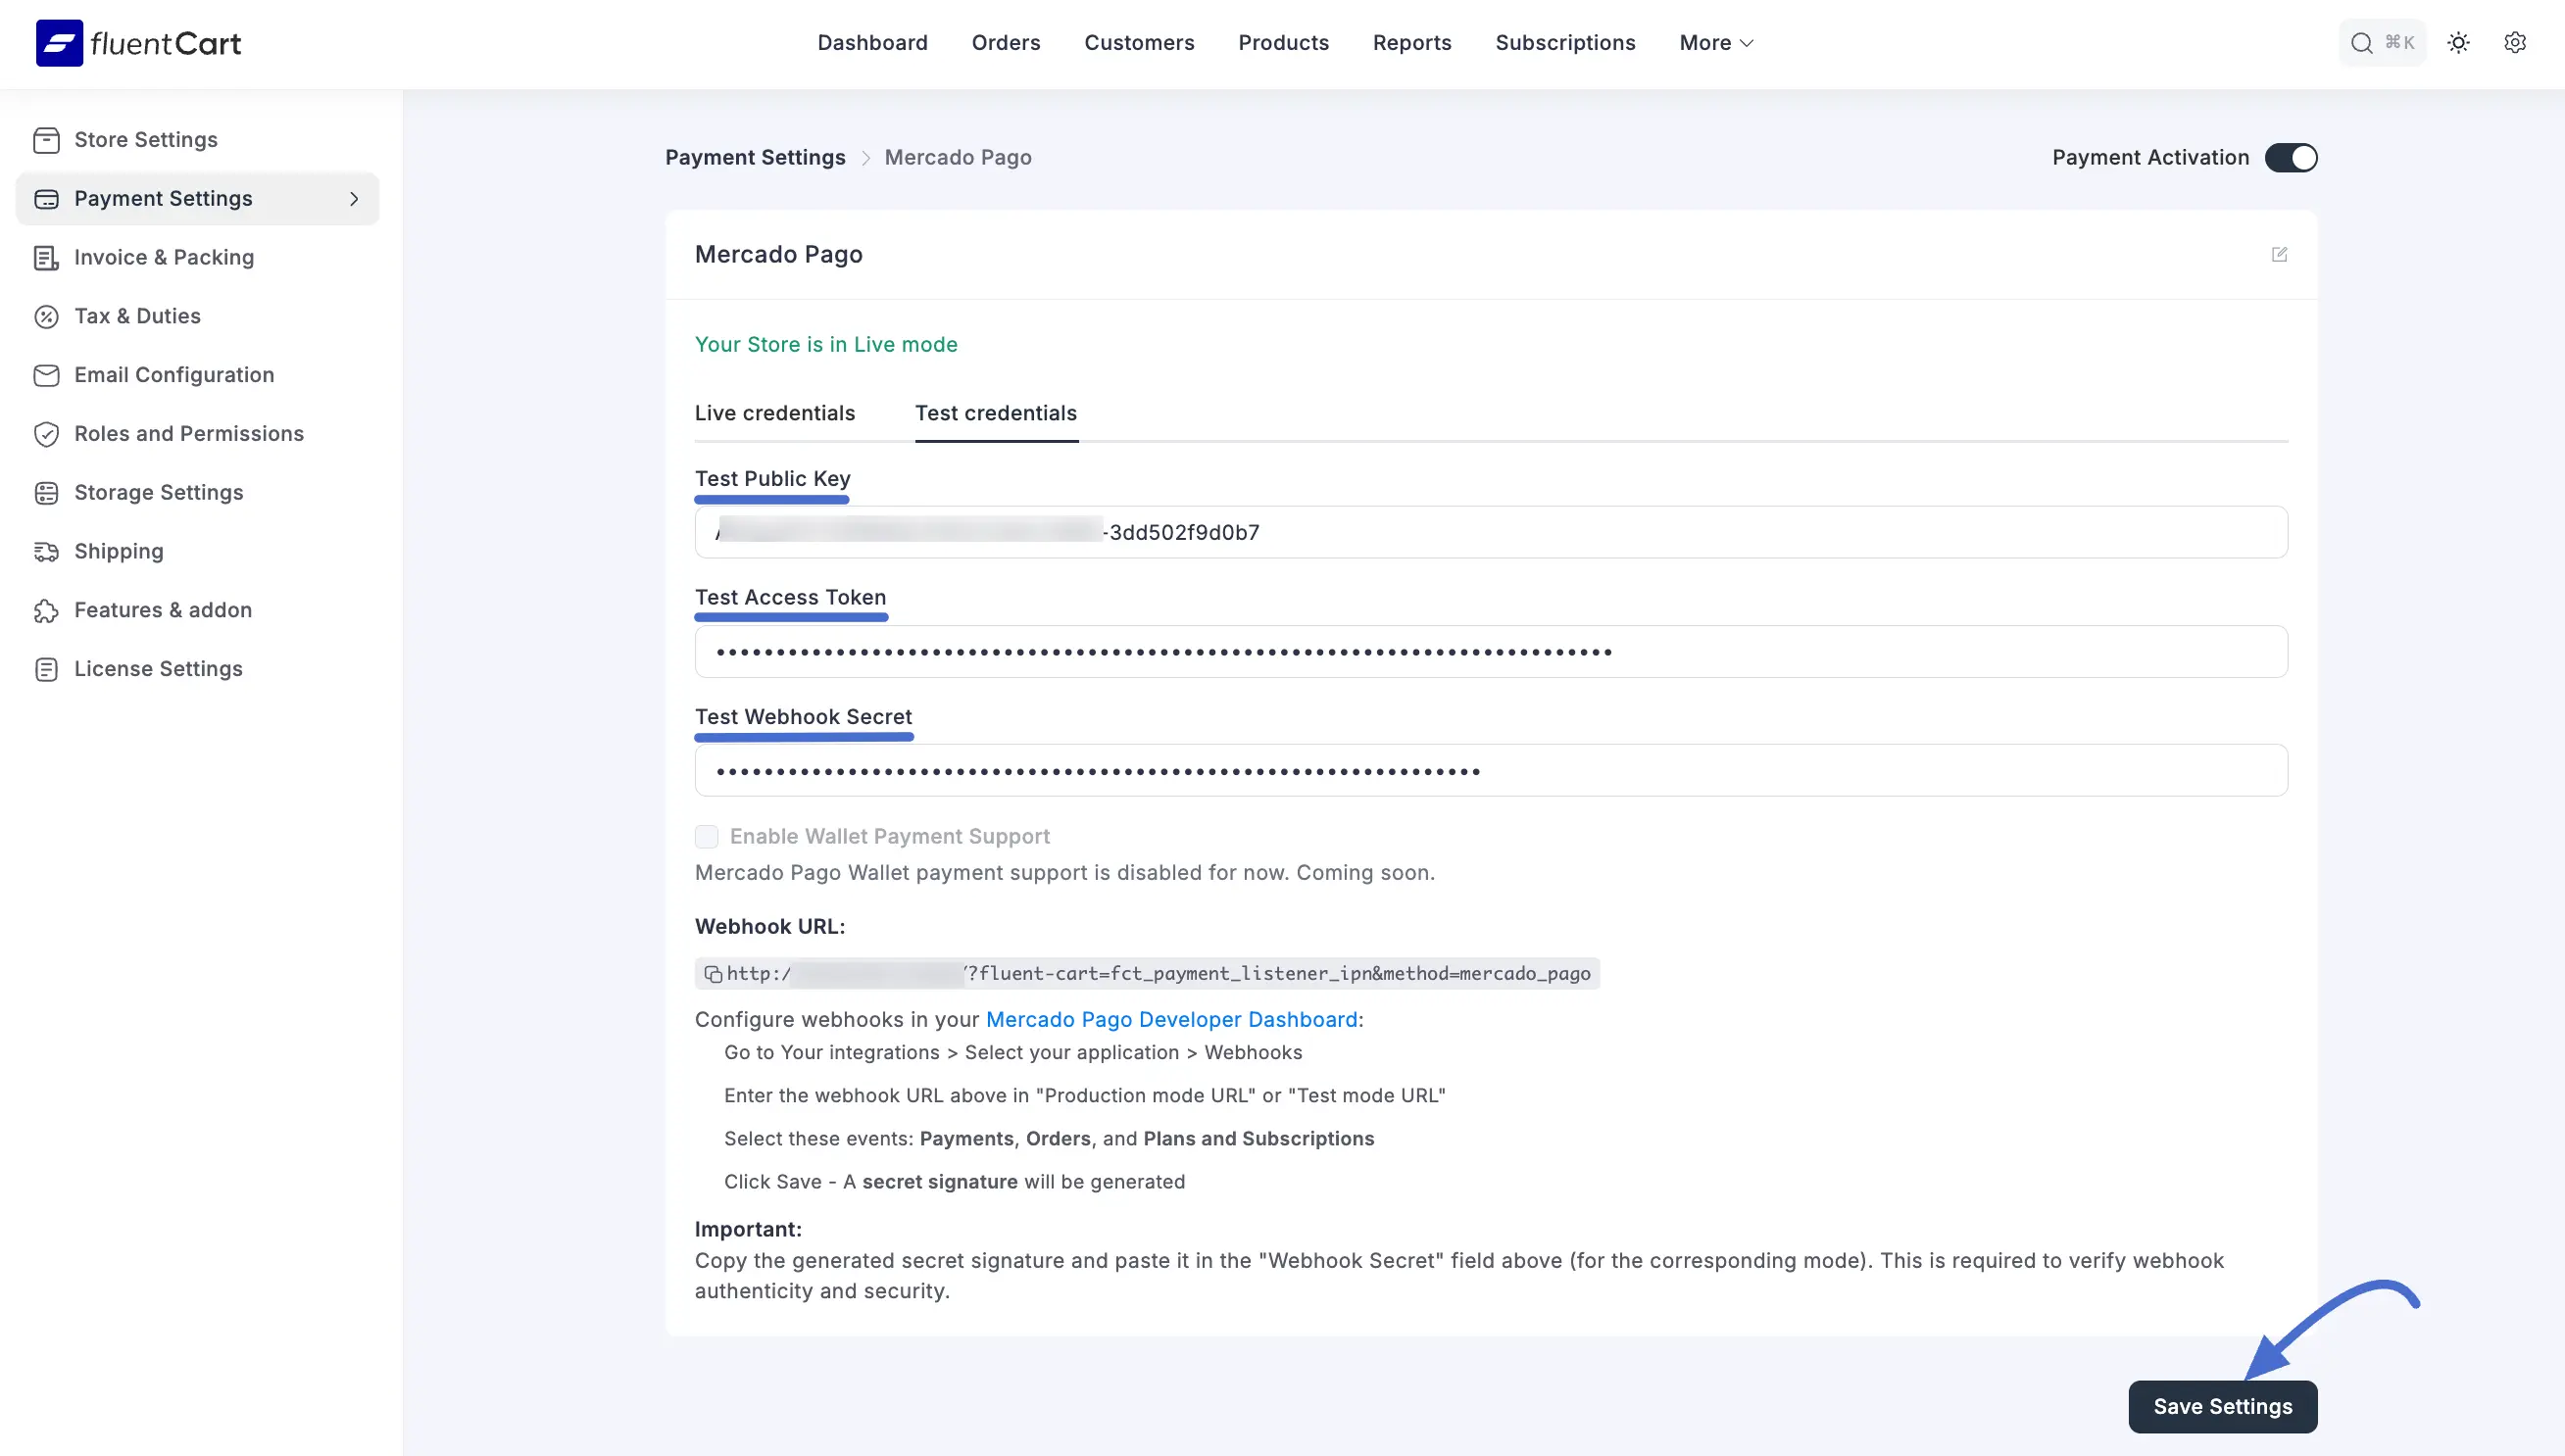
- You will need to enter the following information for your chosen mode:
- Public Key
- Access Token
- Webhook Secret
NOTE
Testing Your Setup: When using Test credentials, you may notice many "false errors" appearing, or the API might suddenly become unavailable. These issues can prevent you from completing the proper checkout flow for your tests. Because of this, we highly recommend testing your store using your real Production credentials before officially going live to ensure everything is working perfectly.
Currency Match: Ensure that your FluentCart store currency is set to the same currency used in your Mercado Pago account.
Step 3: Create an Application in Mercado Pago
To get your keys, you must first create an application in the Mercado Pago Developers portal.
- Log in to your Mercado Pago Developers dashboard and go to Your integrations. Click the Create application button.
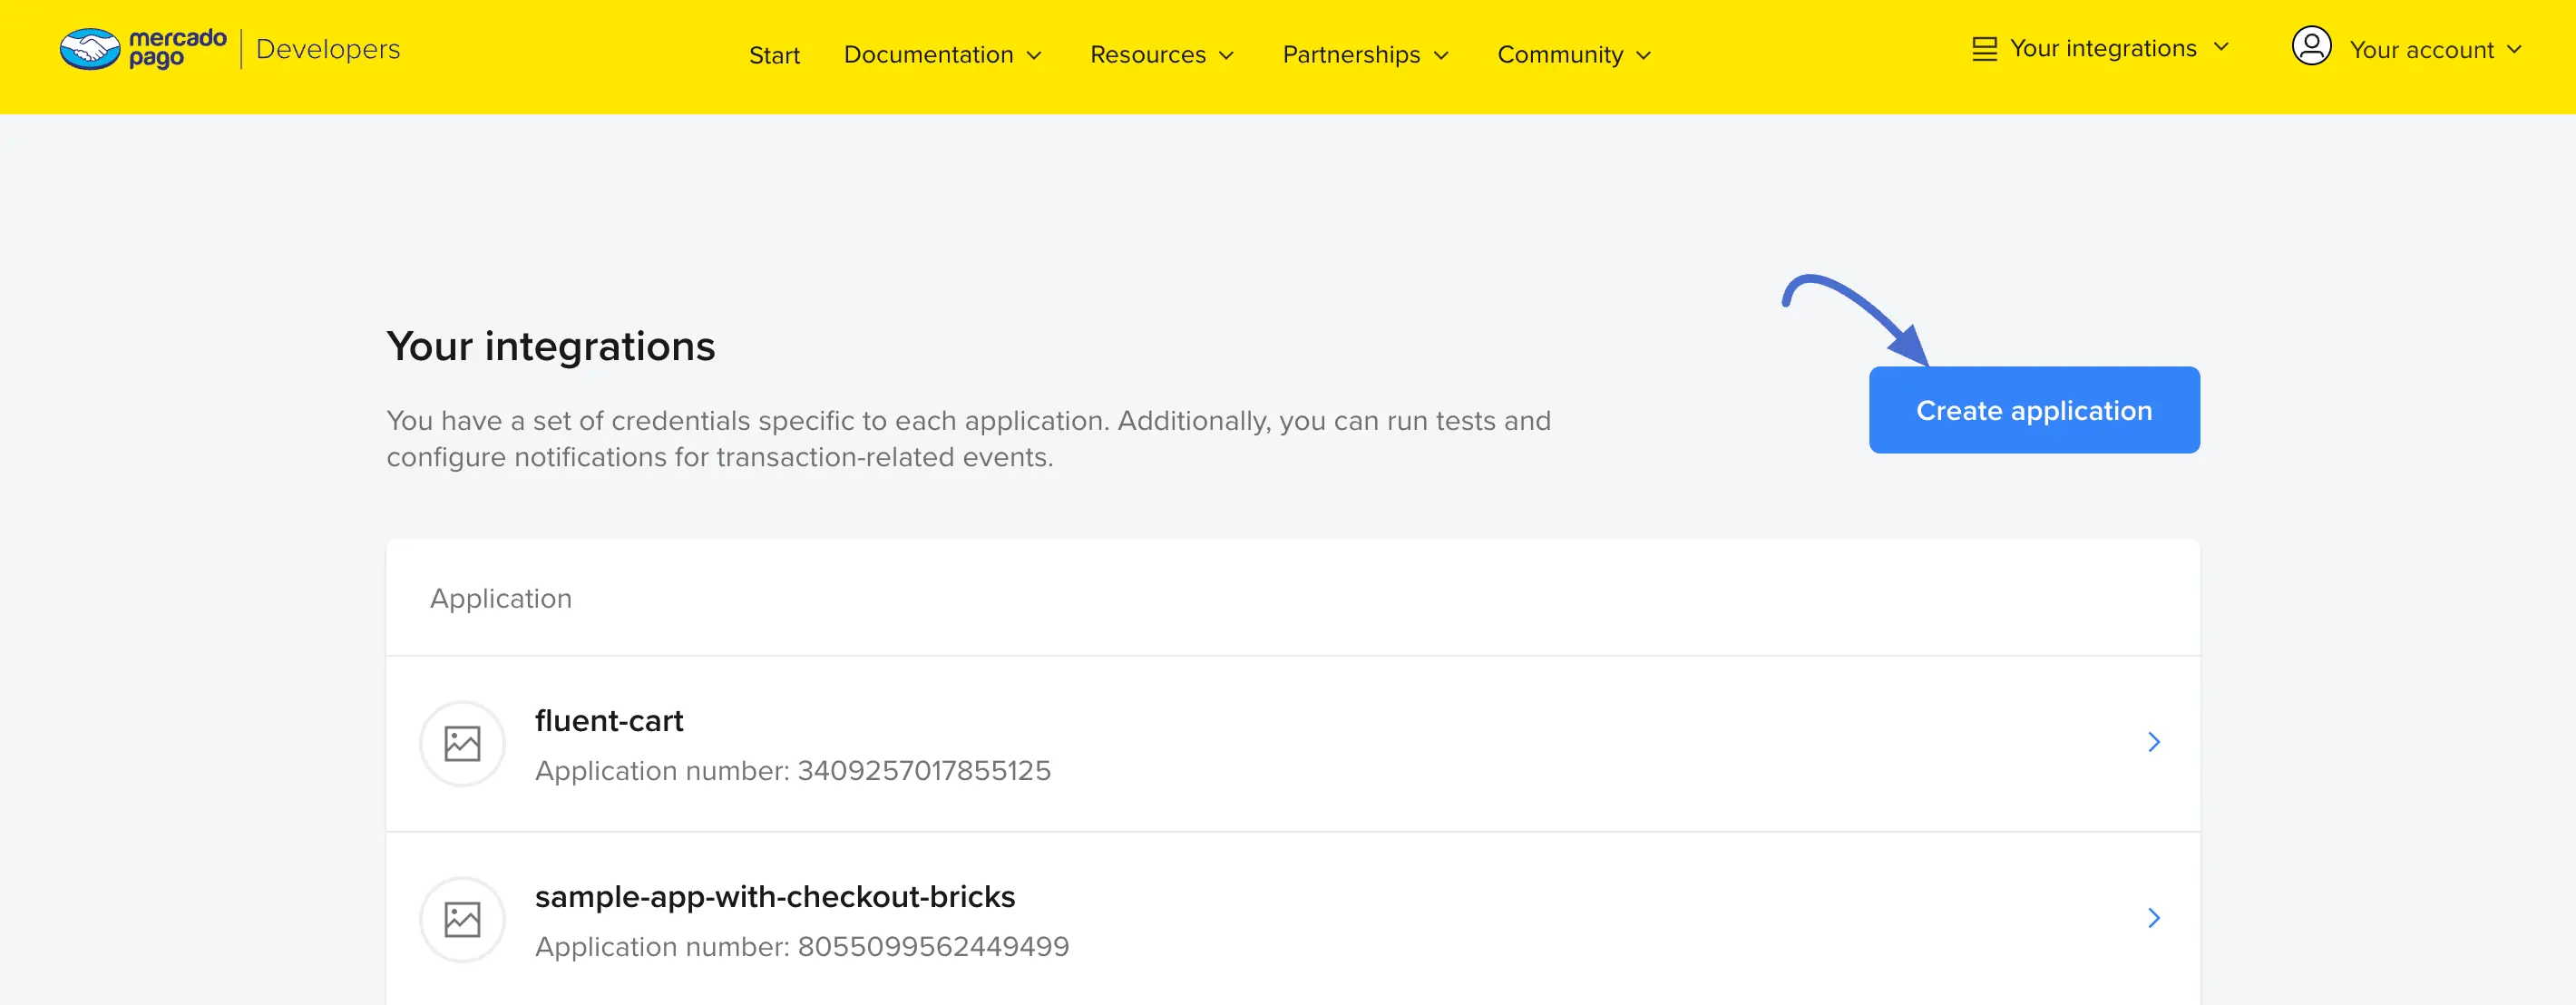
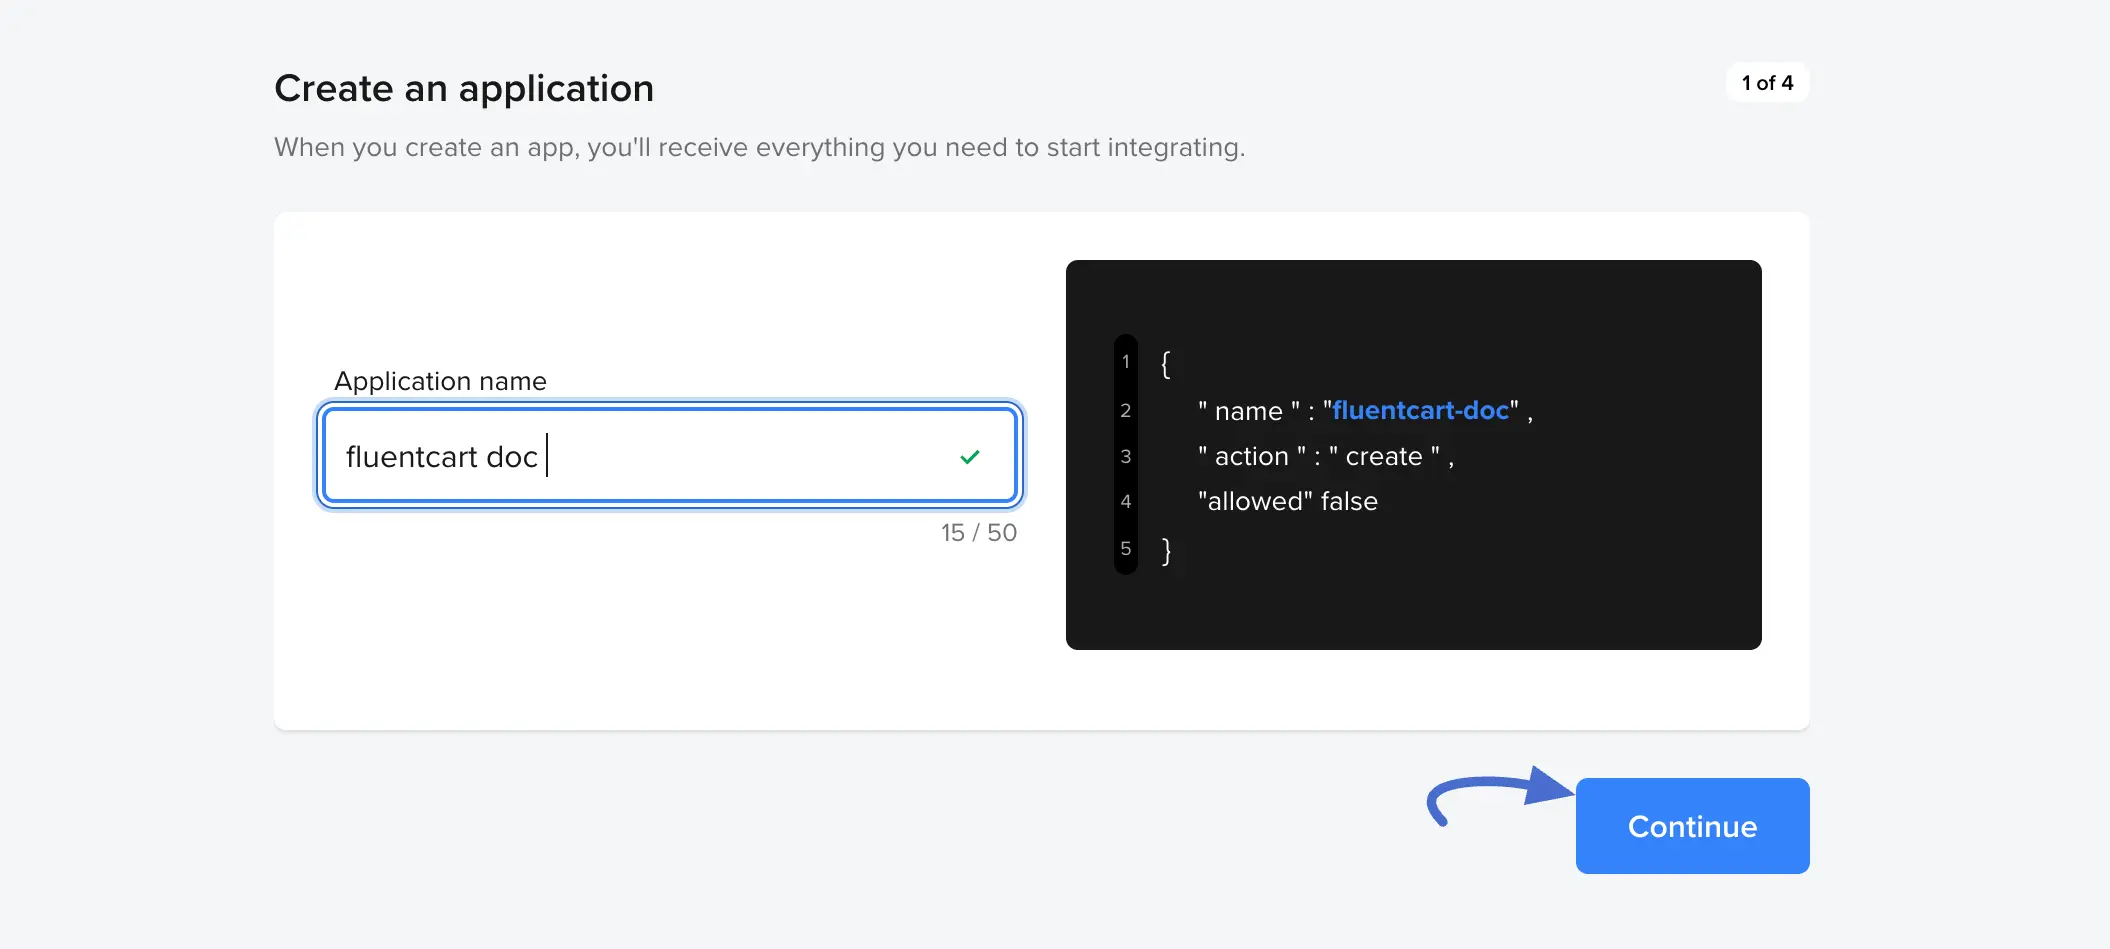
- Enter your Application name and click Continue.
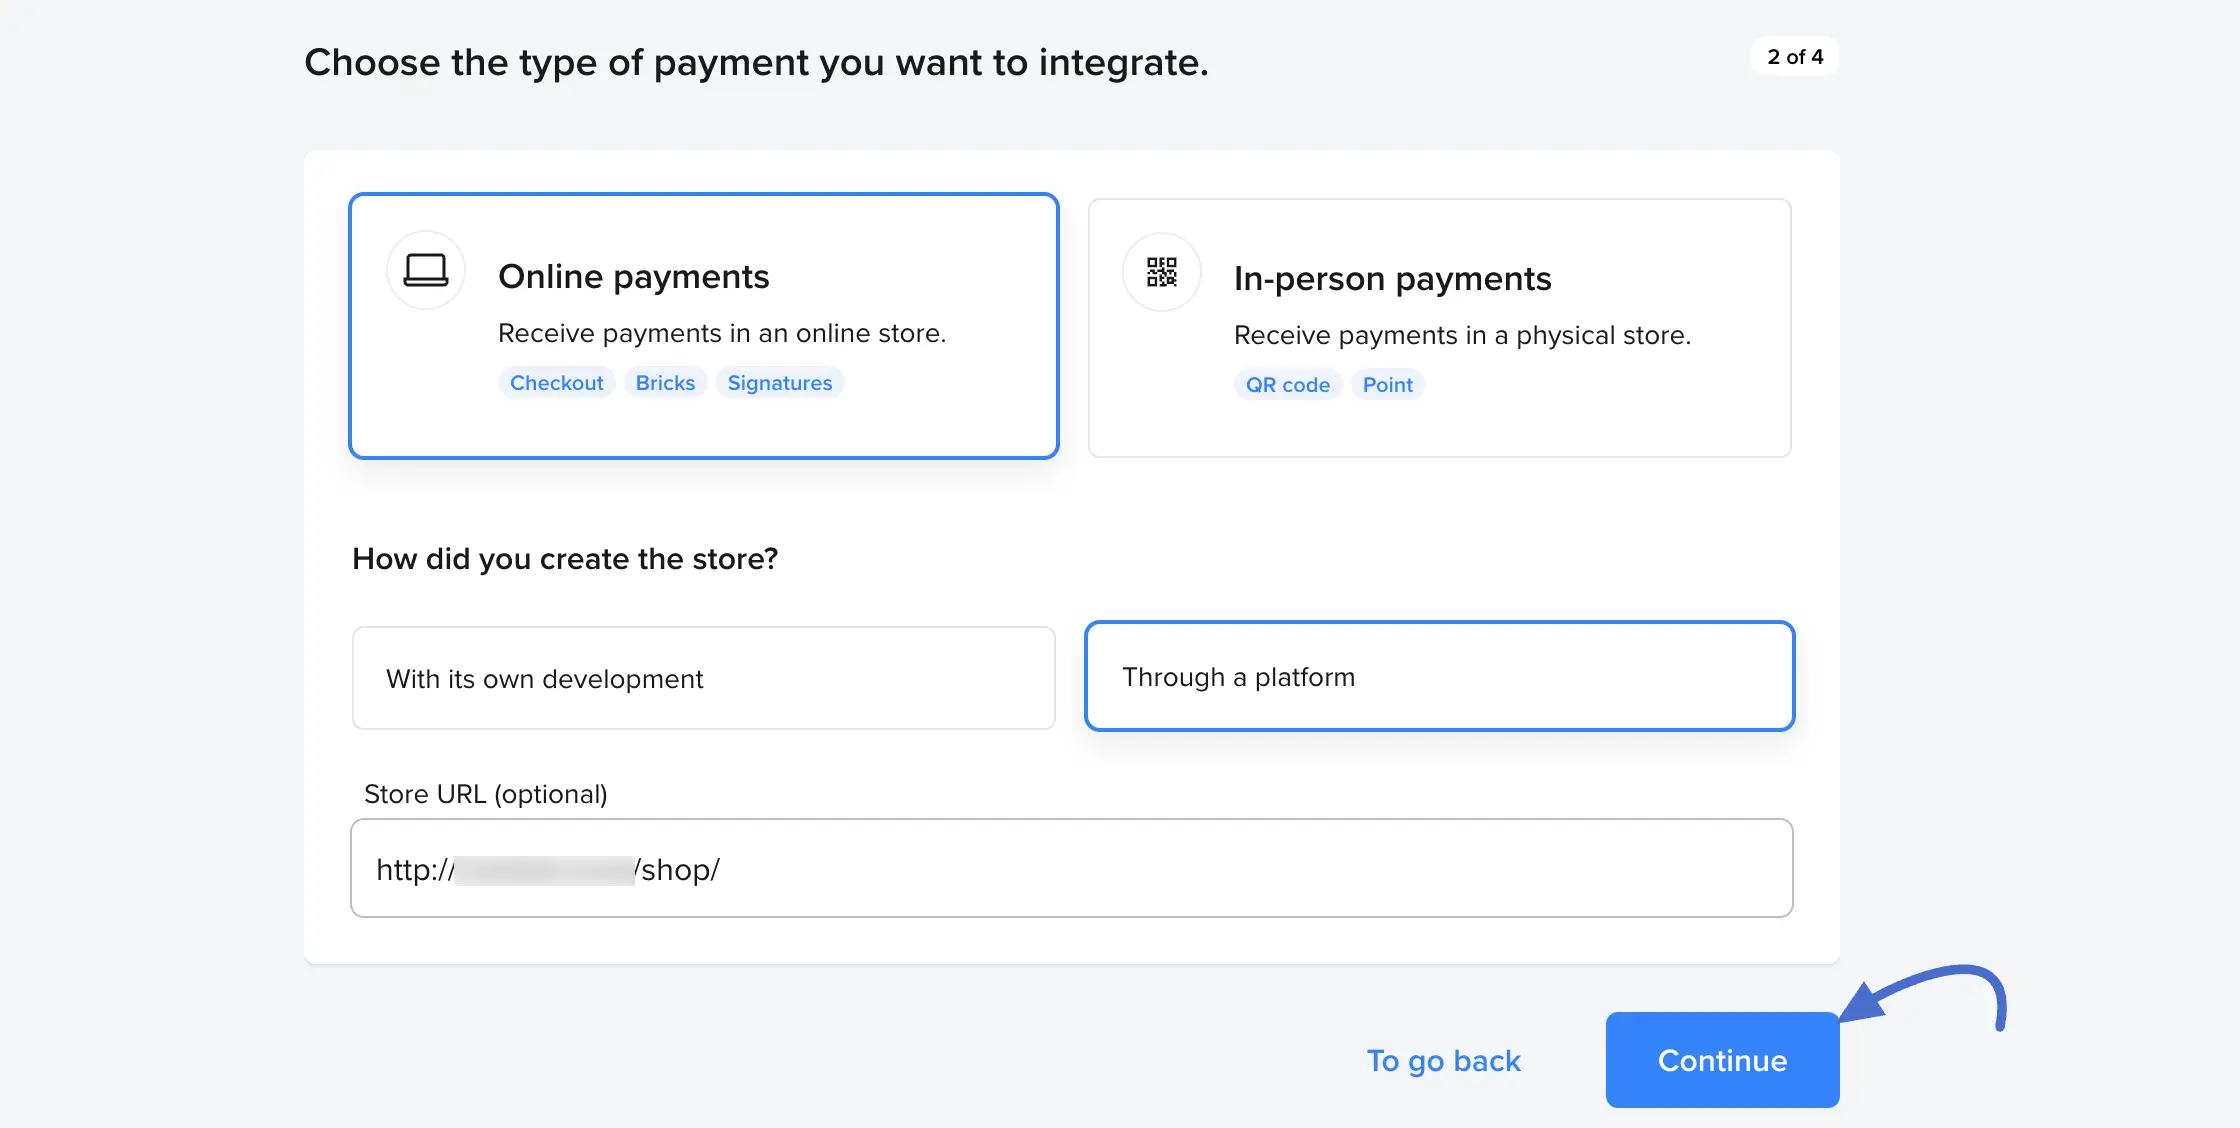
- Select Online payments and choose the option to create your store. Click on the Continue button.
- Confirm your details and click Confirm to generate your application.
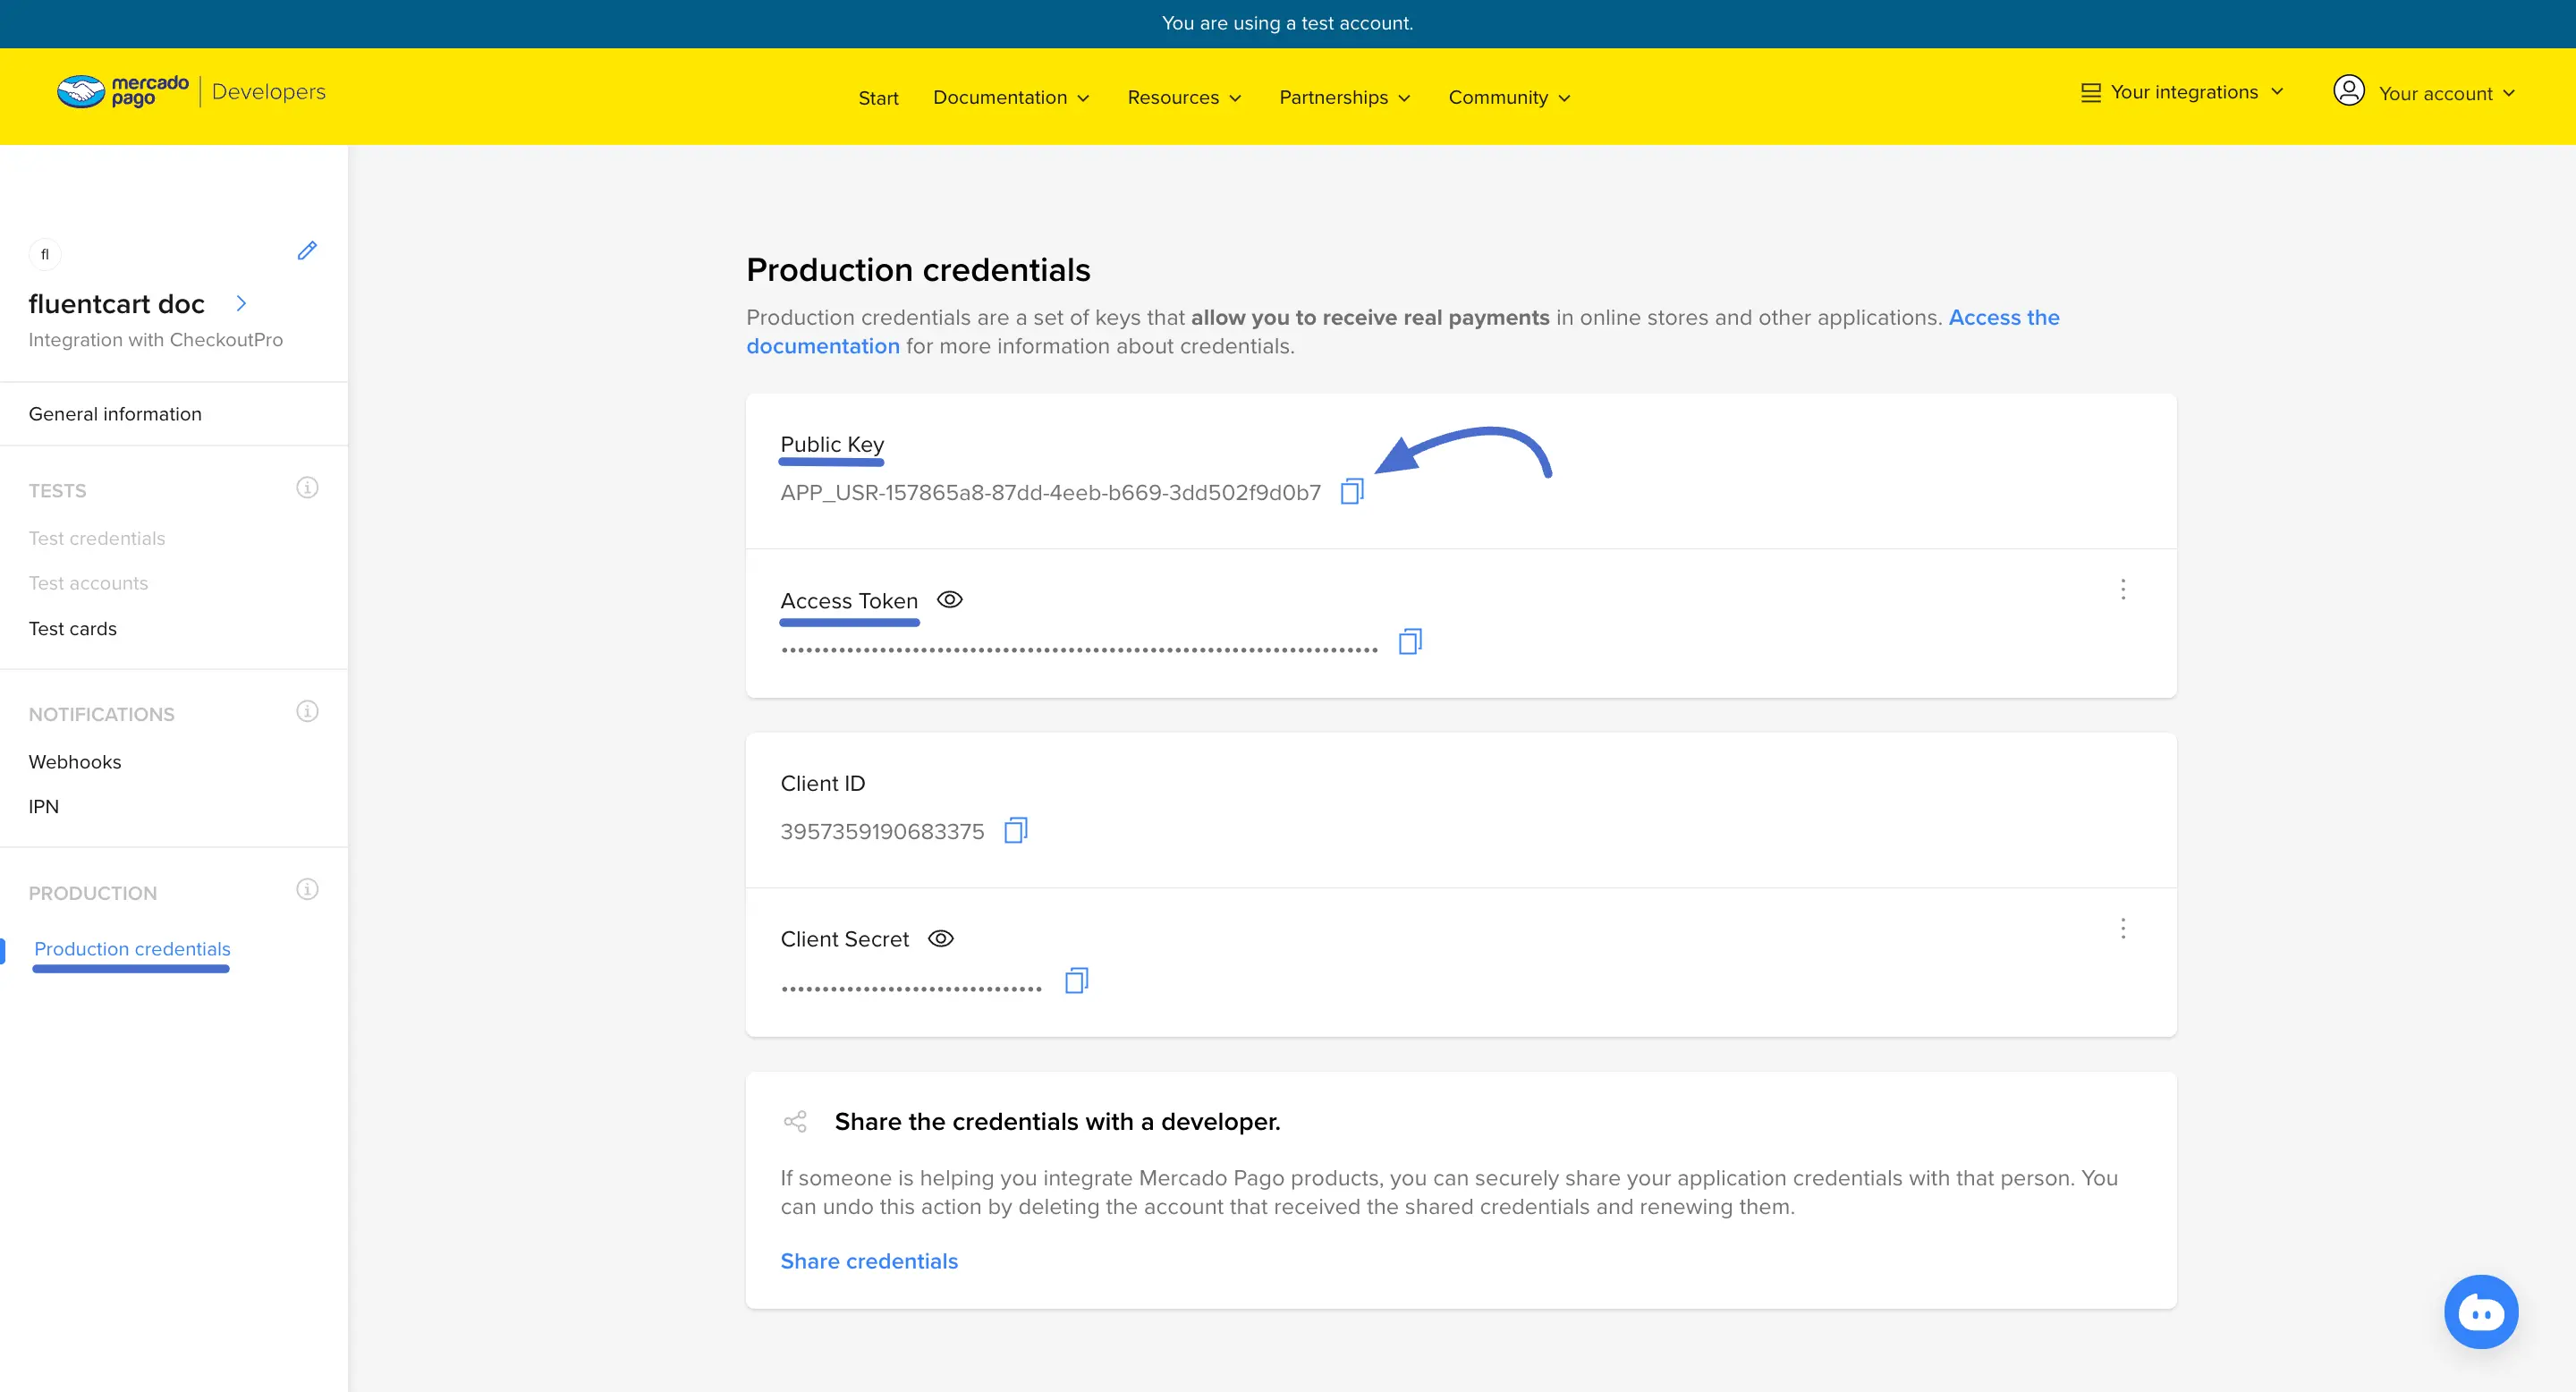
- Navigate to Production credentials in the side menu to copy your Public Key and Access Token for later use.
Step 4: Set up Webhooks
Webhooks are essential for FluentCart to receive real-time updates about transaction statuses.
- Copy the Webhook URL: On your FluentCart Mercado Pago settings page, copy the unique Webhook URL provided.
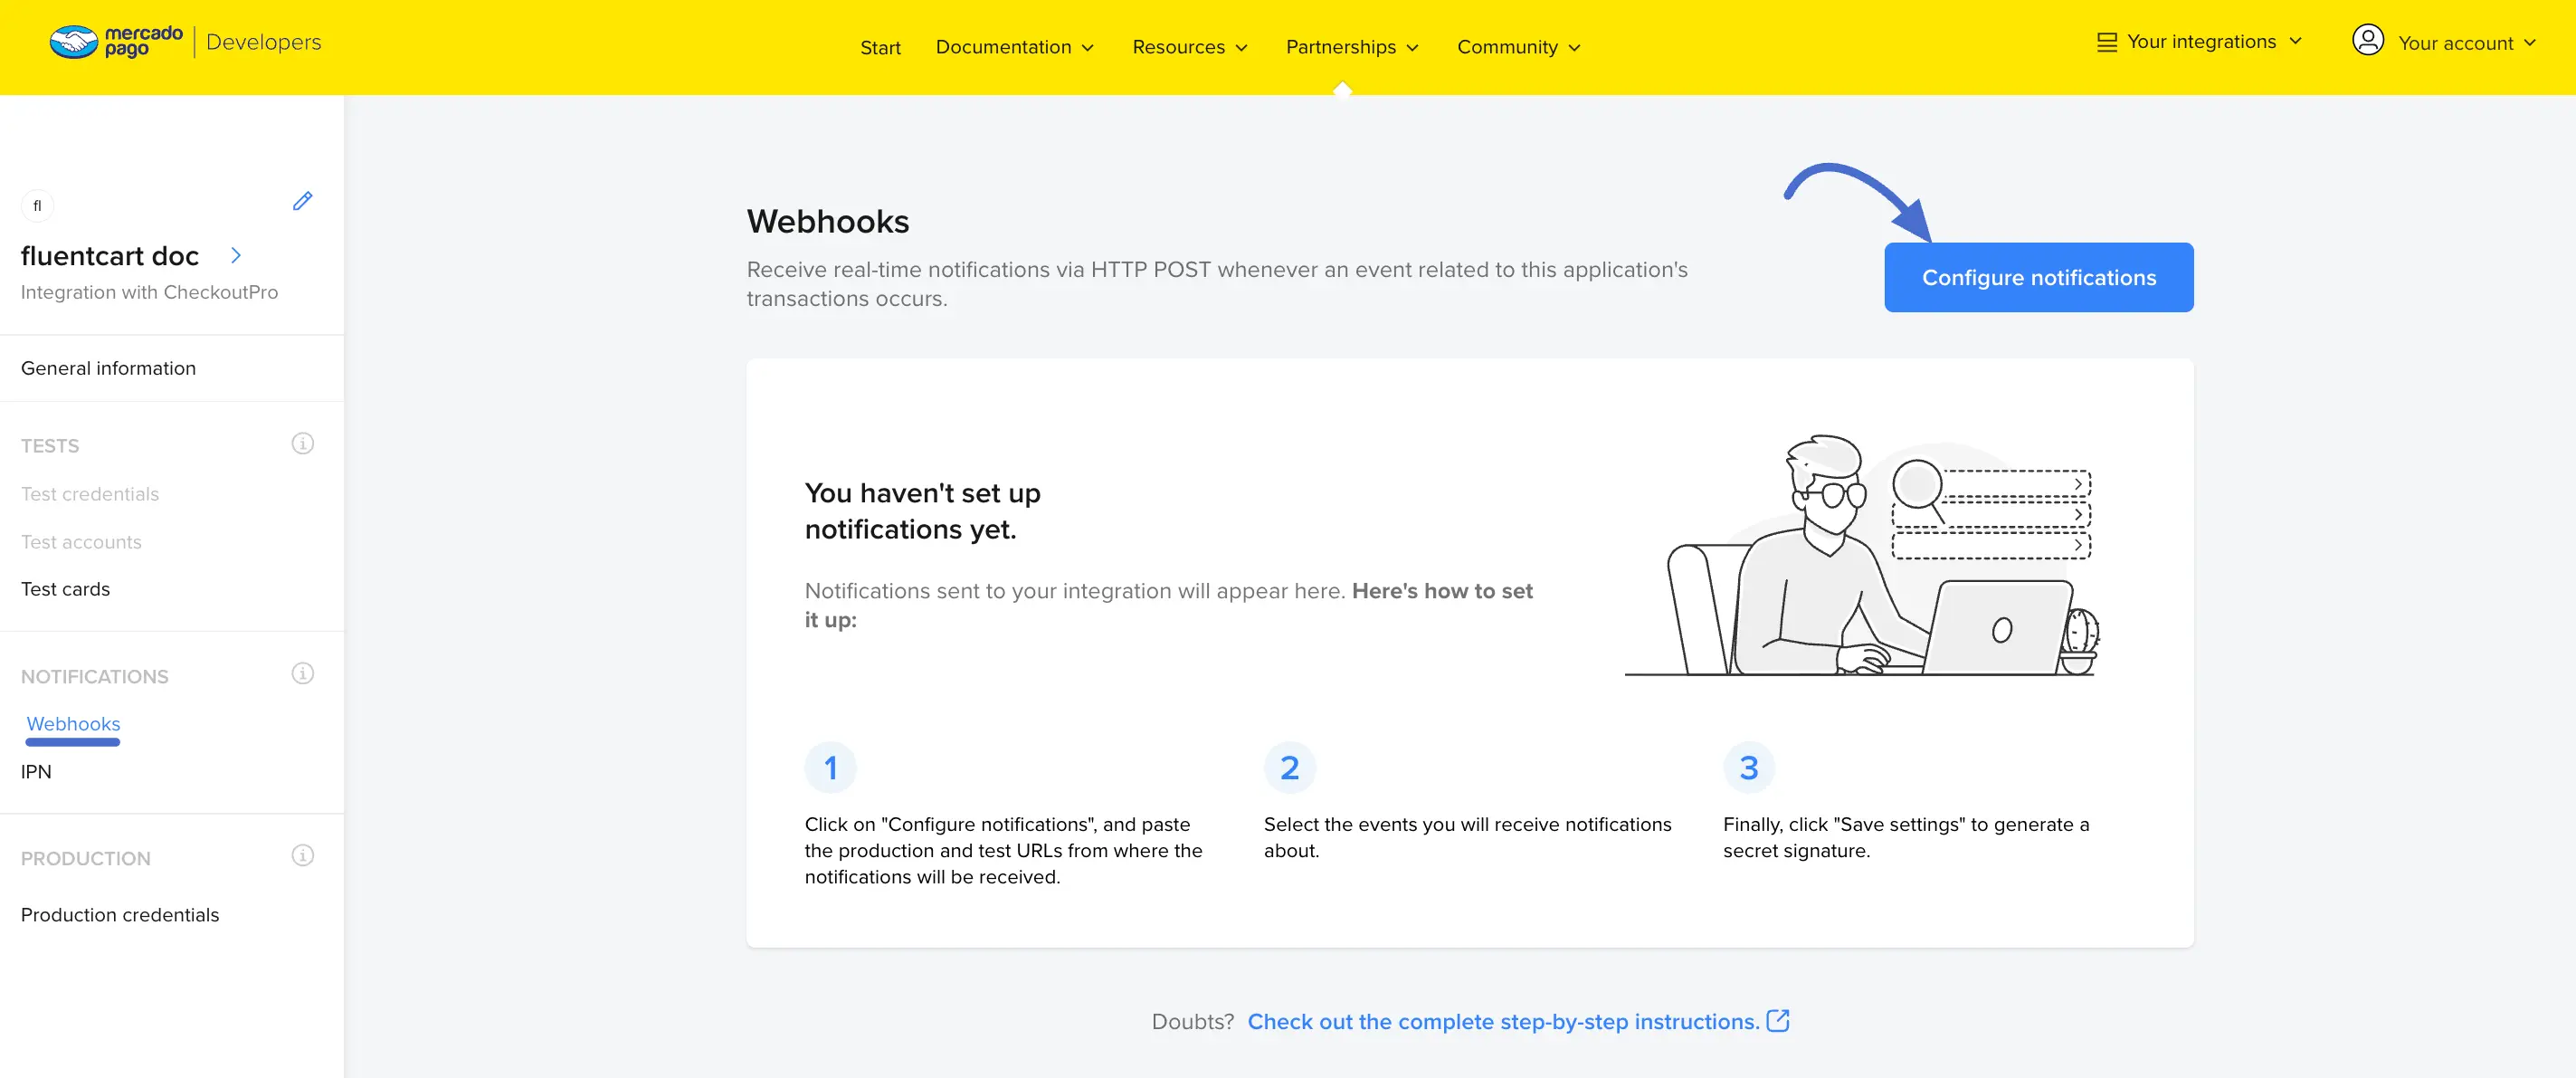
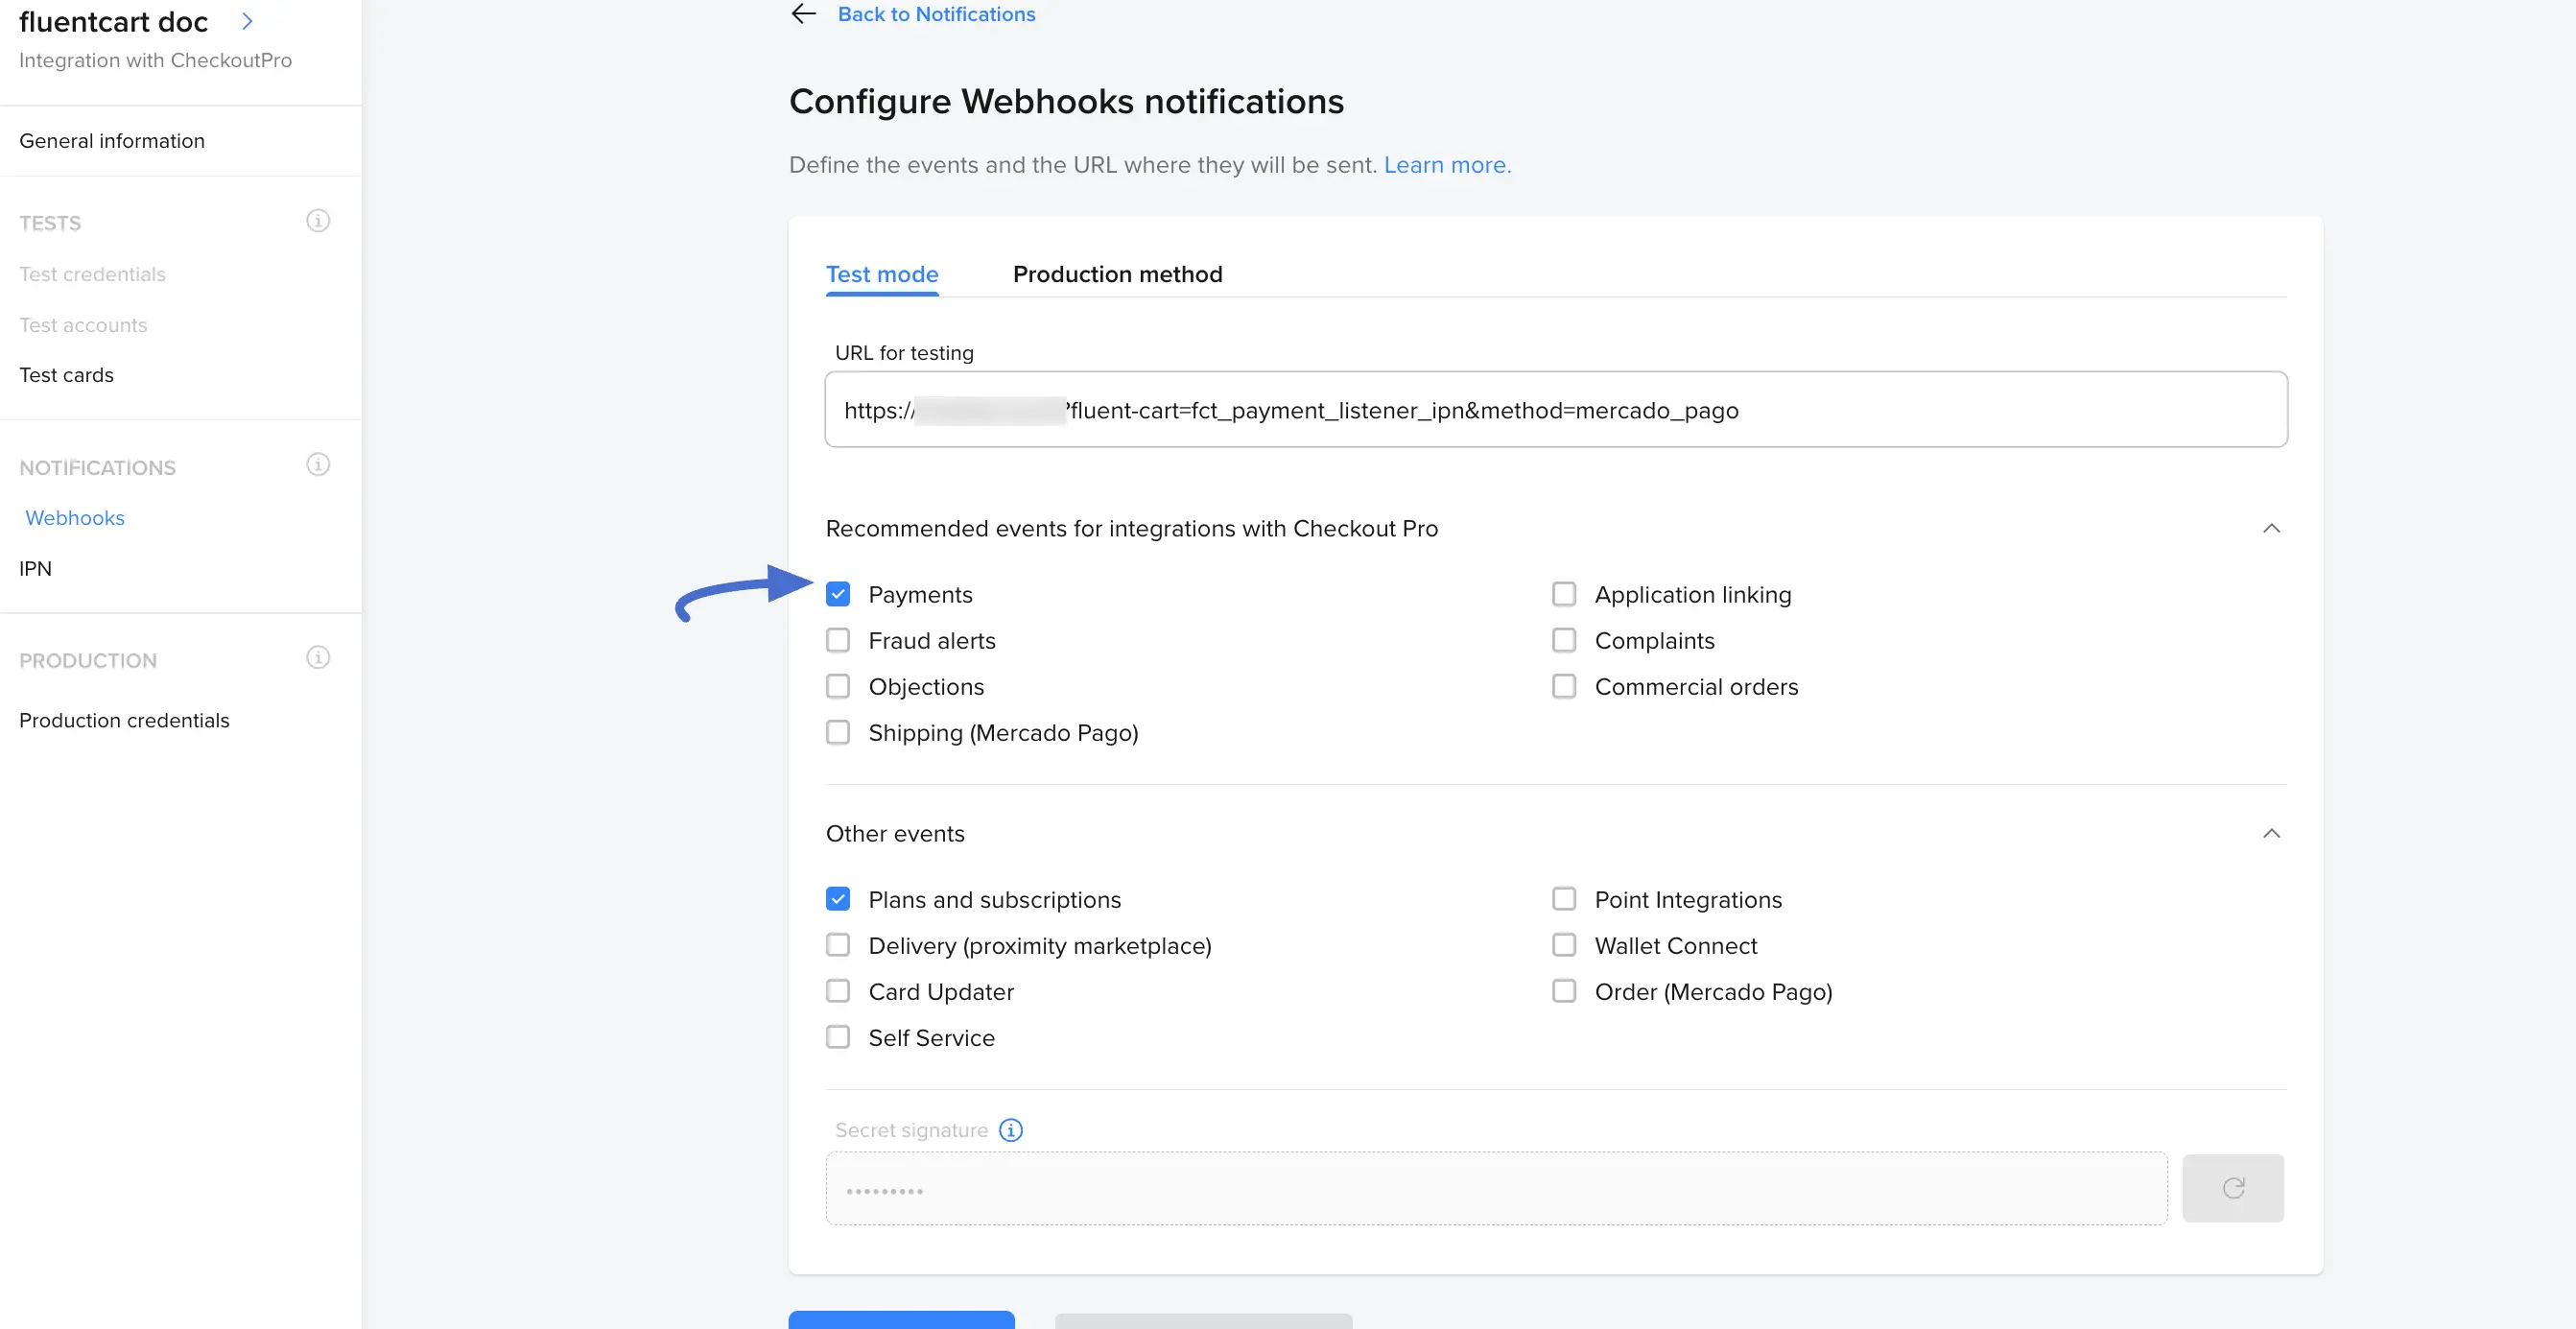
- Configure in Mercado Pago: In your Mercado Pago application, navigate to Notifications > Webhooks and click Configure notifications.
- Paste the URL: Paste the link into the URL for testing (for Test mode) or Production method (for Live mode) field.
- Select Events: Under "Recommended events," check the boxes for:
- Payments
- Plans and subscriptions
- Get Your Secret: Click Save settings. A Secret signature (Webhook Secret) will be generated.
- Add to FluentCart: Copy this secret and paste it into the Test/Live Webhook Secret field back in your FluentCart settings.
Once all fields are filled, click the Save Settings button at the bottom of the page to finalize your integration.