Appearance
Setting Up Shipping Methods
Shipping methods are the different delivery options you offer to customers within a specific shipping zone. FluentCart allows you to create flexible shipping options, from flat rates to free shipping, ensuring you can meet your customers' needs.
This guide will show you how to add and configure shipping methods for your shipping zones.
How to Add a Shipping Method
Before you can add a method, you must have already created a shipping zone.
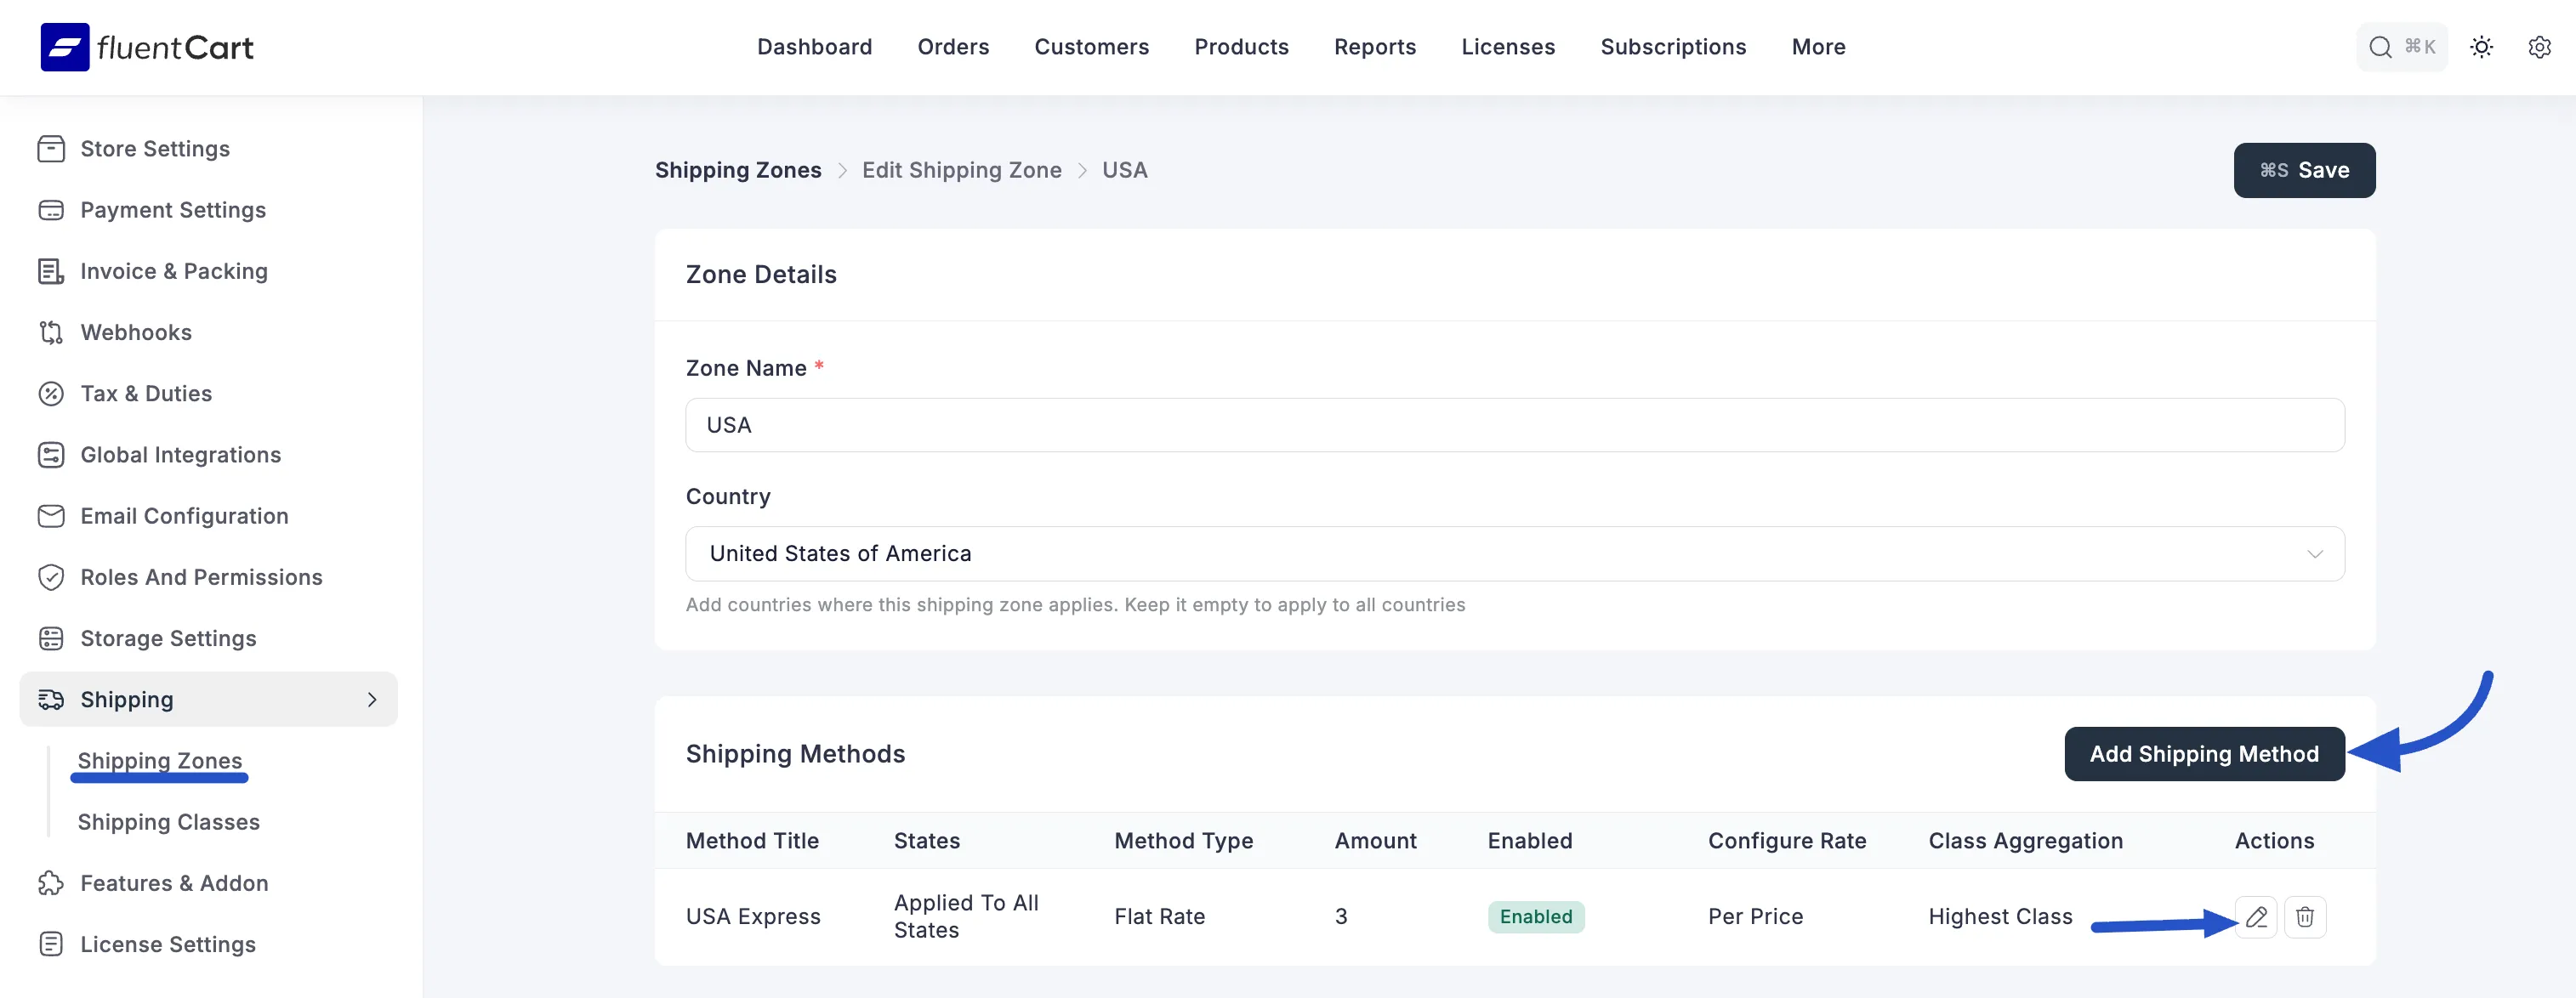
- From your WordPress dashboard, navigate to FluentCart Pro > Settings > Shipping Zones.
- Click on the Shipping Zones sub-menu.
- Find the shipping zone you want to add a method to and click on its name to edit it.
- Inside the zone's settings, scroll down to the Shipping Methods section and click the Add Shipping Method button. You can also manage your existing shipping methods from this screen. To update a method's settings, click the Edit button located on the same row as its title.
- This will open a pop-up window where you can configure the details of your new shipping method.
Configuring the Shipping Method
This is where you define how your shipping option will work.
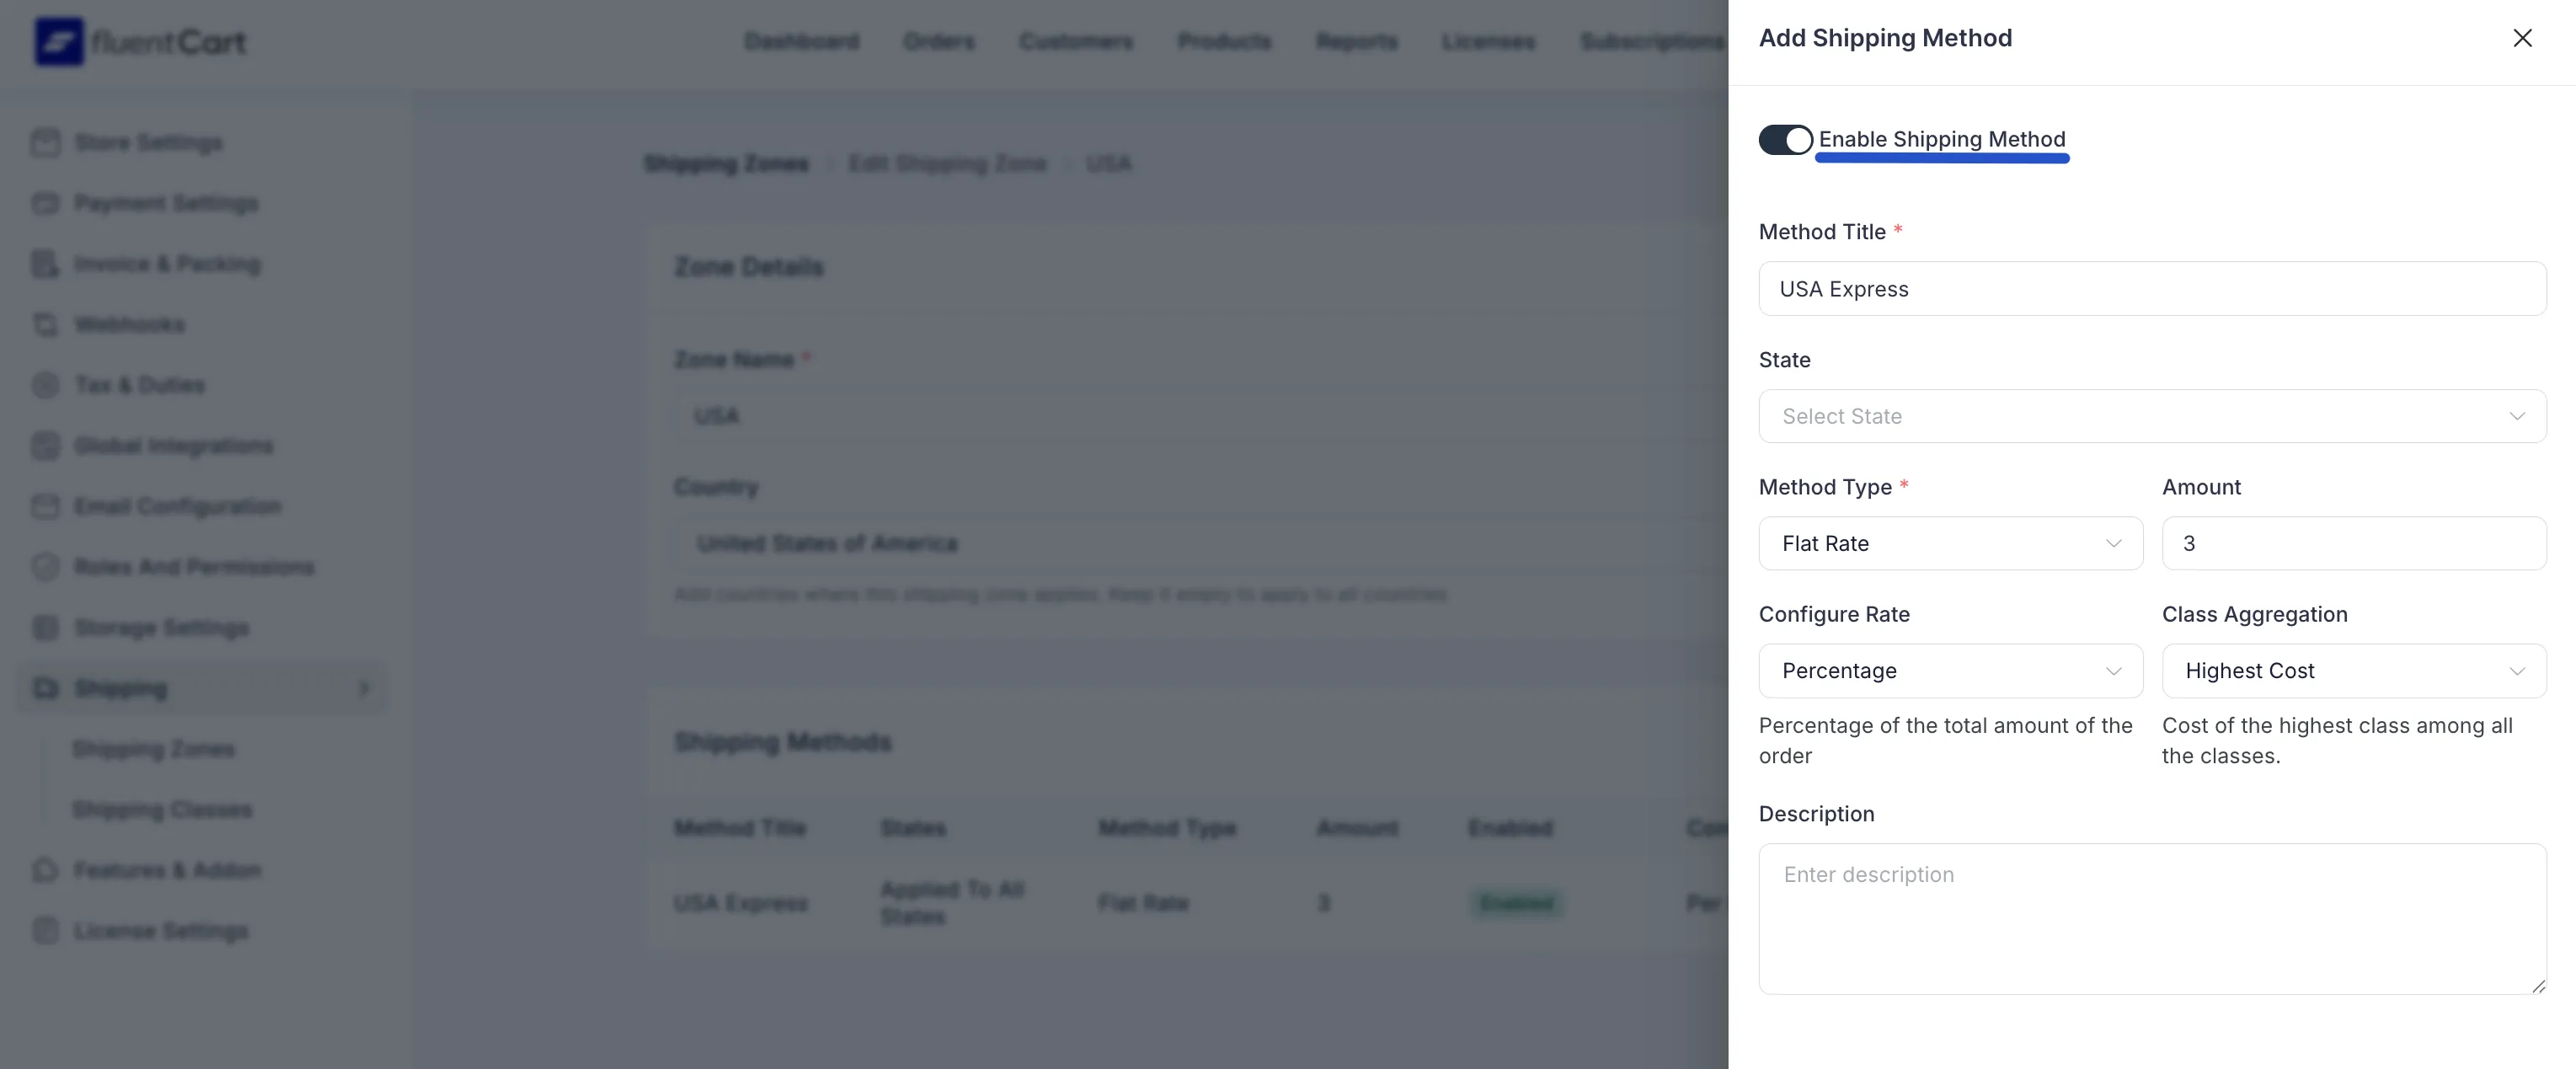
Enable Shipping Method: This toggle at the top of the pop-up acts as the master switch for this specific method. If it's disabled, the method will be saved but won't appear as an option for customers at checkout.
Method Title: Enter a clear and user-friendly name for this shipping option (e.g., "Standard Shipping," "Express Delivery," "Local Pickup"). This is the name your customers will see at checkout.
State: (Optional) If this shipping method should only be available for specific states or provinces within the shipping zone's country, you can select them here. Leave it blank to have the method apply to the entire country.
Method Type: Choose the type of shipping method you want to offer:
- Flat Rate: This is a fixed-cost shipping option. Use this to set a single rate for delivery.
- Free Shipping: As the name suggests, this option is free for the customer. It's an excellent incentive to encourage sales.
- Local Pickup: This allows customers to pick up their order directly from your physical store or a designated location, bypassing shipping costs entirely.
Amount: If you selected "Flat Rate," enter the cost for this shipping method here (e.g., enter 10 for $10.00). The Amount field hides automatically when Configure Rate is set to Per Weight, because the cost then comes from your weight tiers instead of a flat value.
Configure Rate
This setting determines how the "Flat Rate" cost is calculated if a customer has multiple items in their cart.
- Per Order: Applies a single, fixed charge for the entire order, no matter how many items are purchased. This is the most common setup.
- Per Item: The shipping cost is multiplied by the number of items in the cart. For example, if the cost is $2 and a customer buys 3 items, the total shipping cost will be $6.
- Percentage: The shipping cost is calculated as a percentage of the total order price. For example, a 10% rate on a $50 order would result in a $5 shipping fee.
- Per Weight: Charges shipping based on the total weight of the cart, using a set of tiered rates you define (see Weight Tiers below). Ideal for carriers that price by weight brackets — light envelopes at one rate, medium parcels at another, heavy freight higher still.
Weight Tiers (Per-Weight Rates)
When Configure Rate is set to Per Weight, a Weight Tiers editor appears in place of the fixed Amount field. Each tier defines a weight range and the shipping cost that applies when the cart's total weight falls inside that range.
Each row has three fields:
- Min (weight) — The lower bound of the tier, inclusive. Editable on every tier, including the first one (it does not have to start at
0). - Max (weight) — The upper bound of the tier. Must be greater than the tier's Min.
- Cost — The shipping amount charged when the cart's total weight lands inside this tier.
Click Add Tier to append a new row. A new tier defaults to previous max + 0.01 for Min so you can chain ranges quickly, but every field stays editable.
Flexible, non-contiguous ranges
Tiers do not have to be continuous. You can leave gaps between ranges — for example, 0–10 kg, then 15–20 kg — when your carrier simply does not offer rates in the gap, or when weights in that gap should fall back to a different shipping method.
Validation
The editor validates tiers inline before you can save:
- A tier whose Max is less than or equal to its Min shows an error and the Add Tier button is disabled until fixed.
- A tier whose range overlaps an earlier tier (e.g.,
0–10followed by8–15) shows an error — overlapping ranges would create ambiguity when a cart weight fits both tiers.
Correct the highlighted tier and the error clears immediately, re-enabling the Add Tier button and the Save action.
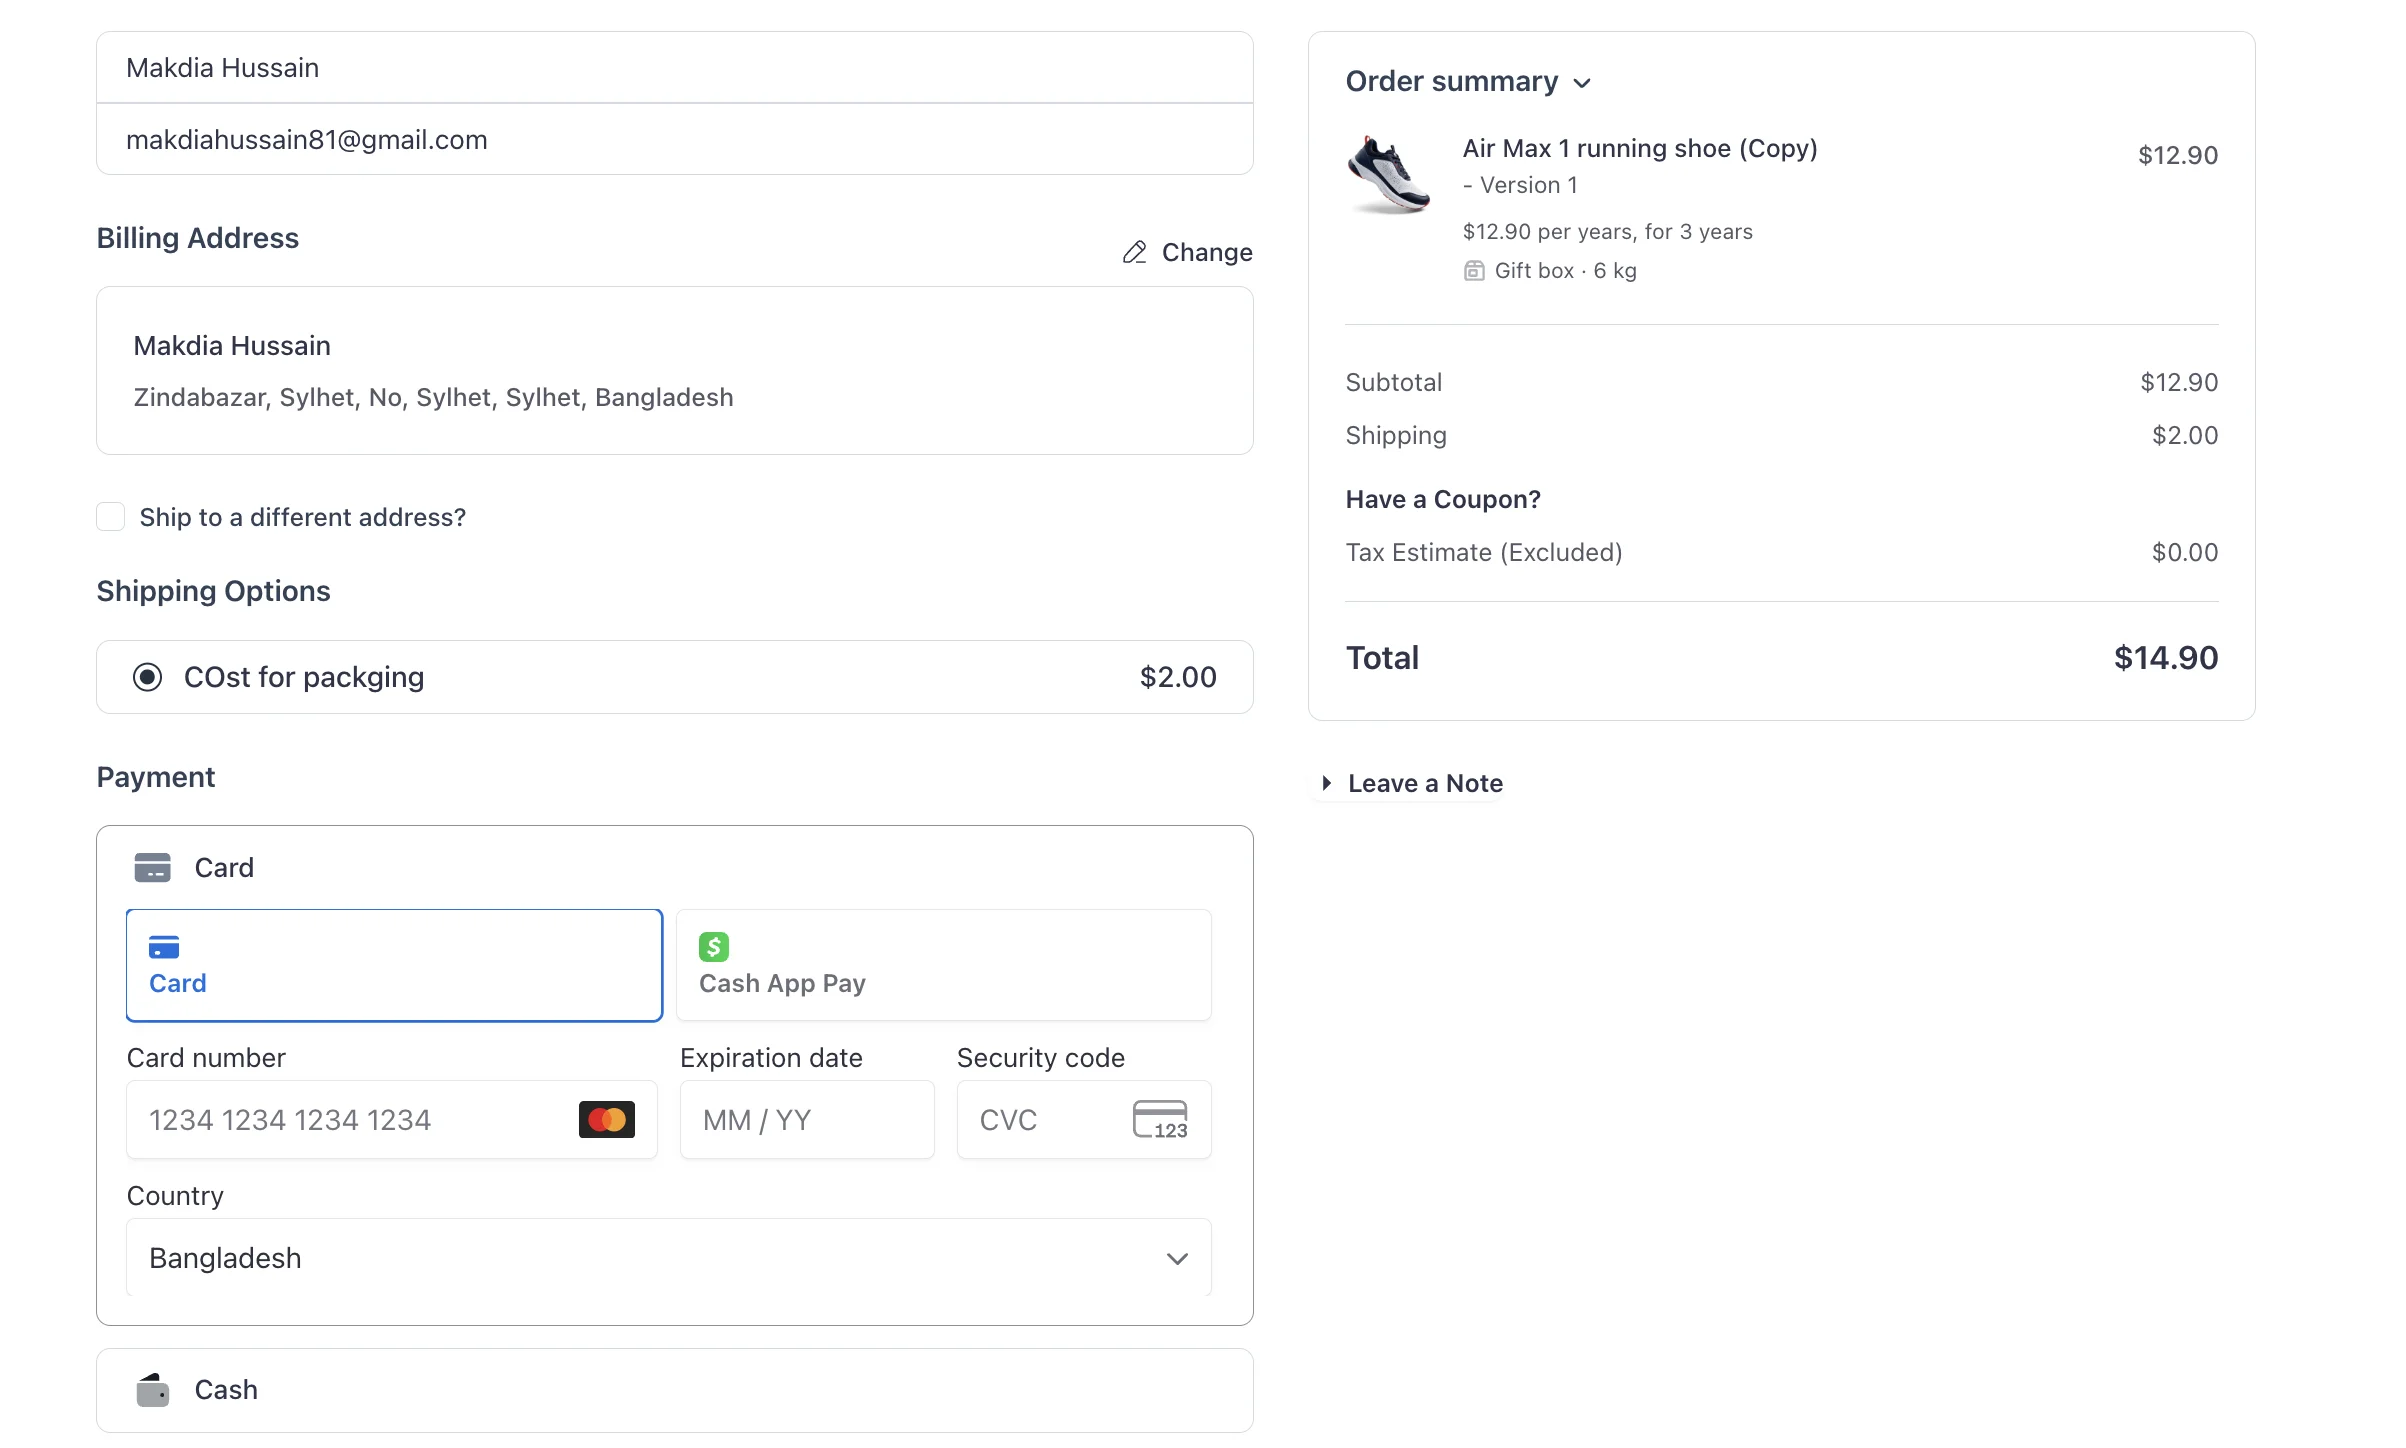
How It Looks at Checkout
Once saved, the shipping method appears under Shipping Options on the checkout page with the method title and its calculated cost. The Order summary on the right reflects the same amount under Shipping, so what the customer picks is exactly what they pay.
- Class Aggregation
This advanced setting is for when a customer's cart contains products from different shipping classes (e.g., a small item and a bulky, oversized item). It tells FluentCart how to combine the shipping costs.
- Combined Cost: The shipping costs for each distinct shipping class in the cart are calculated and then added together to get the final total.
- Highest Cost: Only the single highest shipping cost among all the shipping classes present in the cart is applied.
INFO
The Configure Rate and Class Aggregation settings work together to give you precise control over your shipping fees. For a more detailed guide with advanced examples of how these calculations work, especially when a cart contains multiple items from different shipping classes, please see our documentation on Advanced Shipping Calculations.
- Description:
You can add a short description for the shipping method. Depending on your theme, this might be displayed to the customer at checkout to provide more context (e.g., "Delivered in 3-5 business days").
Once you have configured all the details, click the Save button. Your new shipping method is now active and will be offered to customers in the selected shipping zone.