Appearance
Paddle Settings
Paddle is an all-in-one payment solution that simplifies selling globally by handling payments, sales tax, and compliance for you. By connecting Paddle with FluentCart, you can offer your customers a seamless checkout experience with a wide range of payment methods.
This guide will walk you through the entire process of connecting your Paddle account to FluentCart.
Step 1: Activate Paddle in FluentCart
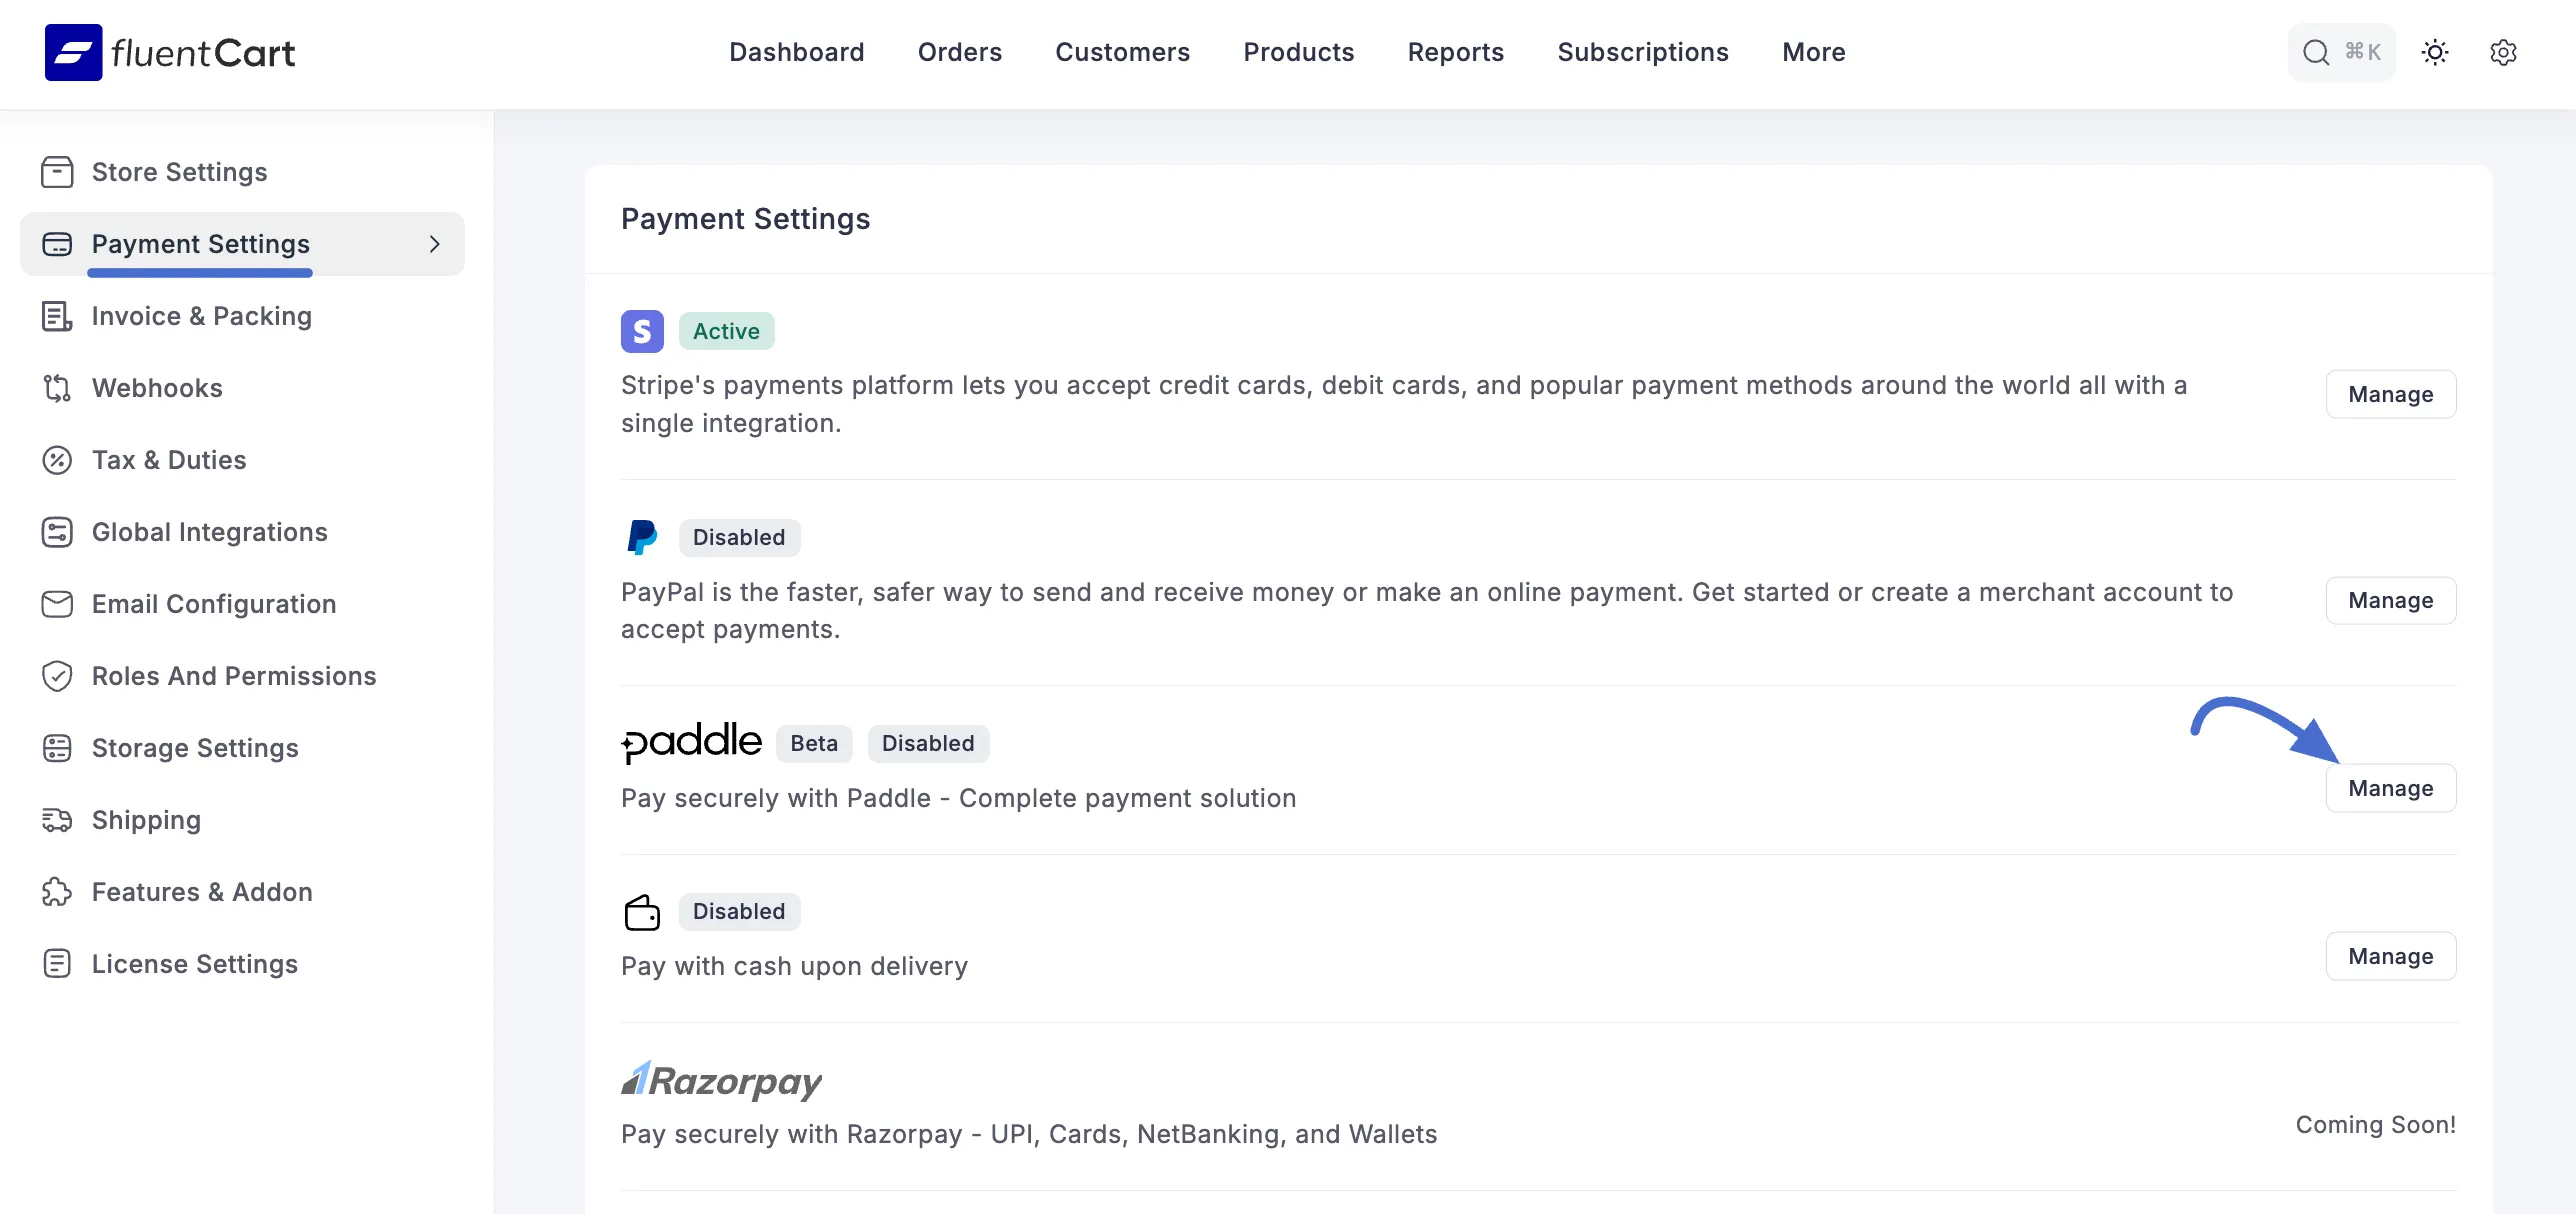
- First, you need to enable Paddle as a payment method in your store.
- From your WordPress dashboard, navigate to FluentCart Pro > Settings.
- Click on the Payment Settings tab.
- You will see a list of available payment gateways. Find Paddle and click the Manage button next to it.
This will take you to the main Paddle settings page, where you will configure the entire integration.
Step 2: Configure Paddle Settings
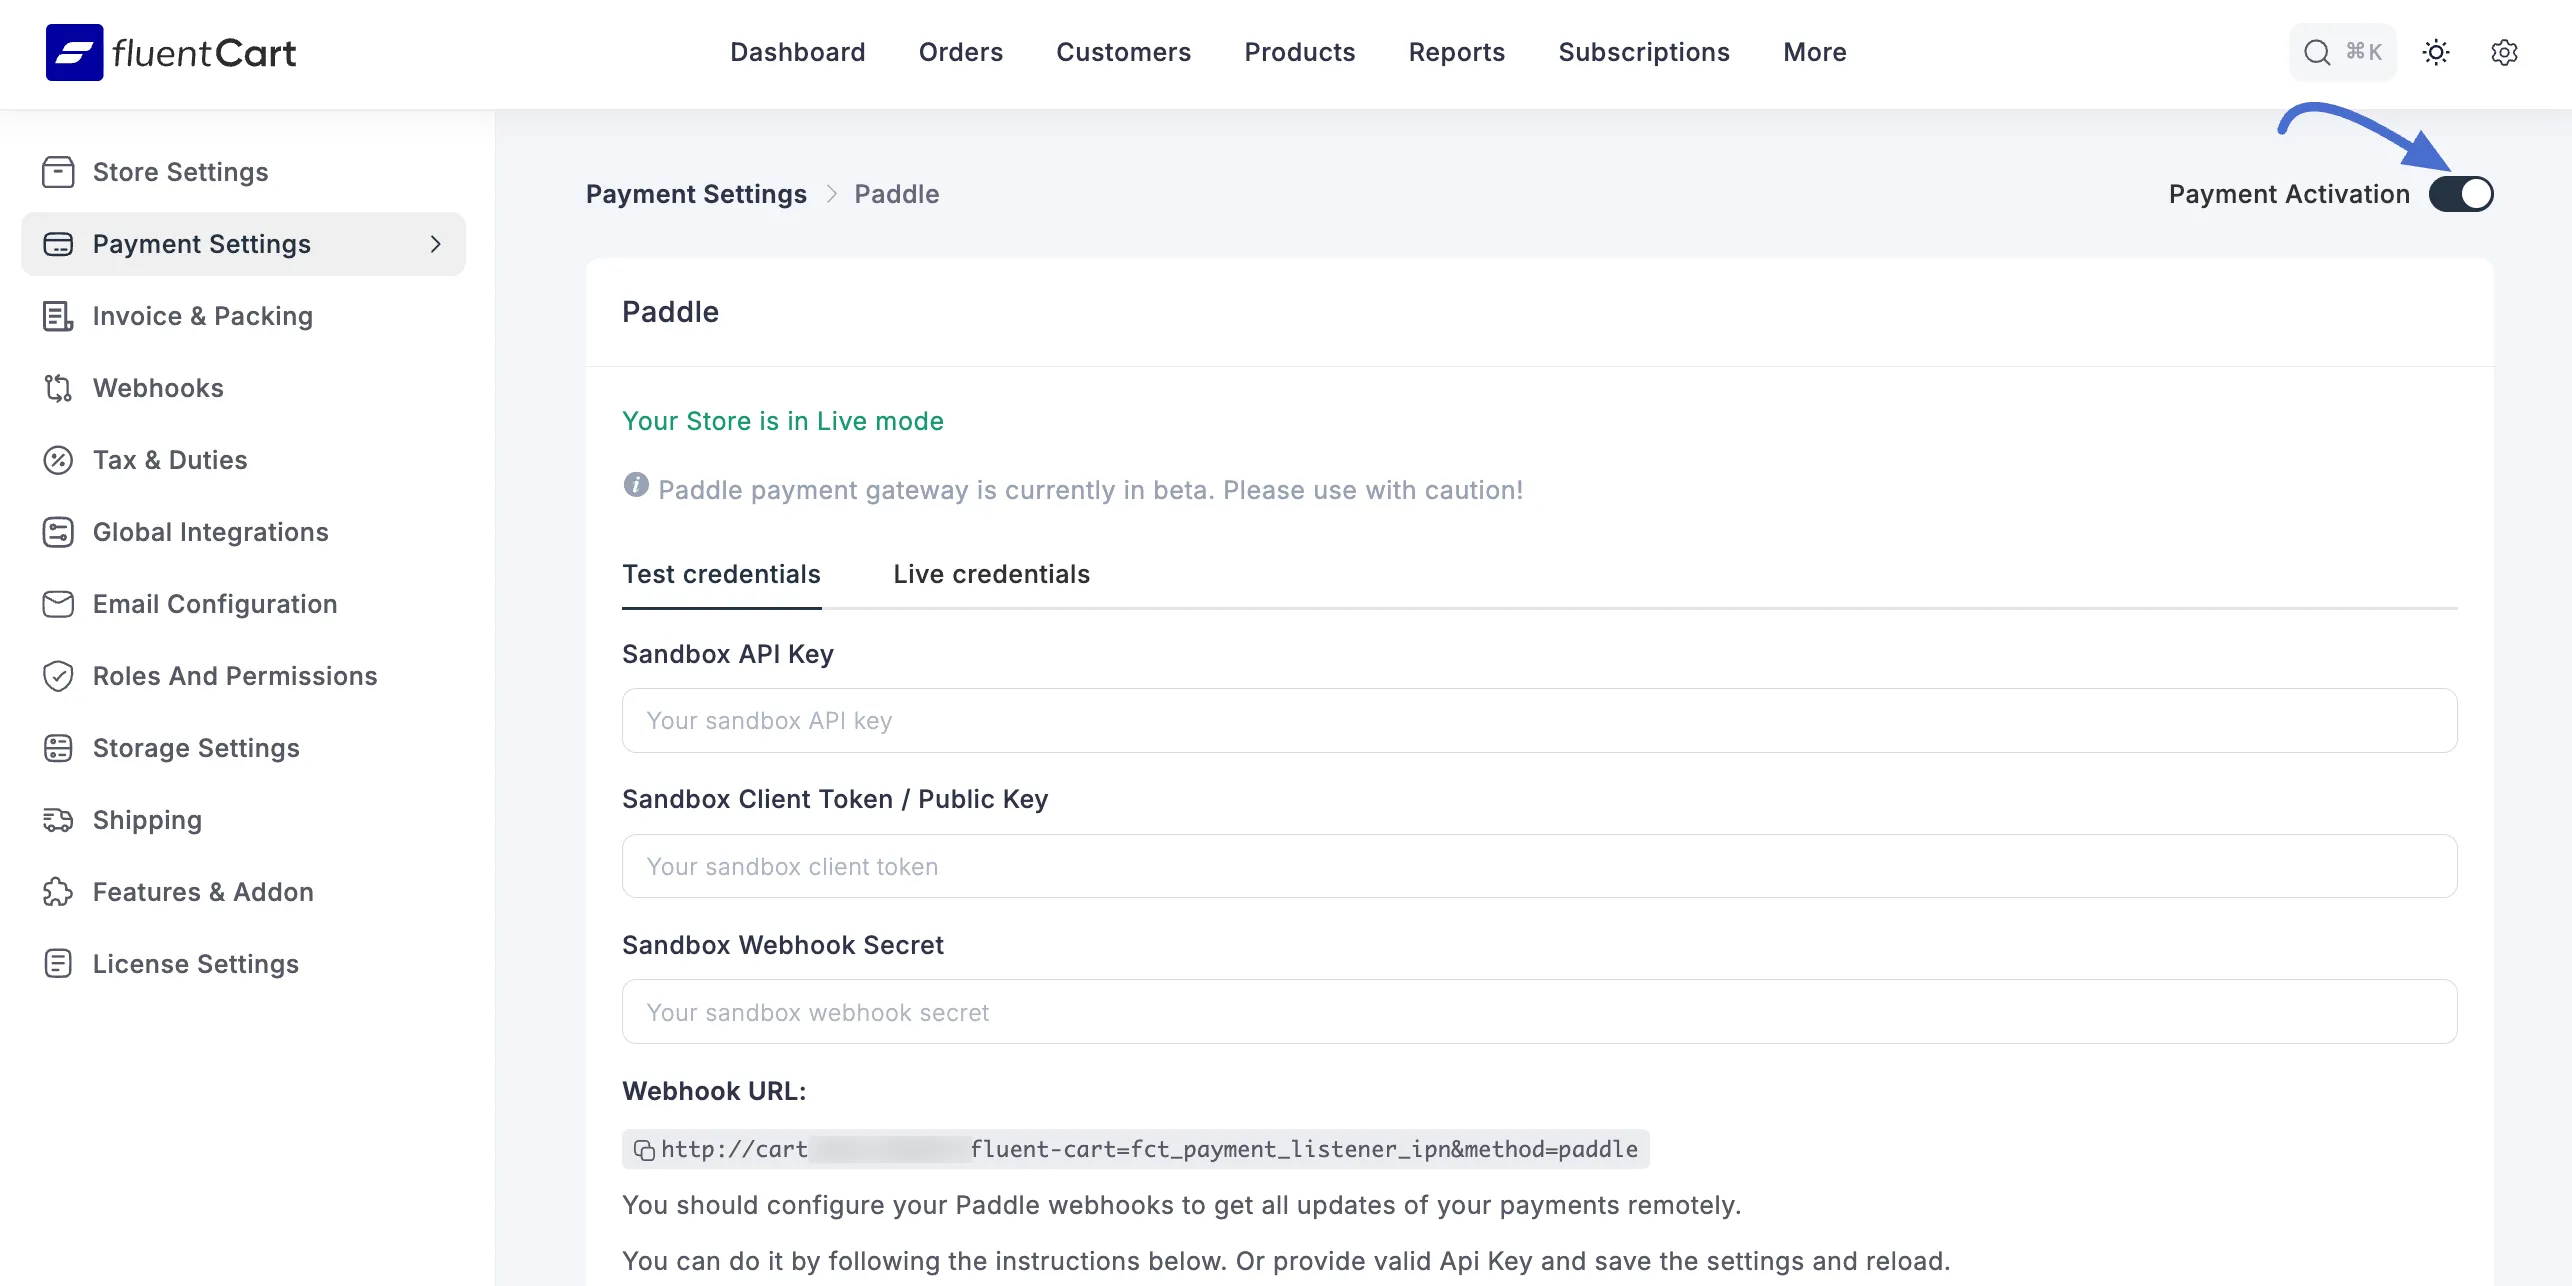
On this page, you need to provide your Paddle API credentials and customize the checkout experience.
First, enable the payment gateway by toggling the Payment Activation switch at the top right. Here's a breakdown of the available settings:
- Test/Live Credentials: You can switch between Test credentials and Live credentials. It's recommended to start with the test mode to ensure everything is working correctly before accepting real payments.
- Sandbox/Live API Key: Enter your API Key from your Paddle dashboard.
- Sandbox/Live Client Token / Public Key: Enter your Client Token or Public Key from Paddle.
- Sandbox/Live Webhook Secret: Enter your Webhook Secret Key. You'll get this when you set up the webhook in your Paddle account (see next step).
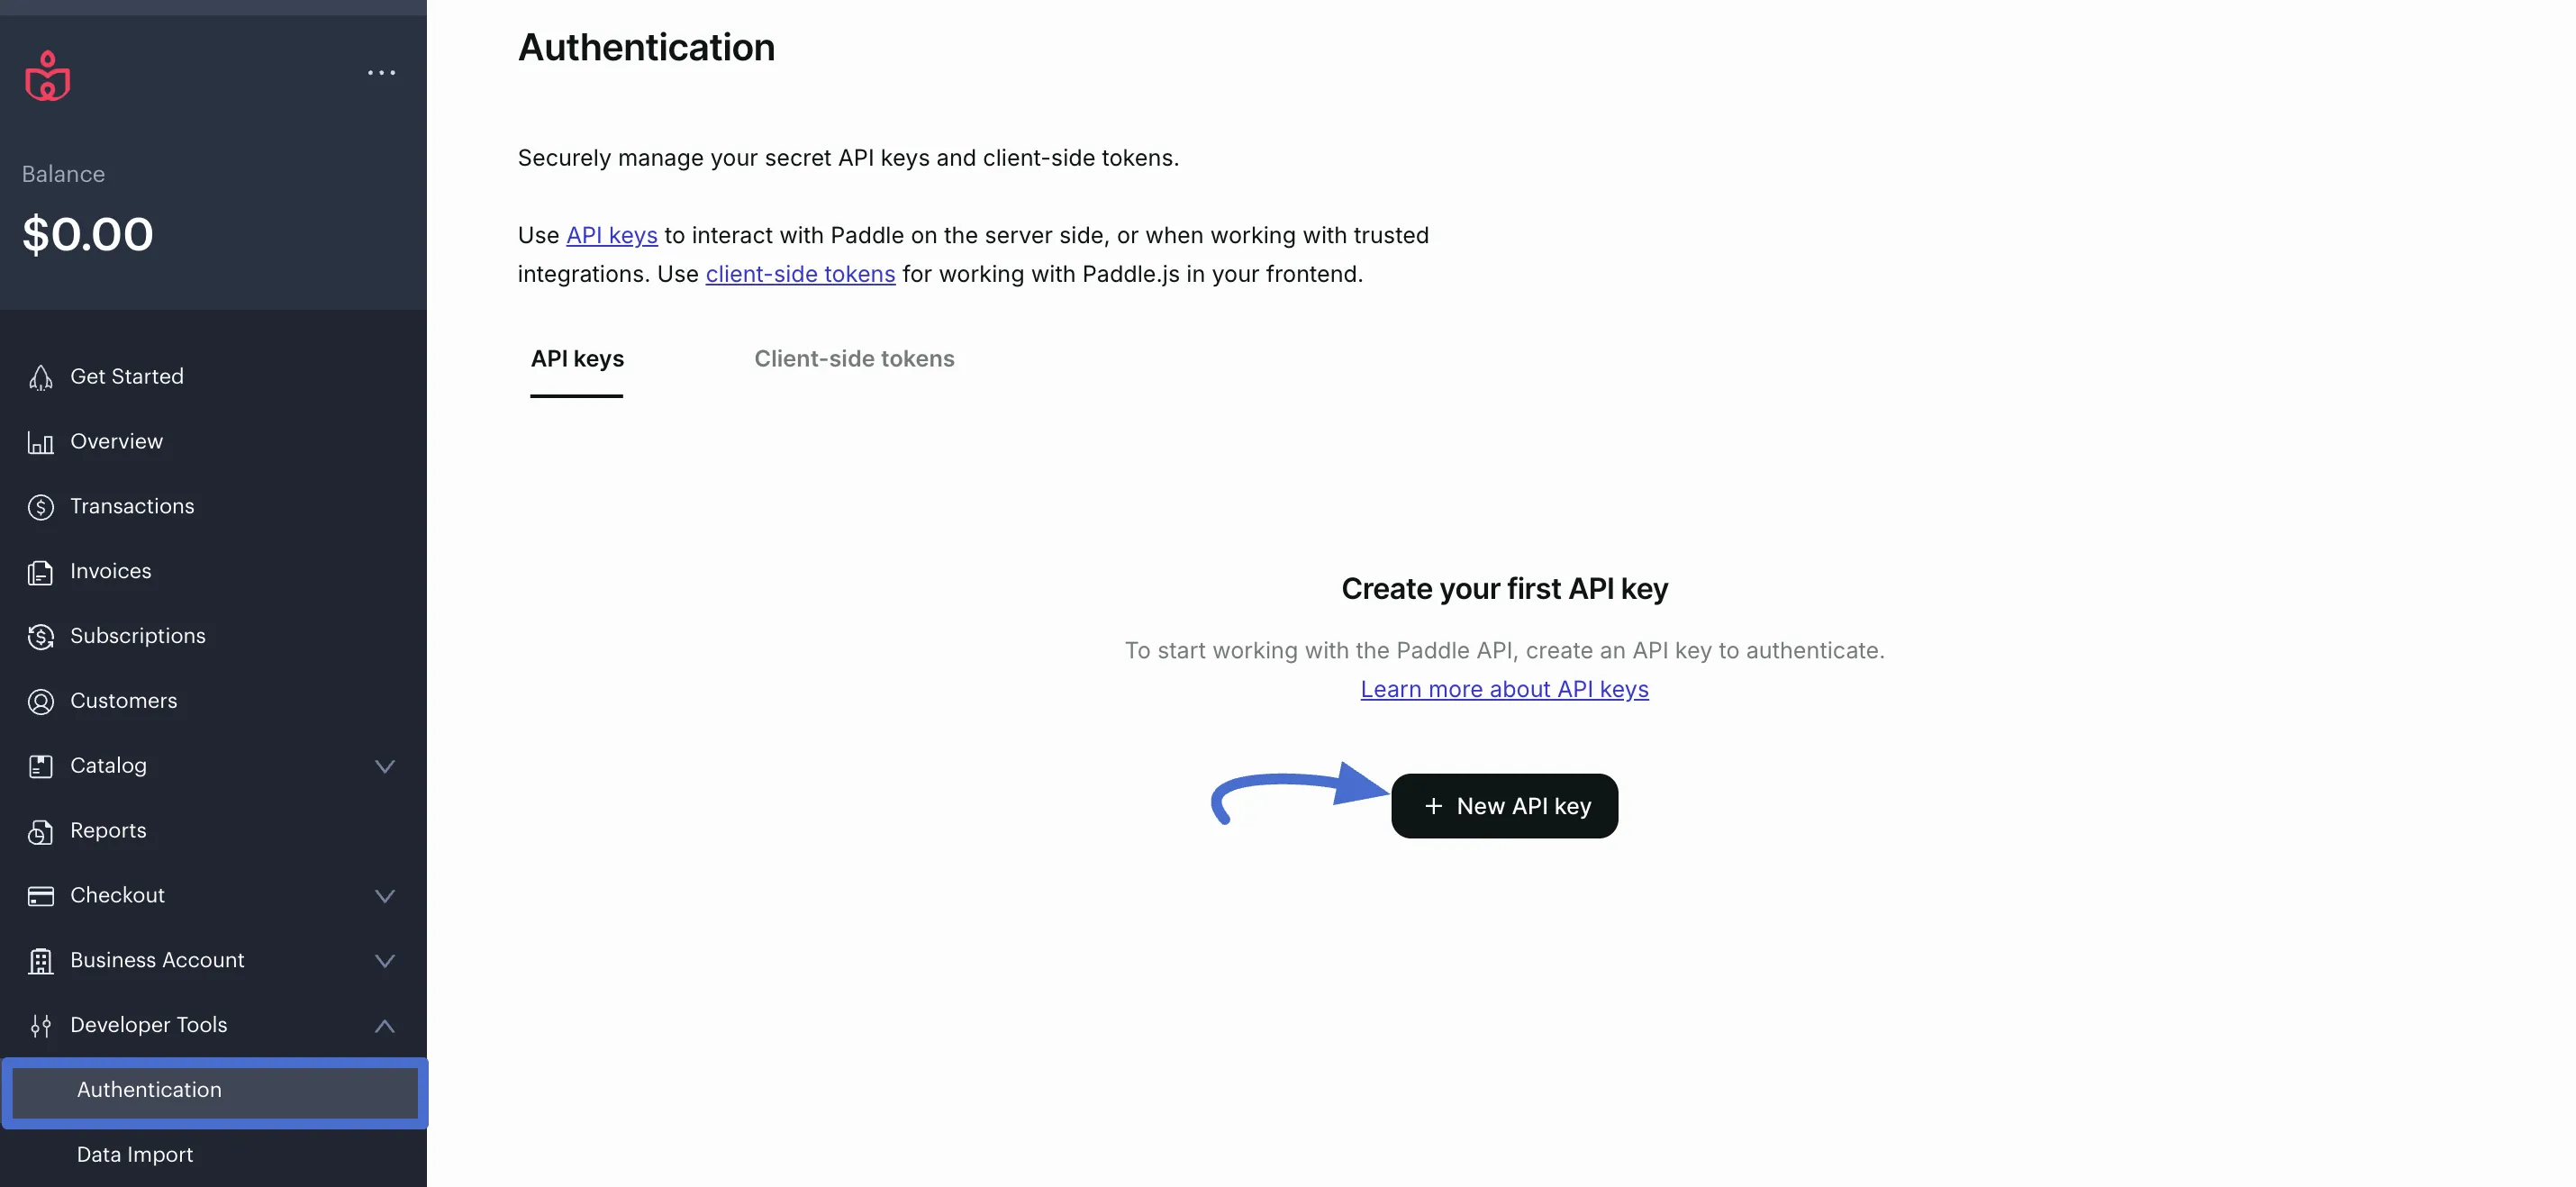
To find your API Keys and Client Token, log in to your Paddle account and navigate to the Developer Tools → Authentication section.
Generating API Key
Once you log in to the Paddle Dashboard, open the Developer Tools dropdown list from the left sidebar, and click Authentication. Now, go to the API keys section and click the + New API key button.
Now, provide the Name and Description for your API key, click the Save button, and your desired API key will be generated.
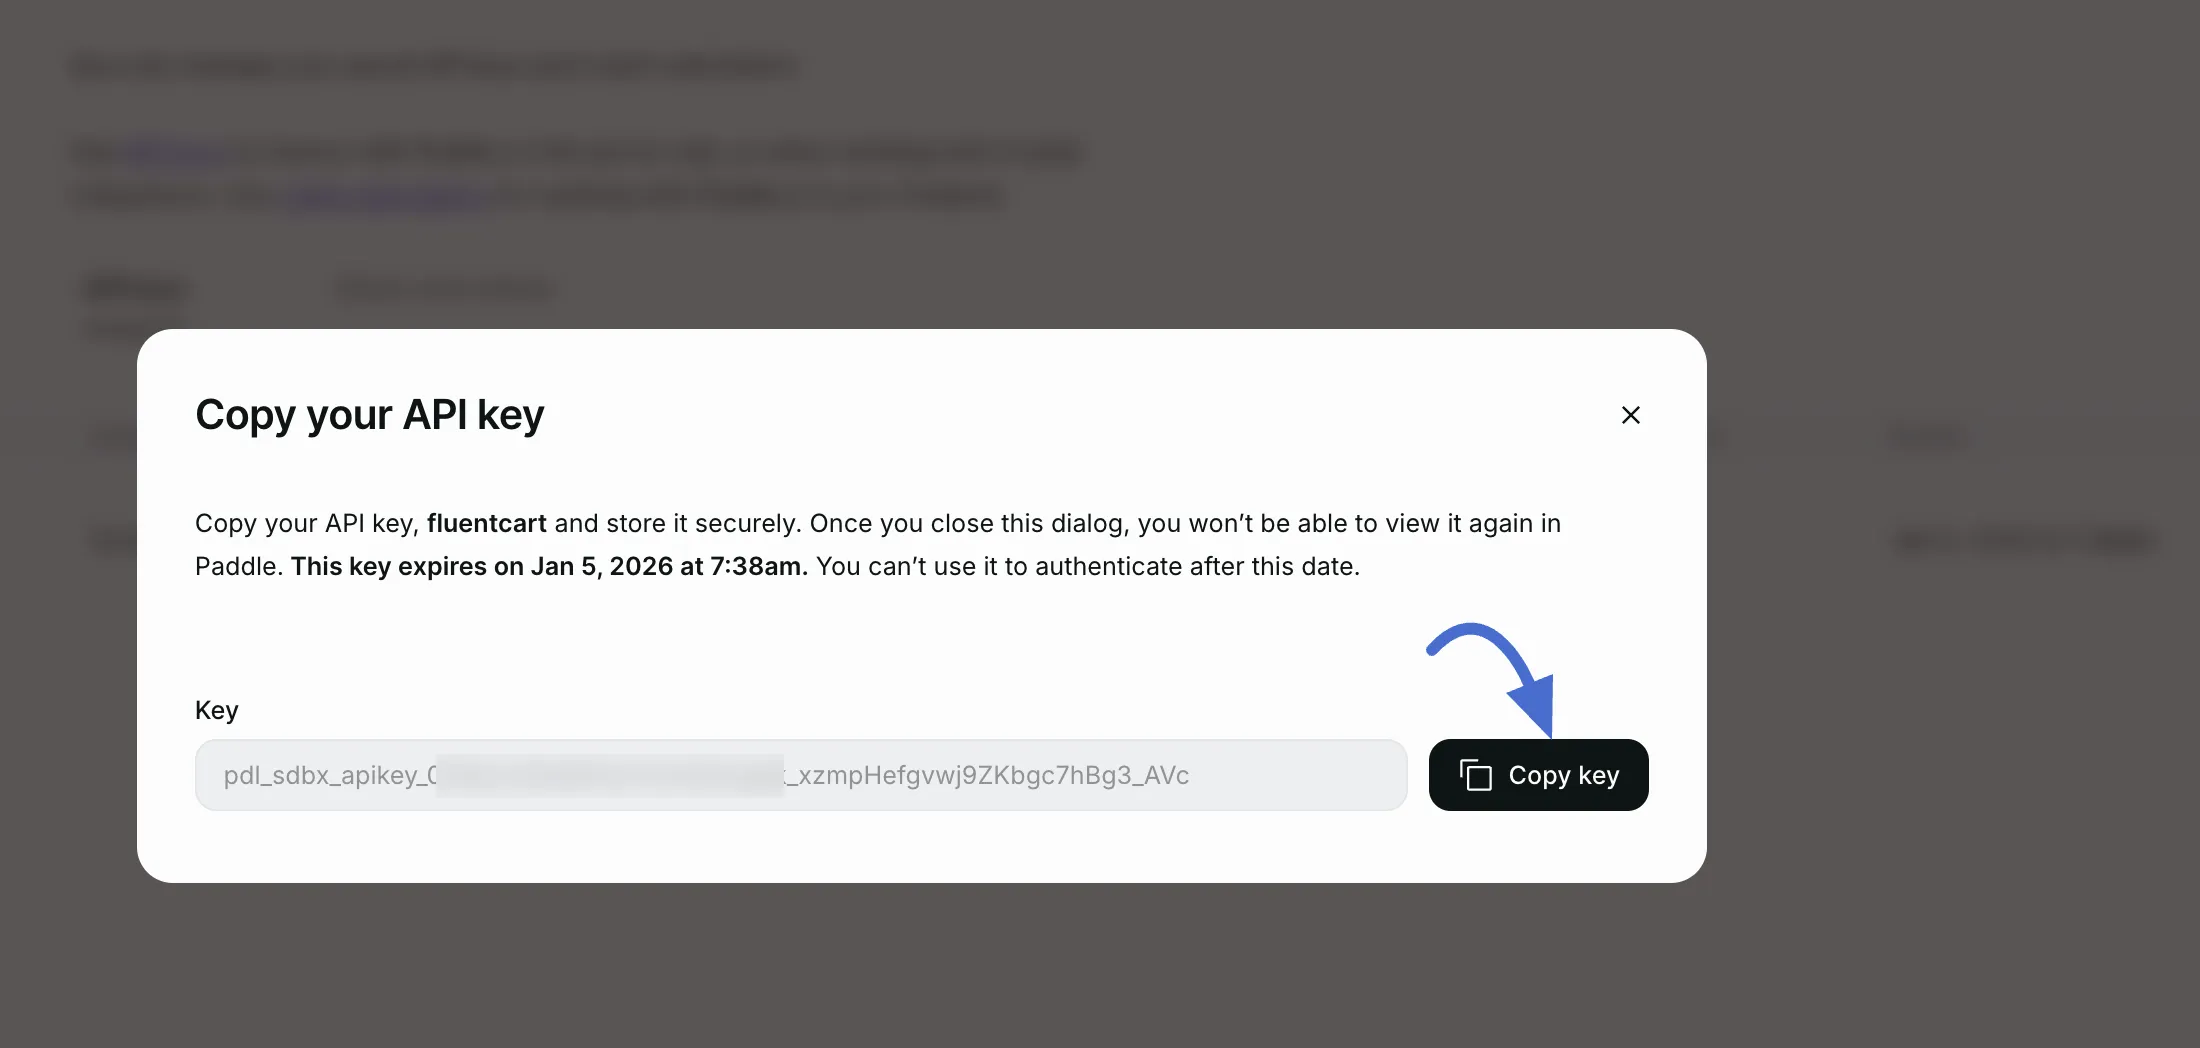
Here, you can see the newly generated API Key. Now, press the Copy key button, and your desired API Key will be copied.
Generating Client Token / Public Token
Now, go to the Client-side tokens section and click the + New client-side token button.
Now, provide the Name and Description for your client token, click the Save button, and your desired client token will be generated.
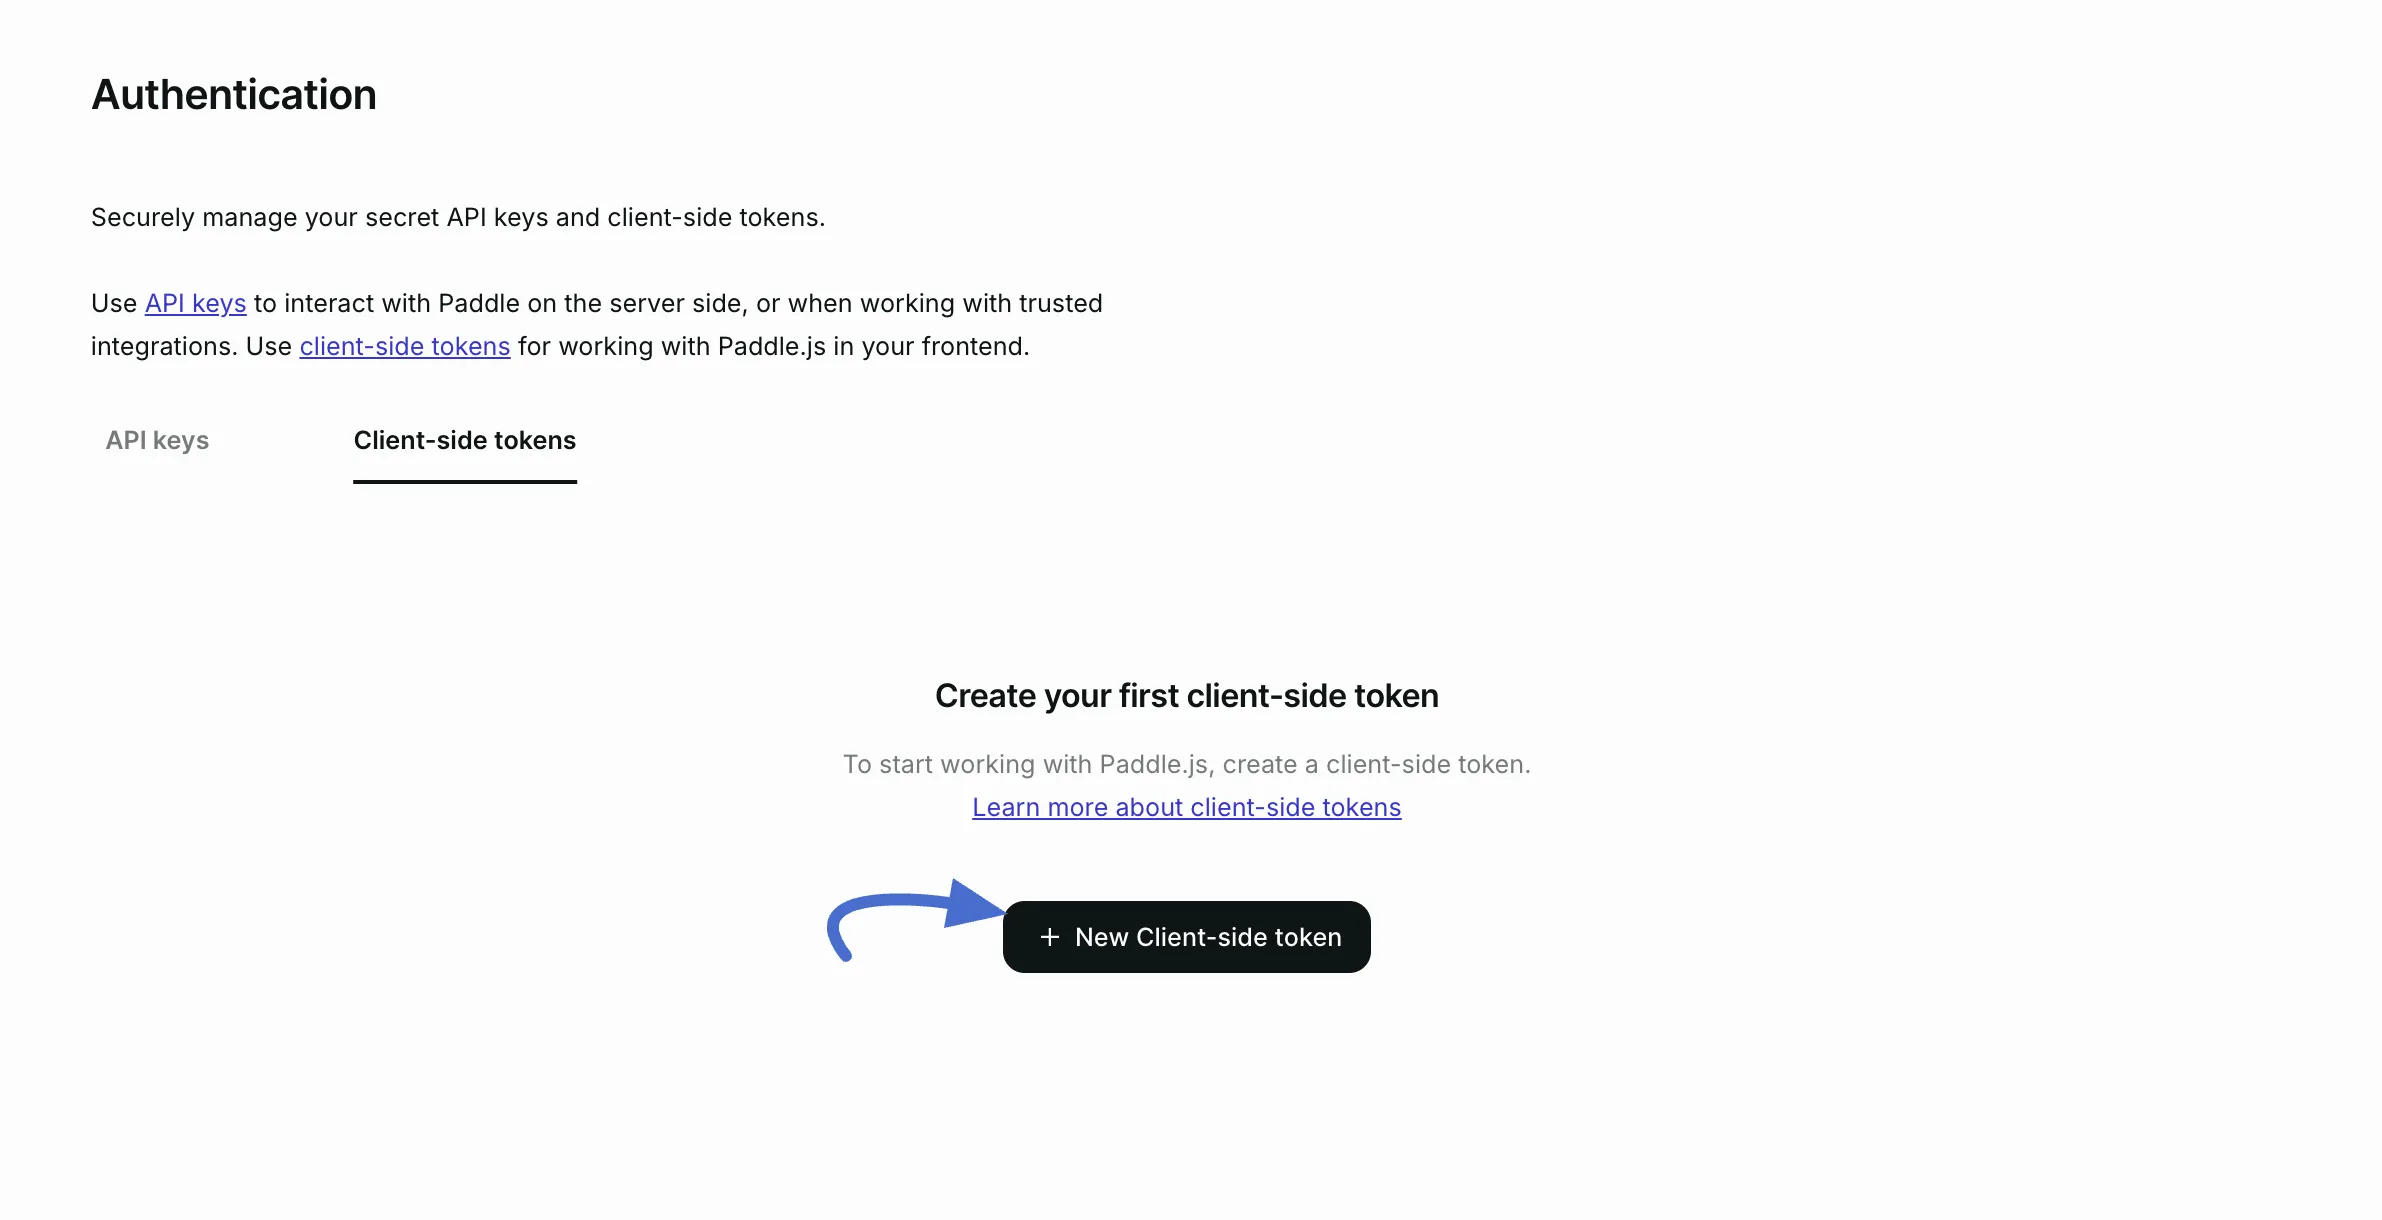
Here, you can see the newly generated Client Token. Now, click the Three-dot icon and press the Copy Token button.

Step 3: Set up Webhooks in Paddle
Webhooks are essential for FluentCart to receive real-time updates about transaction statuses, subscriptions, and other events from Paddle.
- Copy the Webhook URL: First, copy the Webhook URL provided on your FluentCart Paddle settings page.
- Create a New Webhook in Paddle: Log in to your Paddle dashboard. Navigate to Developer Tools → Notifications. Next, click on the + New destination button.
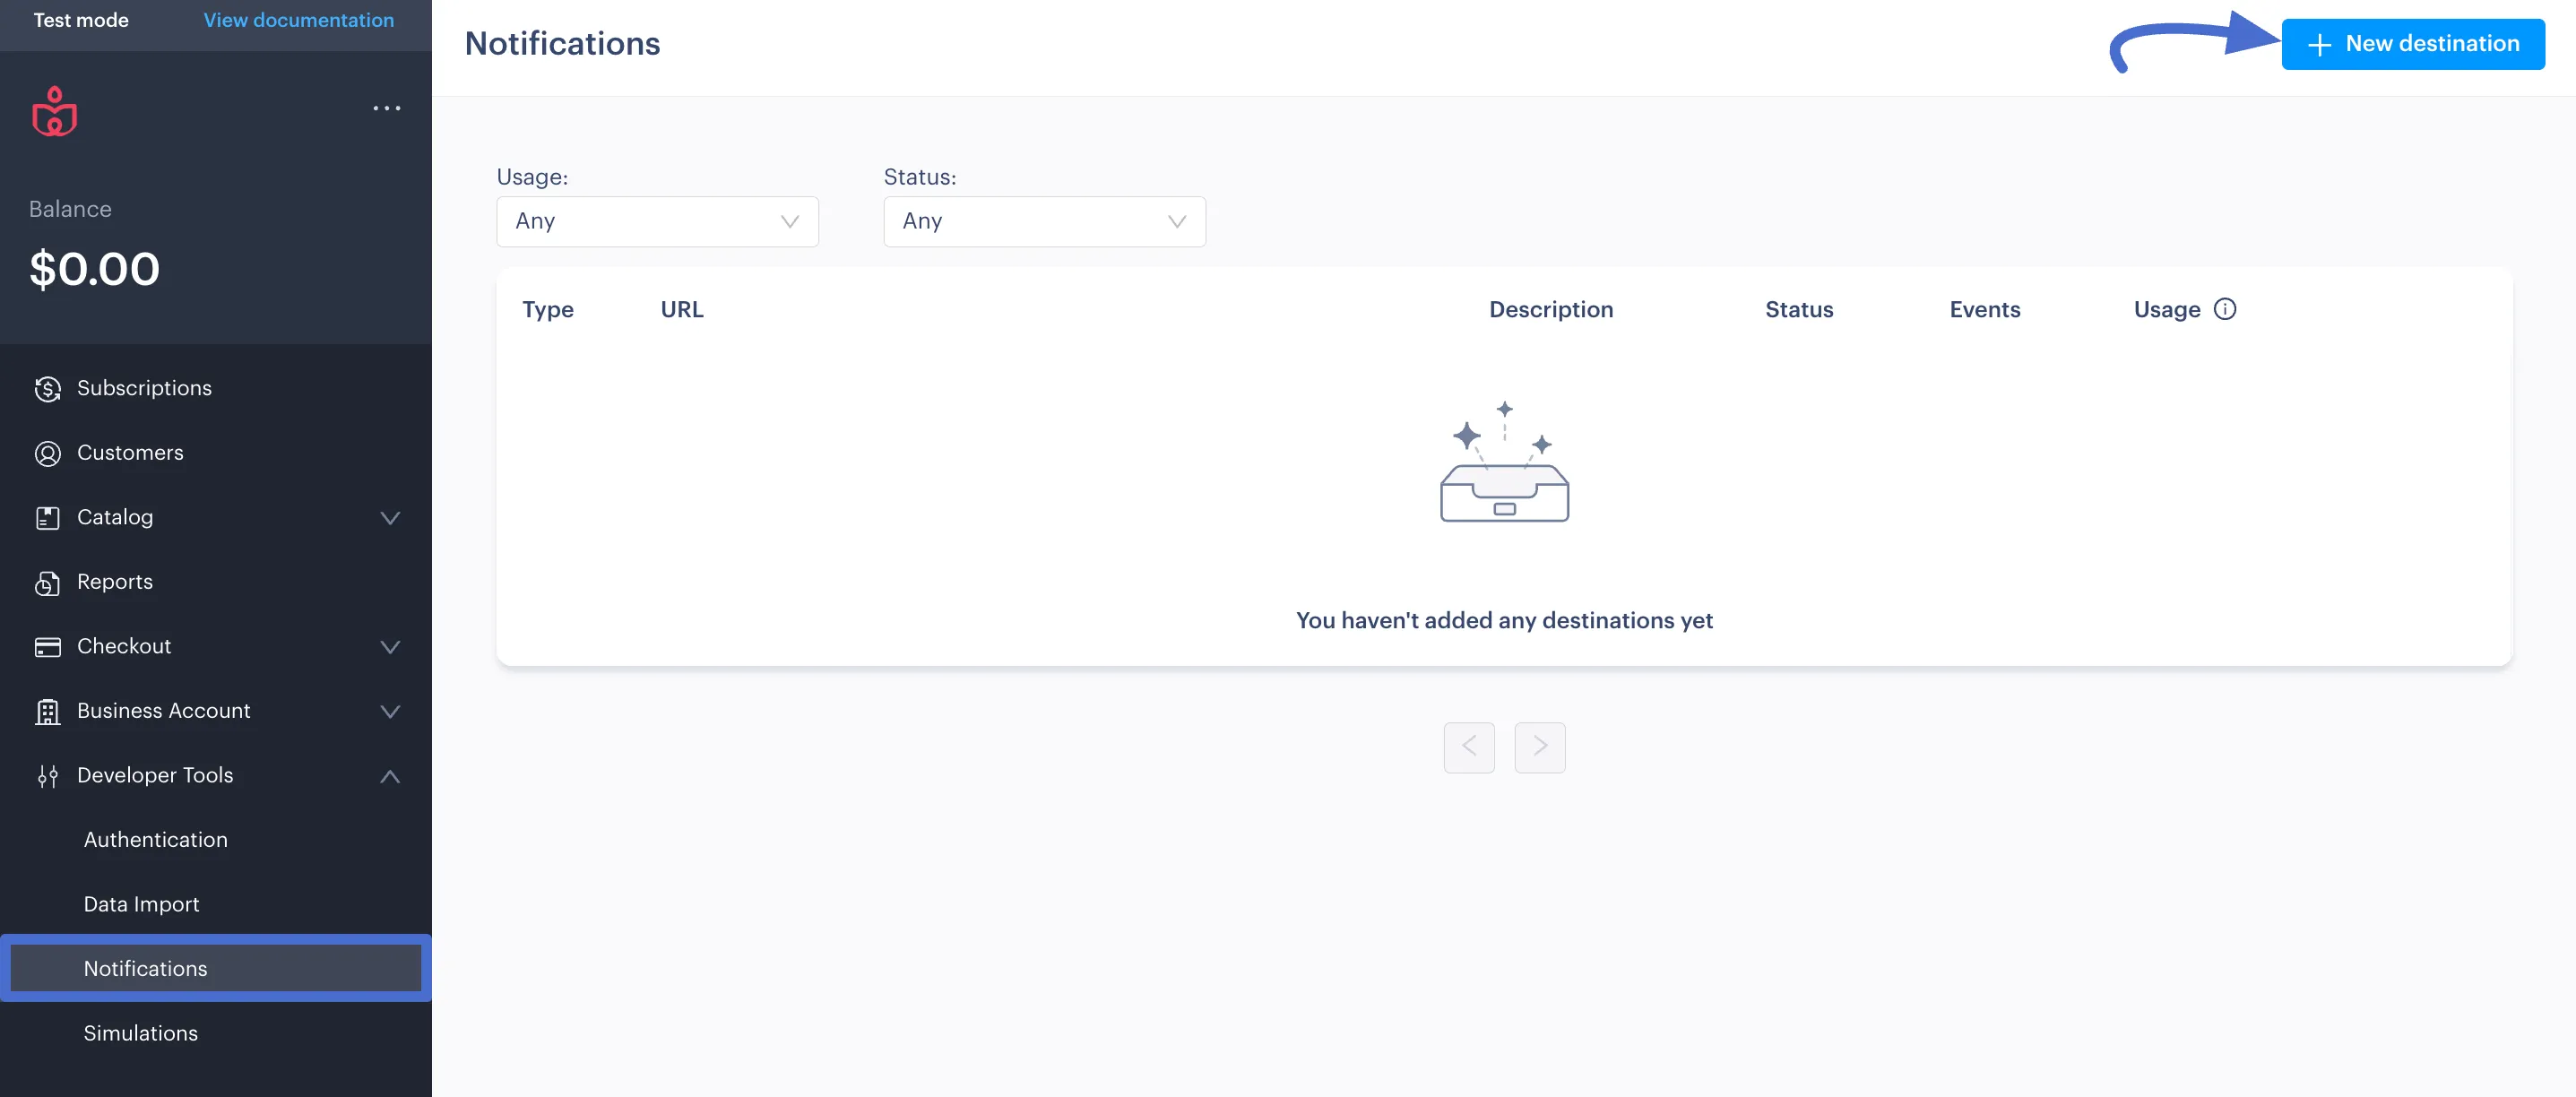
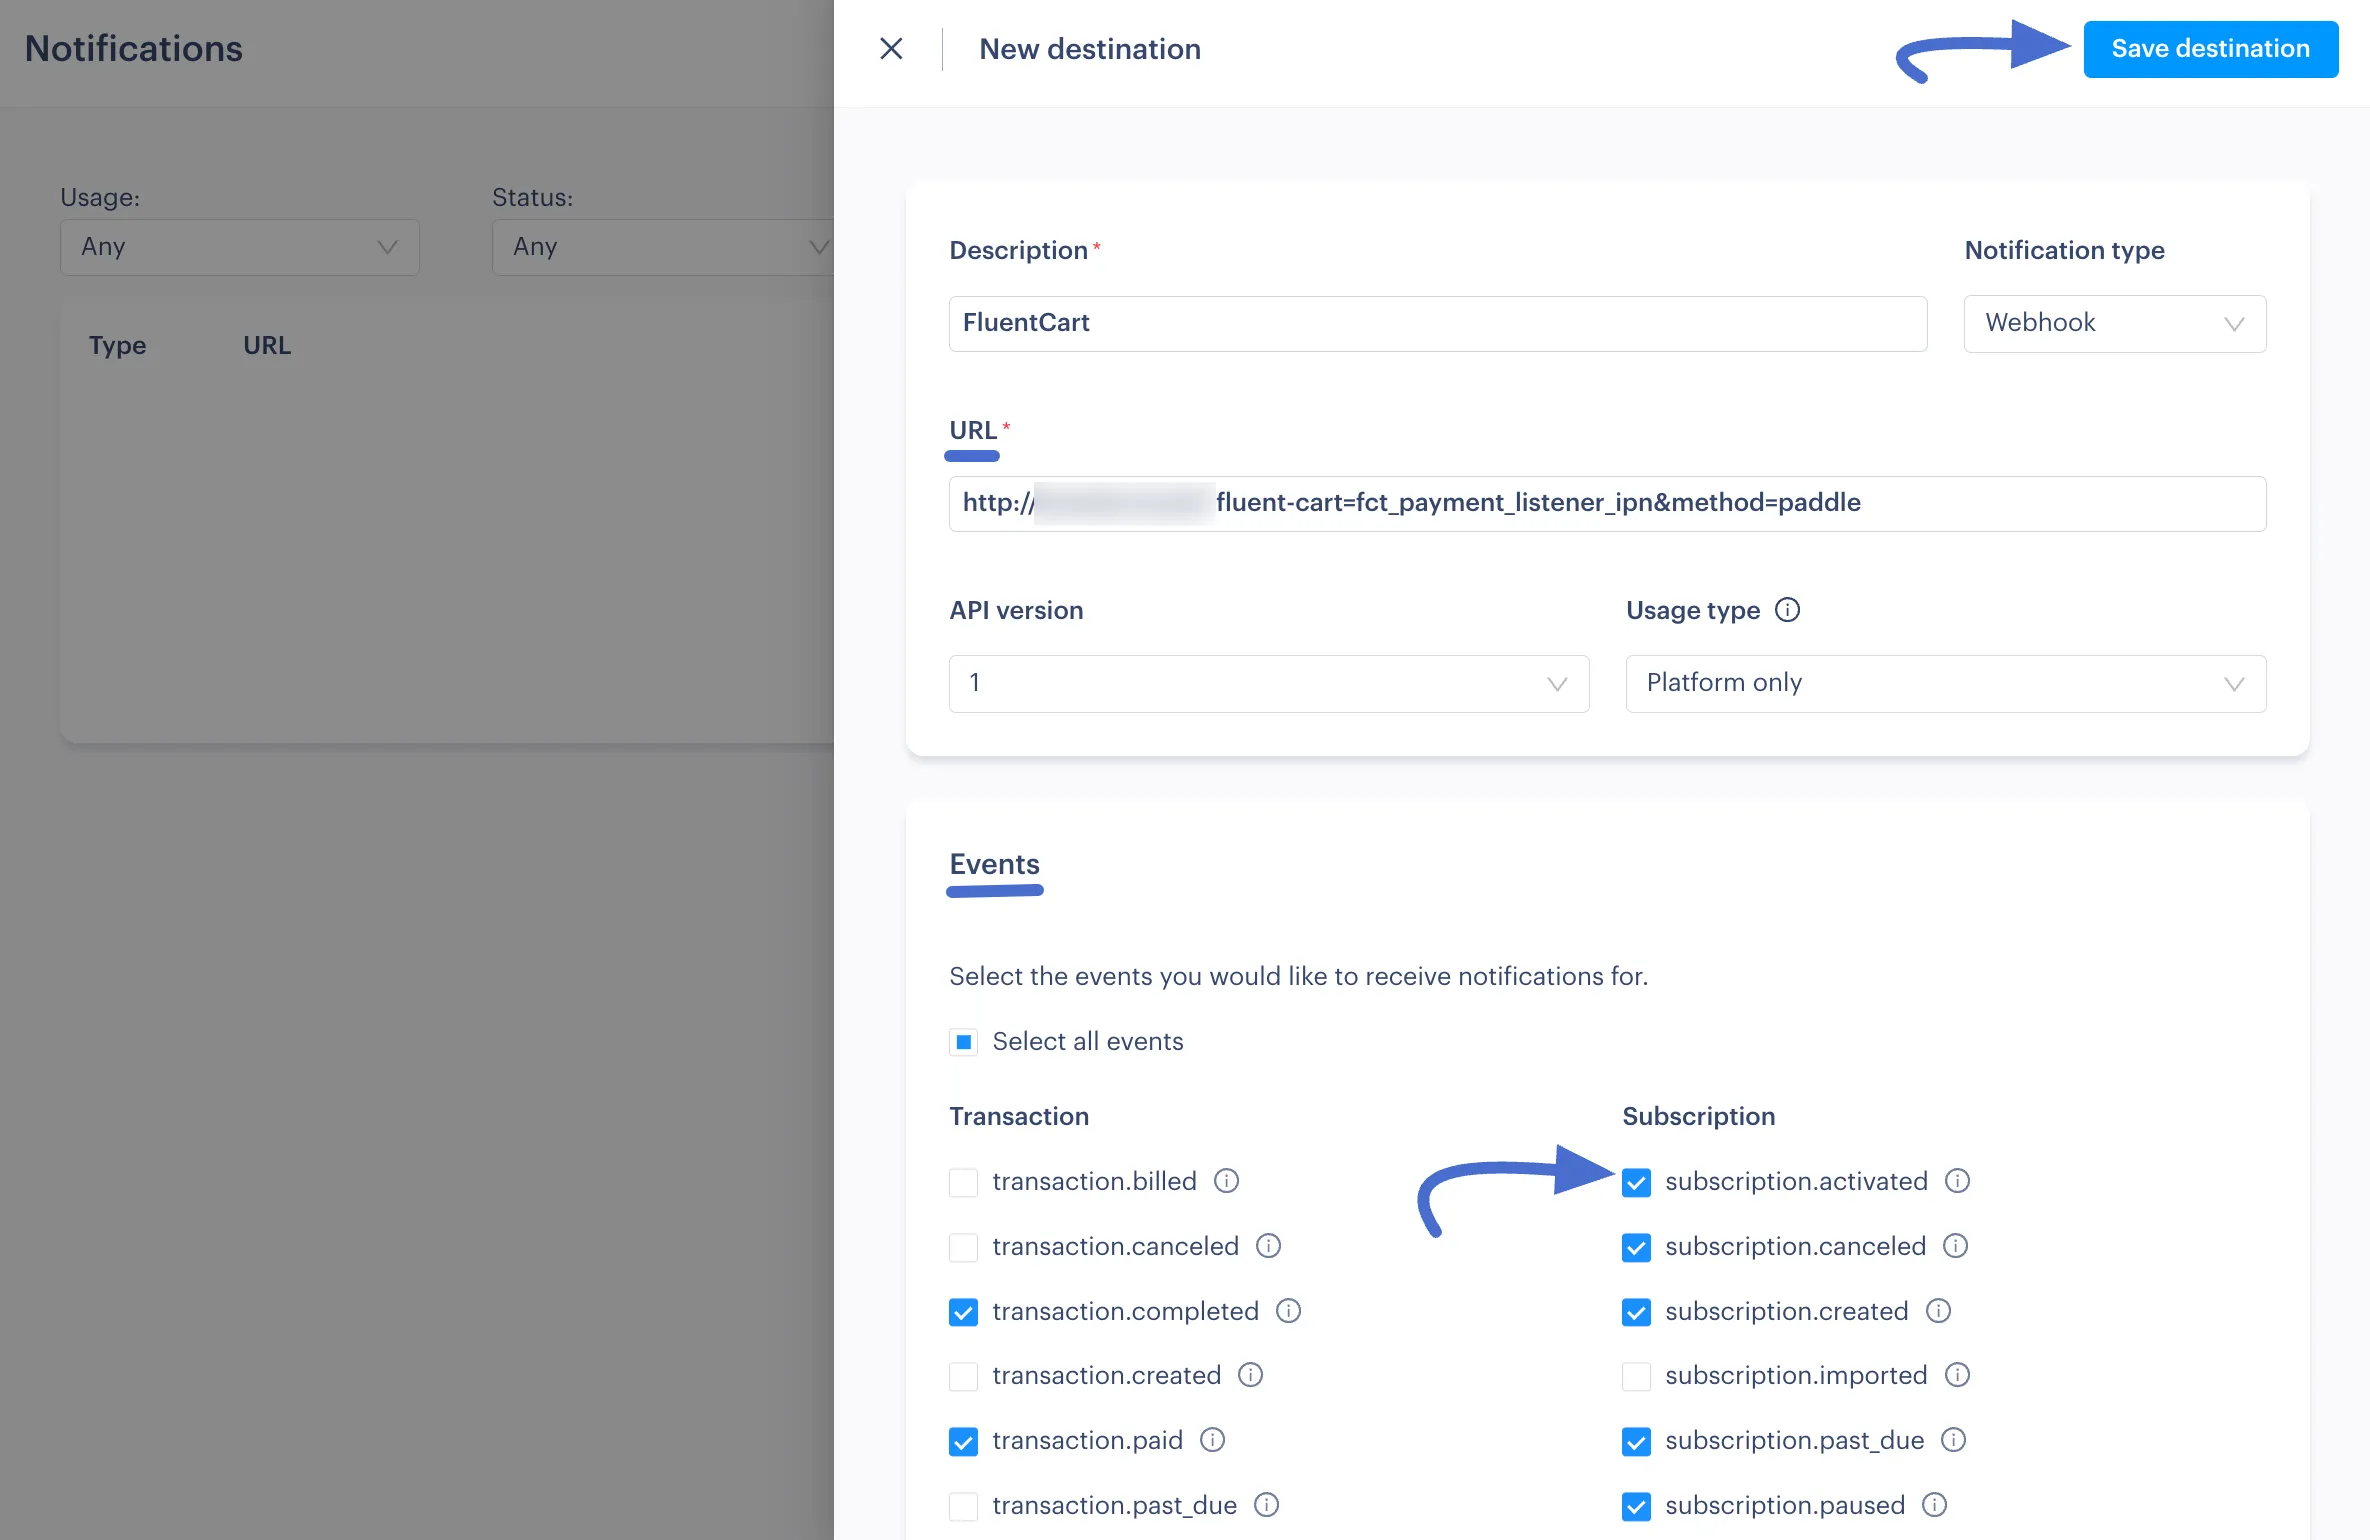
A modal will appear. Paste the URL you copied from FluentCart into the Webhook URL field.
- Select Webhook Events: In the webhook creation form, you need to select the events that Paddle will send to FluentCart. Check the boxes for the following events:
transaction.completedtransaction.paidtransaction.payment_failedadjustment.createdadjustment.updatedsubscription.createdsubscription.activatedsubscription.updatedsubscription.pausedsubscription.resumedsubscription.canceled
After selecting the events, save the webhook by clicking the Save destination button. Paddle will provide you with a Webhook Secret. Simply copy this webhook secret for future use.
Add Webhook Secret to FluentCart:
Go back to your FluentCart Paddle Settings page in WordPress. Then, paste the API key, Secret key, and Webhook Secret into their respective fields.
Customization Options
You can also customize the appearance and text of the Paddle checkout button:
Tax Mode: This setting determines how taxes are calculated for your transactions.
- Use paddle account settings: This is the recommended option. It leverages Paddle's powerful tax platform to automatically calculate and remit sales tax and VAT for you worldwide. All tax settings will be managed directly from your Paddle dashboard.
- Internal: Select this if you want to use the tax rates you have configured within FluentCart's own tax settings (FluentCart → Tax & Duties).
- External: Choose this option if you are using a third-party service to handle tax calculations or if you do not need to charge tax. FluentCart will not add any tax to the transaction.
Paddle Checkout Theme: Select a Light or Dark theme for the Paddle checkout modal.
Paddle Checkout Button Text: Customize the text that appears on the payment button (e.g., "Pay with Card", "Proceed to Paddle").
Button Styling: Adjust the Button Color, Button Hover Color, Button Text Color, and Button Font Size to match your store's design.
Disable Webhook Verification: This security feature ensures that webhook notifications are genuinely coming from Paddle. It should only be disabled for specific debugging or testing scenarios. For a live store, always keep this setting enabled to protect your store from fraudulent requests.
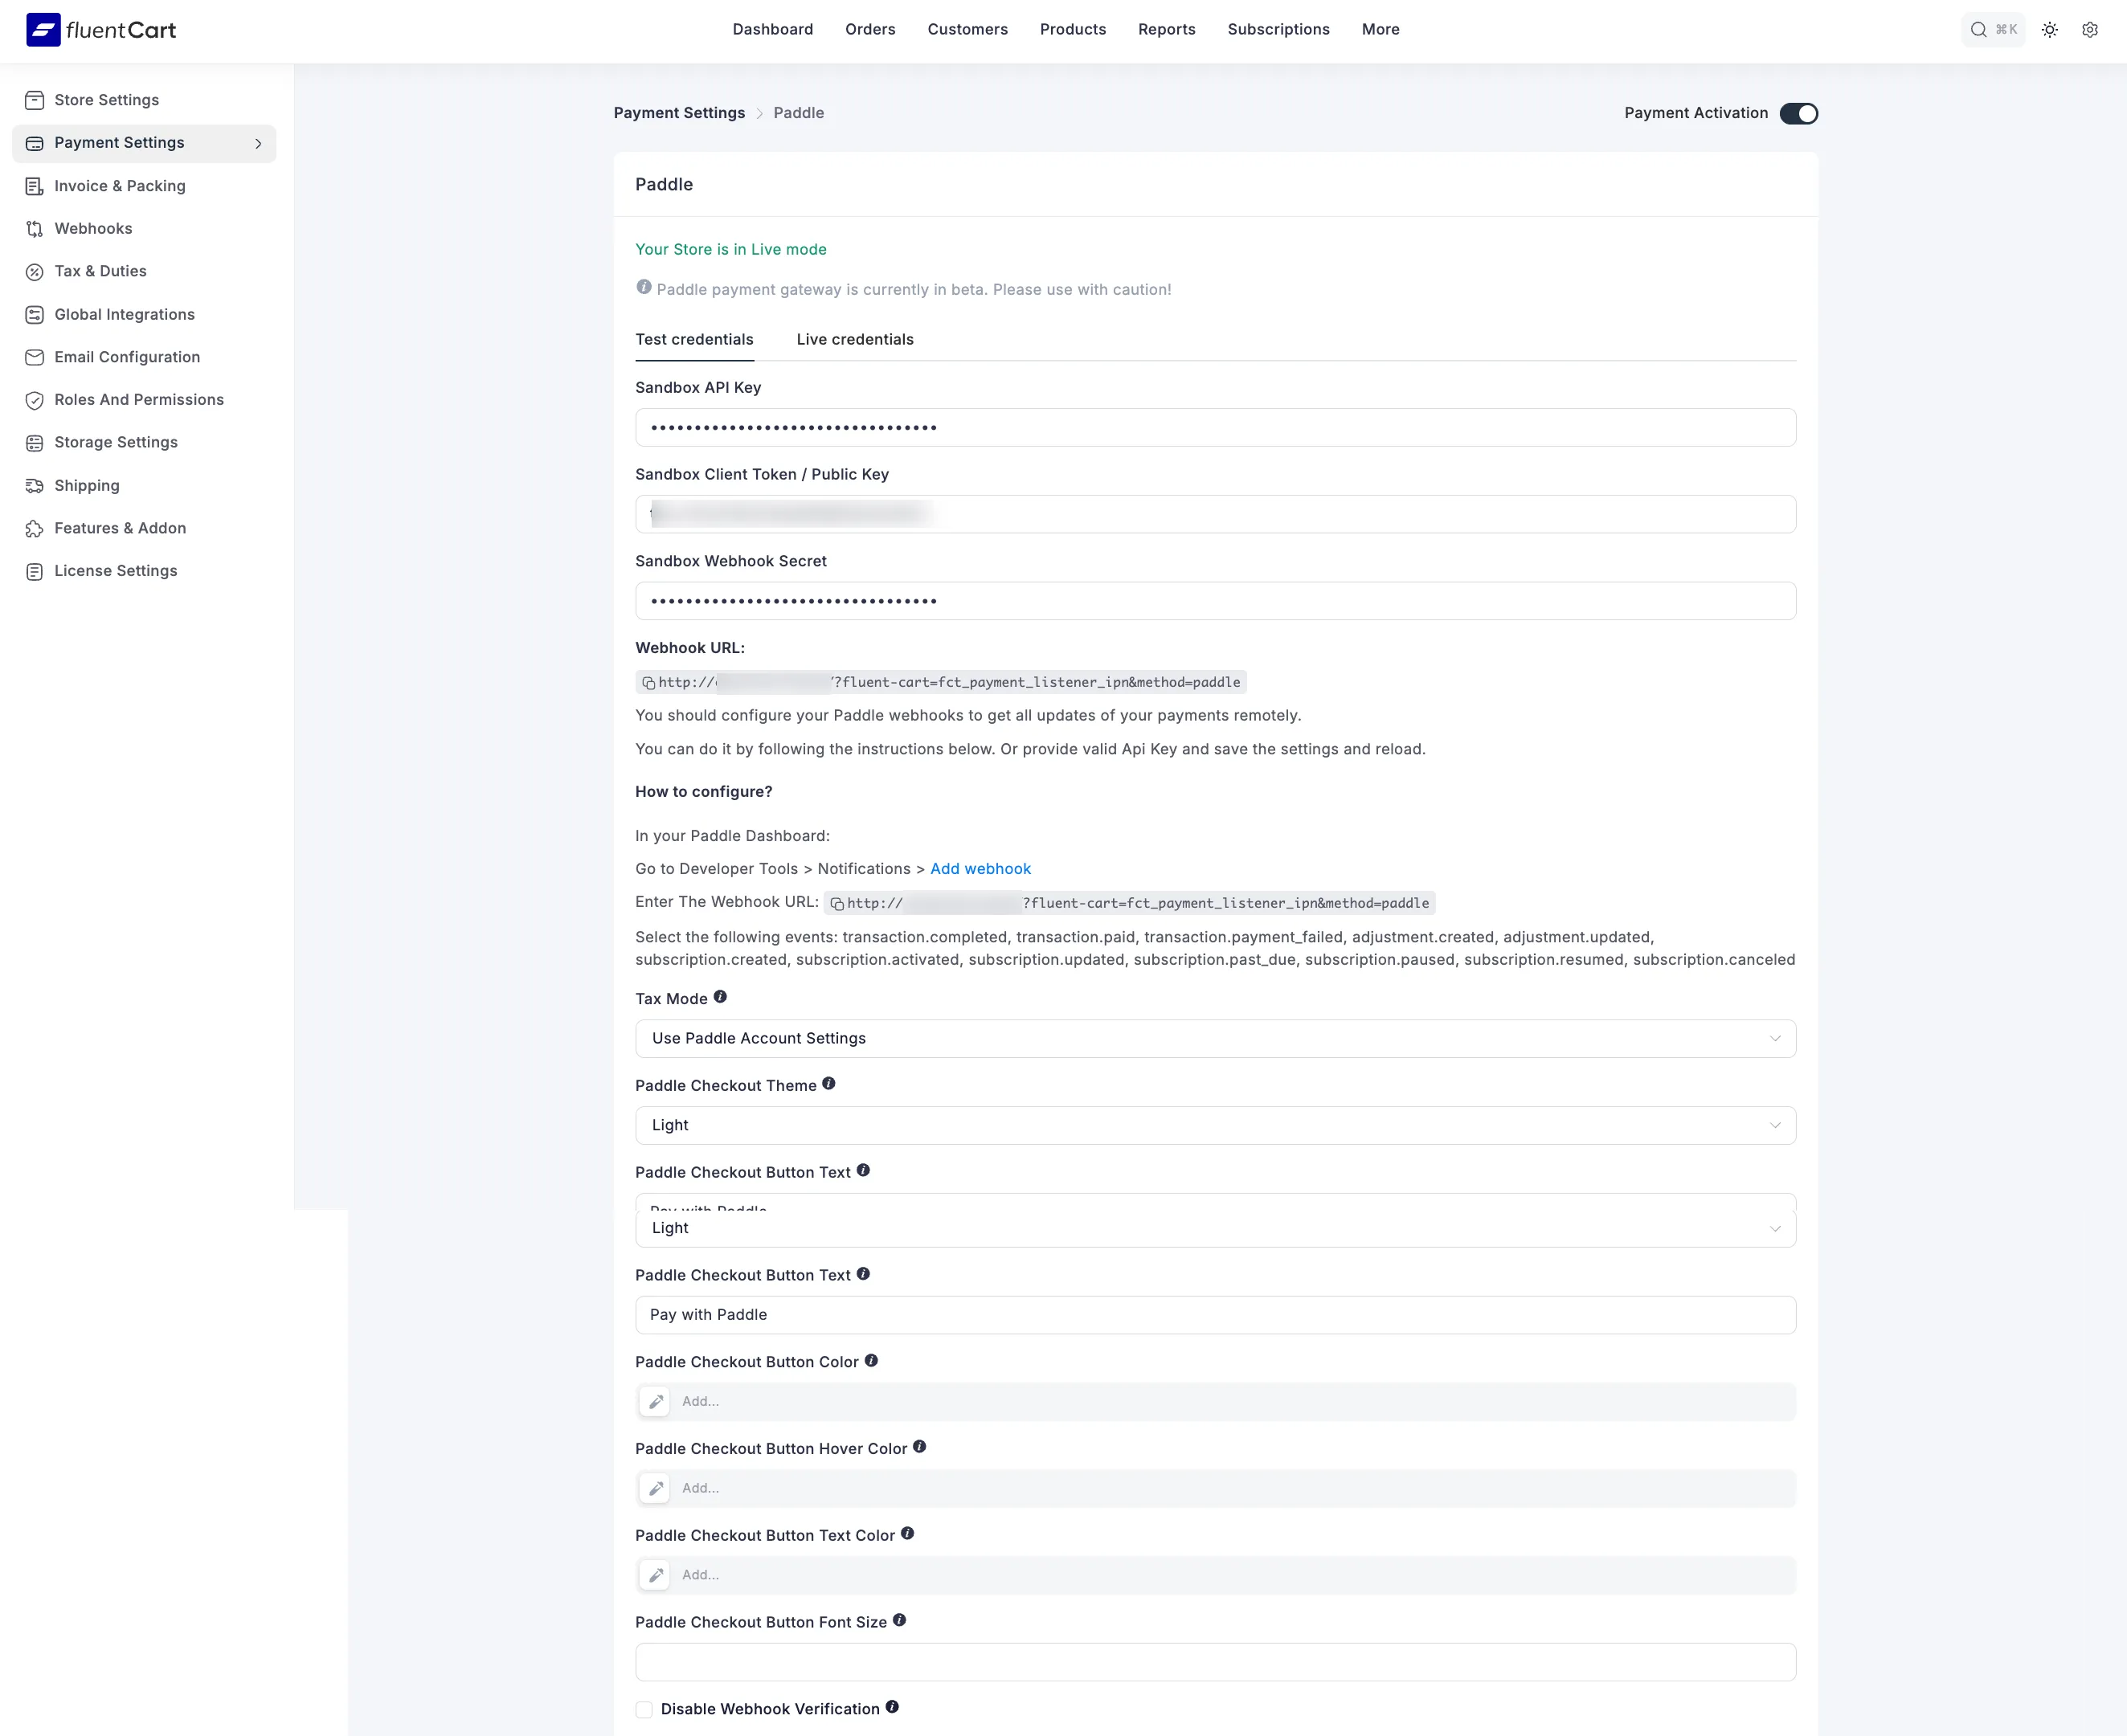
Once you have configured all the settings, click the Save Settings button. Your Paddle integration is now complete!
