Appearance
Stripe Settings
Stripe is a powerful and globally recognized payment platform that allows you to securely accept credit cards, debit cards, and various other payment methods through a single, seamless integration.
This guide will walk you through connecting your Stripe account to FluentCart to begin accepting payments.
Step 1: Accessing Stripe Settings
- From your WordPress dashboard, navigate to FluentCart Pro > Settings.
- Click on the Payment Settings tab.
- Locate Stripe in the list of payment gateways and click the Manage button next to it.
Step 2: Connect Your Stripe Account
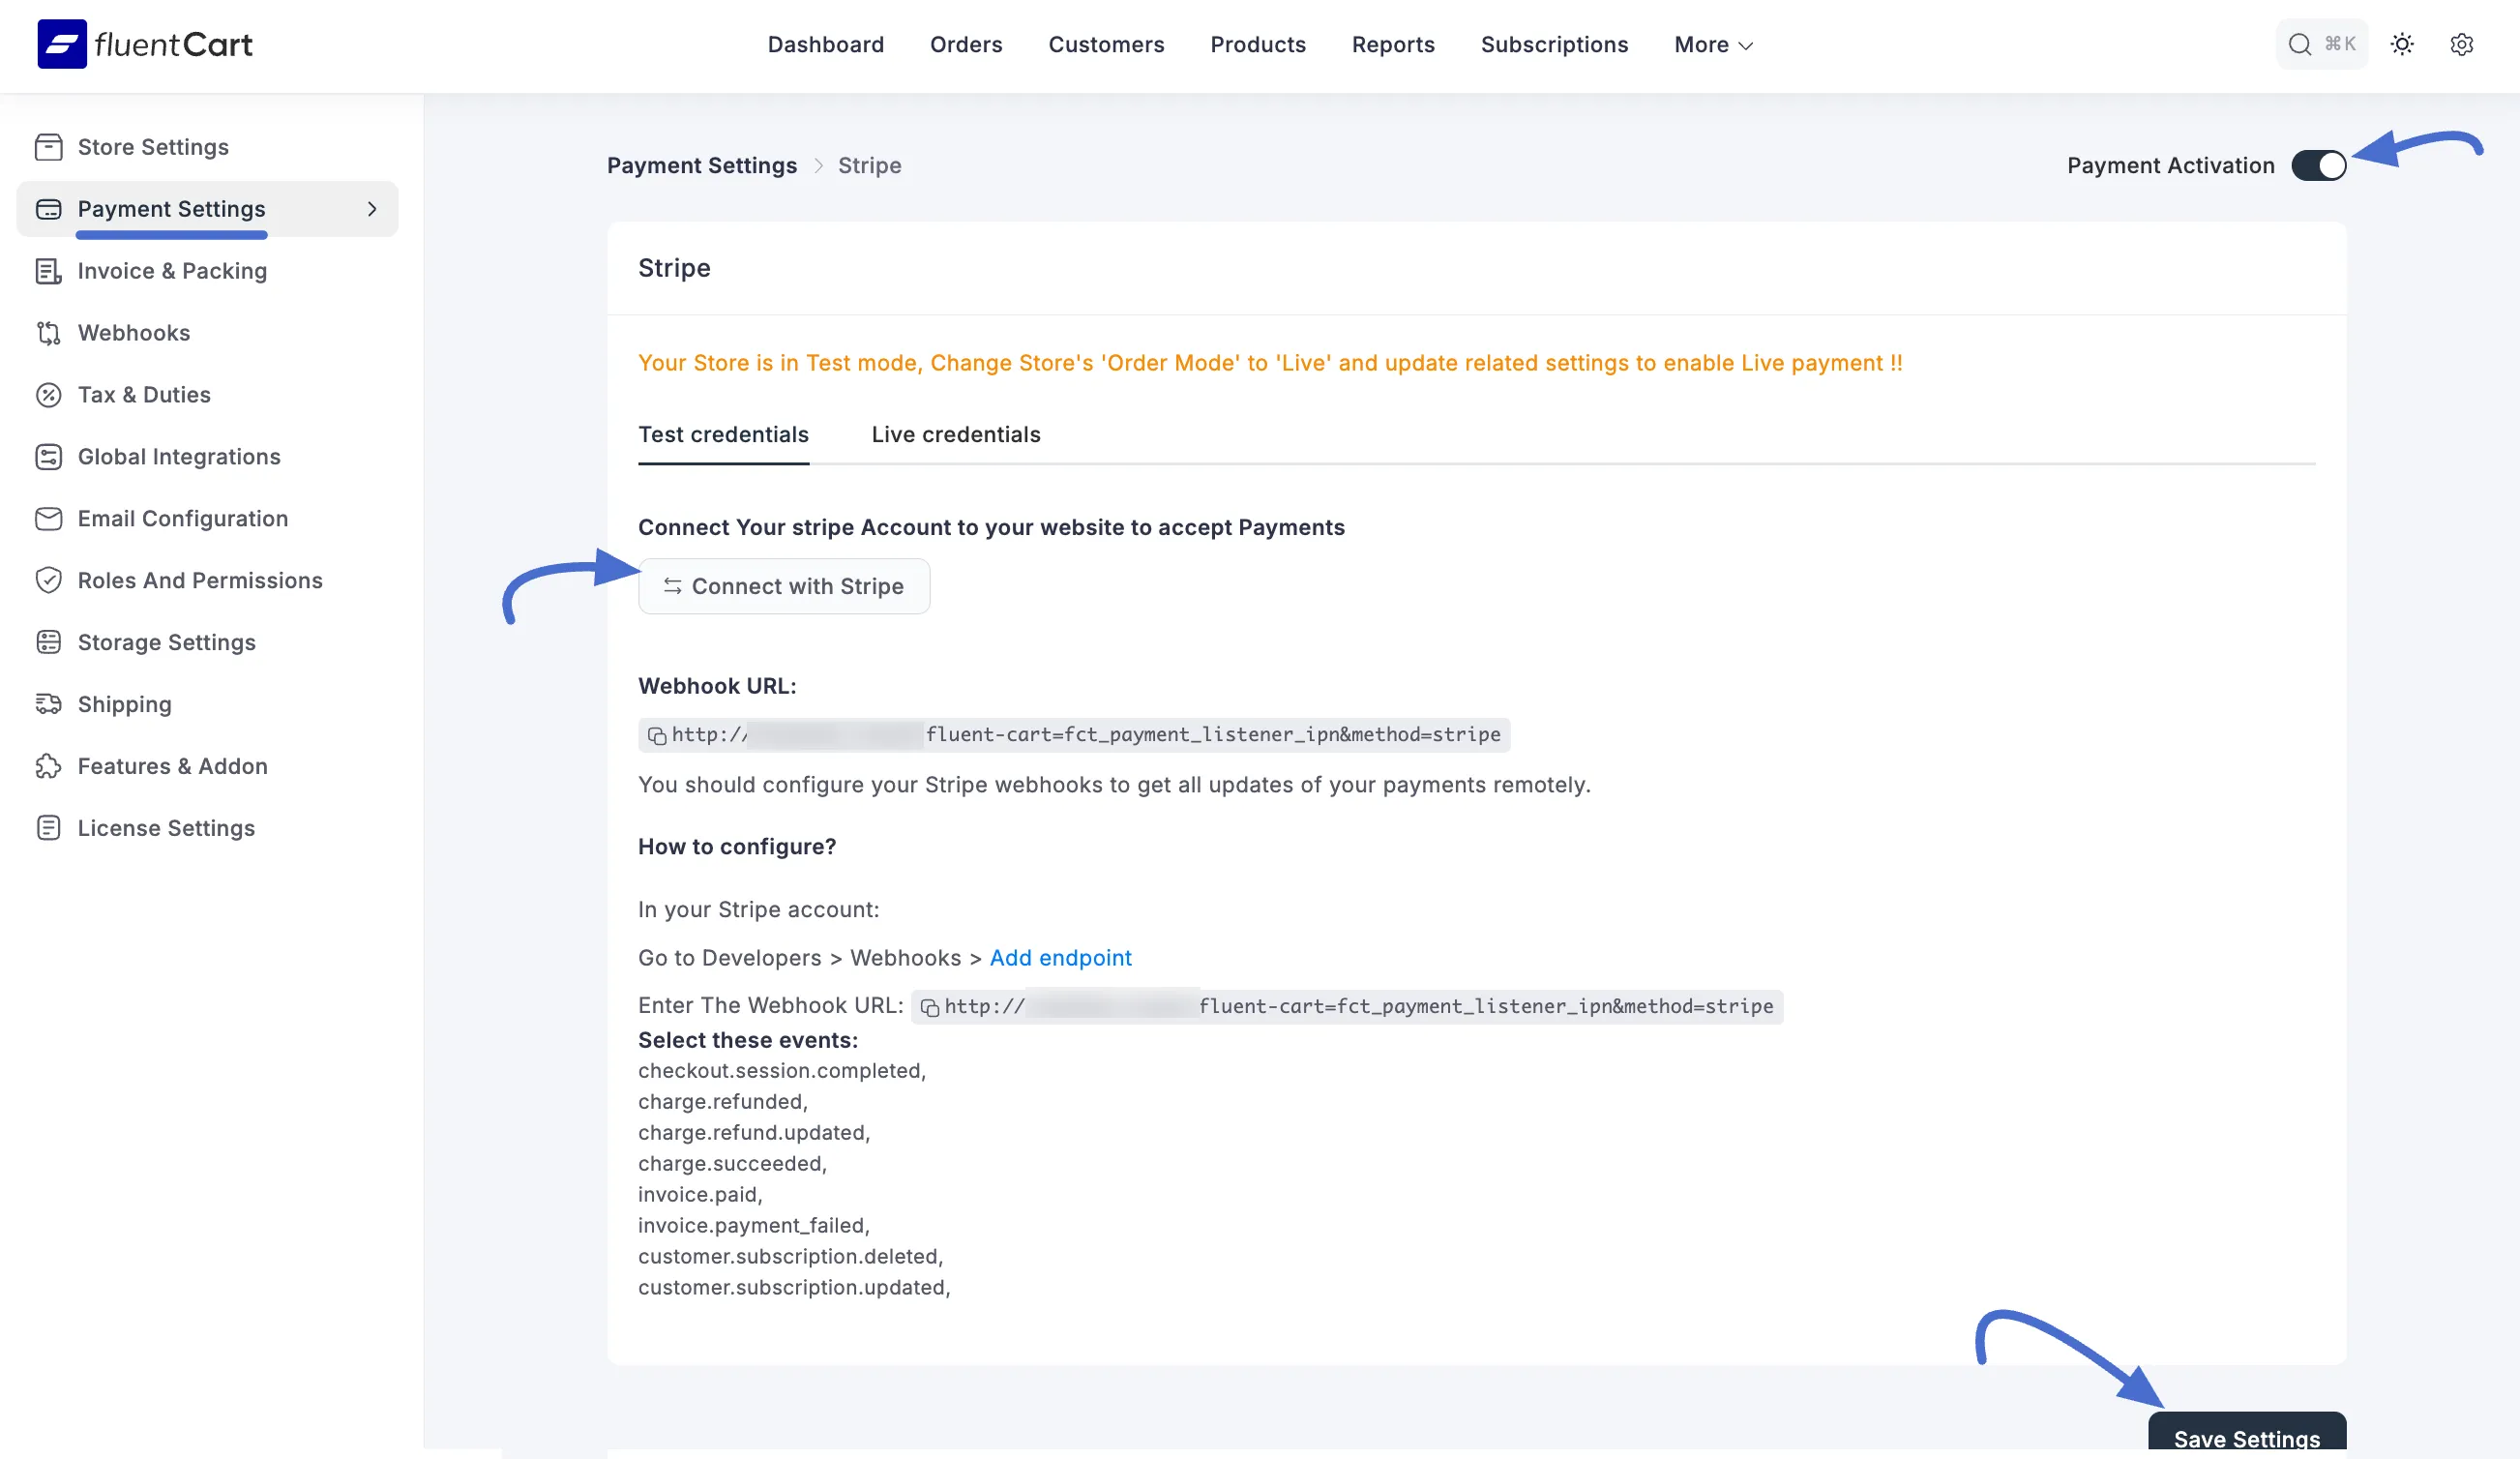
The Stripe settings page allows you to connect your store in both Test and Live modes. You must select the appropriate mode before initiating the connection.
Test Mode Warning: If your store is currently in Test mode, a banner will remind you to switch to Live mode for real transactions.
Select Credentials Mode:
- Test credentials: Select this tab if you want to connect your Stripe account in Test Mode. This is perfect for testing your checkout flow without processing real payments.
- Live credentials: Select this tab when you are ready to start accepting real payments from customers.
Connect with Stripe: After selecting the appropriate tab (Test or Live), click the Connect with stripe button. This will redirect you to Stripe's website, where you will be prompted to log in and authorize the connection with FluentCart. This is a secure process that automatically syncs your account for the selected mode.
INFO
FluentCart securely stores your Stripe connection information using a salt key encryption method. This ensures your informations remain fully encrypted in the database and protected from unauthorized access.
Step 3: Choose Your Checkout Mode
FluentCart gives you two different ways for customers to pay:
- Embedded checkout (Recommended): This keeps the customer on your website. It’s a customizable block that lets you control the design.
- Stripe Hosted checkout: This sends the customer to a secure page managed by Stripe. This is great for high-volume stores or if you want Stripe to handle all the complex security rules for you.
Step 4: Configure Webhooks
Webhooks are essential for the integration to function correctly. They allow Stripe to send real-time notifications to your store about payment events, such as successful charges, refunds, and subscription updates.
Copy Your Webhook URL: On the FluentCart Stripe settings page, you will see your unique Webhook URL. Copy this URL to your clipboard.
Configure in Stripe: Click the Add Endpoint link, and you’ll be redirected to your Create an event destination page.
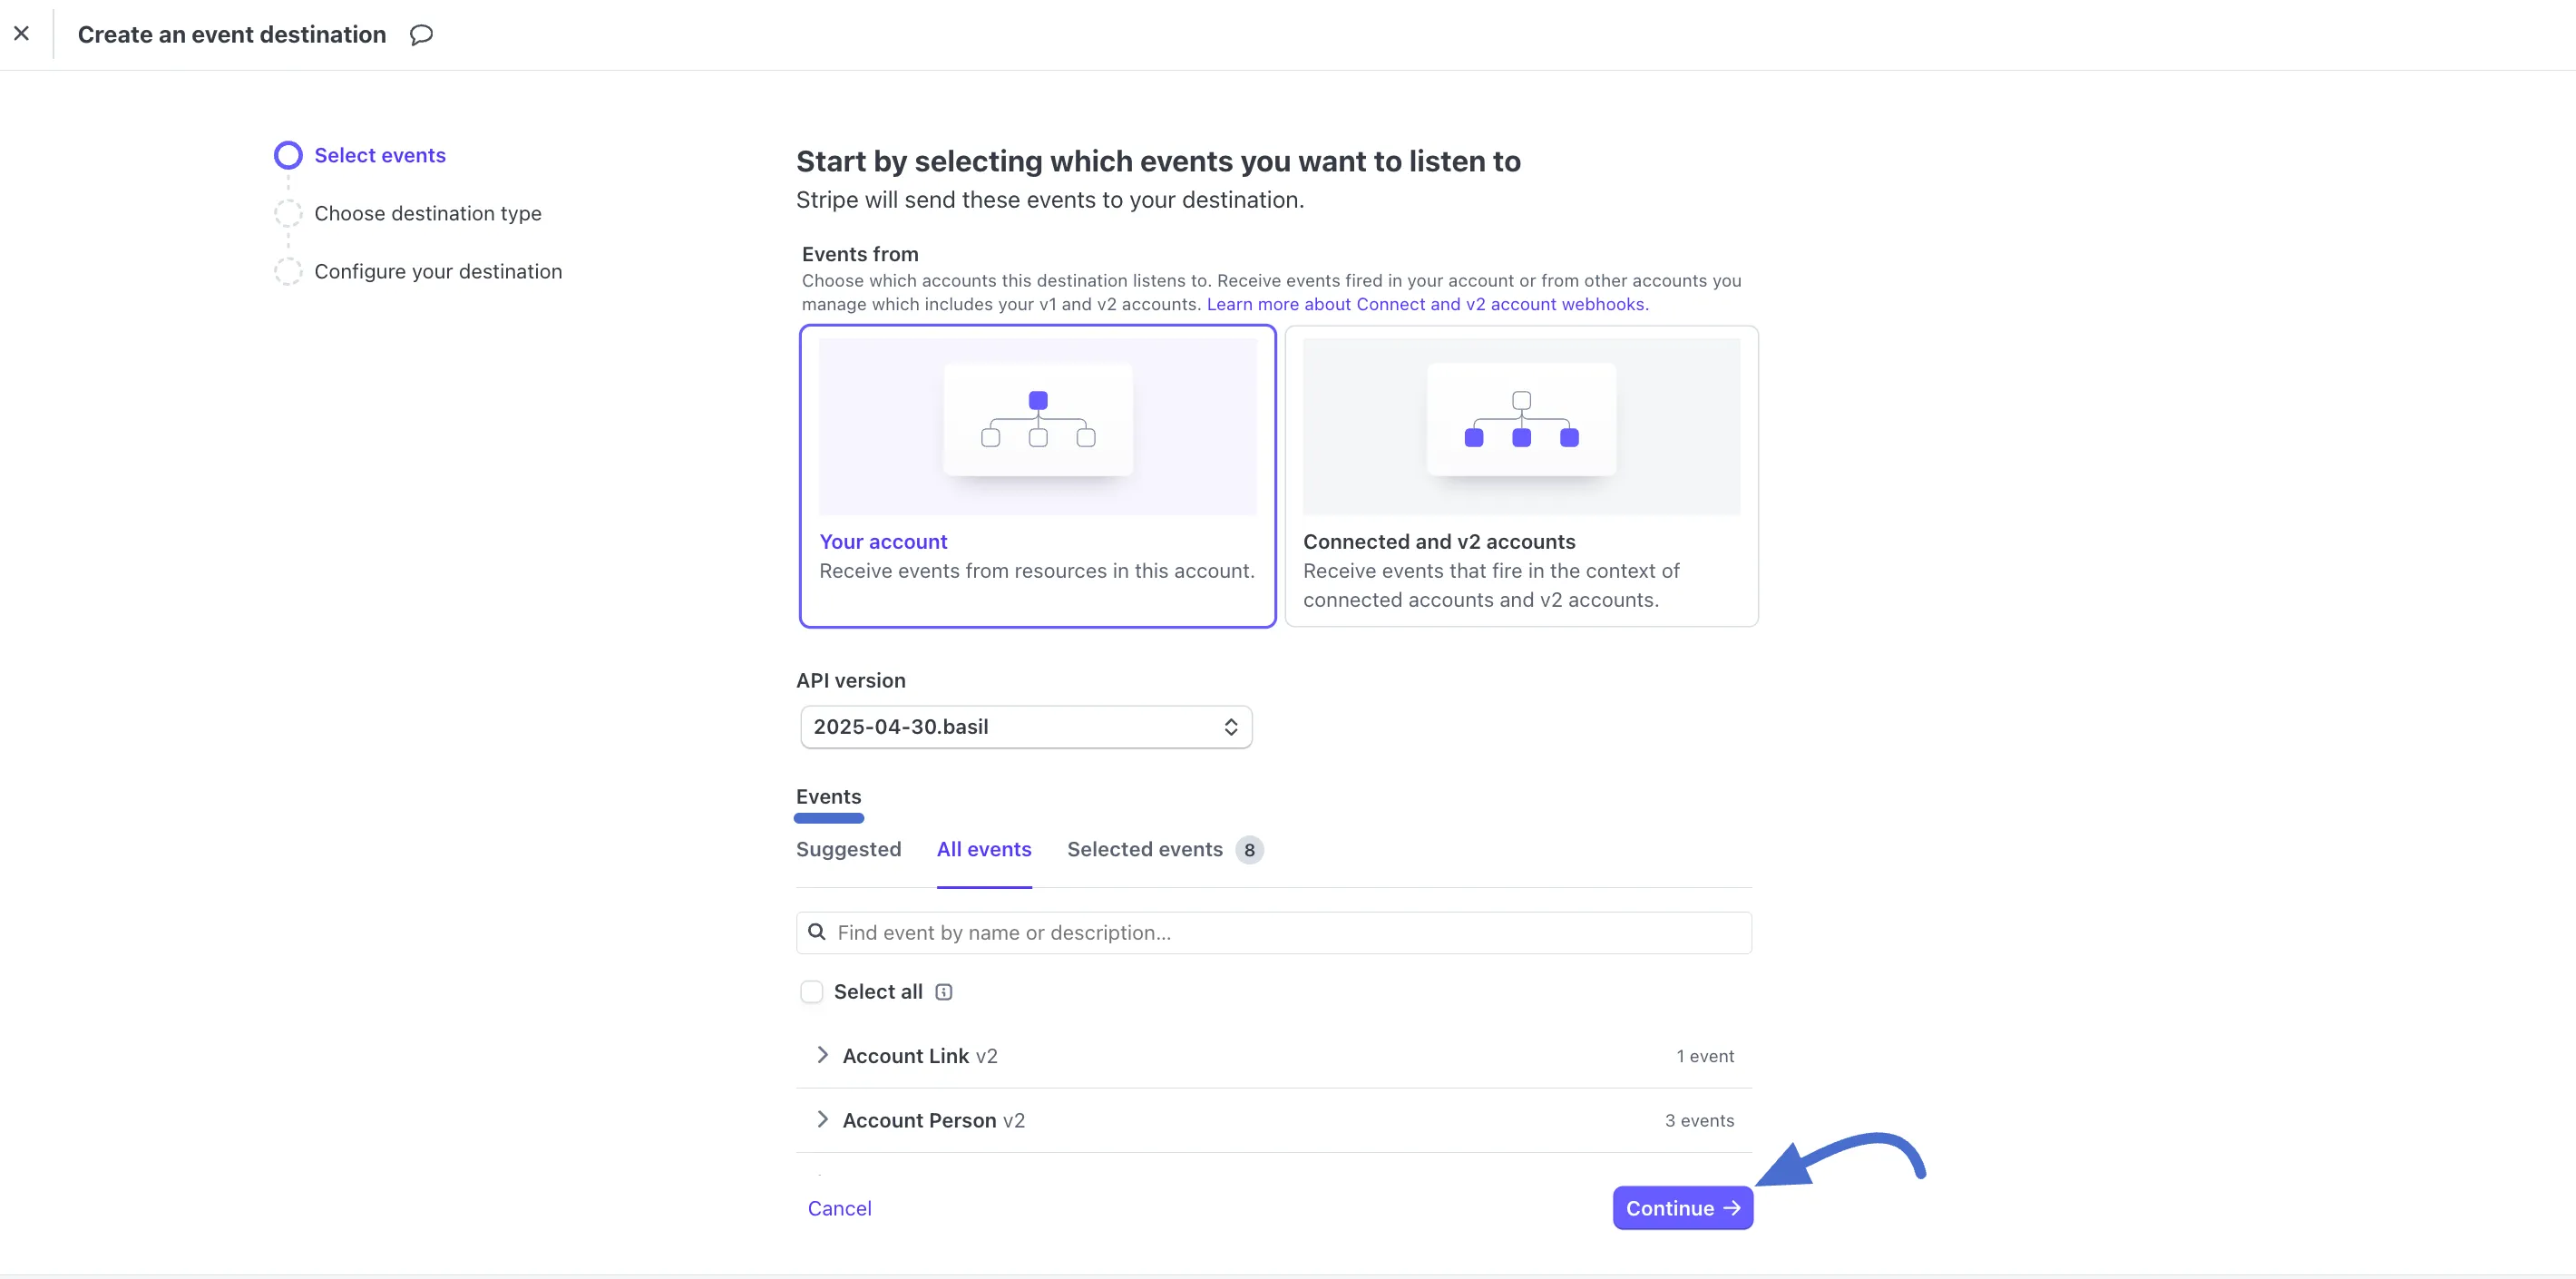
Select the Important Events: Now, choose the events recommended by FluentCart for Stripe to send to your endpoint. Under Events, click the All events tab. Click the checkboxes to select these specific events:
The Events recommended by FluentCart are briefly explained below:
- checkout.session.completed: The customer finished checkout, and the order is ready to process.
- charge.refunded: A completed payment has been refunded to the customer.
- charge.refund.updated: Details of a refund were updated (like the amount or reason).
- charge.succeeded: The customer’s payment went through successfully.
- invoice.paid: A subscription invoice was paid by the customer.
- invoice.payment.failed: A subscription invoice payment failed (e.g., card declined).
- customer.subscription.deleted: The customer canceled their subscription.
- customer.subscription.updated: The customer’s subscription was changed (e.g., upgraded or downgraded).
Once you select all the suggested Webhook Events, click the Continue button.
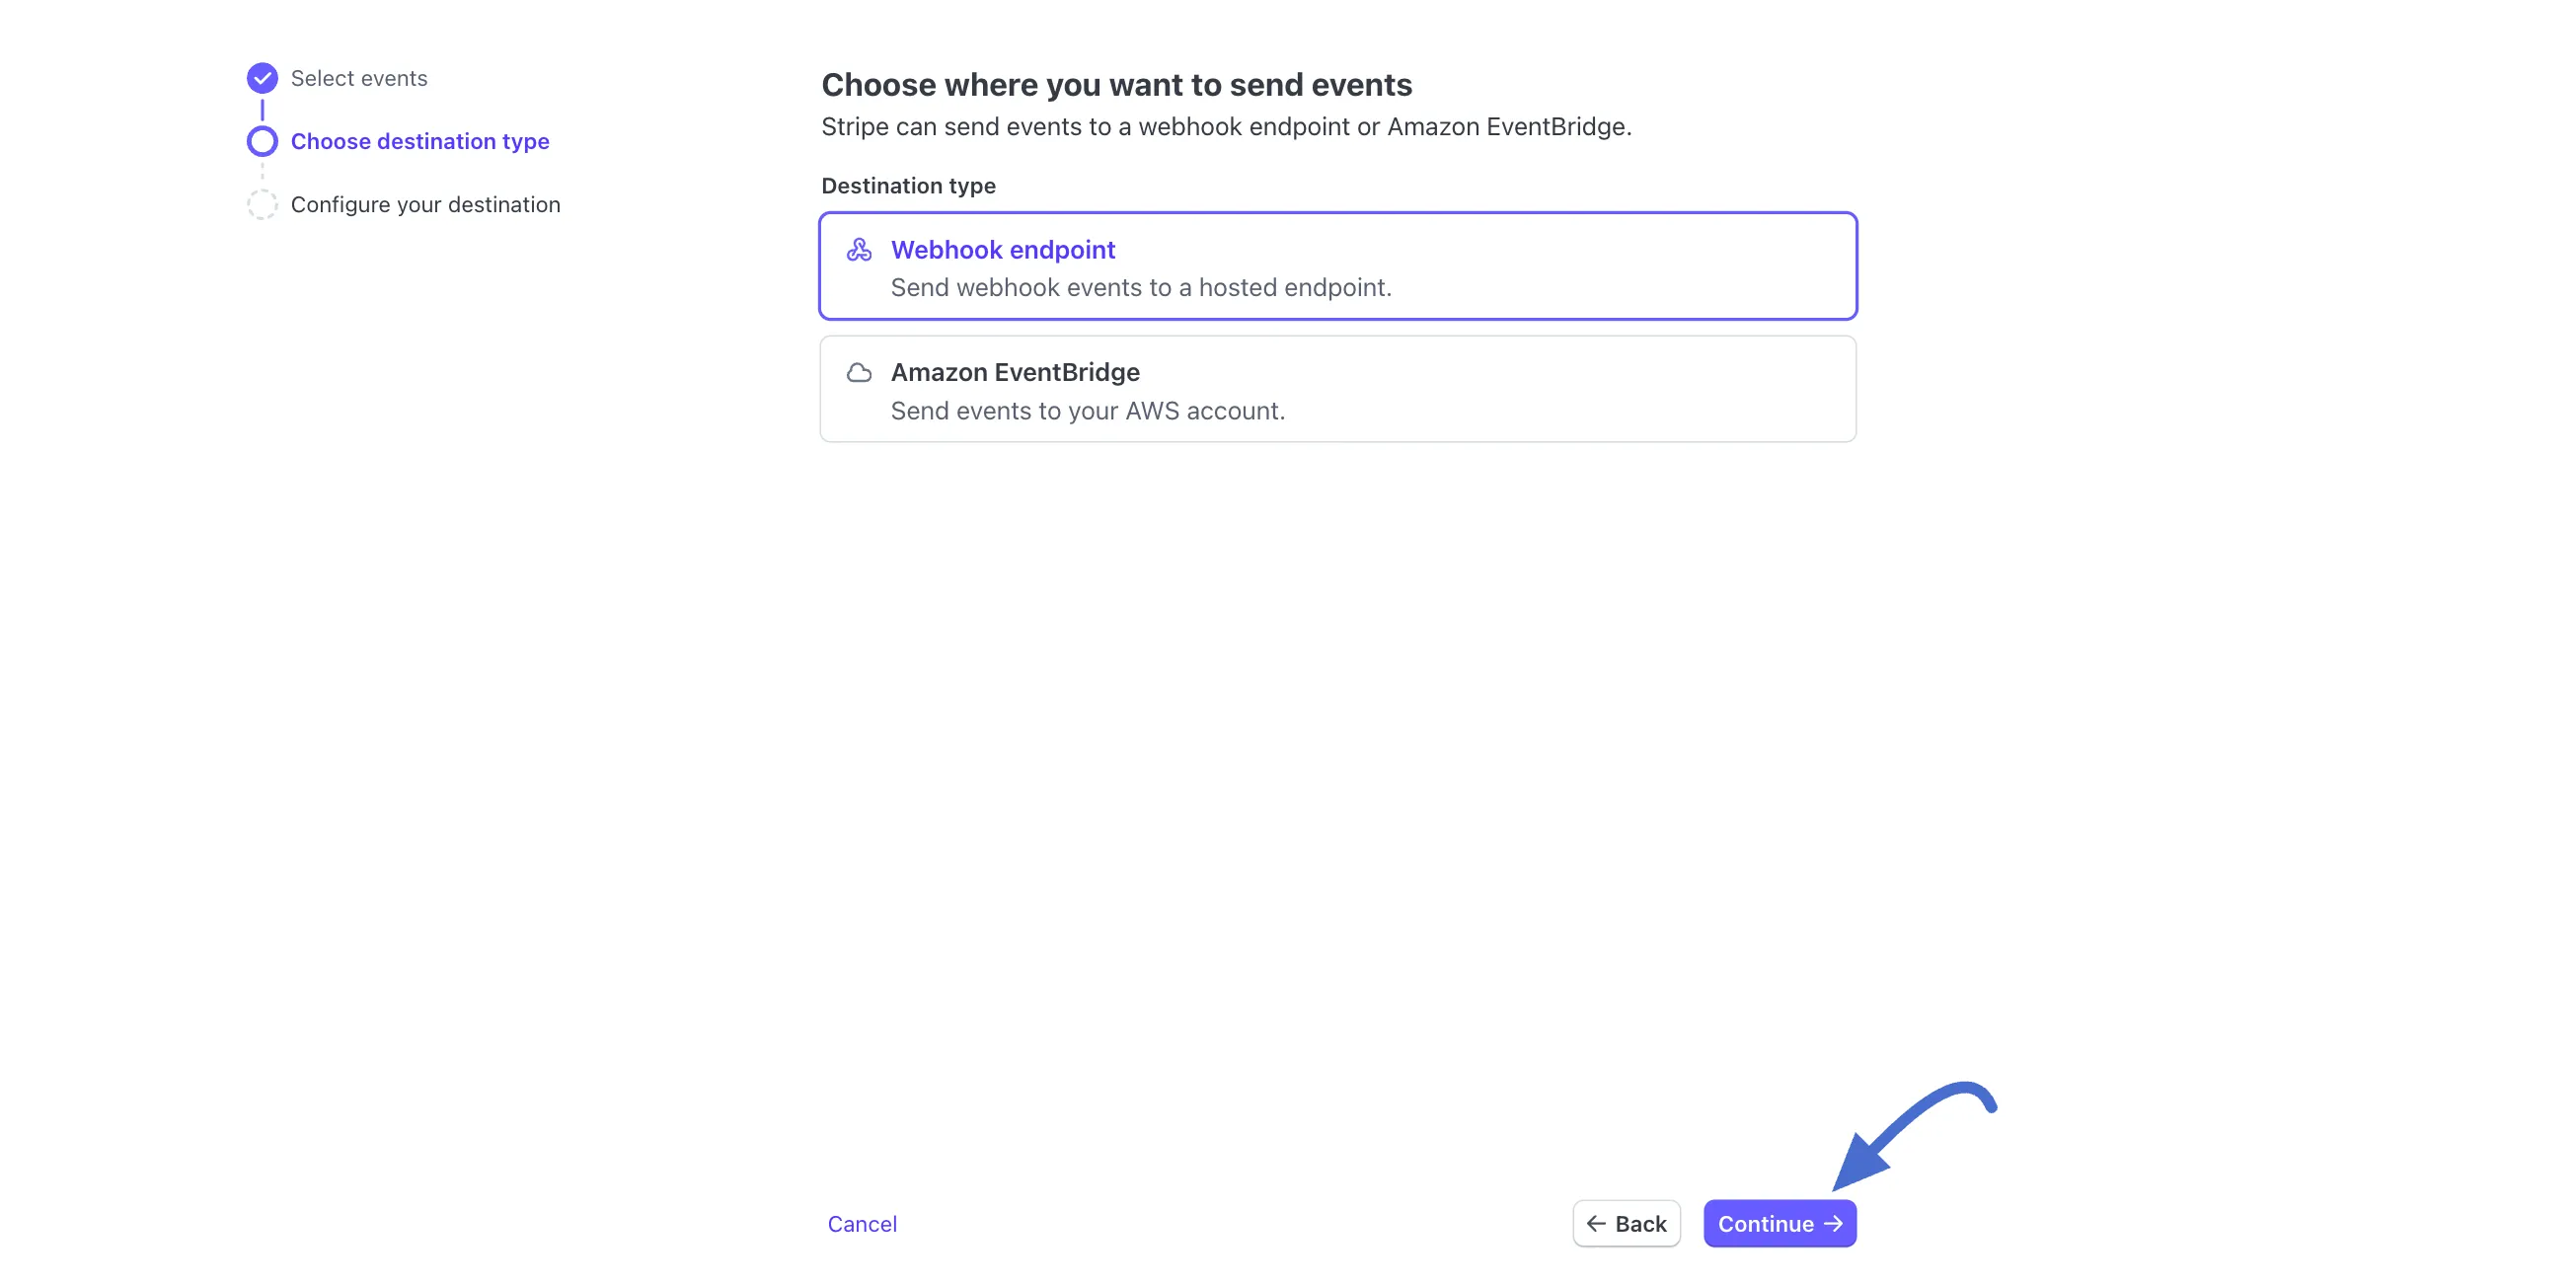
Then, select the Webhook endpoint and again click the Continue button.
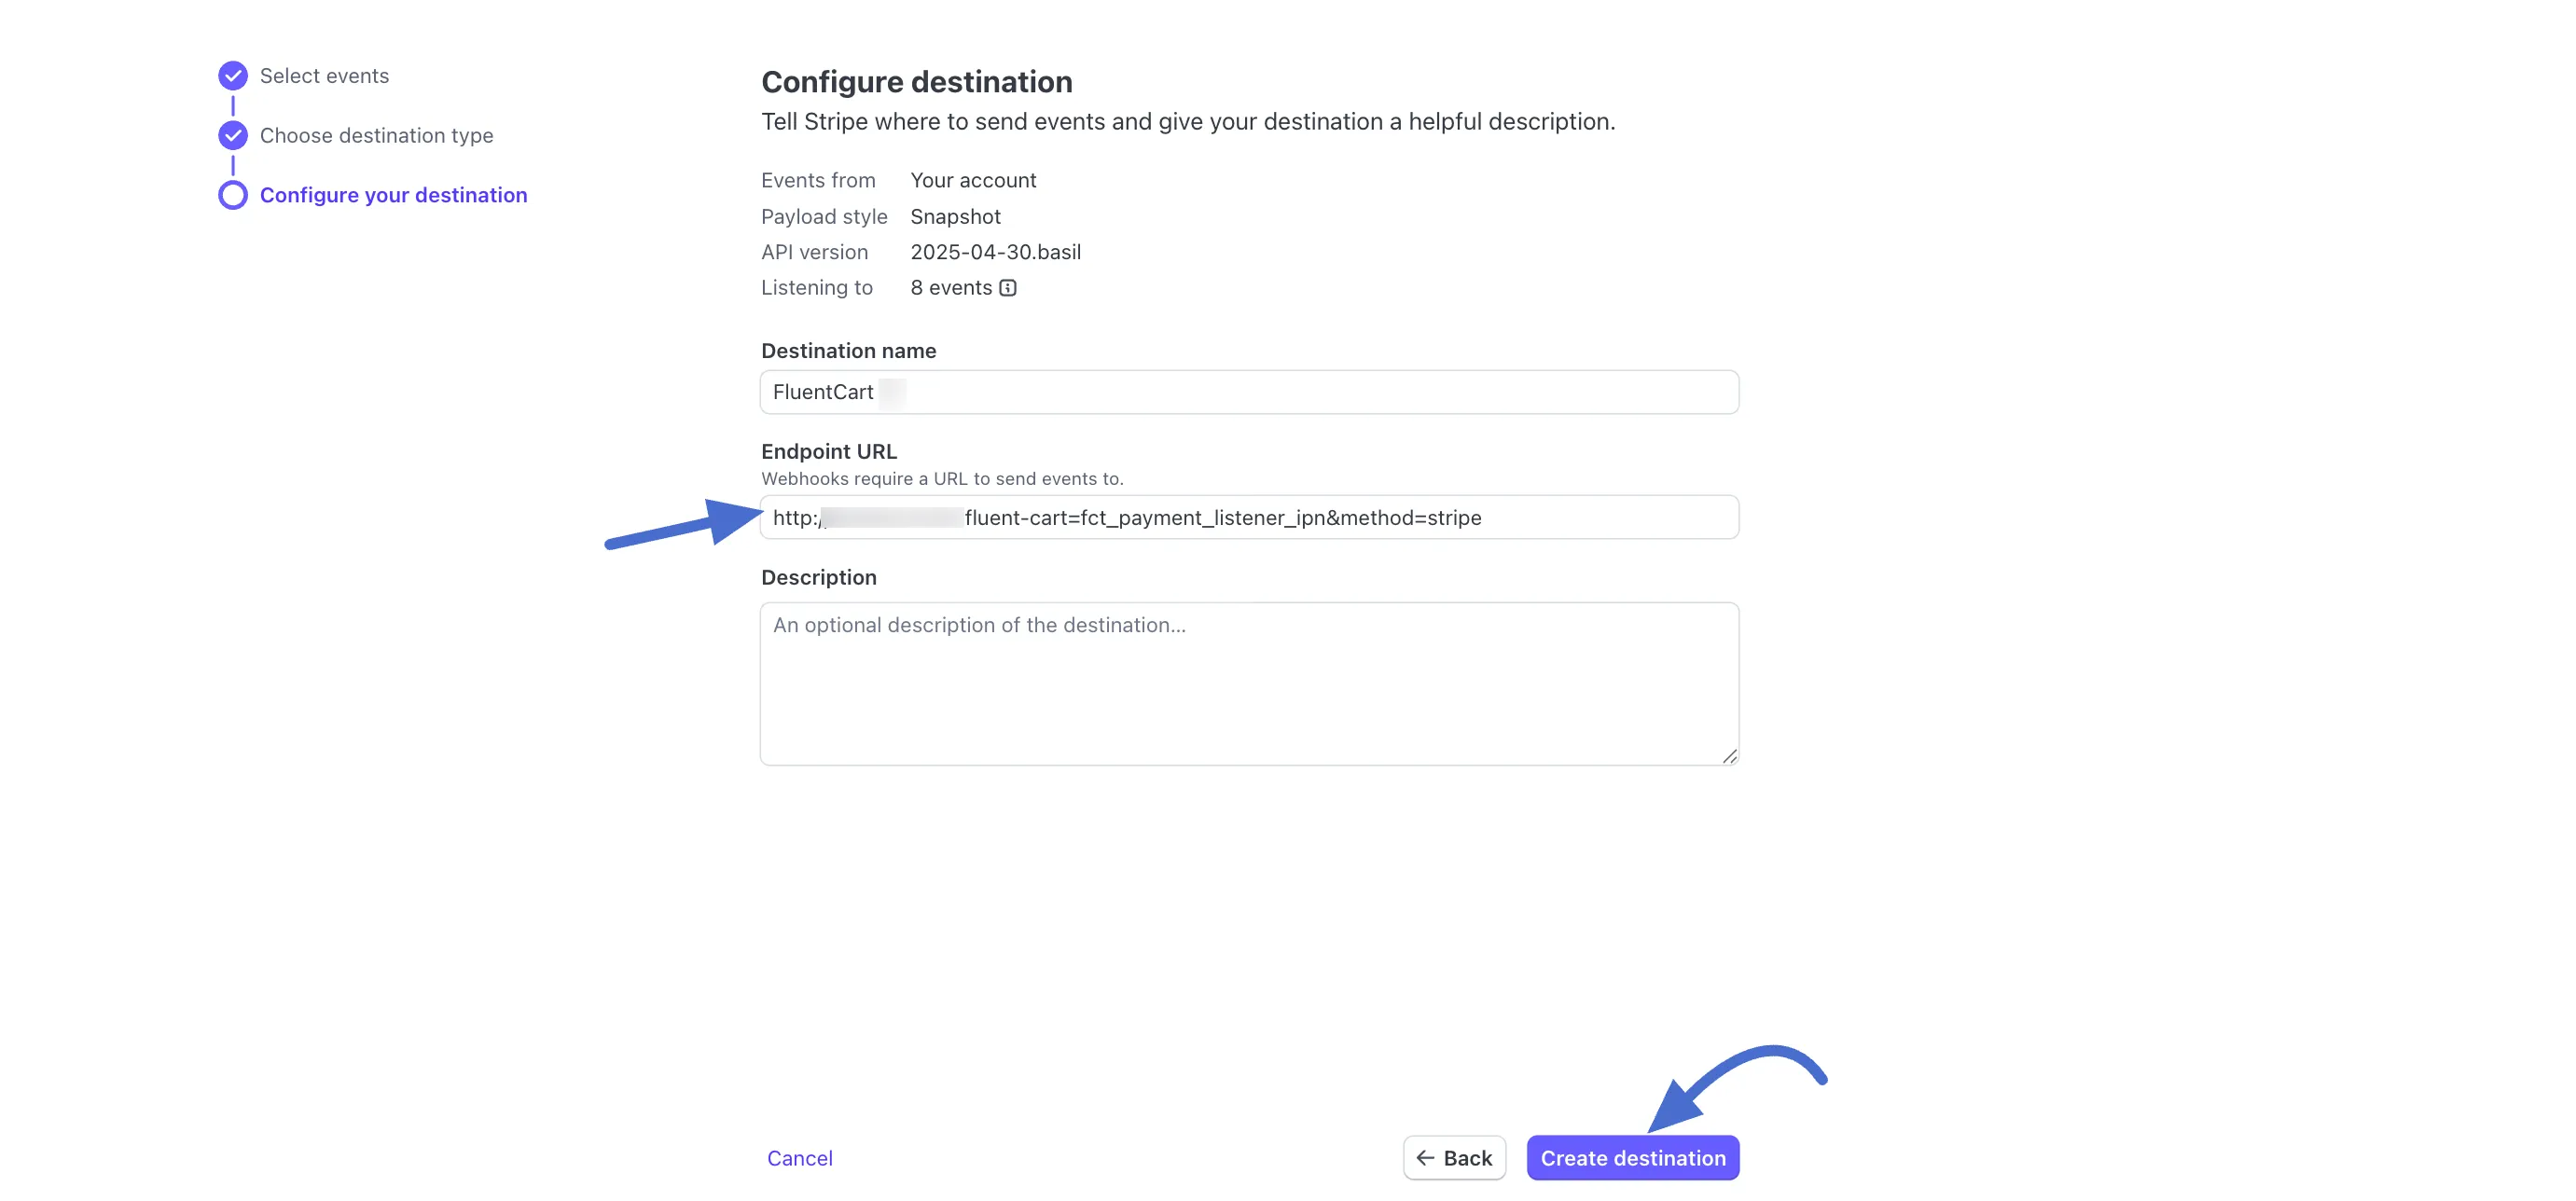
Next, type a destination name, paste the webhook URL you copied earlier into the Endpoint URL field, and then click the “Create Destination” button.
Step 5: Activate and Save
- Payment Activation: Back on the FluentCart Stripe settings page, ensure the Payment Activation toggle at the top right is switched on.
- Save Settings: Click the Save Settings button at the bottom to finalize the setup.
Your store is now configured to securely accept payments through Stripe.
Note You can also connect your Stripe account by adding your API keys directly to your site's
wp-config.phpfile for more secure setup. For detailed instructions on this advanced method, please see our guide on Configuring Stripe via wp-config.php.