Appearance
FluentCart with Amazon S3
Amazon S3 is a powerful cloud storage service that acts like a secure, high-performance storage for your media files. By connecting Amazon S3 to FluentCart, you offload your files from your website's server storage to this dedicated storage solution. This makes your website load much faster for your customers, improves scalability, and ensures your digital products are delivered reliably.
This guide will walk you through the entire process of setting up an Amazon S3 bucket and connecting it to FluentCart.
Step 1: Find the Storage Settings in FluentCart
First, let's go to the right place in FluentCart.
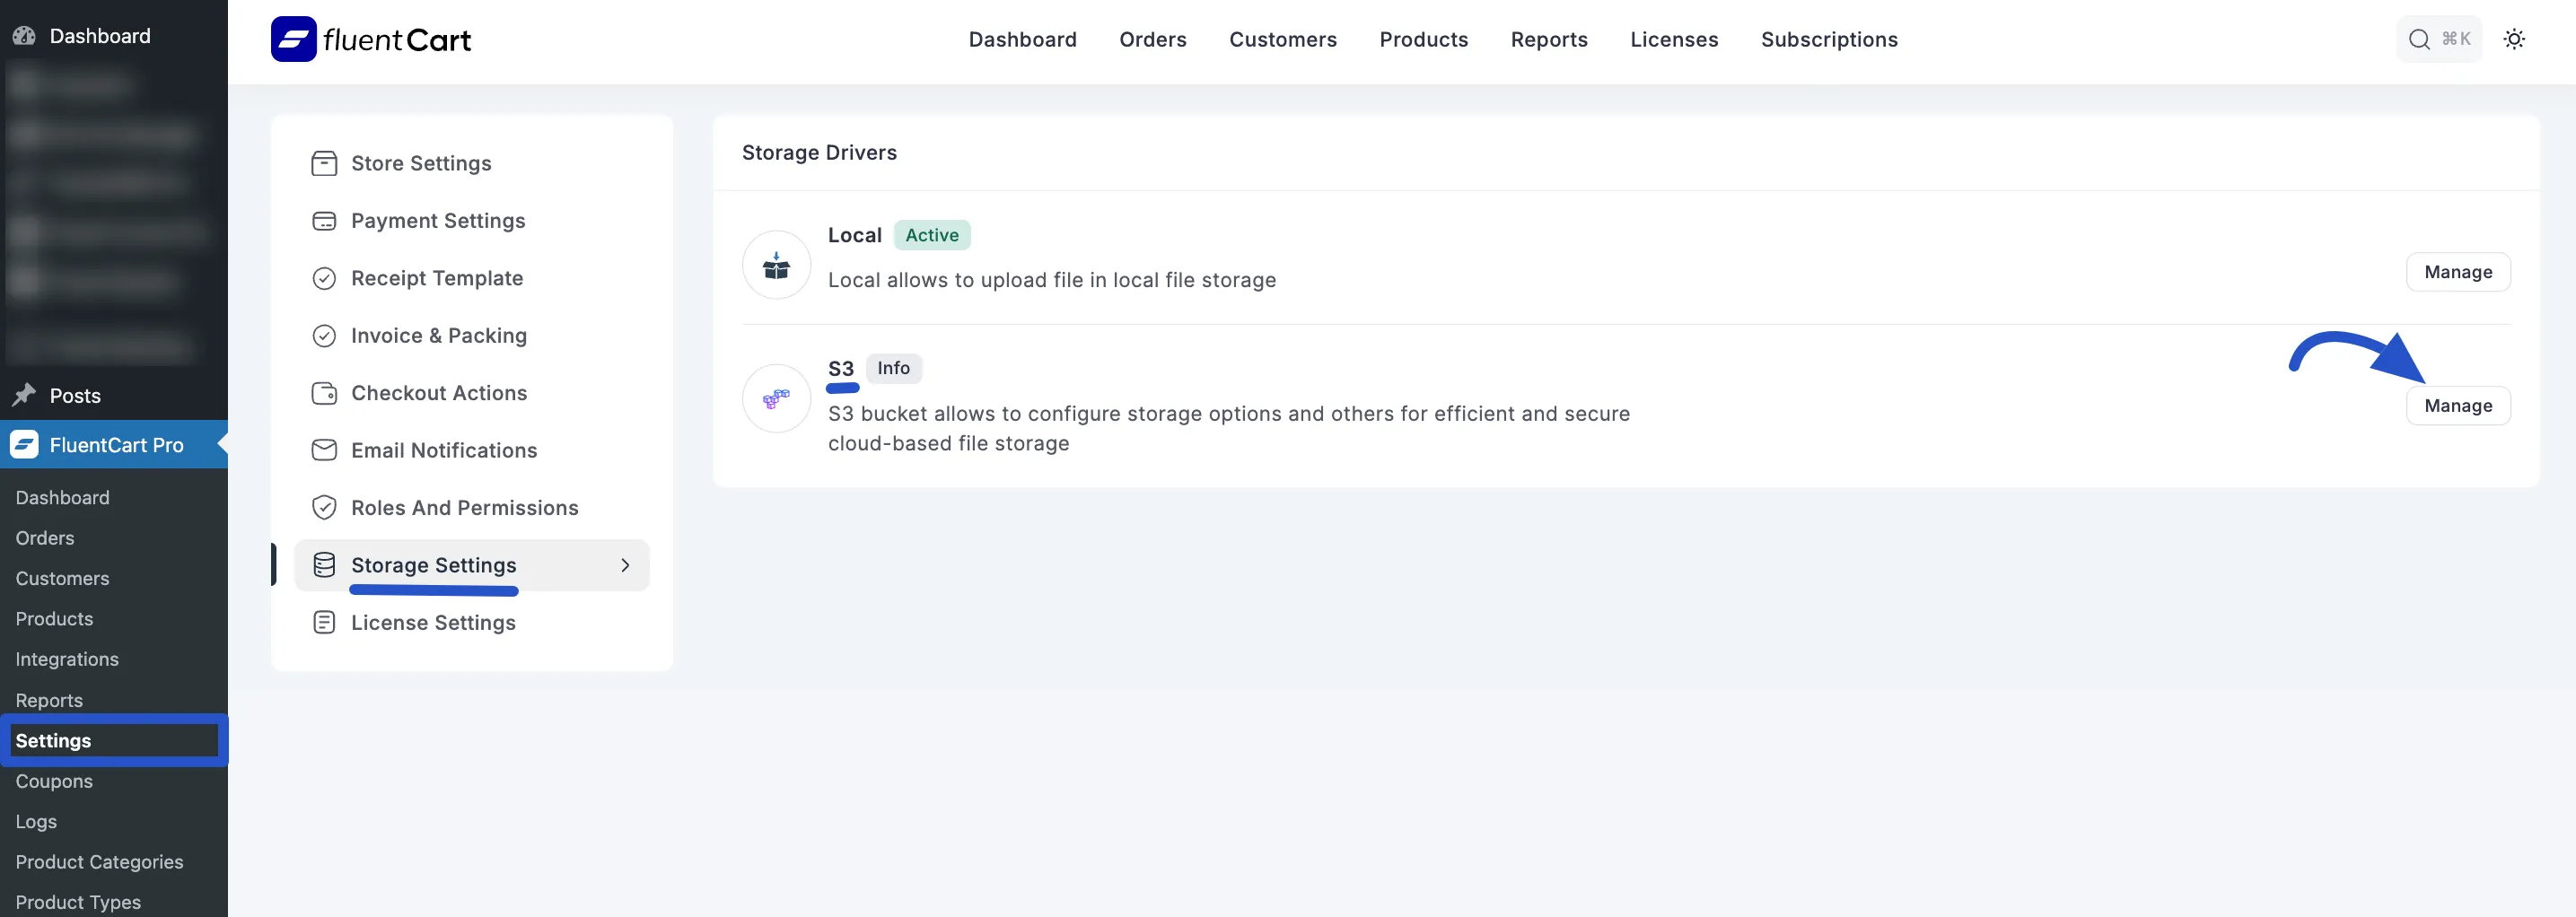
- From your WordPress dashboard, go to FluentCart.
- Click on Settings in the left-hand menu.
- Choose Storage Settings.
- You will see a list of cloud storage options. Find Amazon S3 and click the Manage button.
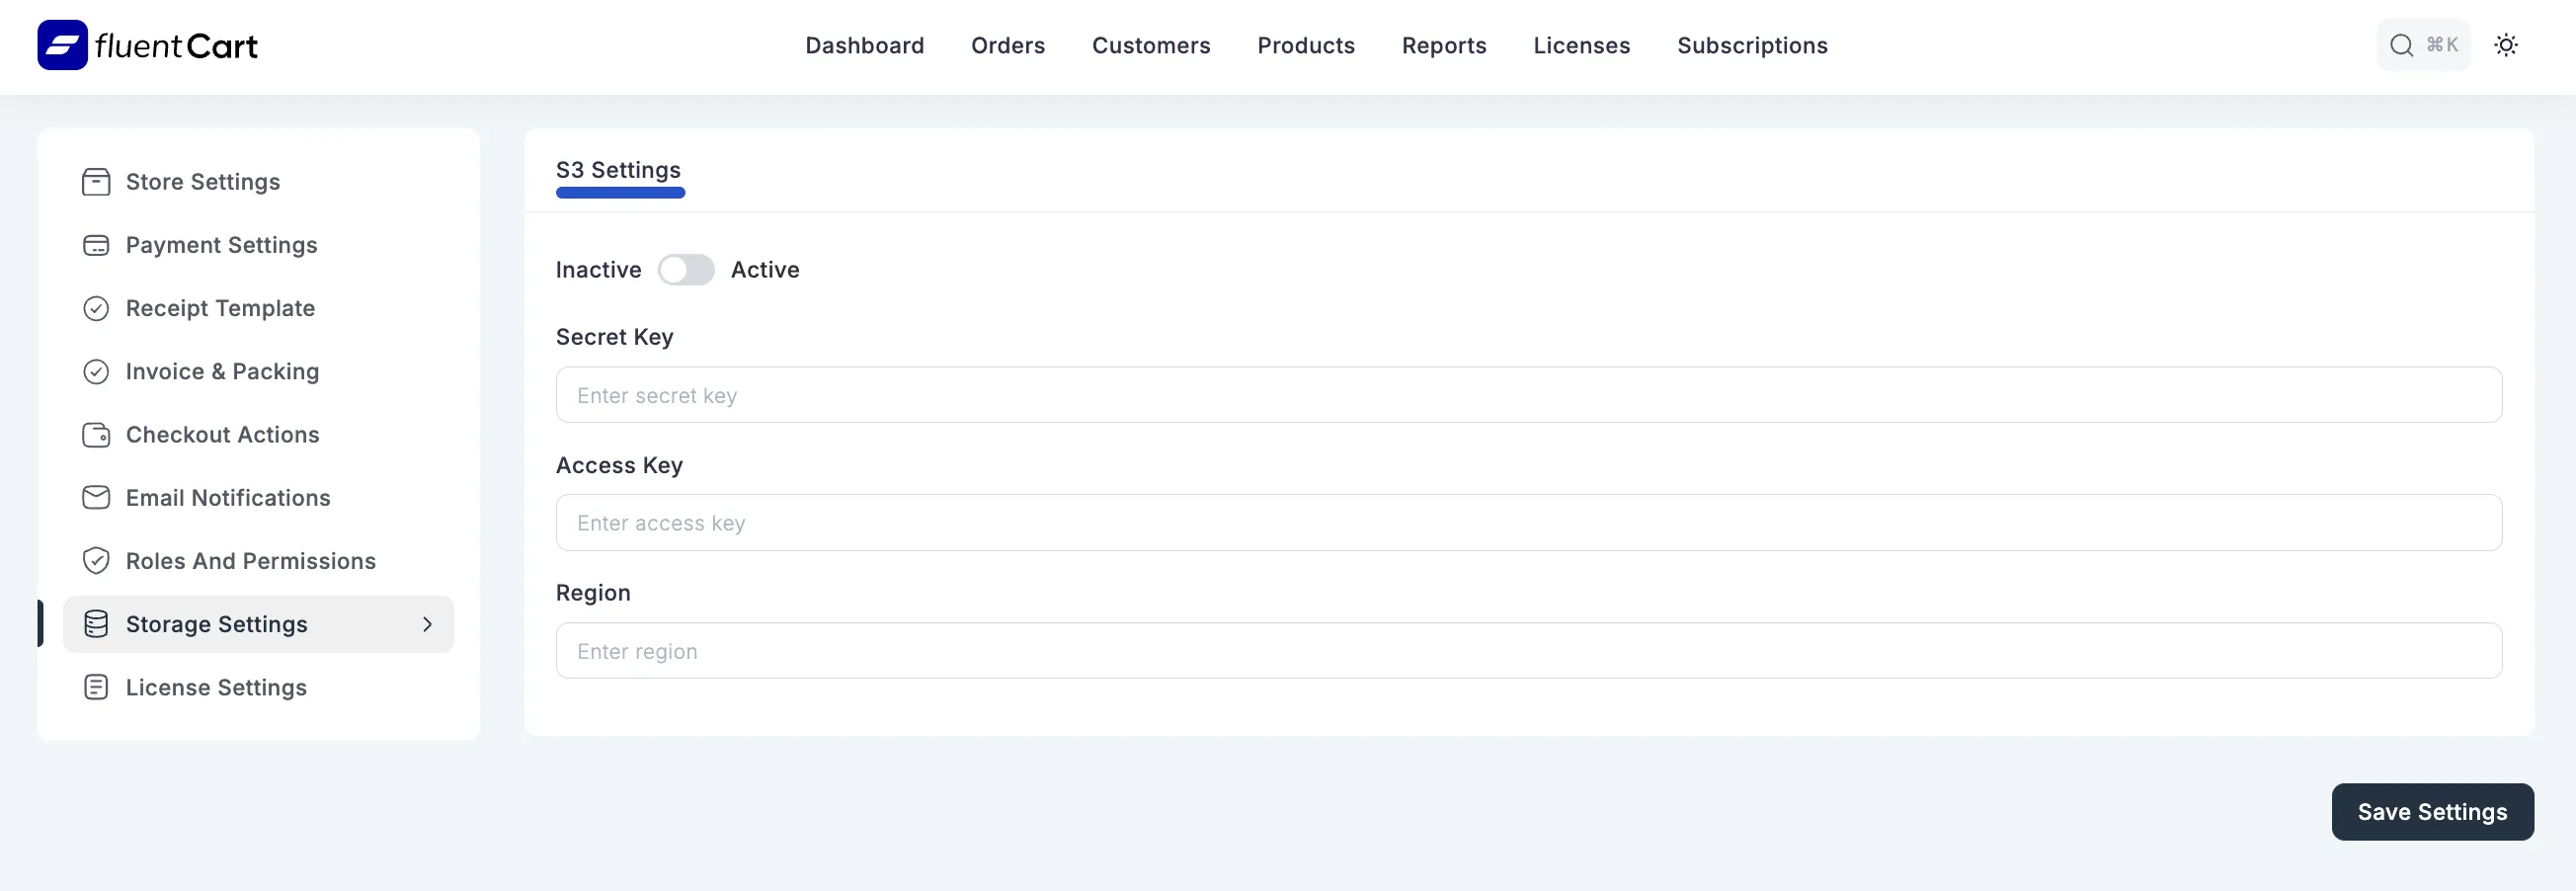
You’ll now see the fields we need to fill in to connect FluentCart to Amazon S3.
To retrieve this information, please visit your Amazon AWS account. Don’t worry, we’ll guide you through each step to make the process simple and stress-free.
Step 2: Get Your Credentials from Amazon S3
Think of this step as creating a secure storage box in your Amazon S3 for your media files, and then generating a special key that only FluentCart can use to access it.
Create a "Bucket" (Your File Box)
First, we need to create a "bucket," which is just what Amazon calls a storage container.
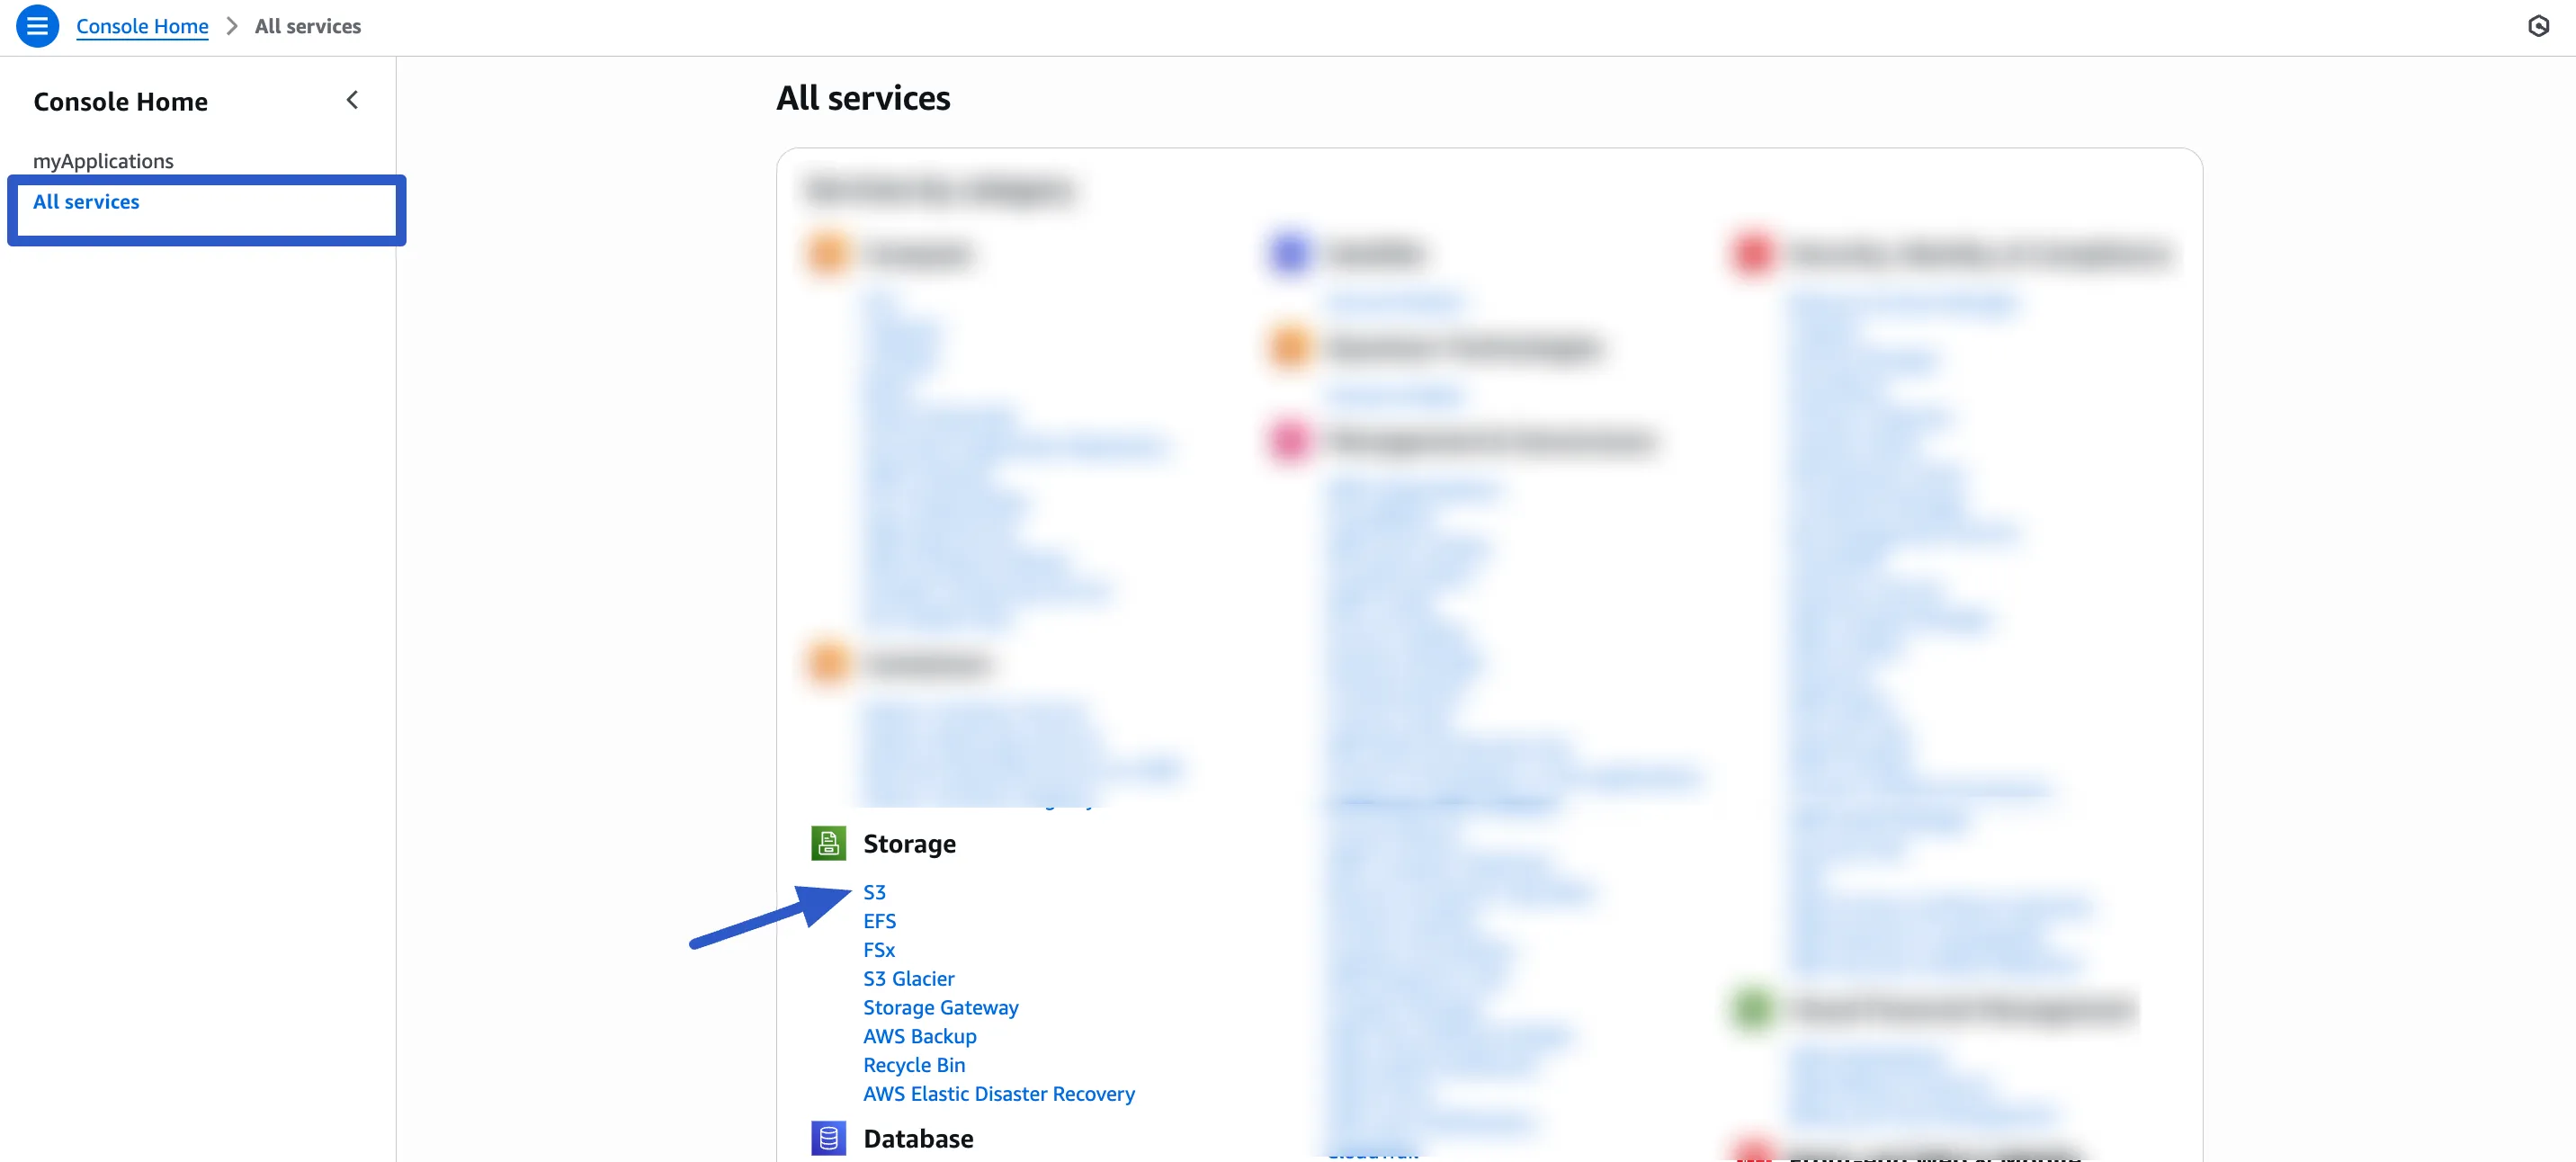
- Log in to your Amazon AWS account.
- From the main dashboard, find and click on S3 under the "Storage" section. If you can't find it, you can search for "S3" in the search bar at the top.
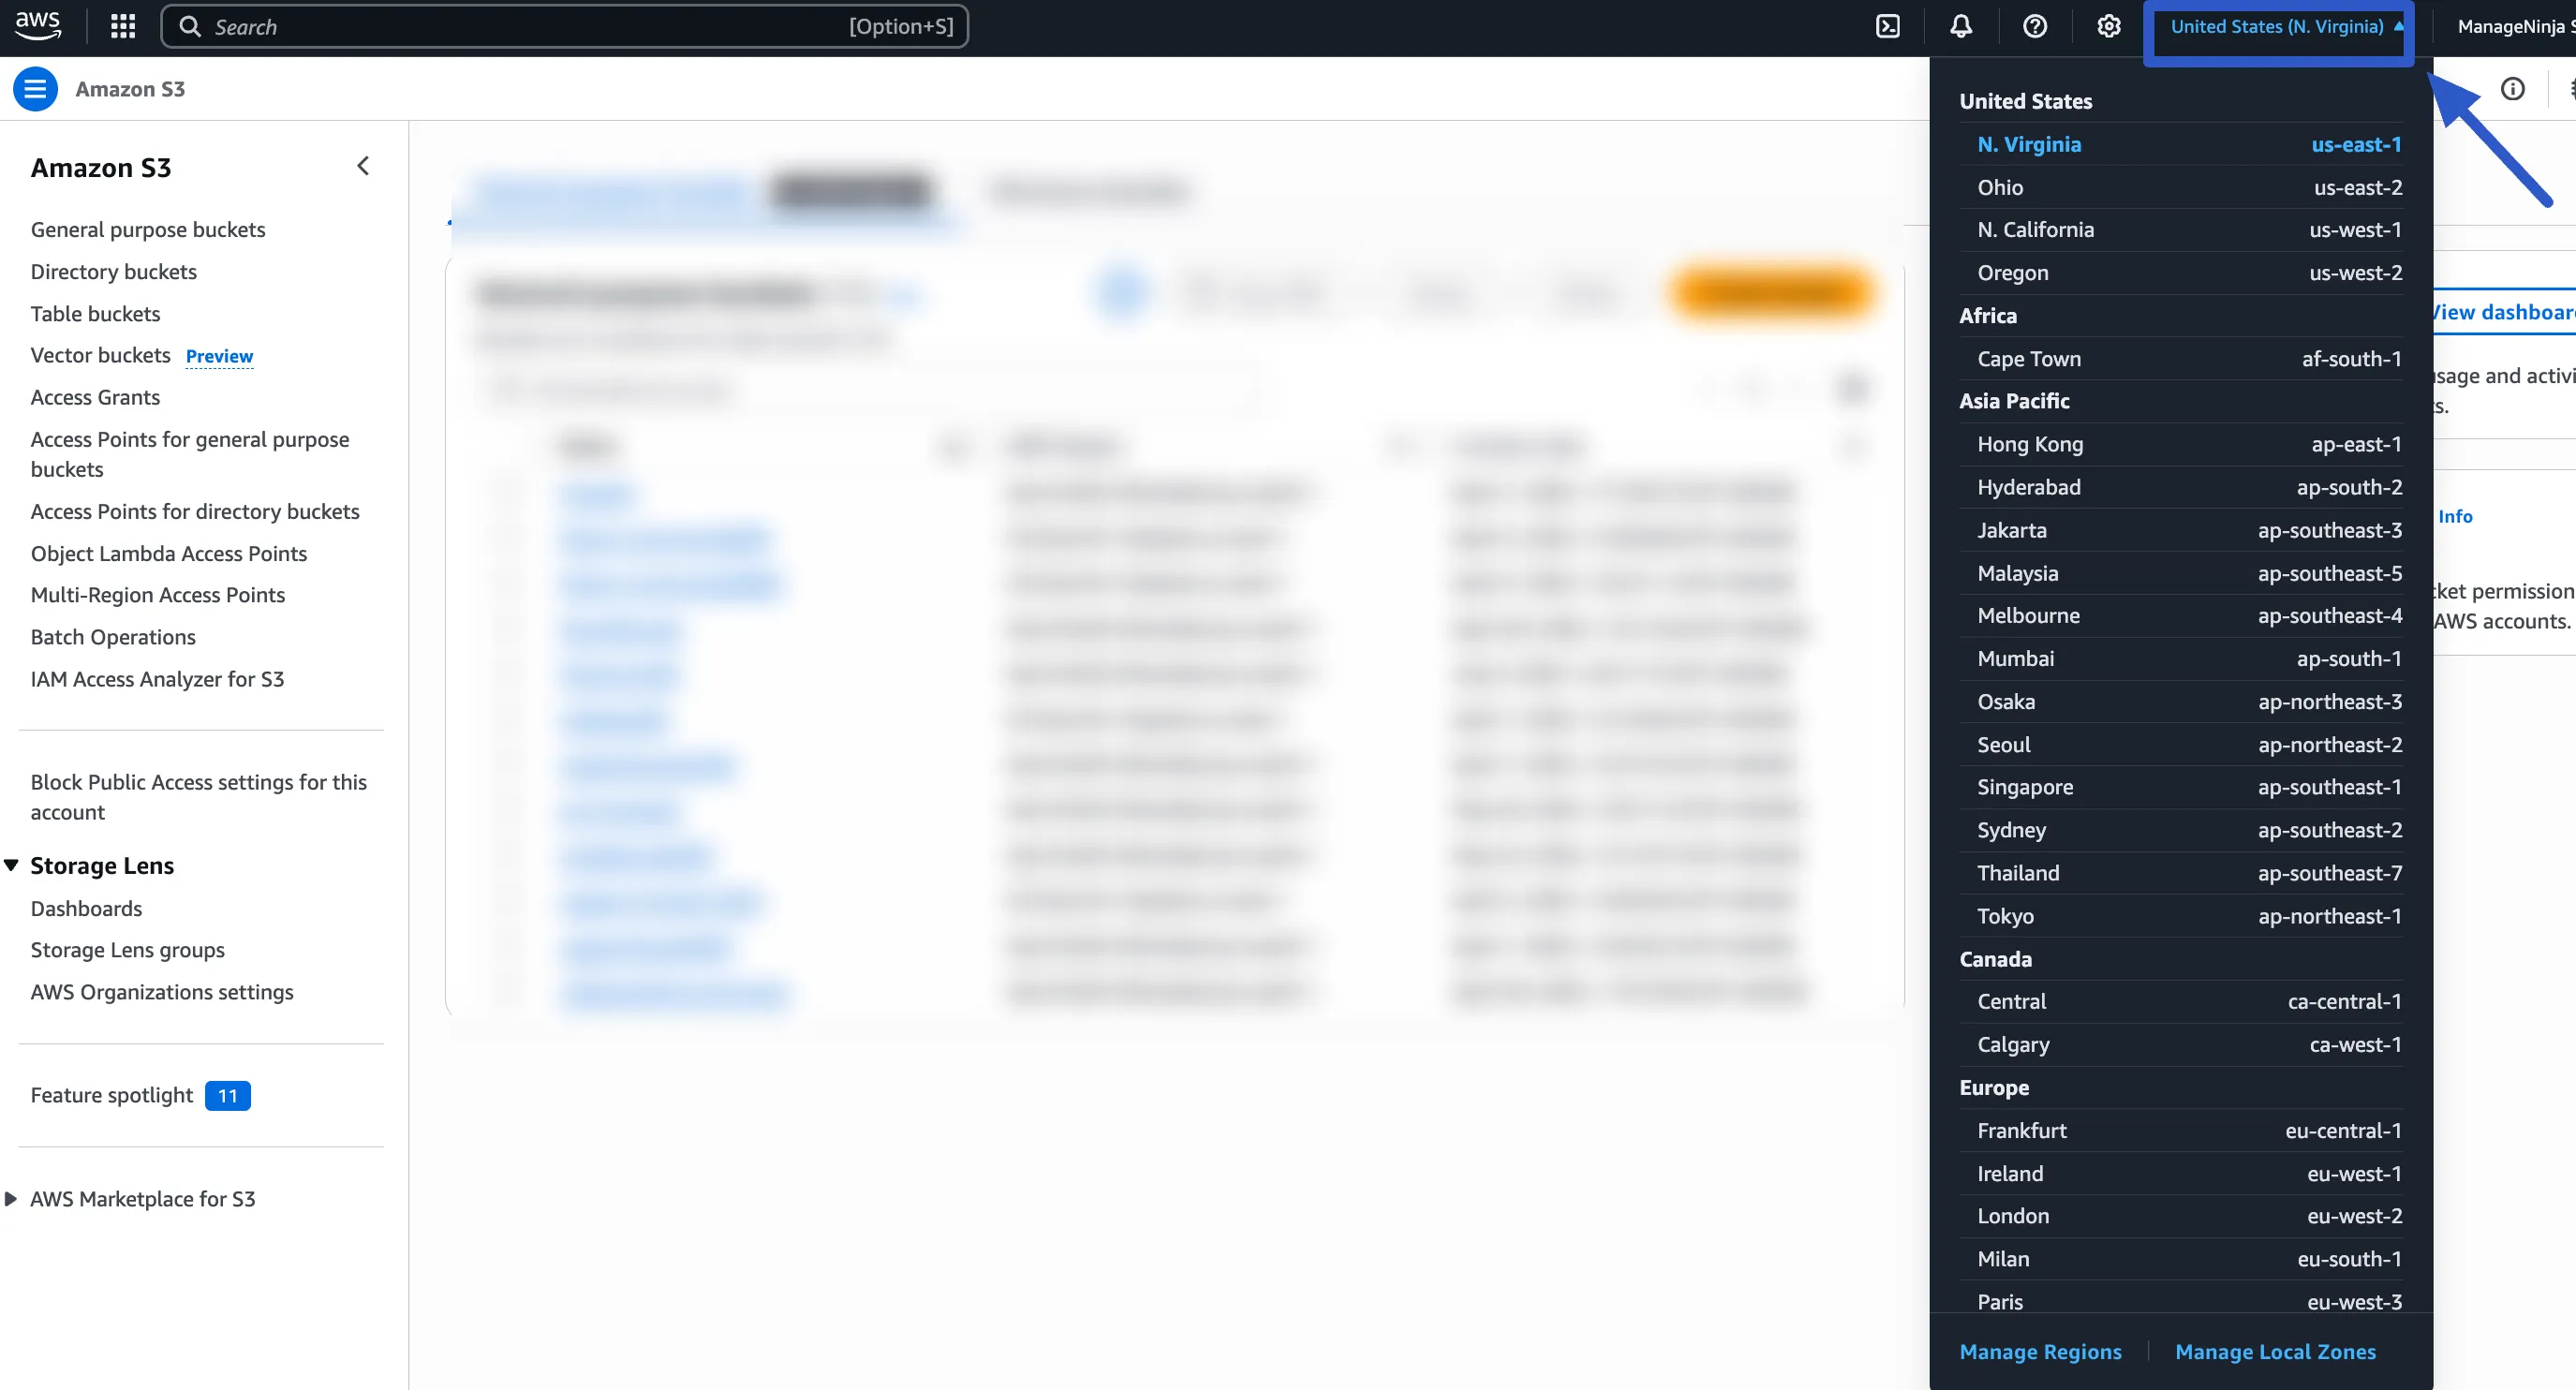
- Before we make the bucket, let's choose a Region. This is the physical location of the data center where your files will be stored. You should pick a region that is most closest to you. You can change this at the top right of the AWS console.
- Now, click the Create Bucket button. This will start the setup process for your new storage bucket.
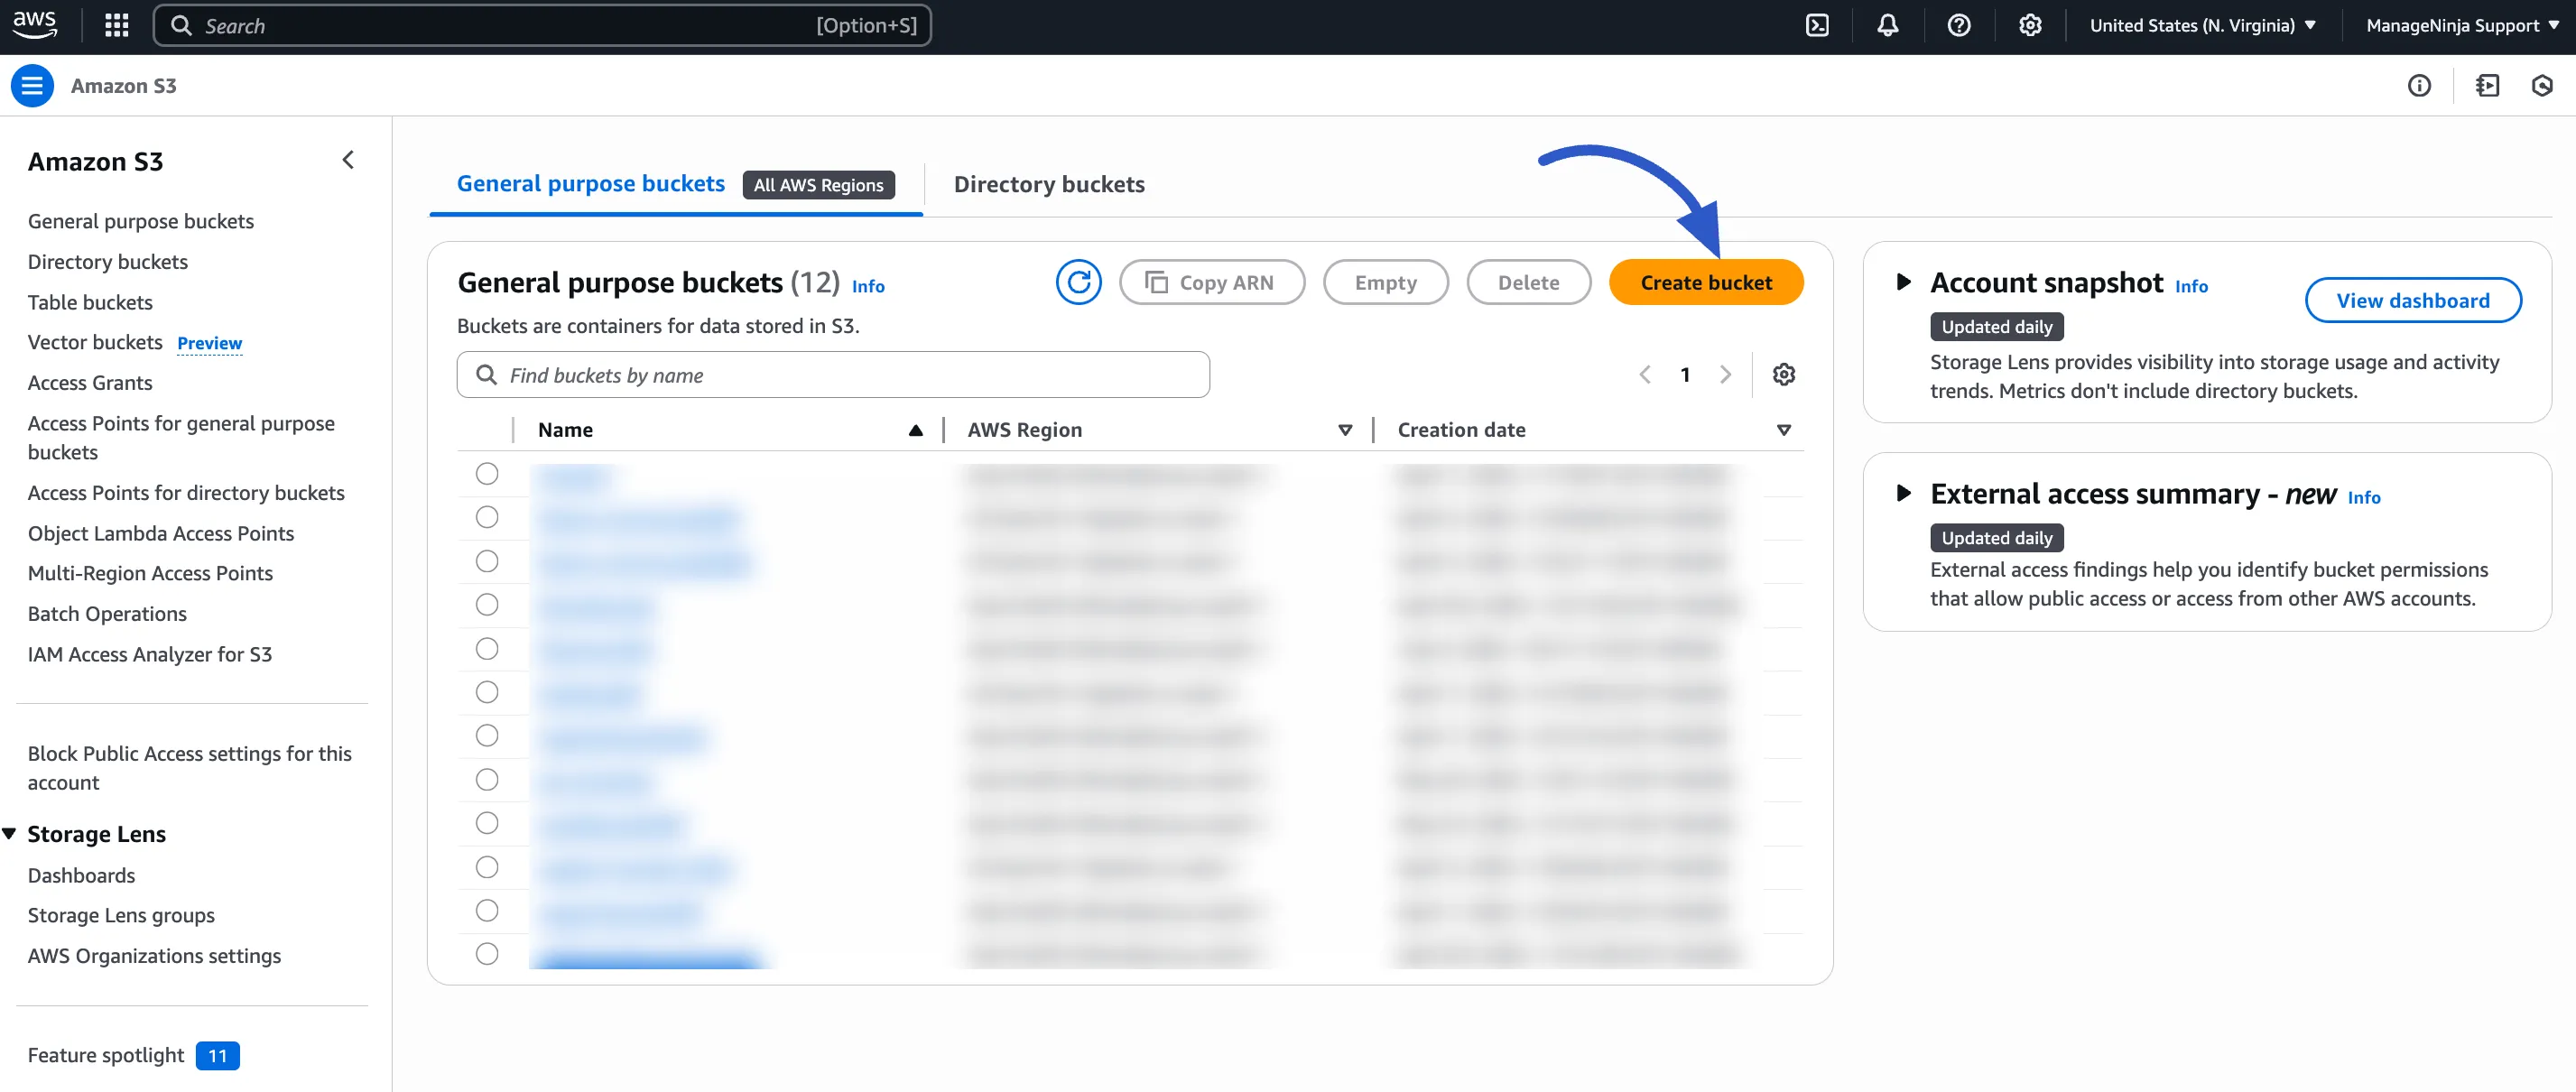
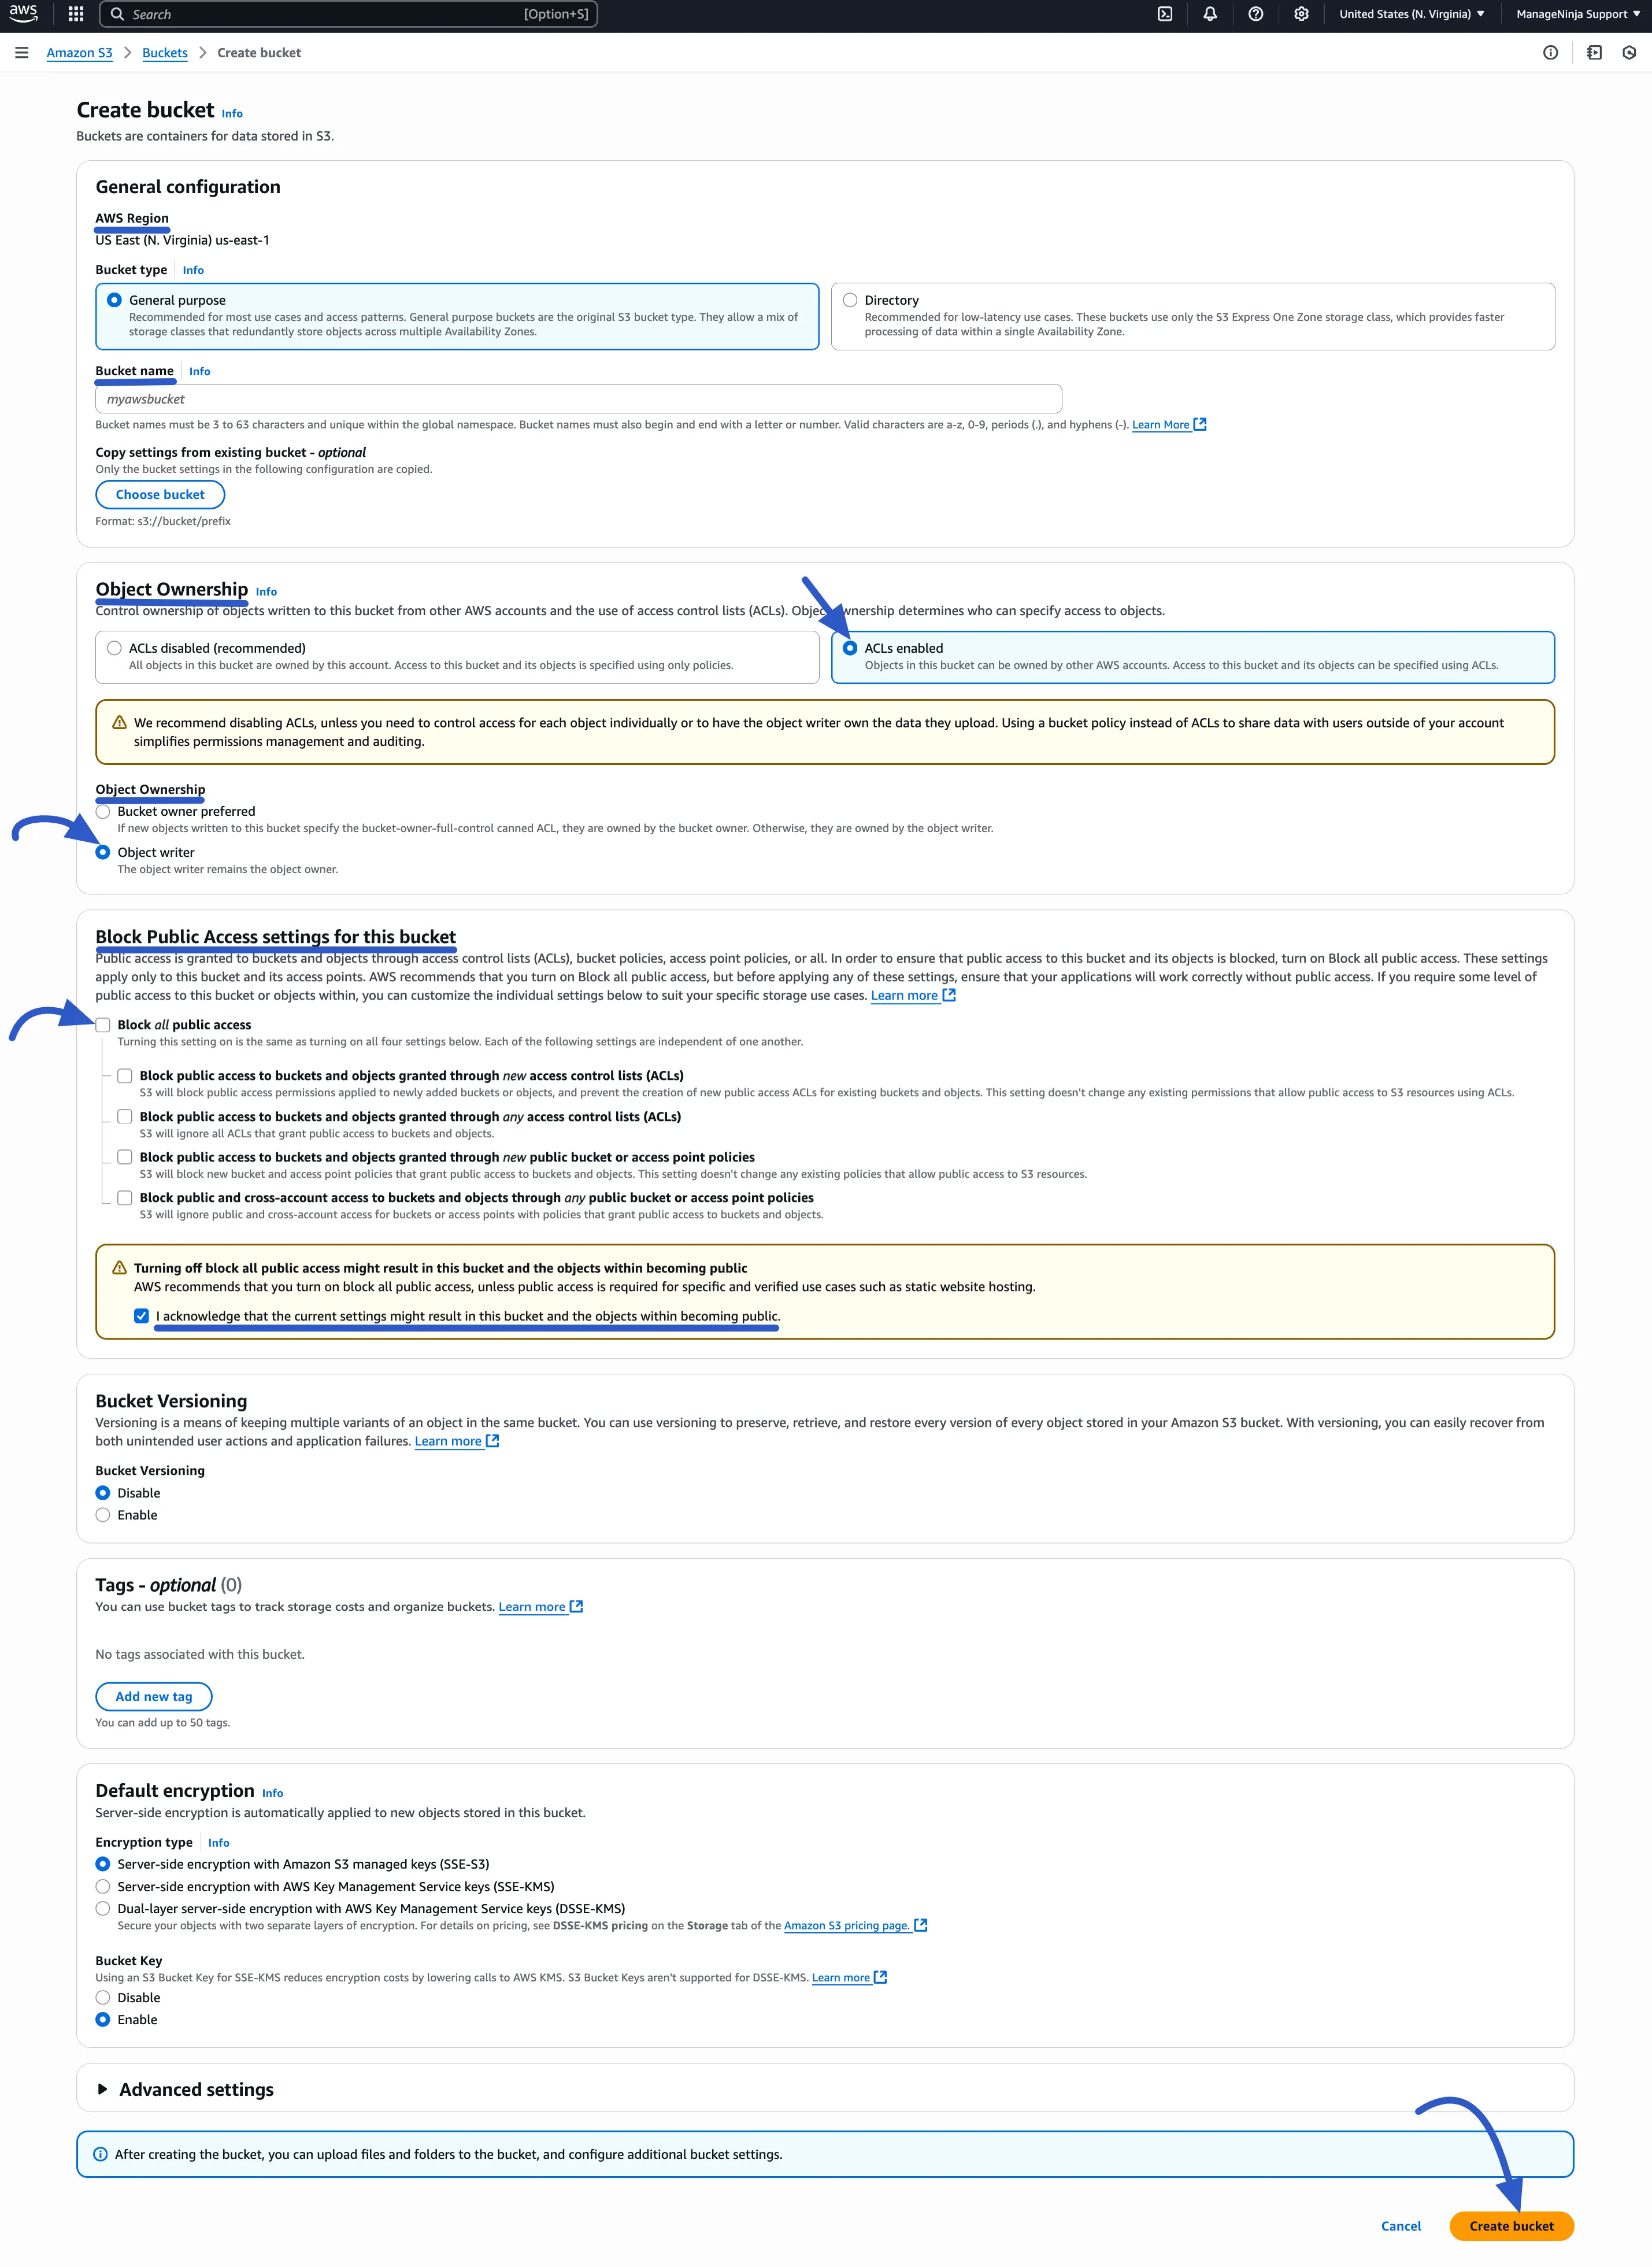
- On the bucket creation page, follow these instructions carefully:
- Bucket Name: Give your bucket a unique name.
- Object Ownership: Select ACLs enabled, and then choose Object writer. This is like telling Amazon it's okay for FluentCart to put files into this bucket.
- Amazon will show a warning. Check the box that says, "I acknowledge that the current settings might result in this bucket and the objects within becoming public."
- Click the Create Bucket button at the bottom.
Make a note of the Region you chose (like us-east-1), as you'll need it in a moment.
Create an "IAM User" (A Special Key)
Instead of giving FluentCart the master key to your entire Amazon account, we’ll create a special user with a limited key that only works for your S3 bucket. This is much more secure.
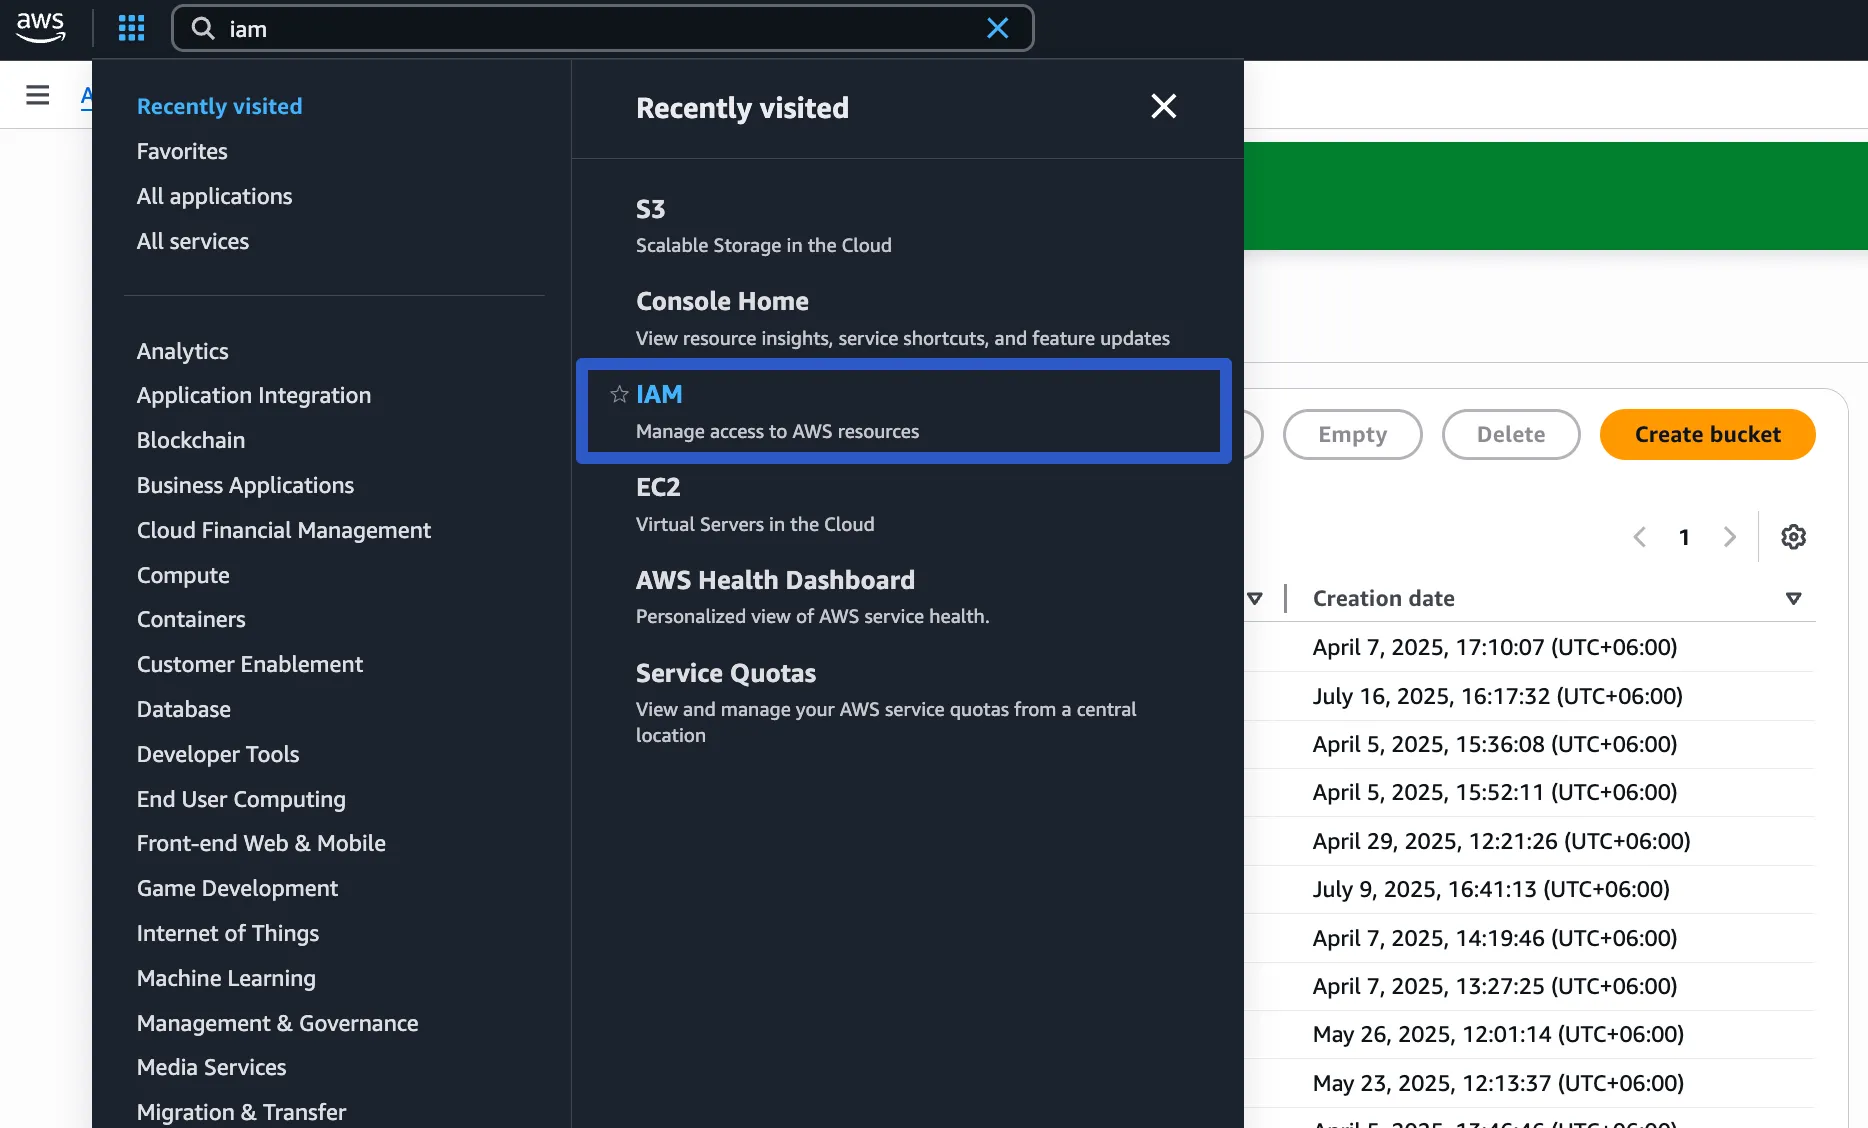
- In the AWS search bar at the top, type IAM and select it from the results.
- On the IAM dashboard, click Users from the left sidebar, and then click the Create User button.
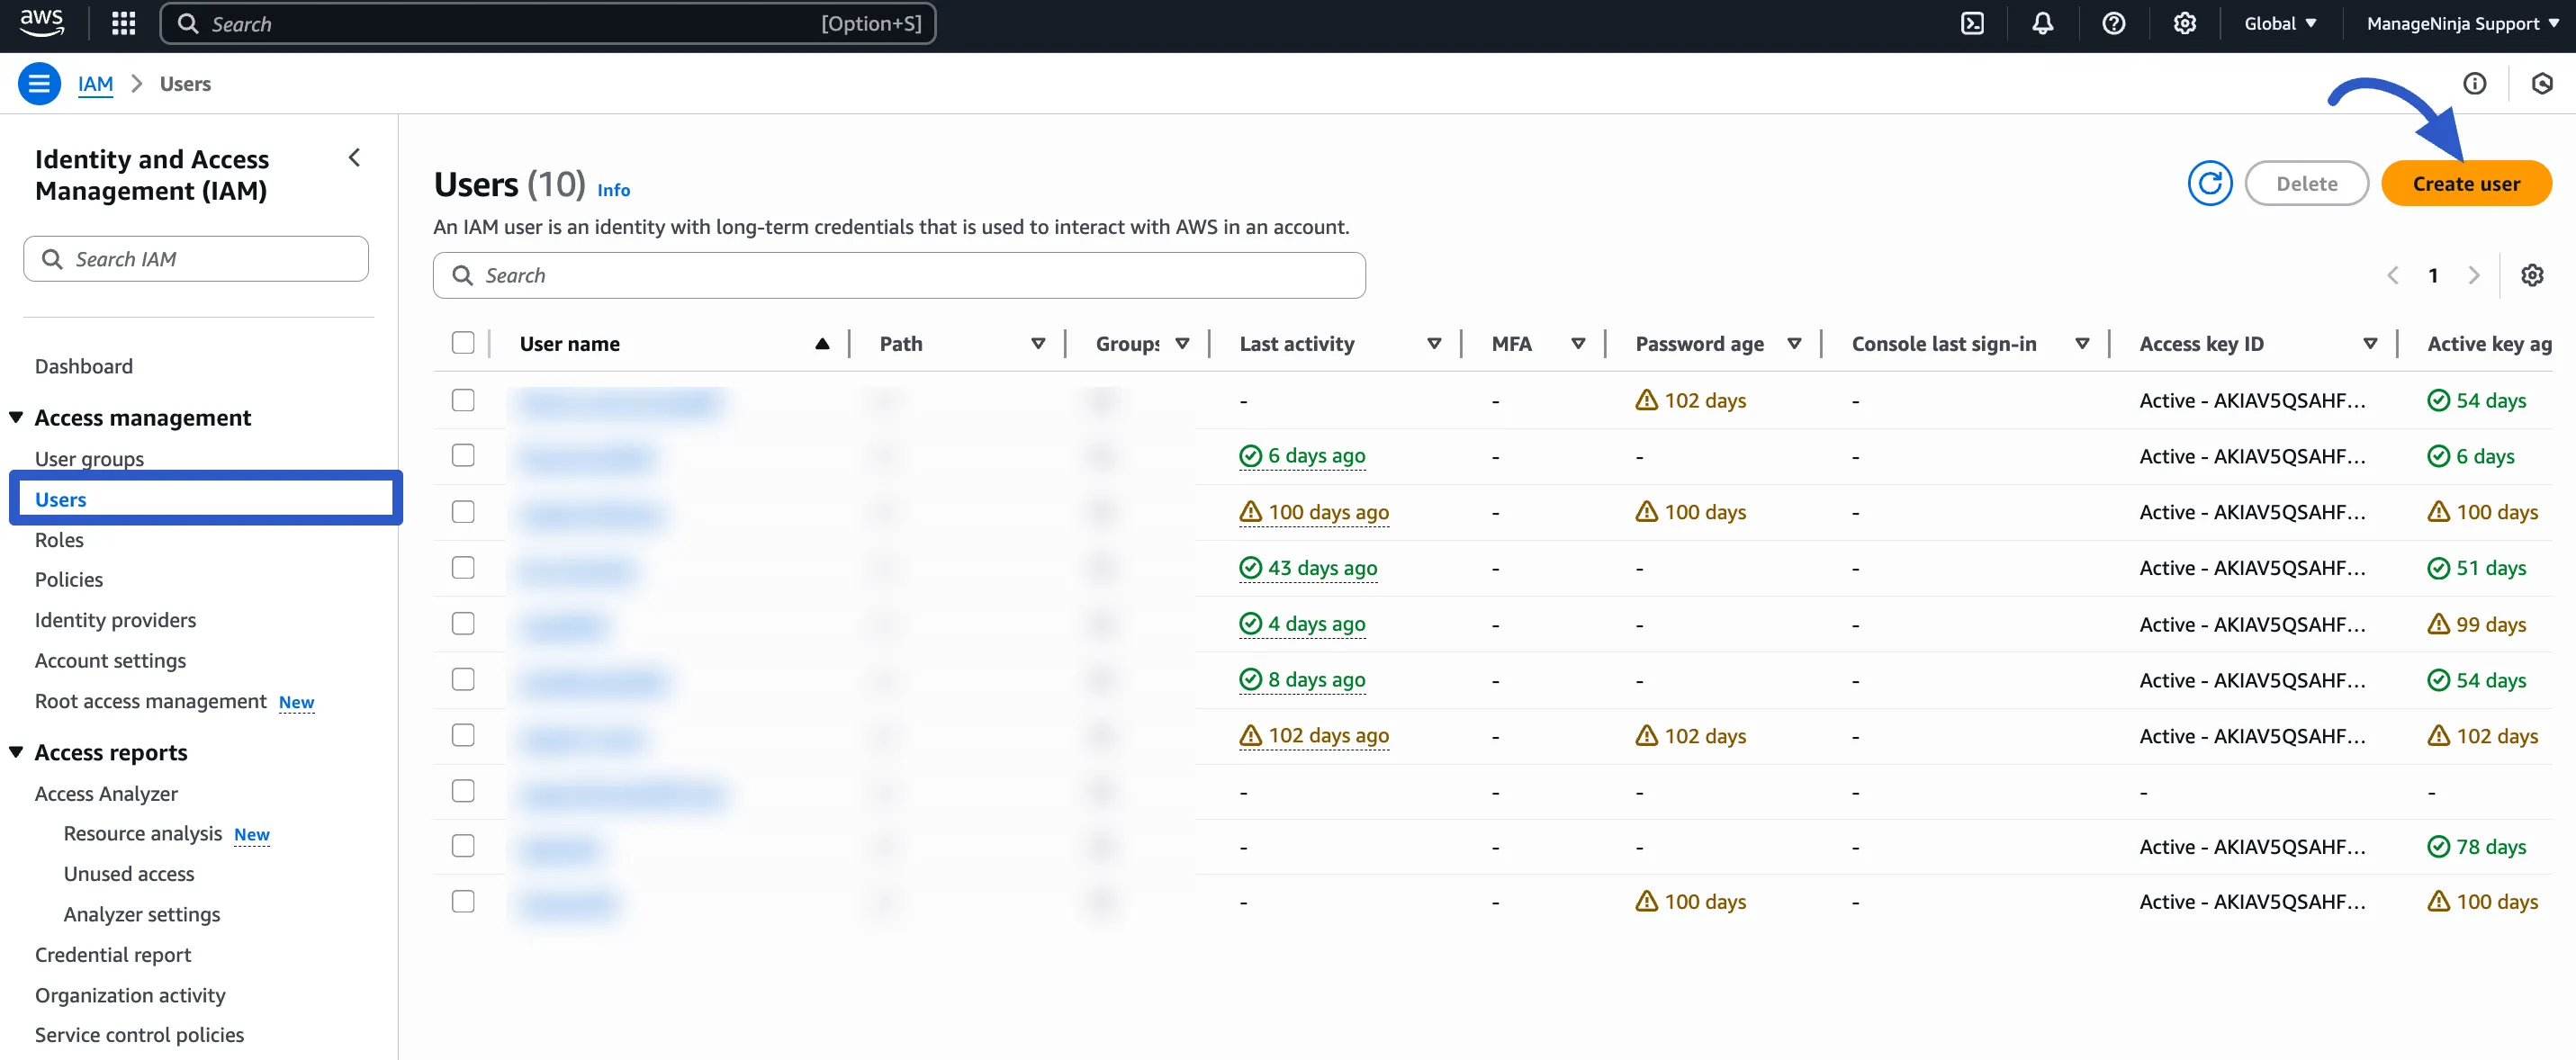
- User name: Give your user a name.
- Leave the box for "Provide user access to the AWS Management Console" unchecked. FluentCart doesn't need it. After that, click the Next button.

- In the permissions step, choose Attach policies directly.
- In the search bar, type AmazonS3FullAccess, check the box next to it, and click the Next button.
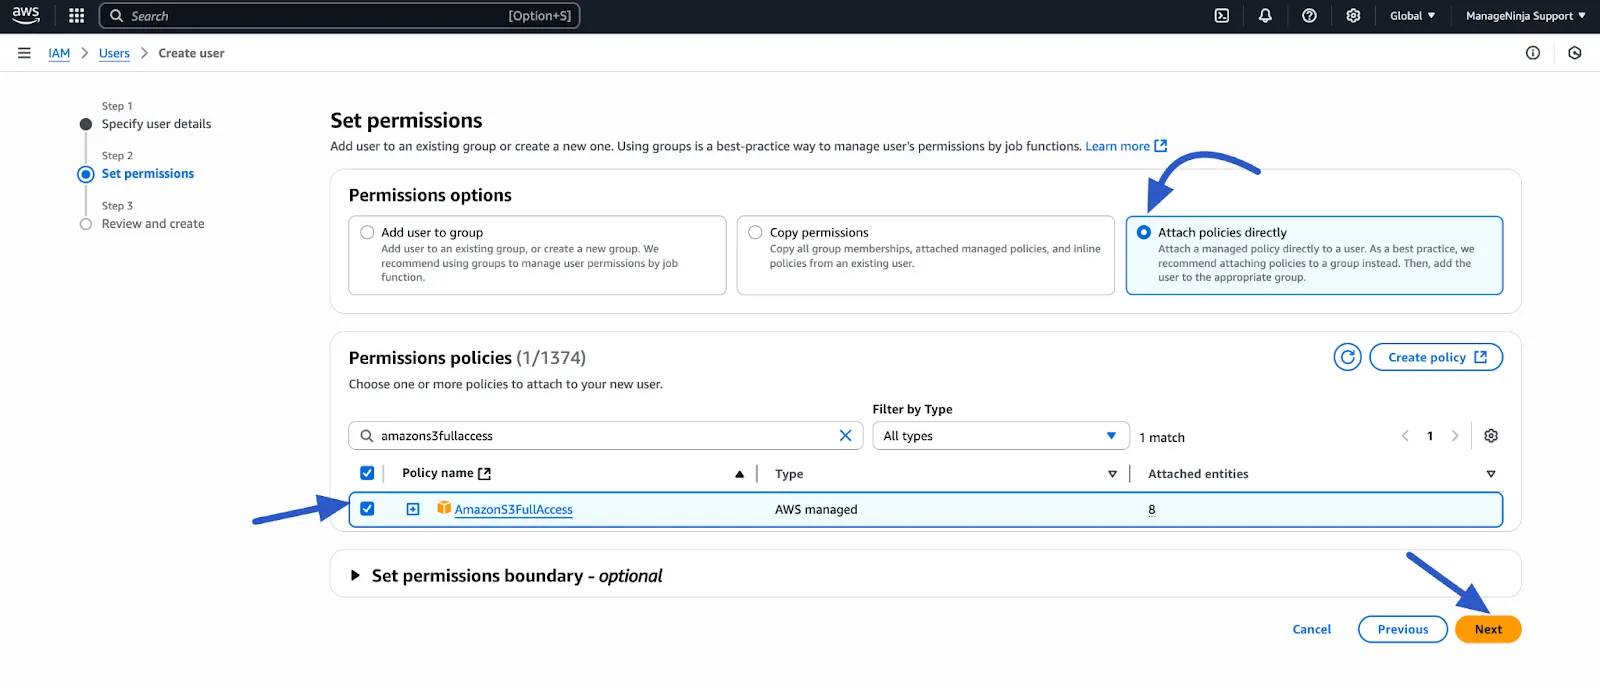
- You can skip the Review and Create step and click on the Create User button to create the new user.
- Your user is now created! Click on the new User Name in the list to see its details.
- Now, go to the Security credentials tab. Scroll down to the Access keys section and click Create access key.
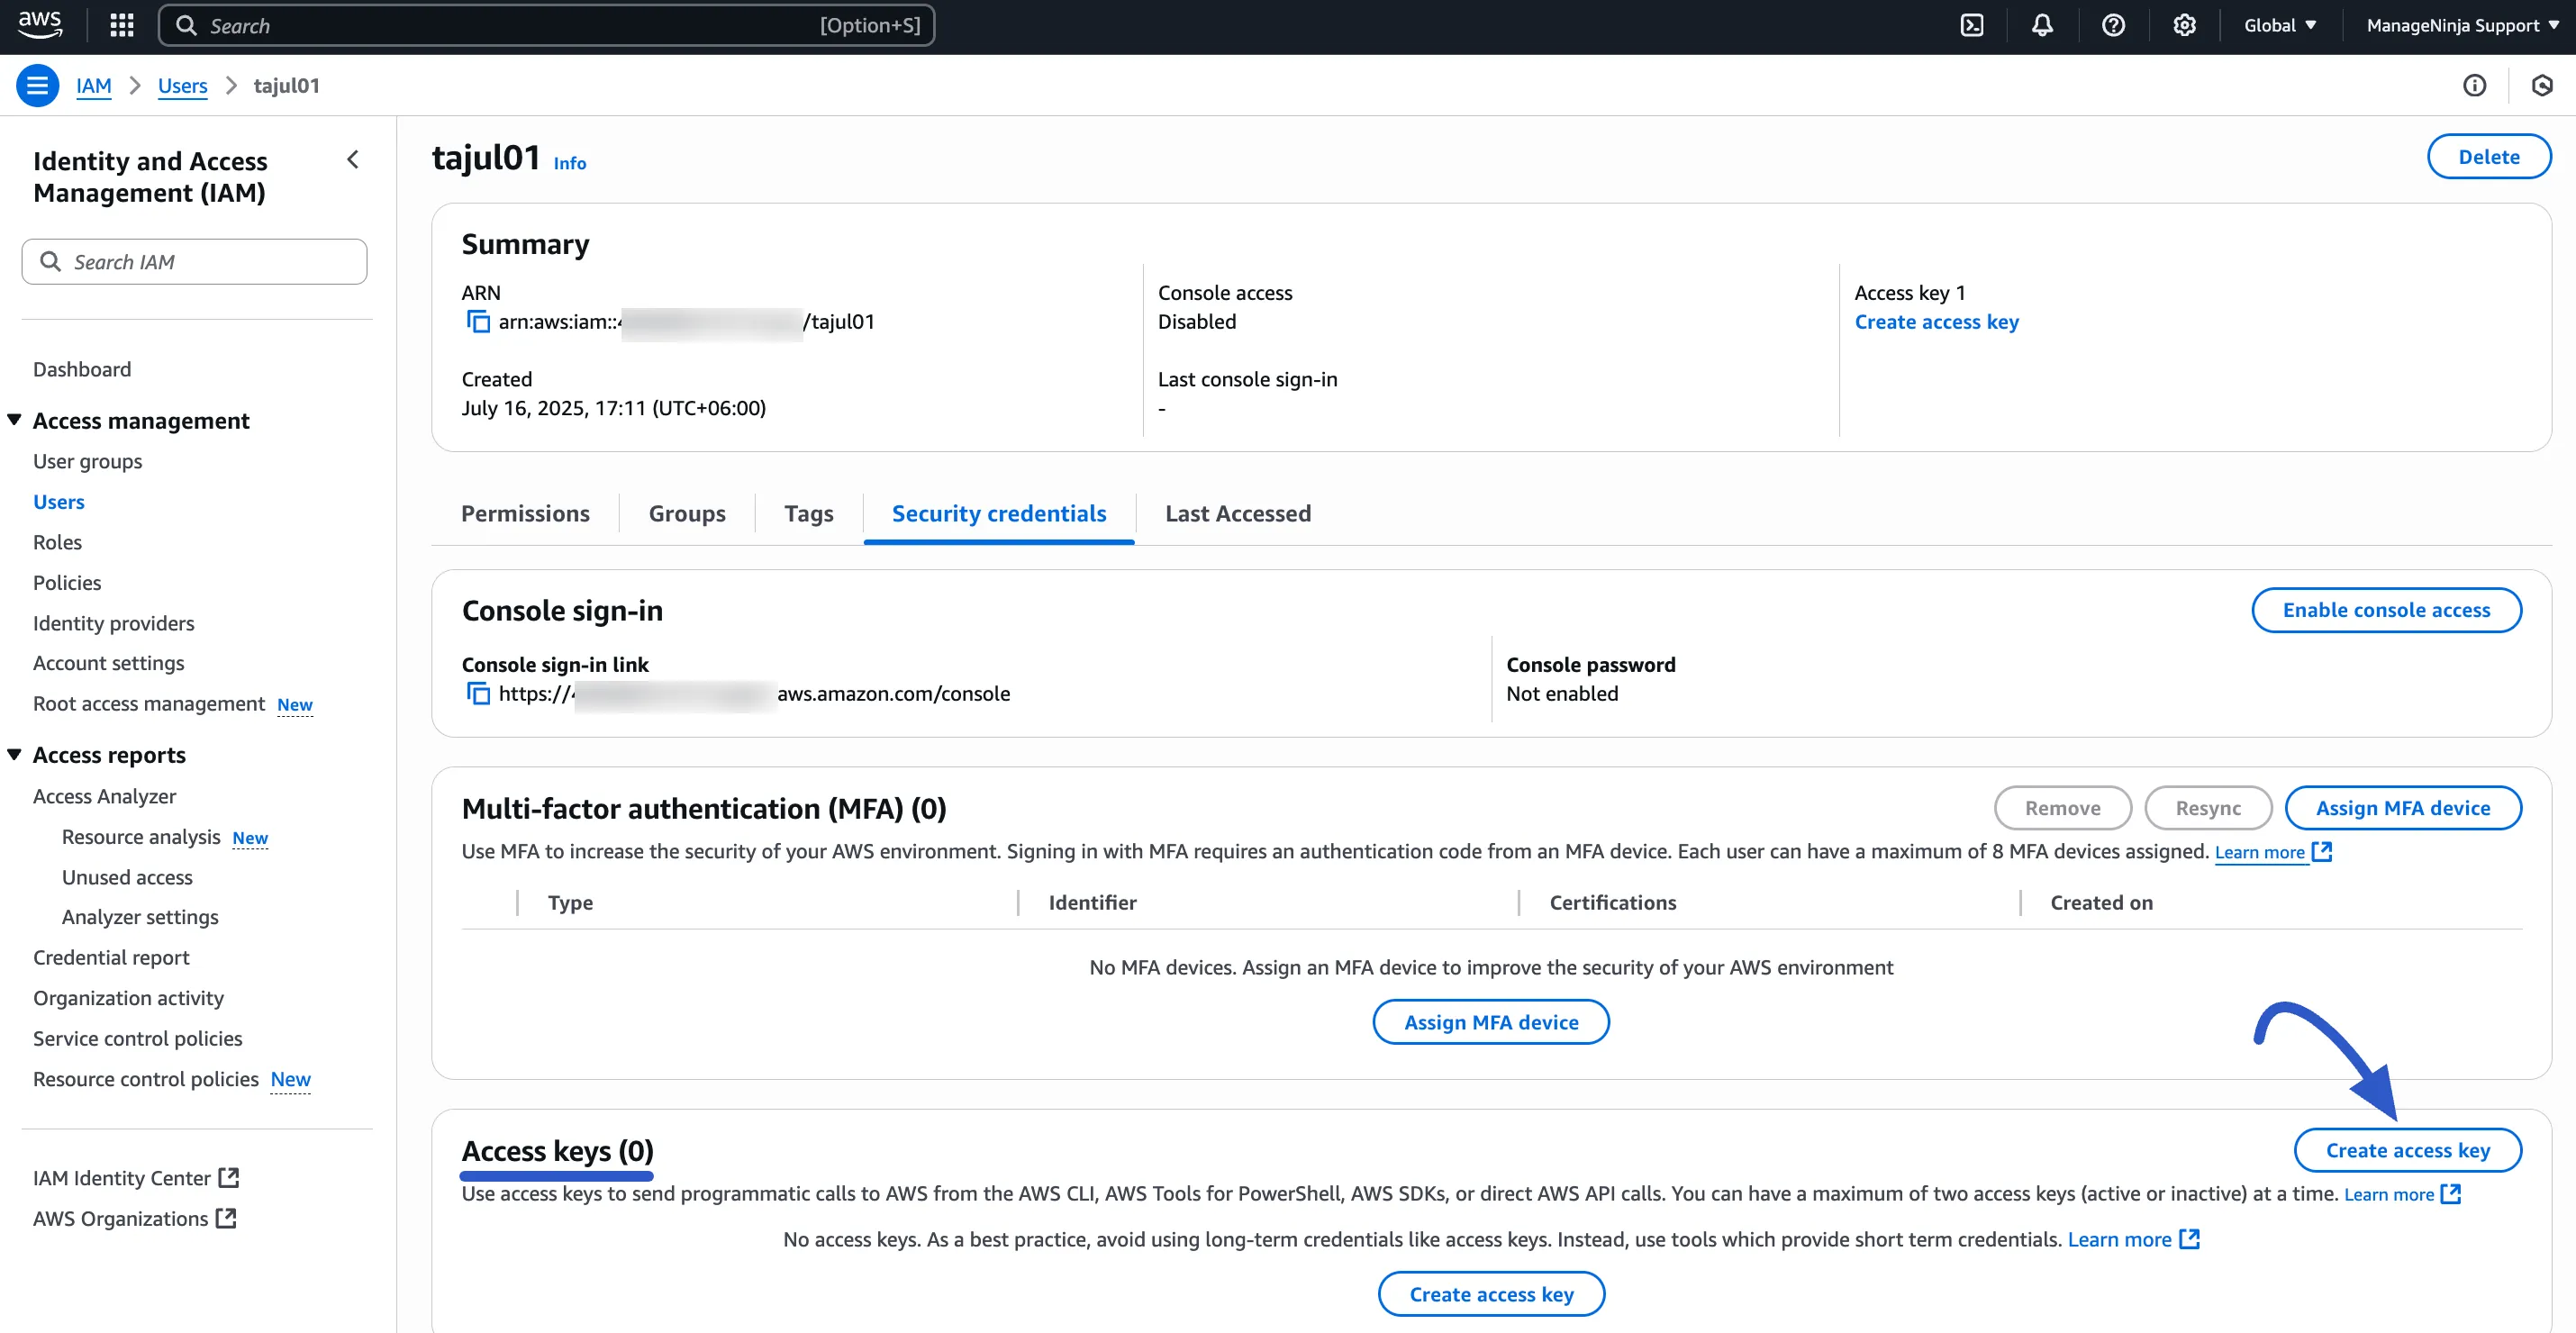
- The next step asked how you'll use the access key. Choose Other and click Next. You can skip the next step by clicking Create access key.
- Now you'll see your Access key and Secret access key. This is very important! Copy both of these keys somewhere safe. You can also click the Download CSV file button to save them to your computer.
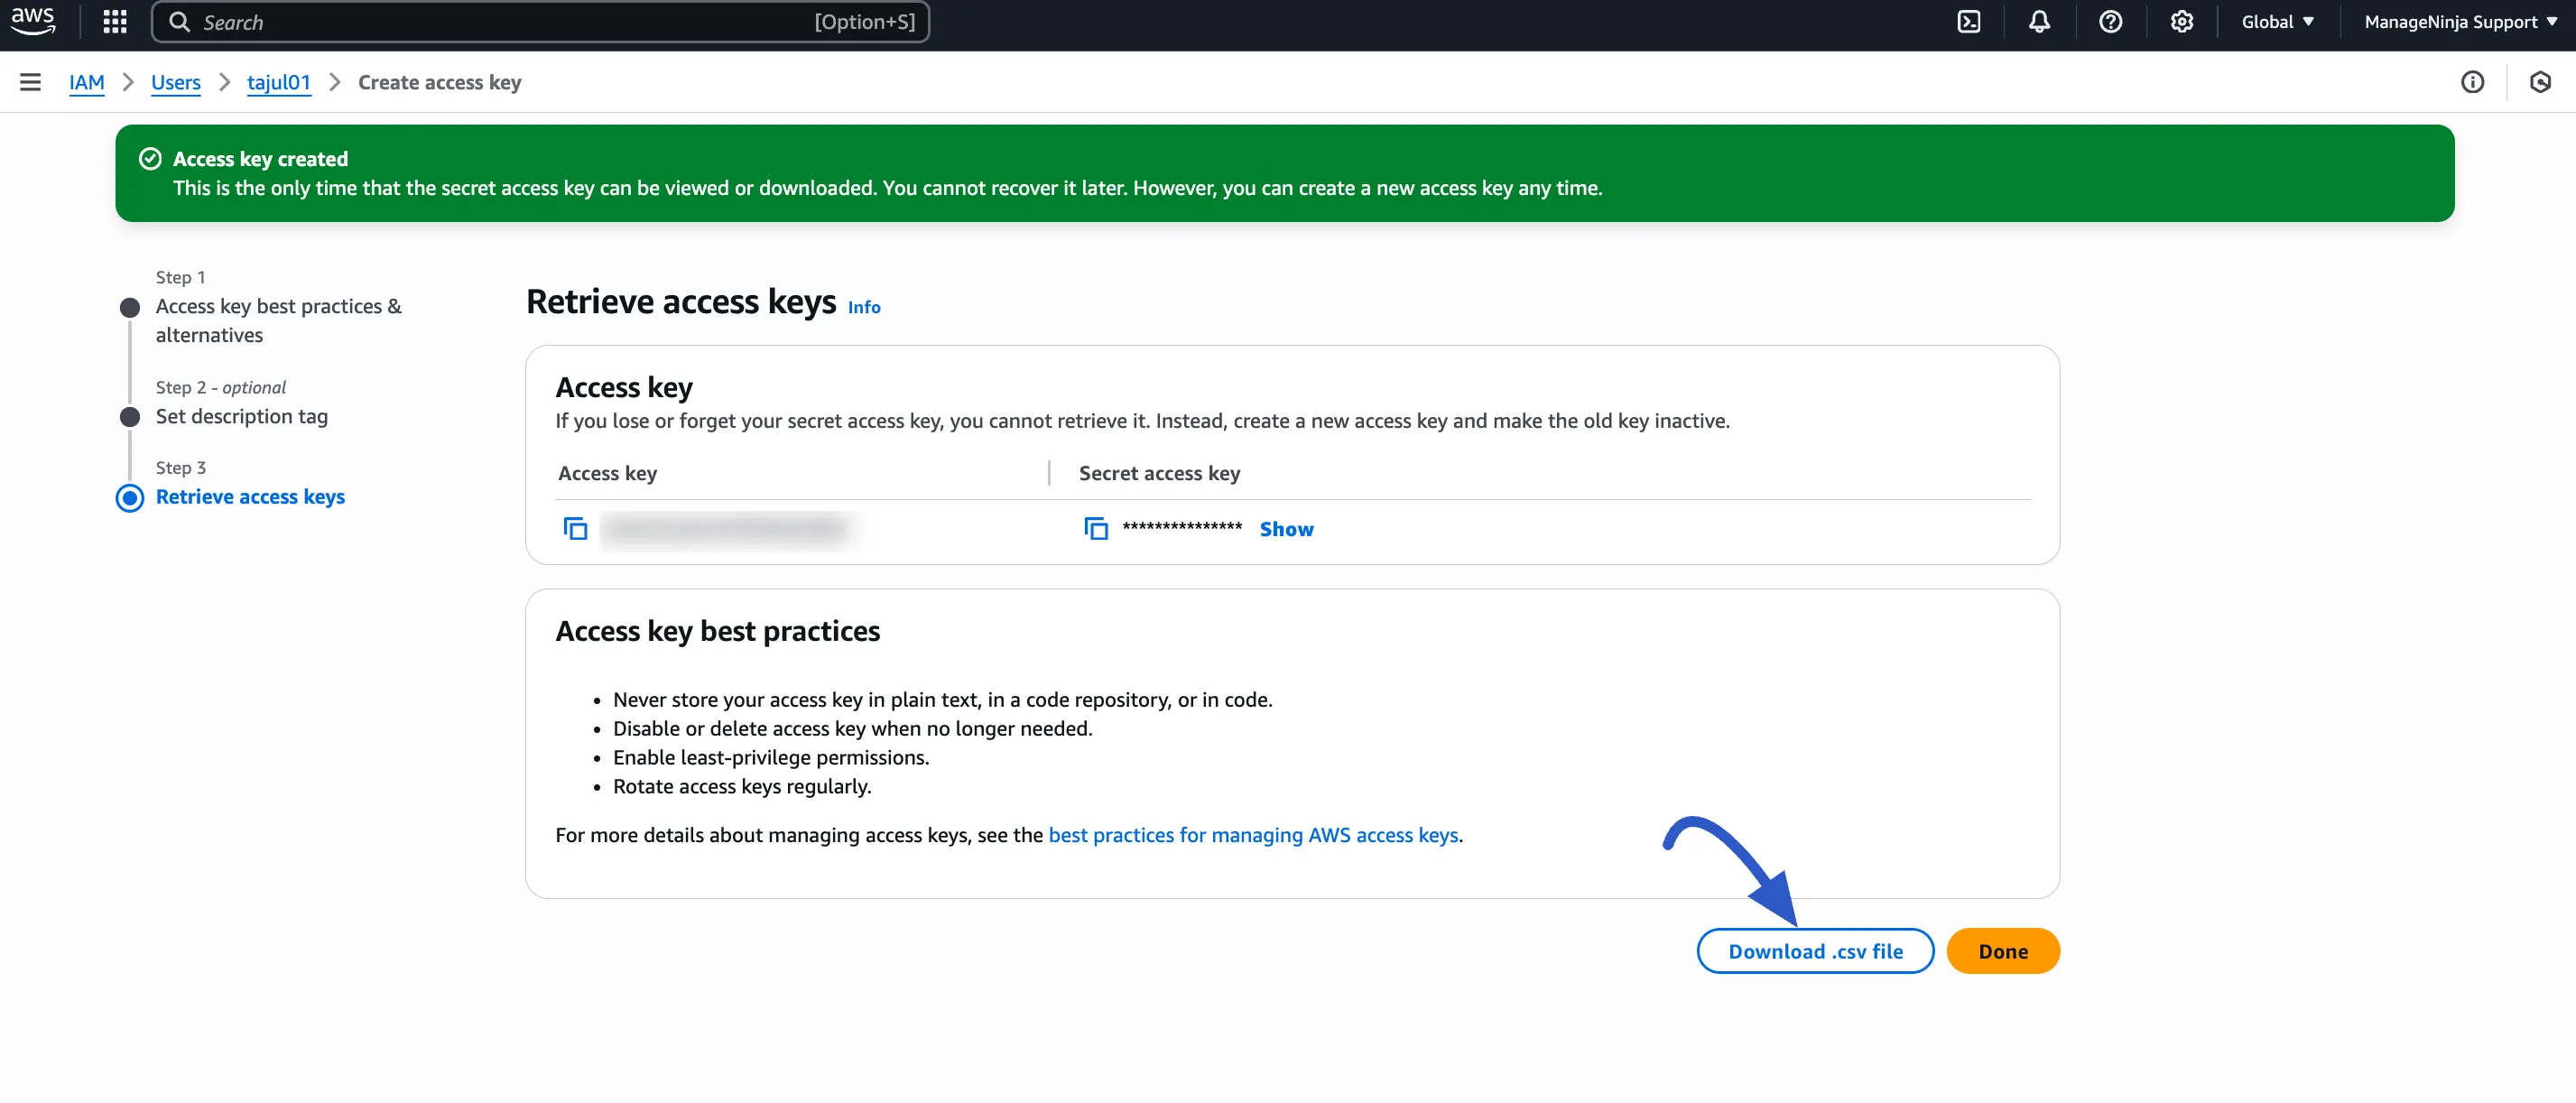
Heads up! Amazon will only show you the Secret Access Key once. If you lose it, you'll have to create a new one.
Step 3: Configure Amazon S3 in FluentCart
Okay, we have our bucket and our special keys. It's time to head back to FluentCart and put it all together.
- Go back to your FluentCart Storage Settings for Amazon S3.
- Toggle the switch from "Inactive" to "Active".
- Secret Key: Paste the Secret access key you just copied from the IAM User.
- Access Key: Paste the Access key you copied.
- Region: Enter the region you chose when you created your bucket (e.g.,
us-east-1). - Click the Test S3 Config button. You should see a success message.
- Finally, click Save Settings button.
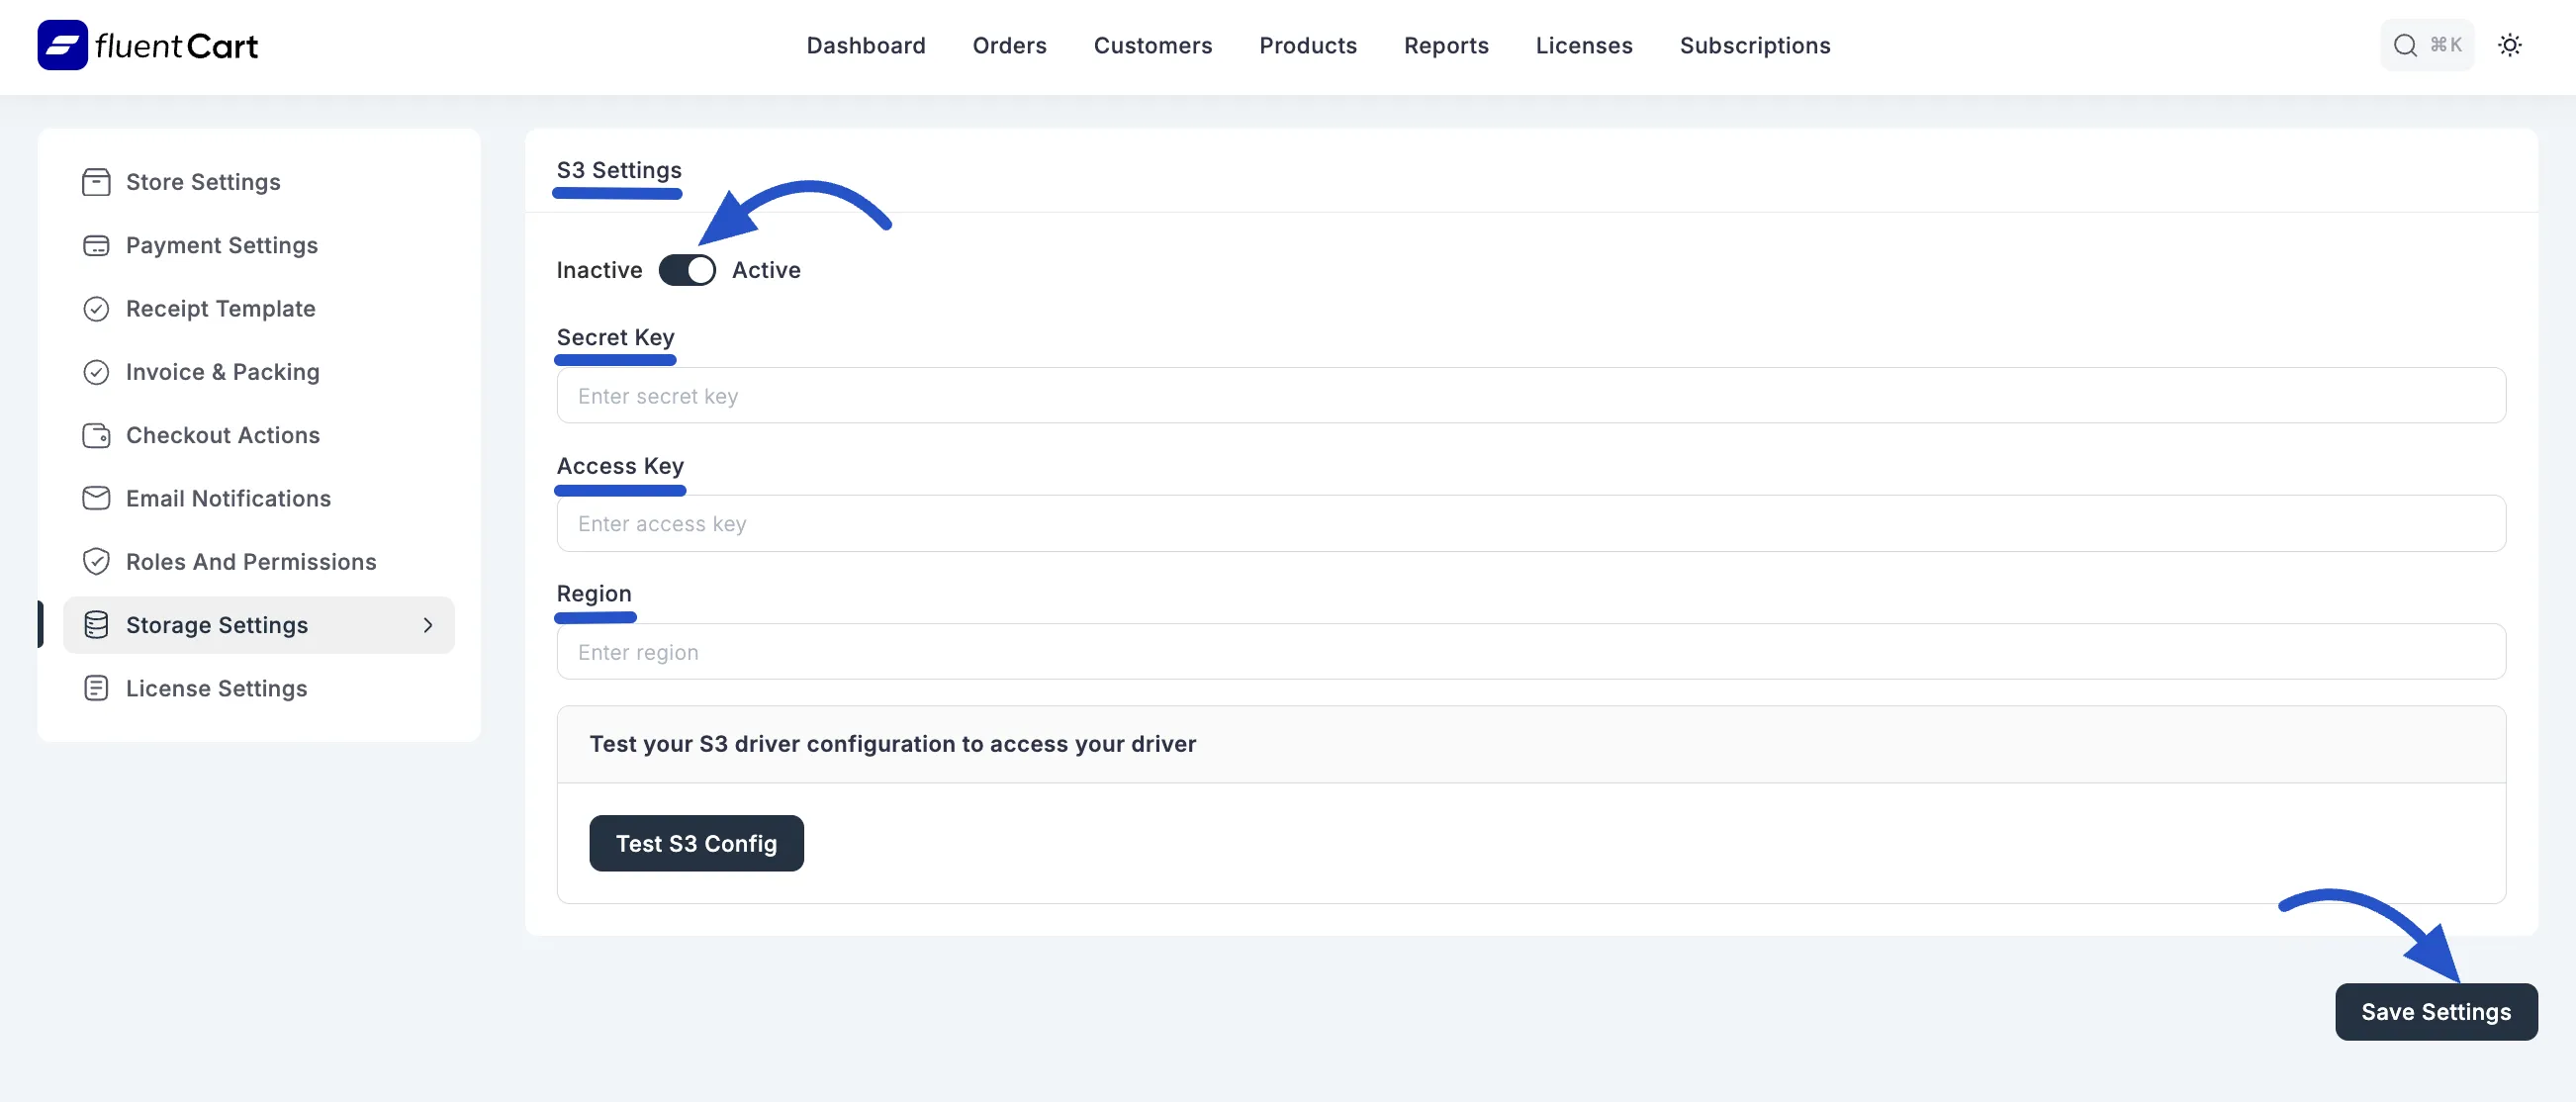
That's it! Your FluentCart store is now connected to Amazon S3. All your new media files will be automatically stored in your S3 bucket, making your site faster and more efficient.
Troubleshooting Common Issues
If the connection test fails, don't worry! Here are a few common things to check:
- Did you copy the keys correctly? Double-check that there are no extra spaces at the beginning or end of your Access Key or Secret Key.
- Is the Region correct? The region you enter in FluentCart must exactly match the region of your S3 bucket in AWS.
- Are the permissions right? Go back to your bucket's settings in AWS and make sure that "Block all public access" is turned off.
