Appearance
FluentCommunity Integrating
Connecting FluentCart with FluentCommunity lets you automatically manage your customers' access to community spaces and courses. When a customer buys a product, you can instantly enroll them in a specific course or add them to an exclusive space.
This automation is perfect for online courses, membership sites, or any store looking to build a community. It saves you from manually adding new members and ensures access is granted or removed based on their purchases or subscriptions.
FluentCart gives you two ways to set this up: Global Integrations (for all products) and Product-Specific Integrations (for certain products). This guide will show you how to use both.
When to Use Each Integration Type
Before you begin, it's helpful to decide which type of integration best suits your goal:
- Use a Global Integration when: You want a general rule to apply to every single customer, regardless of what they buy.
- Example: Adding all paying customers to a general "Welcome" or "All Customers" space in your community.
- Use a Product-Specific Integration when: You want a targeted action to apply only to customers who buy a specific product or one of its variations.
- Example: Enrolling customers who bought your "Beginner's Yoga Course" into the corresponding "Yoga Students" space and course within FluentCommunity.
Important Note on Priority If a customer purchases a product that has a specific integration rule, the product-specific rule will always take priority over any global rules.
Part 1: Global Integration (For All Products)
A global integration is perfect for broad actions that should apply to all your paying customers.
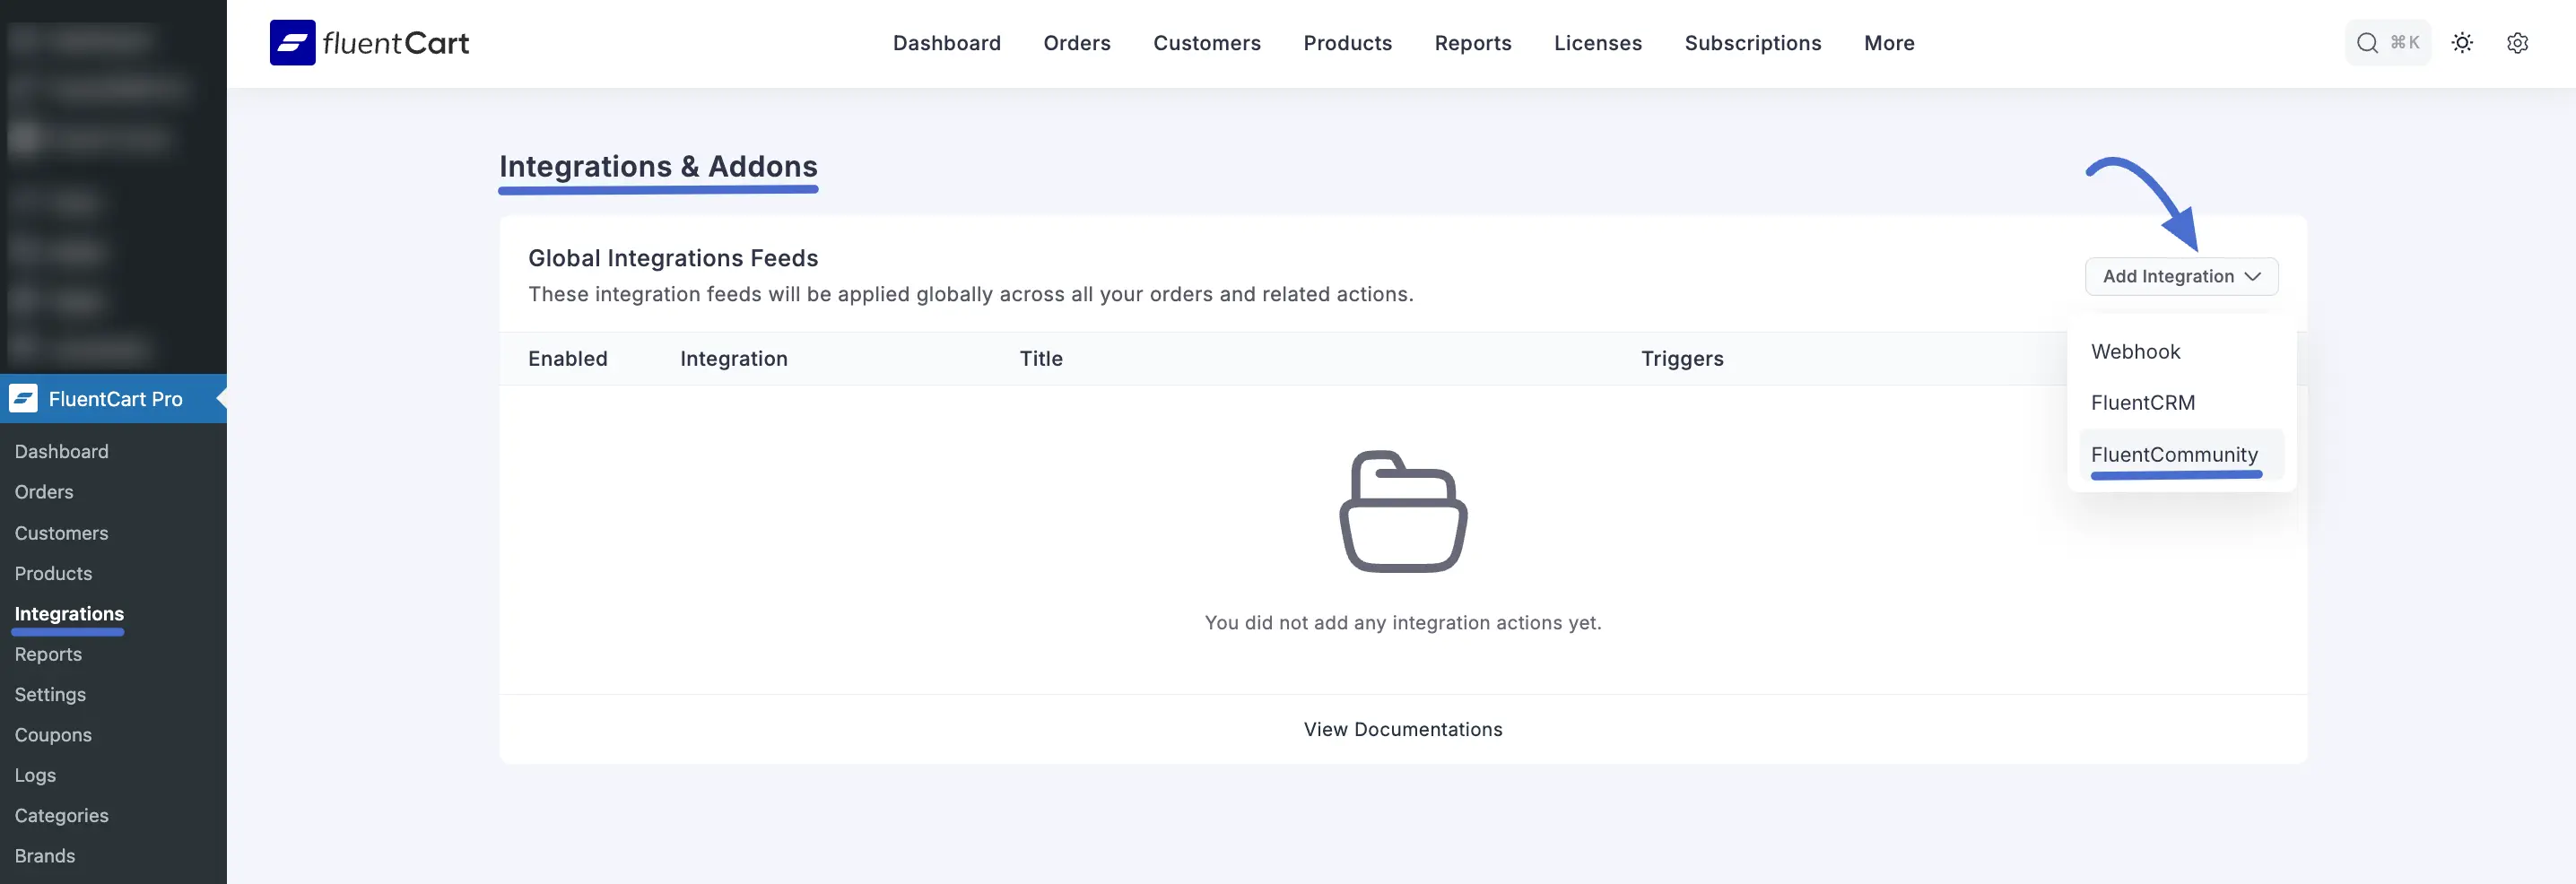
Navigating to Integrations
First, you'll need to go to the correct screen in your WordPress dashboard.
- Navigate to FluentCart Pro.
- Click on Integrations from the sidebar menu.
Creating a New FluentCommunity Feed
- On the Integrations & Addons dashboard, click the Add Integration button at the top right.
- Select FluentCommunity from the dropdown menu. This will take you to the configuration screen for your new automation feed.
Part 2: Product-Specific Integration
A product-specific integration is ideal for highly targeted automations, like granting access to a course that corresponds directly to the product purchased.
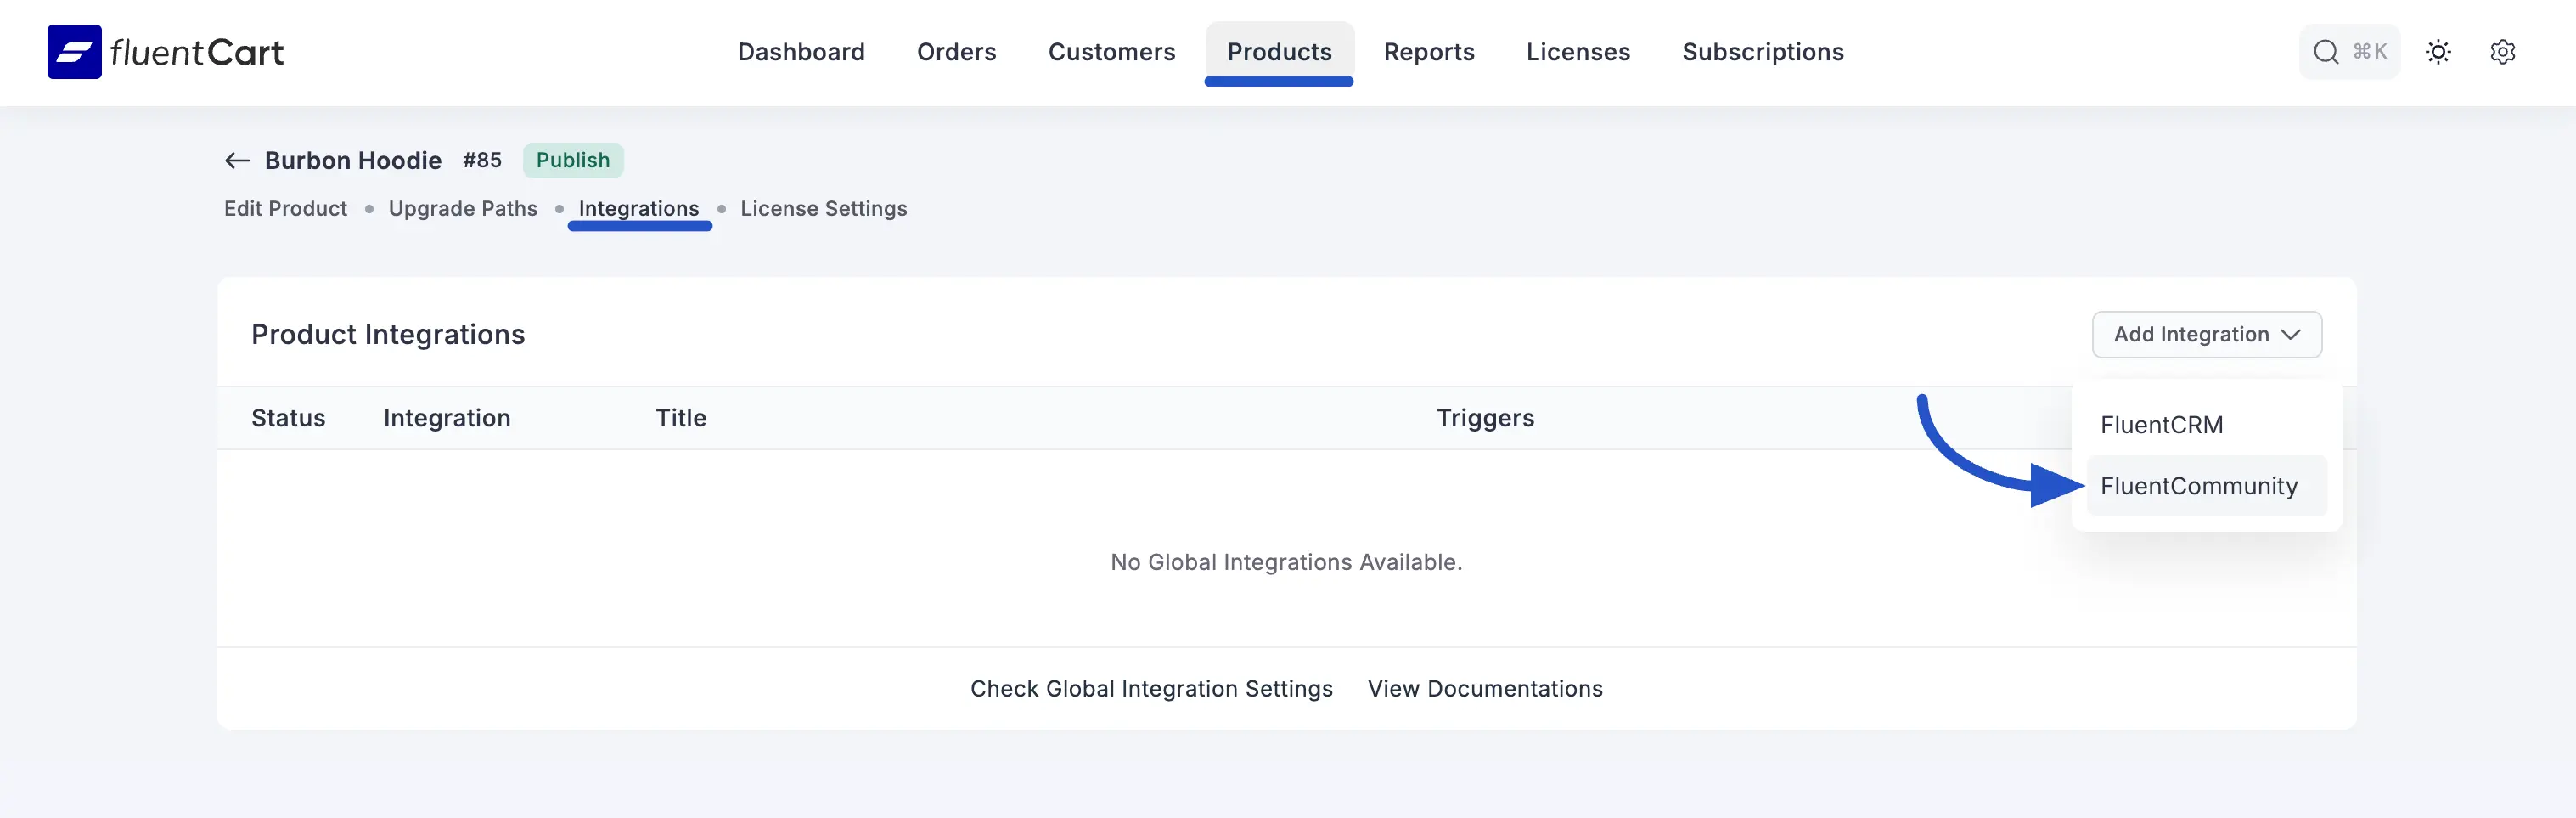
Navigating to the Product
- From your WordPress dashboard, navigate to FluentCart Pro > Products.
- Click on the product for which you want to create a specific integration to open its editor.
Accessing Product Integrations
- Inside the product editor, you will see a series of tabs at the top. Click on the Integrations tab.
- On the Product Integrations screen, click the Add Integration button and select FluentCommunity Feed. This will open the feed configuration screen.
Part 3: Configuring the Integration Feed
Whether you are creating a global or a product-specific feed, the configuration screen is nearly identical. This is where you define exactly what actions FluentCommunity will perform when a purchase is made.
Feed Title: Give your feed a descriptive name for your own internal reference (e.g., "Enroll in Beginner's Course" or "Add All Customers to Welcome Space").
Add to Spaces: Select one or more FluentCommunity Spaces you would like to automatically add the customer to upon purchase.
Add to Courses: Select one or more FluentCommunity Courses you would like to automatically enroll the customer in.
Remove from Spaces: (Optional) Select any Spaces you would like to automatically remove the customer from. This is useful if a new purchase moves them to a more advanced group.
Remove from Courses: (Optional) Select any Courses you would like to automatically unenroll the customer from.
Mark the community profile as verified: Enable this option to automatically grant the customer a "verified" status within FluentCommunity, which can be used to signify them as a paying member.
Remove from selected Courses/Spaces on Refund or Subscription Access Expiration: This is a crucial automation feature. If enabled, FluentCart will automatically revoke the user's access to the selected spaces and courses if their order is refunded or their subscription expires.
Event Trigger: Select the specific store event that will trigger this automation. The available Event Triggers are:
- Order Paid (Payment / Subscription)
- Order Canceled
- Order Refunded (Full)
- Subscription Activated
- Subscription Canceled
- Subscription Renewed
- Subscription End of Term (Completed)
- Subscription Expired / End of Access Validity
- Shipping
- Order Shipped
- Order Delivered
Run on Selected Variations Only (Product-Specific Only): This powerful option appears only on product-specific integrations. It allows you to run the automation only when a customer purchases a specific variation of the product (e.g., a "Lifetime Access" tier). Leave this empty to have the feed run for all variations of this product.
Enable this Integration: Ensure the toggle at the top right is switched on to make the automation active. If it is disabled, the feed will be saved but will not run.
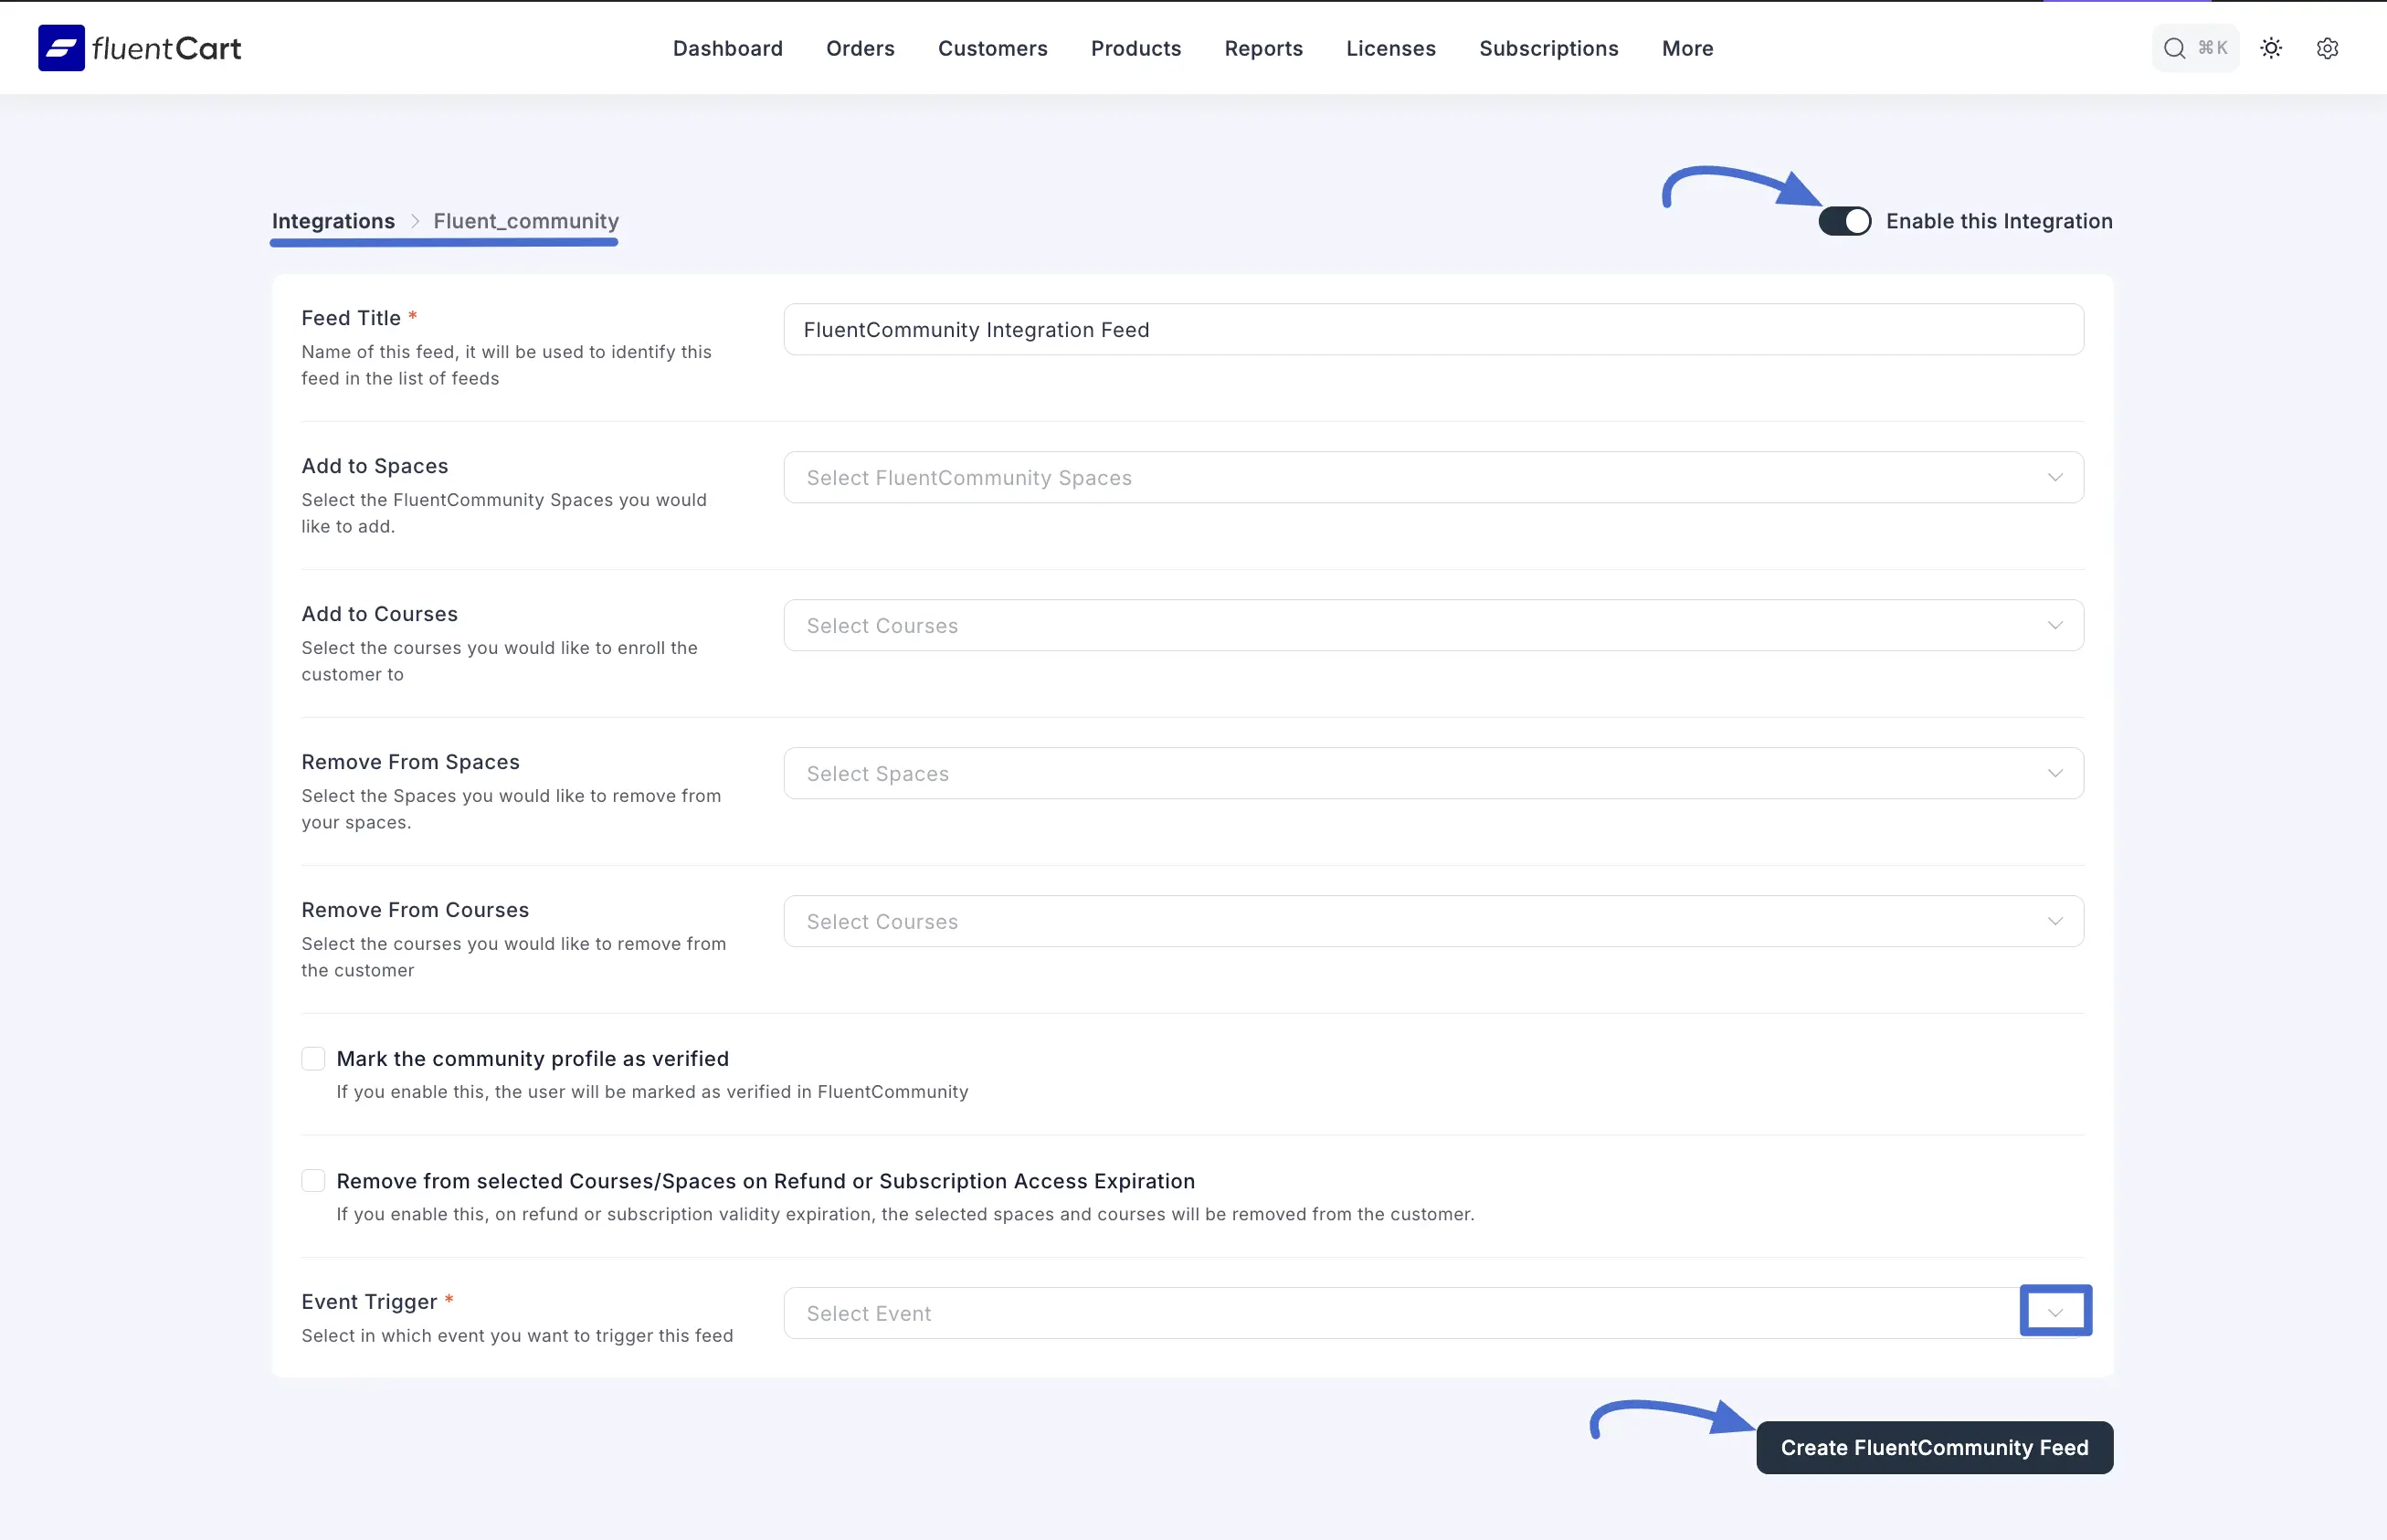
Once everything is configured, click the Create FluentCommunity Feed button. Your automation is now live!
Use Case Example: A Clothing Store
Imagine you run a clothing store selling two hoodie variations: Classic Hoodie and Premium Hoodie.
Your Goal:
- Add all customers to a general "Hoodie Lovers" space.
- Add customers who buy the Classic Hoodie into the "Classic Hoodie Owners" space.
- Add customers who buy the Premium Hoodie into the "Premium Hoodie Owners" space.
The Solution:
- Global Integration: Create one Global Feed that adds every customer to the "Hoodie Lovers" space when their order is paid.
- Product-Specific Integrations:
- Inside the Classic Hoodie product, create a Product-Specific Feed to add customers to the Classic Hoodie Owners space.
- Inside the Premium Hoodie product, create another Product-Specific Feed to add customers to the Premium Hoodie Owners space.
The Result:
When a customer buys the Classic Hoodie, both automations run. The global feed adds them to the Hoodie Lovers space, and the product feed adds them to Classic Hoodie Owners, creating a smooth, automated onboarding experience.