Appearance
Viewing & Filtering Orders
The Orders list is your central hub for tracking all transactions and customer purchases in your FluentCart store. This guide will show you how to view your orders and use filters to quickly find the specific orders.
Accessing the Orders List
From your WordPress dashboard, navigate to FluentCart Pro > Orders. This will take you directly to the main Orders screen, where you'll see a list of all the transactions in your store.
Understanding the Orders List Table
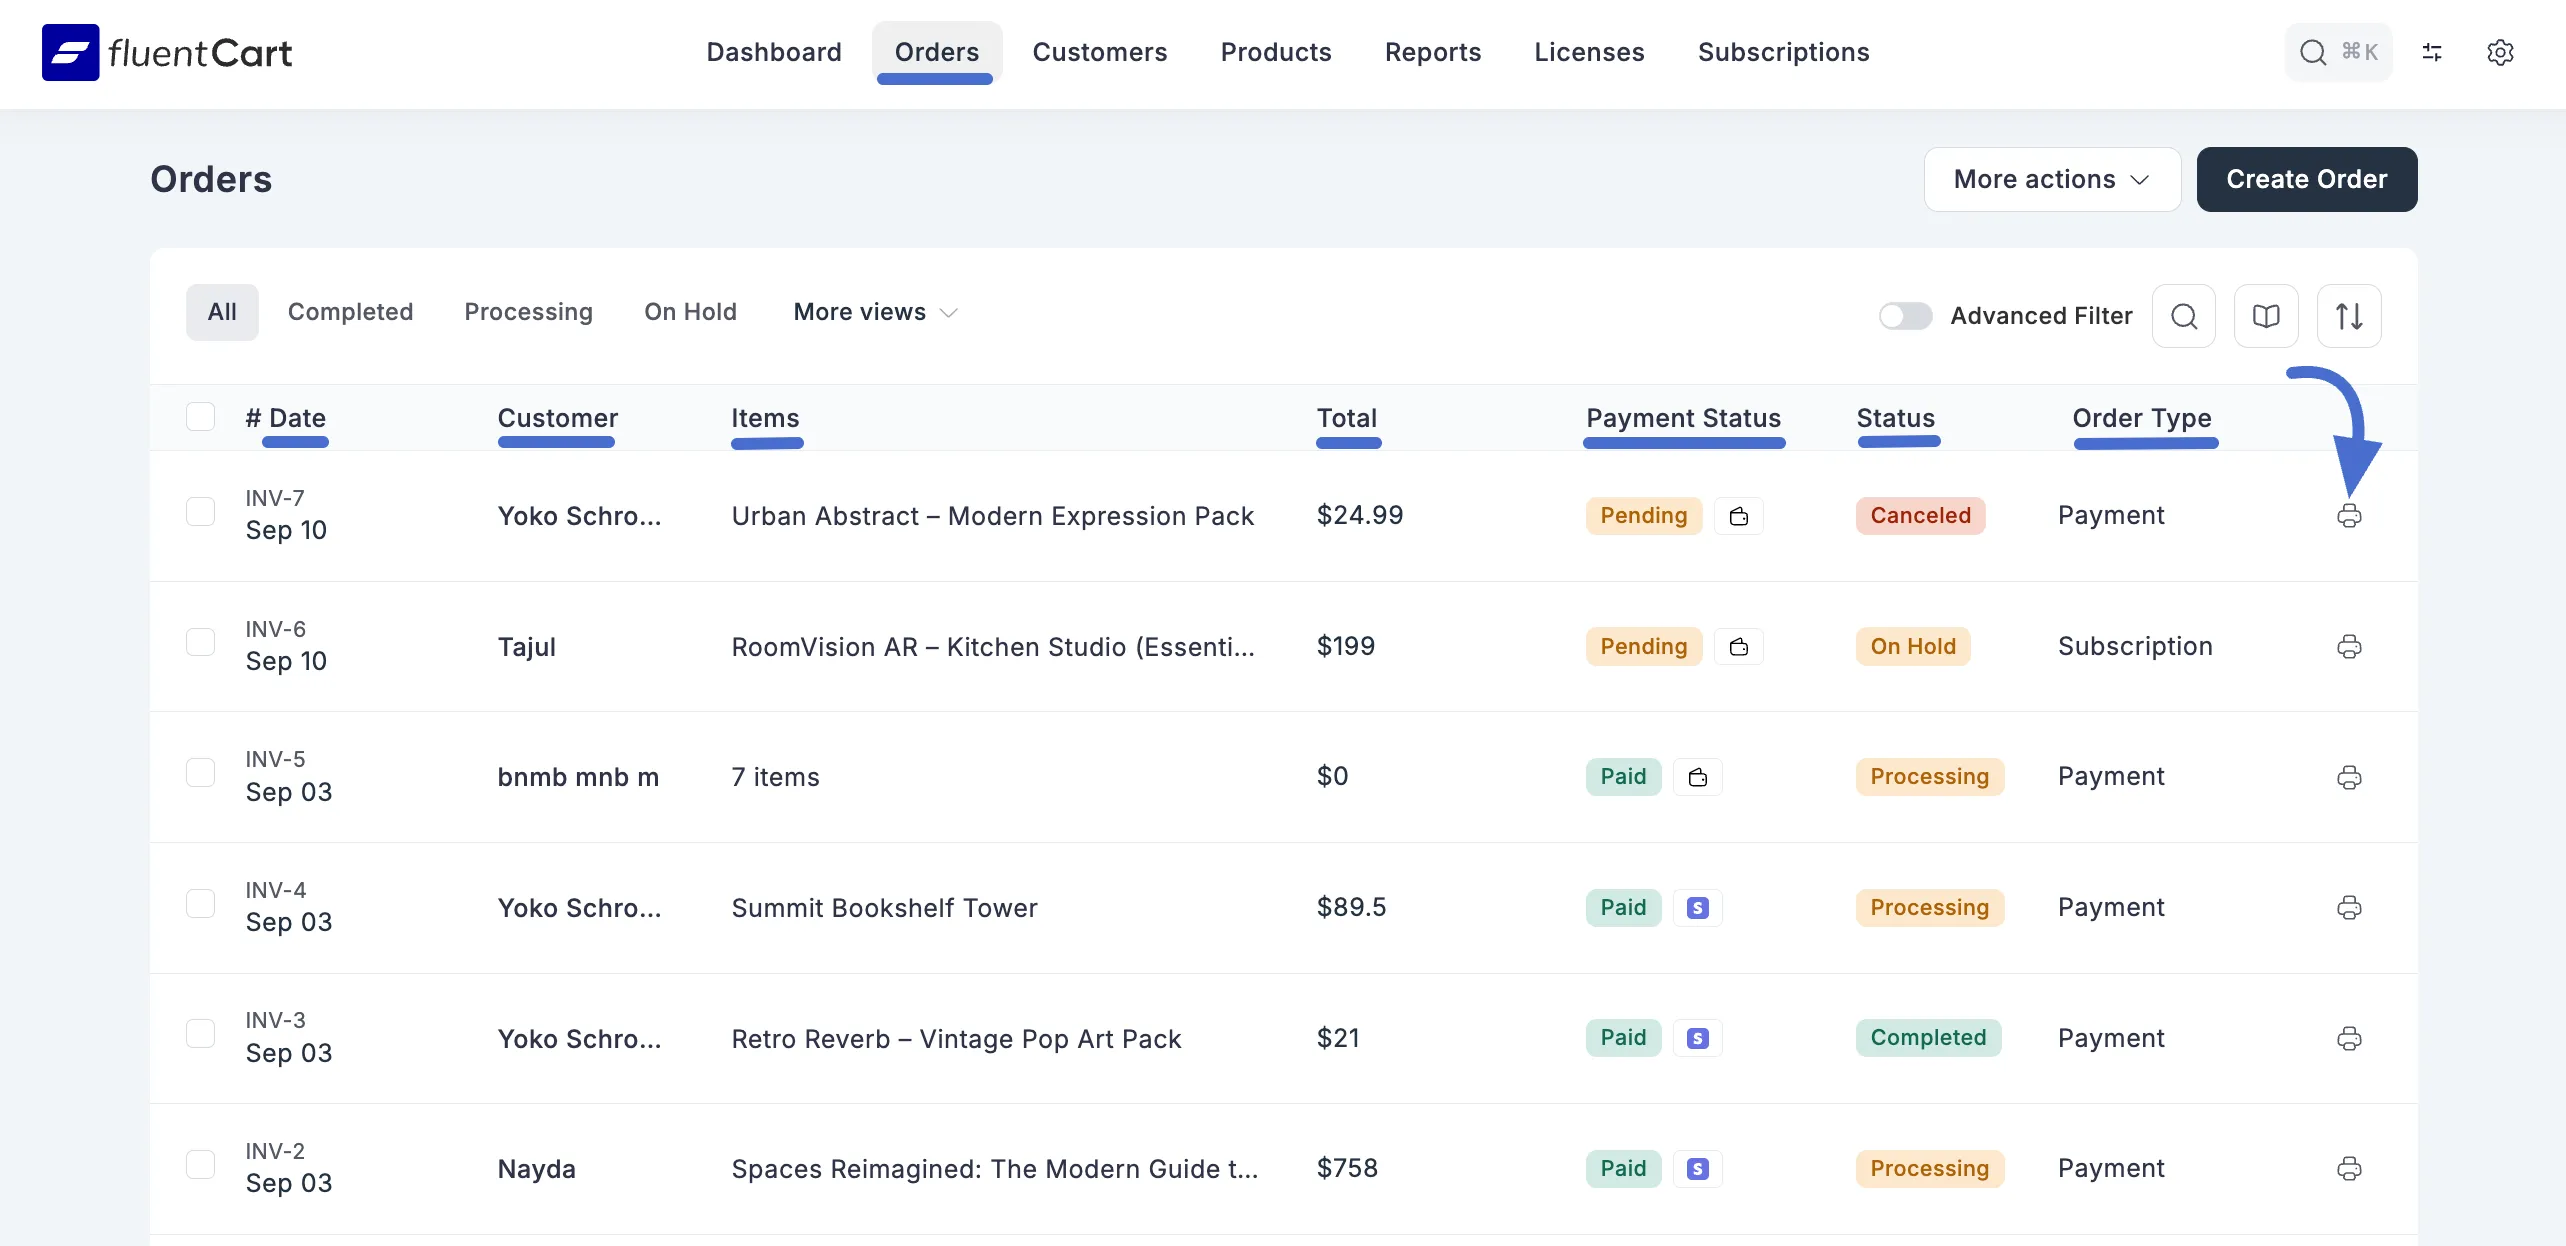
Your orders are neatly organized in a table. Each row is a single order, and each column gives you a quick piece of information:
Date: The date and time when the order was placed.
Customer: The name of the customer who placed the order.
Items: The number of distinct product items included in the order.
Total: The total monetary value of the order.
Payment Status: Indicates the current status of the payment.
Status: The current fulfillment or processing status of the order.
Order Type: Differentiates between various types of transactions.
Action Icons: On the far right of each row, you'll see icons that let you quickly print things like order details.
Customizing Your View & Actions
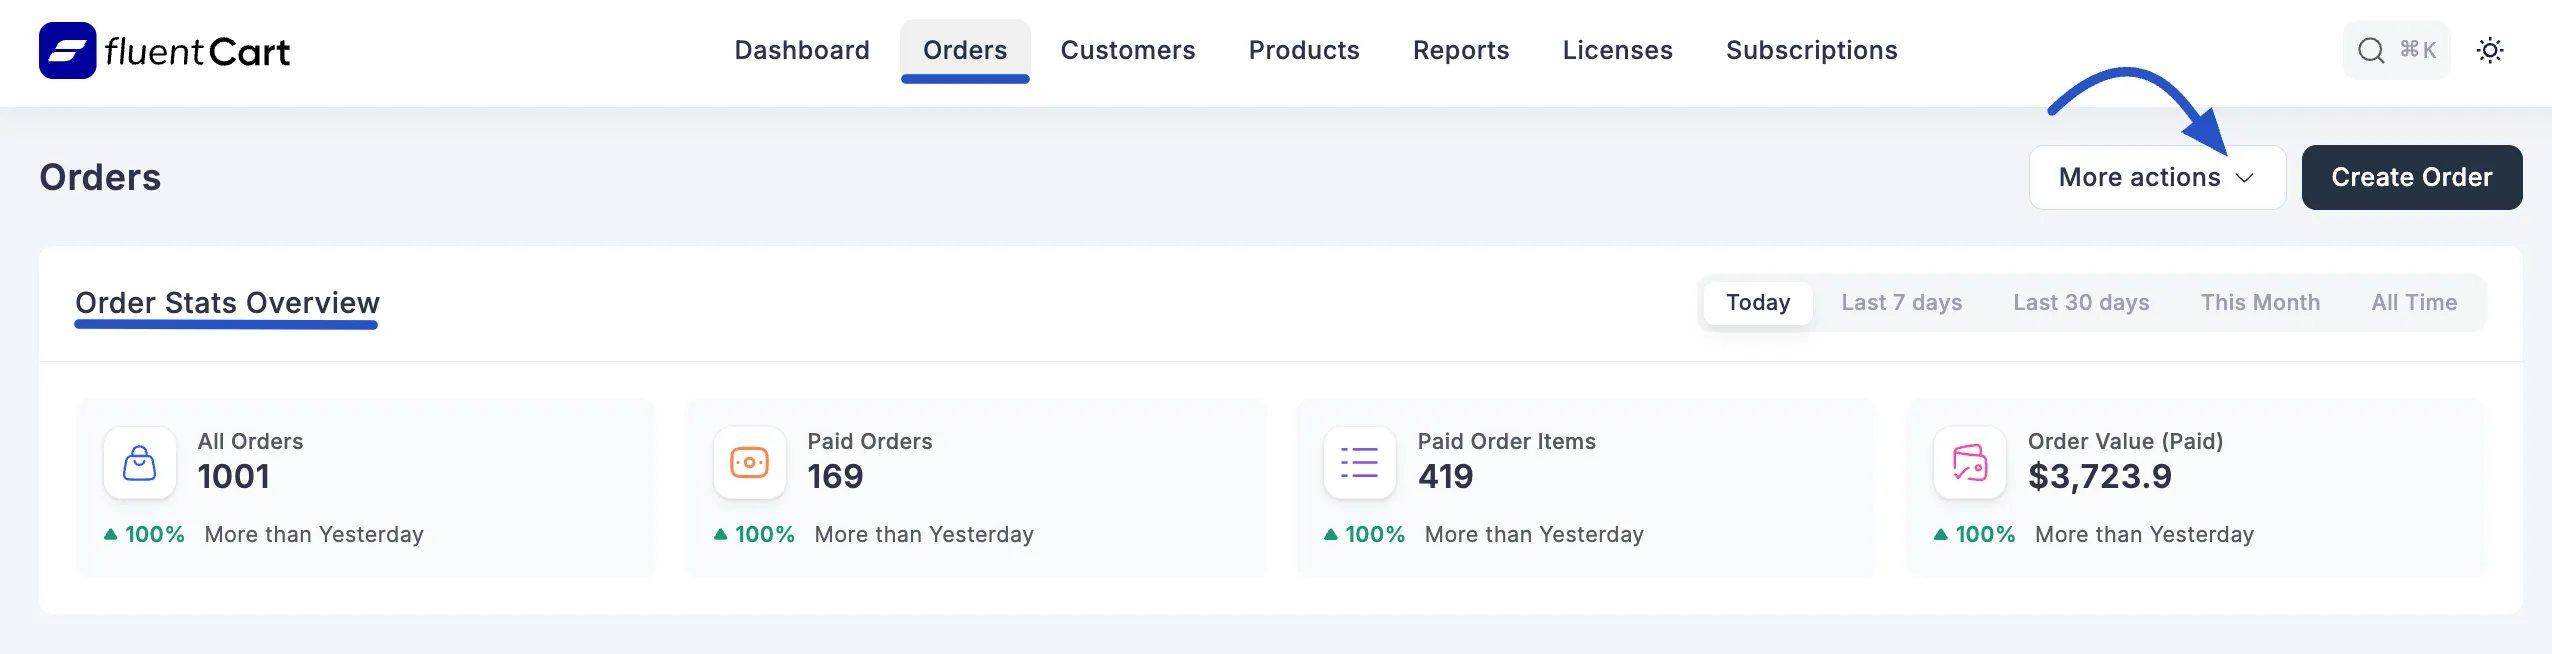
You can change what you see on the Orders page to fit your needs and quickly clean up your data. In the top-right corner, you’ll find a More actions dropdown button that gives you a few handy options:
Showing or Hiding Order Stats
If you want a quick "health check" of your store, you can toggle the order stats panel.
Just click the More actions button and select Show Order Stats. A summary will appear at the top, showing you important numbers like:
- All Orders: The total number of orders your store has ever received.
- Paid Orders: How many orders have been successfully paid for.
- Paid Order Items: The total number of individual items sold.
- Order value (Paid): The total amount of money you've earned from paid orders.
(If you want to hide this summary to get more space on your screen, just click the dropdown again and choose the Hide Order Stats option).
Show Bulk Actions
Selecting this option from the dropdown will reveal checkboxes and bulk management tools on your orders list. This allows you to select multiple orders at once to change their statuses or perform other actions simultaneously, saving you a lot of time.
Sometimes you need to apply the same action to many orders at once, such as removing old records. That's where bulk actions come in handy: simply select multiple orders and click Delete Selected button to remove them all at once.
Delete Test Orders
When you are first setting up your store, you will likely create a few fake orders to test your payment gateways. Instead of deleting them one by one, simply click Delete Test Orders from the dropdown to instantly clean up your dashboard and reset your data before going live.
Filtering Orders
FluentCart provides many ways to filter your orders, helping you narrow down the list based on status or other criteria.
1. Filtering by Order Status
Across the top of the list, you'll see tabs for the most common order statuses. You can click on any of them to instantly filter your orders:
- All: Shows every single order in your store.
- Completed: Only shows orders that are fully paid and fulfilled.
- Processing: Filters for orders that have been paid but are still waiting to be shipped or completed.
- On Hold: Shows orders that might be waiting for payment or need some other manual check-up.
For even more filter options, click the More views dropdown menu. Here you can find more specific filters like:
- Paid: Shows all orders that have been paid for, no matter their fulfillment status.
- Subscription: Narrows the list to only the first order a customer made when they signed up for a subscription.
- Renewal: Shows only the orders that were automatically created when a subscription renewed.
- Refunded: Displays orders that have been fully refunded.
- Partially Refunded: Shows orders where you only returned part of the money to the customer.
- Upgraded From / Upgraded To: These are helpful for tracking subscription upgrades. One shows the original order, and the other shows the new, upgraded order.
2. Using the Advanced Filter
For times when you need to get super specific, the Advanced Filter is your best friend.
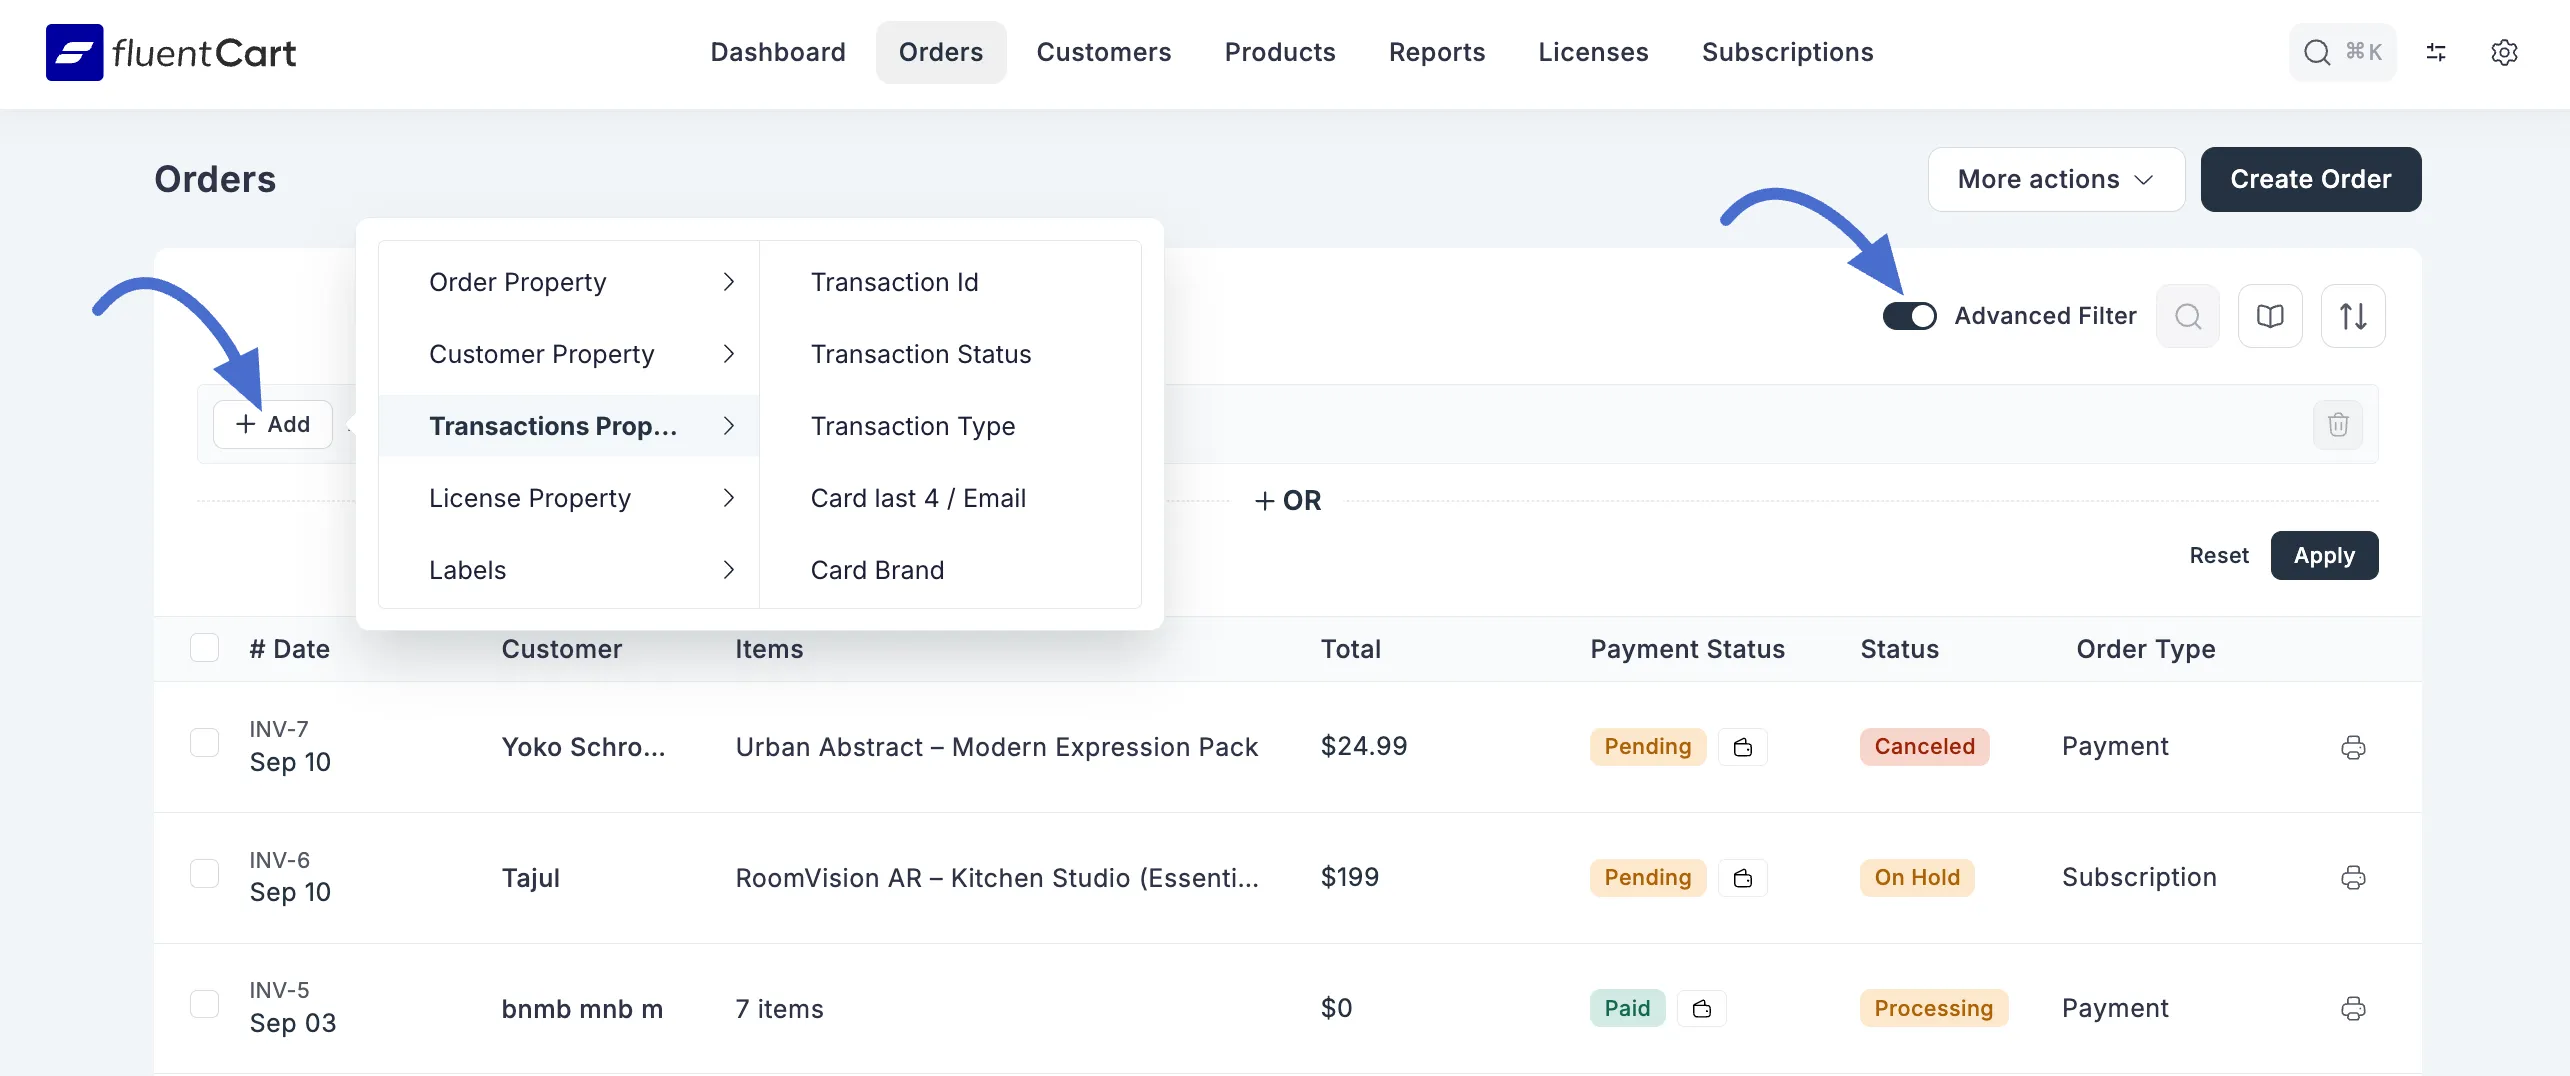
Click the toggle button next to the search bar to turn on the Advanced Filter. This opens up a new panel where you can set very detailed rules. Clicking the + Add button reveals several categories to build your filter:
- Order Property: Filters related to the order itself, like which product was ordered or the payment method used. For example, you can filter By Order Items, Order Status, Payment Status, Order Type, Payment Method, Order Amount, Order Date.
- Customer Property: Filters based on details about the customer, like their name or email address. For example, you can filter by Customer Name, Customer Email.
- Transactions Property: Lets you search by specific payment details, such as the Transaction ID, Transaction Status, Card Brand, or the last 4 digits of their card.
- License Property: Filters for orders that contain software licenses, based on the license key or status.
- Labels: Filters orders based on any custom labels you have assigned.
You can add multiple rules by clicking the +OR button to create very powerful and specific searches. When you're done, click Apply. To go back to the full list, just click Reset.
3. Using the Search Bar
If you just need to find something fast, the search bar at the top of the page is perfect. You can type in an Order ID, customer name, email, or product name to instantly find what you're looking for.