Appearance
Configuring Email Notifications
The Notifications section in FluentCart is where you manage all the automated transactional emails sent to both your customers and store administrators. Keeping everyone informed about order activity is crucial for a professional e-commerce experience and efficient store management.
This guide will walk you through how to enable, disable, and customize these important email notifications.
Accessing the Notifications Screen
- From your WordPress dashboard, navigate to FluentCart Pro > Settings.
- Click on the Email Configuration tab.
- From the sub-menu, select Notifications.
Managing Your Notifications
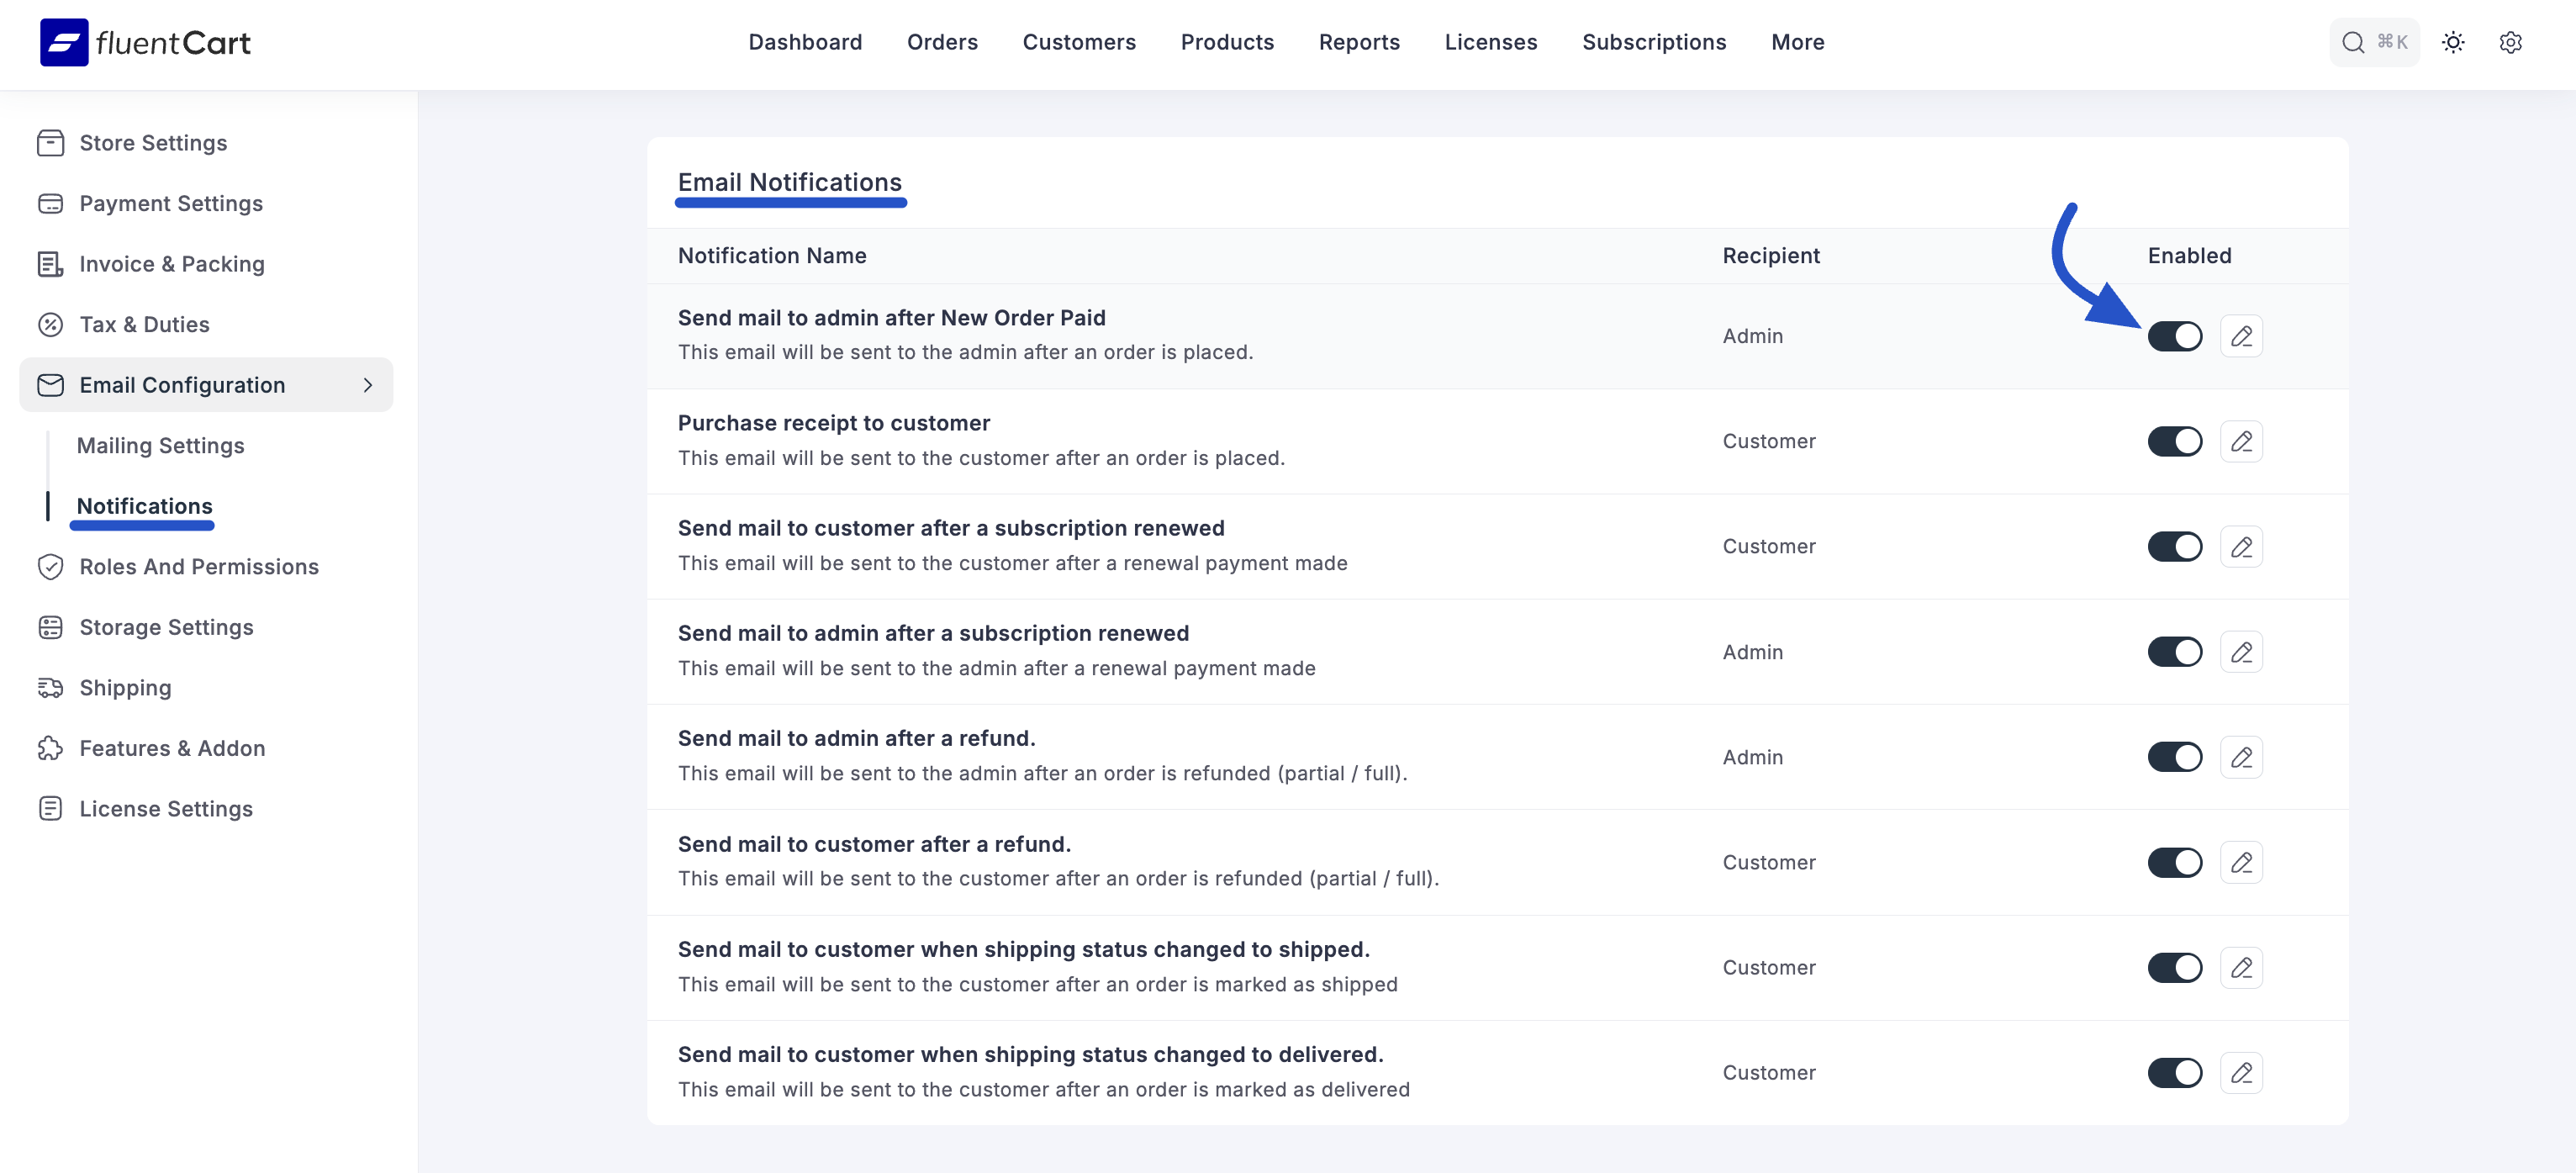
On this screen, you will see a list of all available email notifications. For each one, you can see its Notification Name, the intended Recipient (Admin or Customer), and a toggle to enable or disable it.
Available Notifications:
- Send mail to admin after New Order Paid: Notifies the store admin when a new order has been successfully paid for.
- Purchase receipt to customer: Sends a receipt to the customer immediately after their order is placed.
- Send mail to customer after a subscription renewed: Confirms to the customer that their subscription renewal payment was successful.
- Send mail to admin after a subscription renewed: Alerts the admin that a subscription renewal payment has been made.
- Send mail to admin after a refund: Informs the admin that a full or partial refund has been processed.
- Send mail to customer after a refund: Notifies the customer that a refund has been issued for their order.
- Send mail to customer when shipping status changed to shipped: Informs the customer that their physical order has been shipped.
- Send mail to customer when shipping status changed to delivered: Confirms to the customer that their order has been marked as delivered.
Enabling or Disabling Notifications
To quickly activate or deactivate any notification, simply click the toggle switch in the "Enabled" column. The email will only be sent if the toggle is on.

Customizing an Email Notification
To customize the content of a specific email, click the pencil icon on the right-hand side of its row. This will take you to the editor for that specific email template.
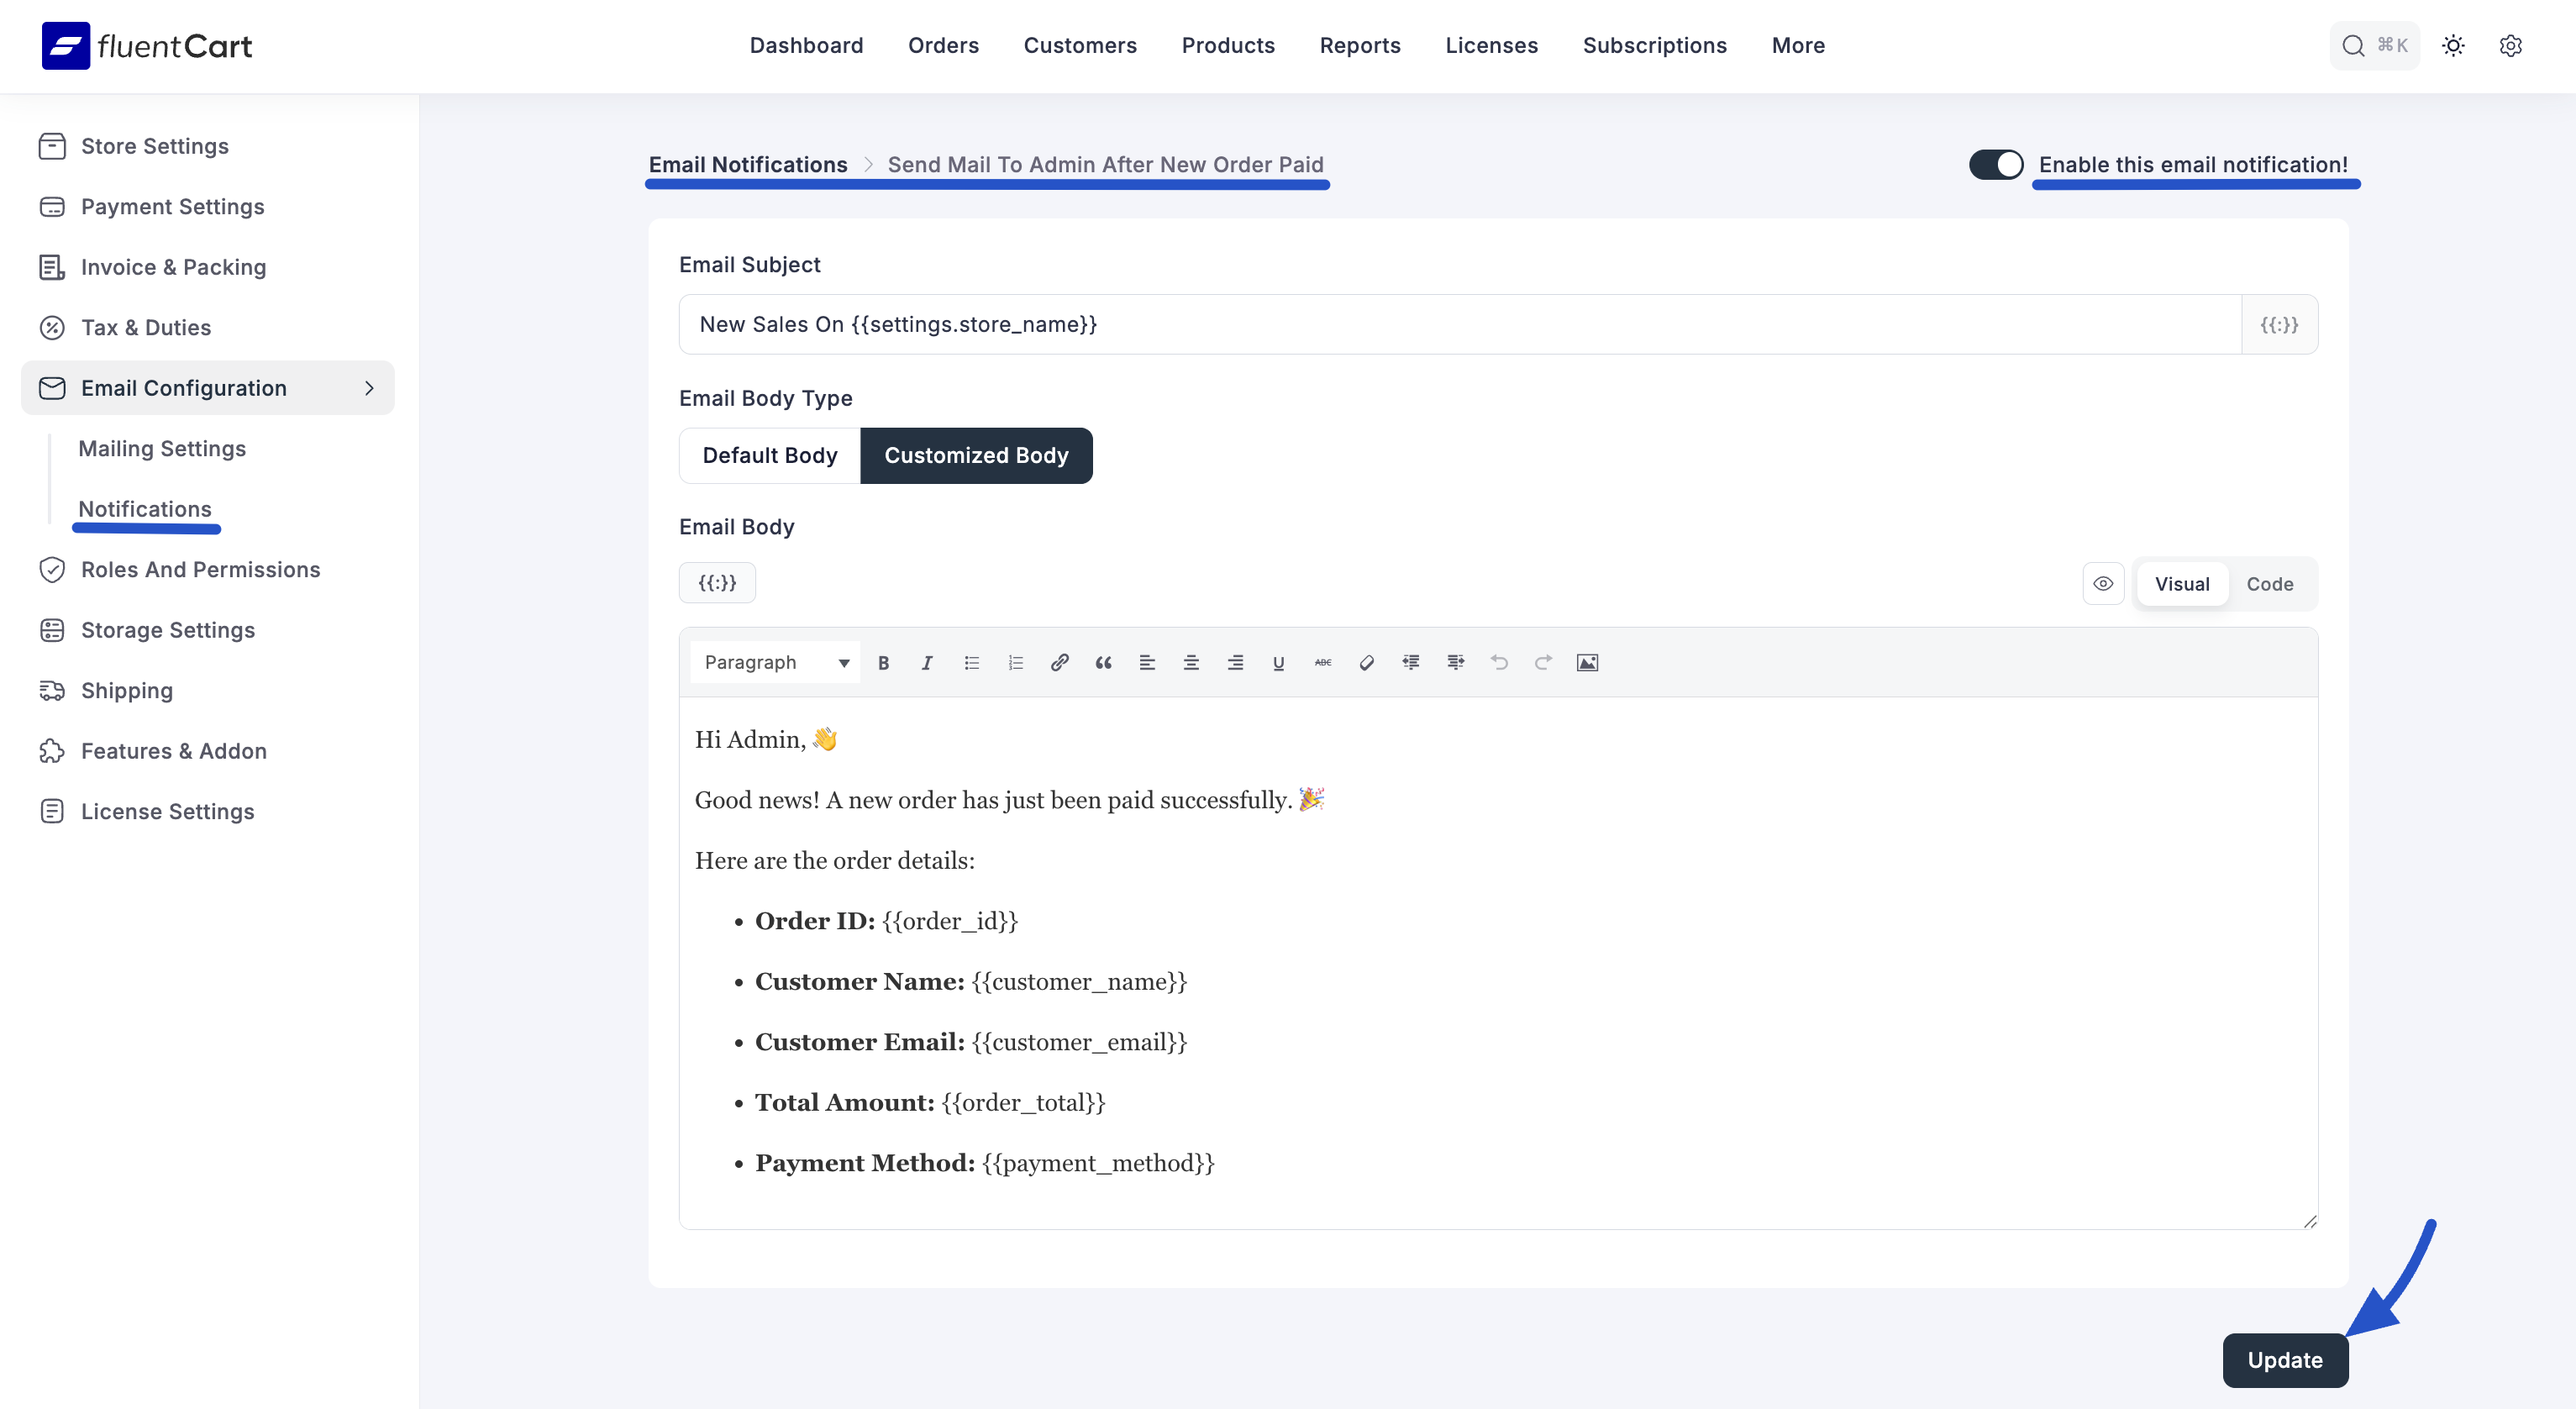
- Enable this email notification! This toggle at the top right serves the same purpose as the one on the main list, allowing you to activate or deactivate the email from within the editor.
Email Subject
This field controls the subject line of the email. You can personalize it by clicking the shortcode icon {;} on the right to insert dynamic information, such as the customer's name or the order ID.
Email Body Type
You have two options for the email's main content:
- Default Body: This is the standard, pre-written email content provided by FluentCart. It contains all the essential information for that specific notification and is ready to use out of the box.
- Customized Body: Select this option to take full control over the email's content. This is perfect for matching the email's design and tone to your brand's voice.
Customizing the Email Body
If you select Customized Body, a full rich text editor will appear.
- Content Editor: Use the editor to write your own text, apply formatting (like bold, italics, and lists), and structure the email exactly as you want it.
- Shortcodes: Just like with the subject line, you can use the shortcode icon {;} above the editor to insert dynamic placeholders for order, customer, and general store details. This allows you to create highly personalized and informative emails.
- Visual/Code View: You can switch between the Visual editor and the Code editor (for HTML) to achieve more advanced customizations.

Once you are finished editing, click the Update button to save your changes. Your customized email will now be sent whenever its corresponding event is triggered.
