Appearance
Paystack Settings
Paystack is a popular and secure payment gateway that allows you and your customers to pay using credit cards, debit cards, bank transfers, USSD, and more. When you integrate Paystack with FluentCart, you can easily accept fast and reliable payments from customers across Africa, as well as international payments from customers worldwide.
This guide will walk you through the entire process of connecting your Paystack account to FluentCart.
Step 1: Install & Activate Paystack in FluentCart
First, you need to install and enable Paystack as a payment method in your store.
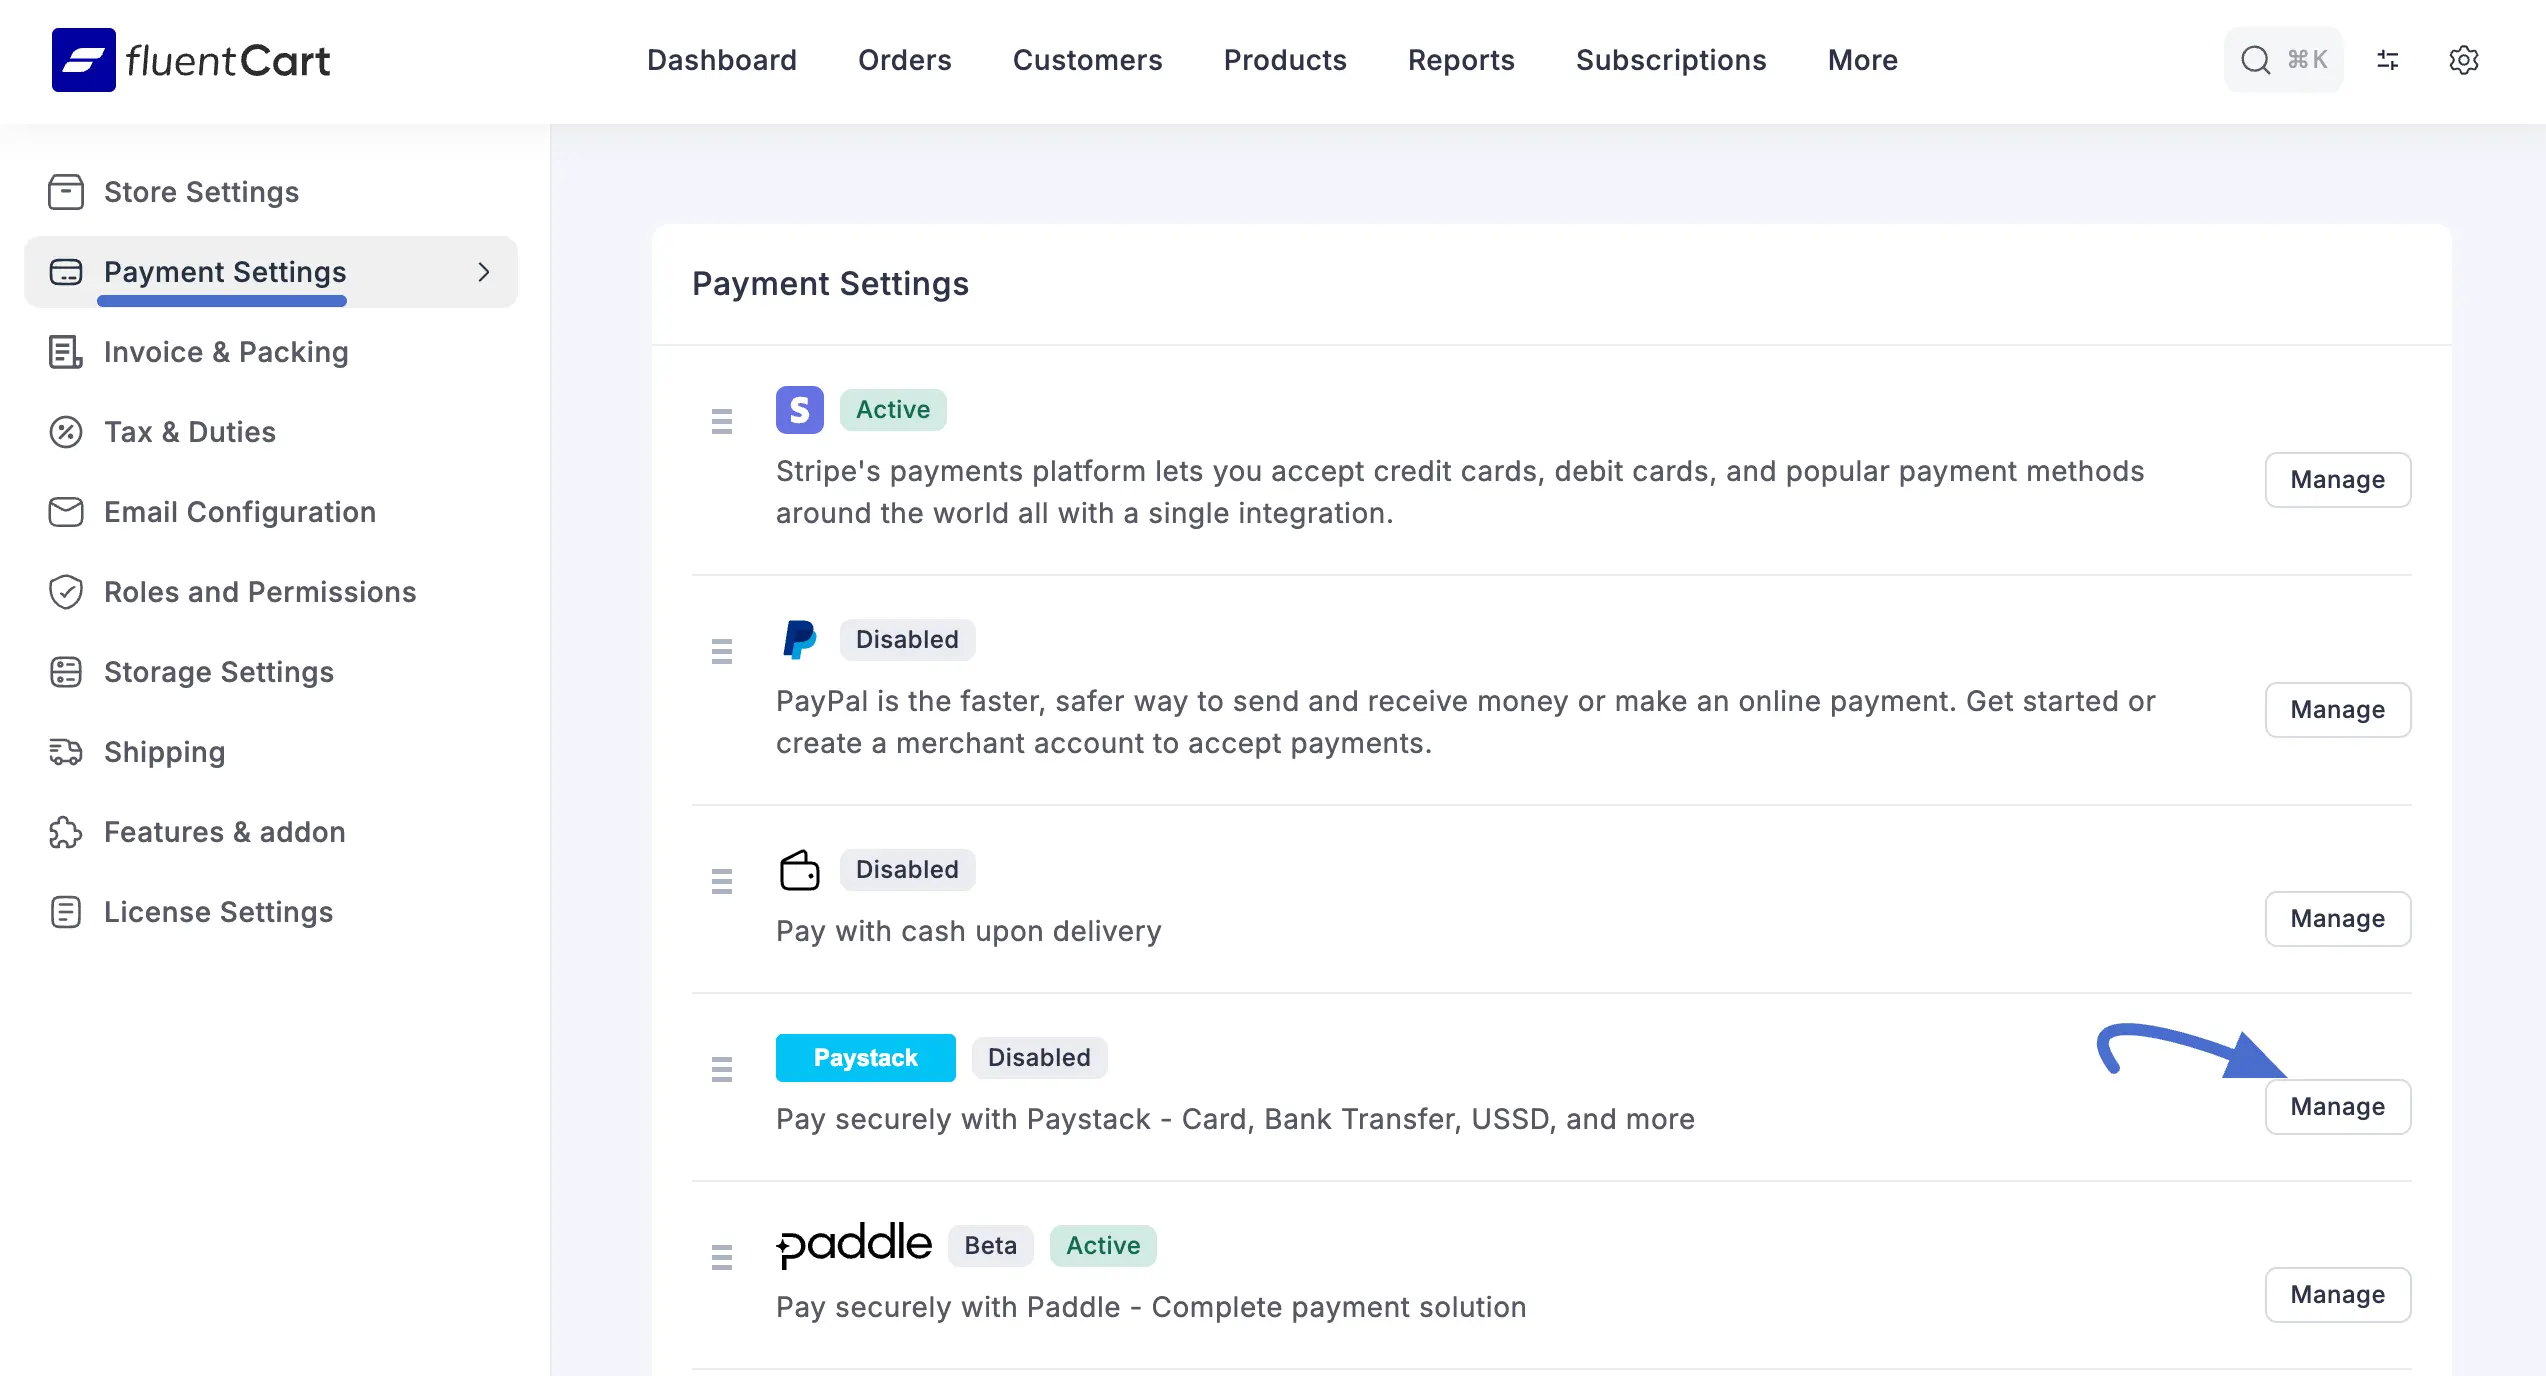
- From your WordPress dashboard, navigate to FluentCart Pro > Settings.
- Click on the Payment Settings tab.
- You will see a list of available payment gateways. Find Paystack and click the Install & Activate button next to it.
- After a moment, the page will refresh, and the button will change to Manage. Click the Manage button to open the Paystack Settings page.
Step 2: Configure Paystack Settings in FluentCart
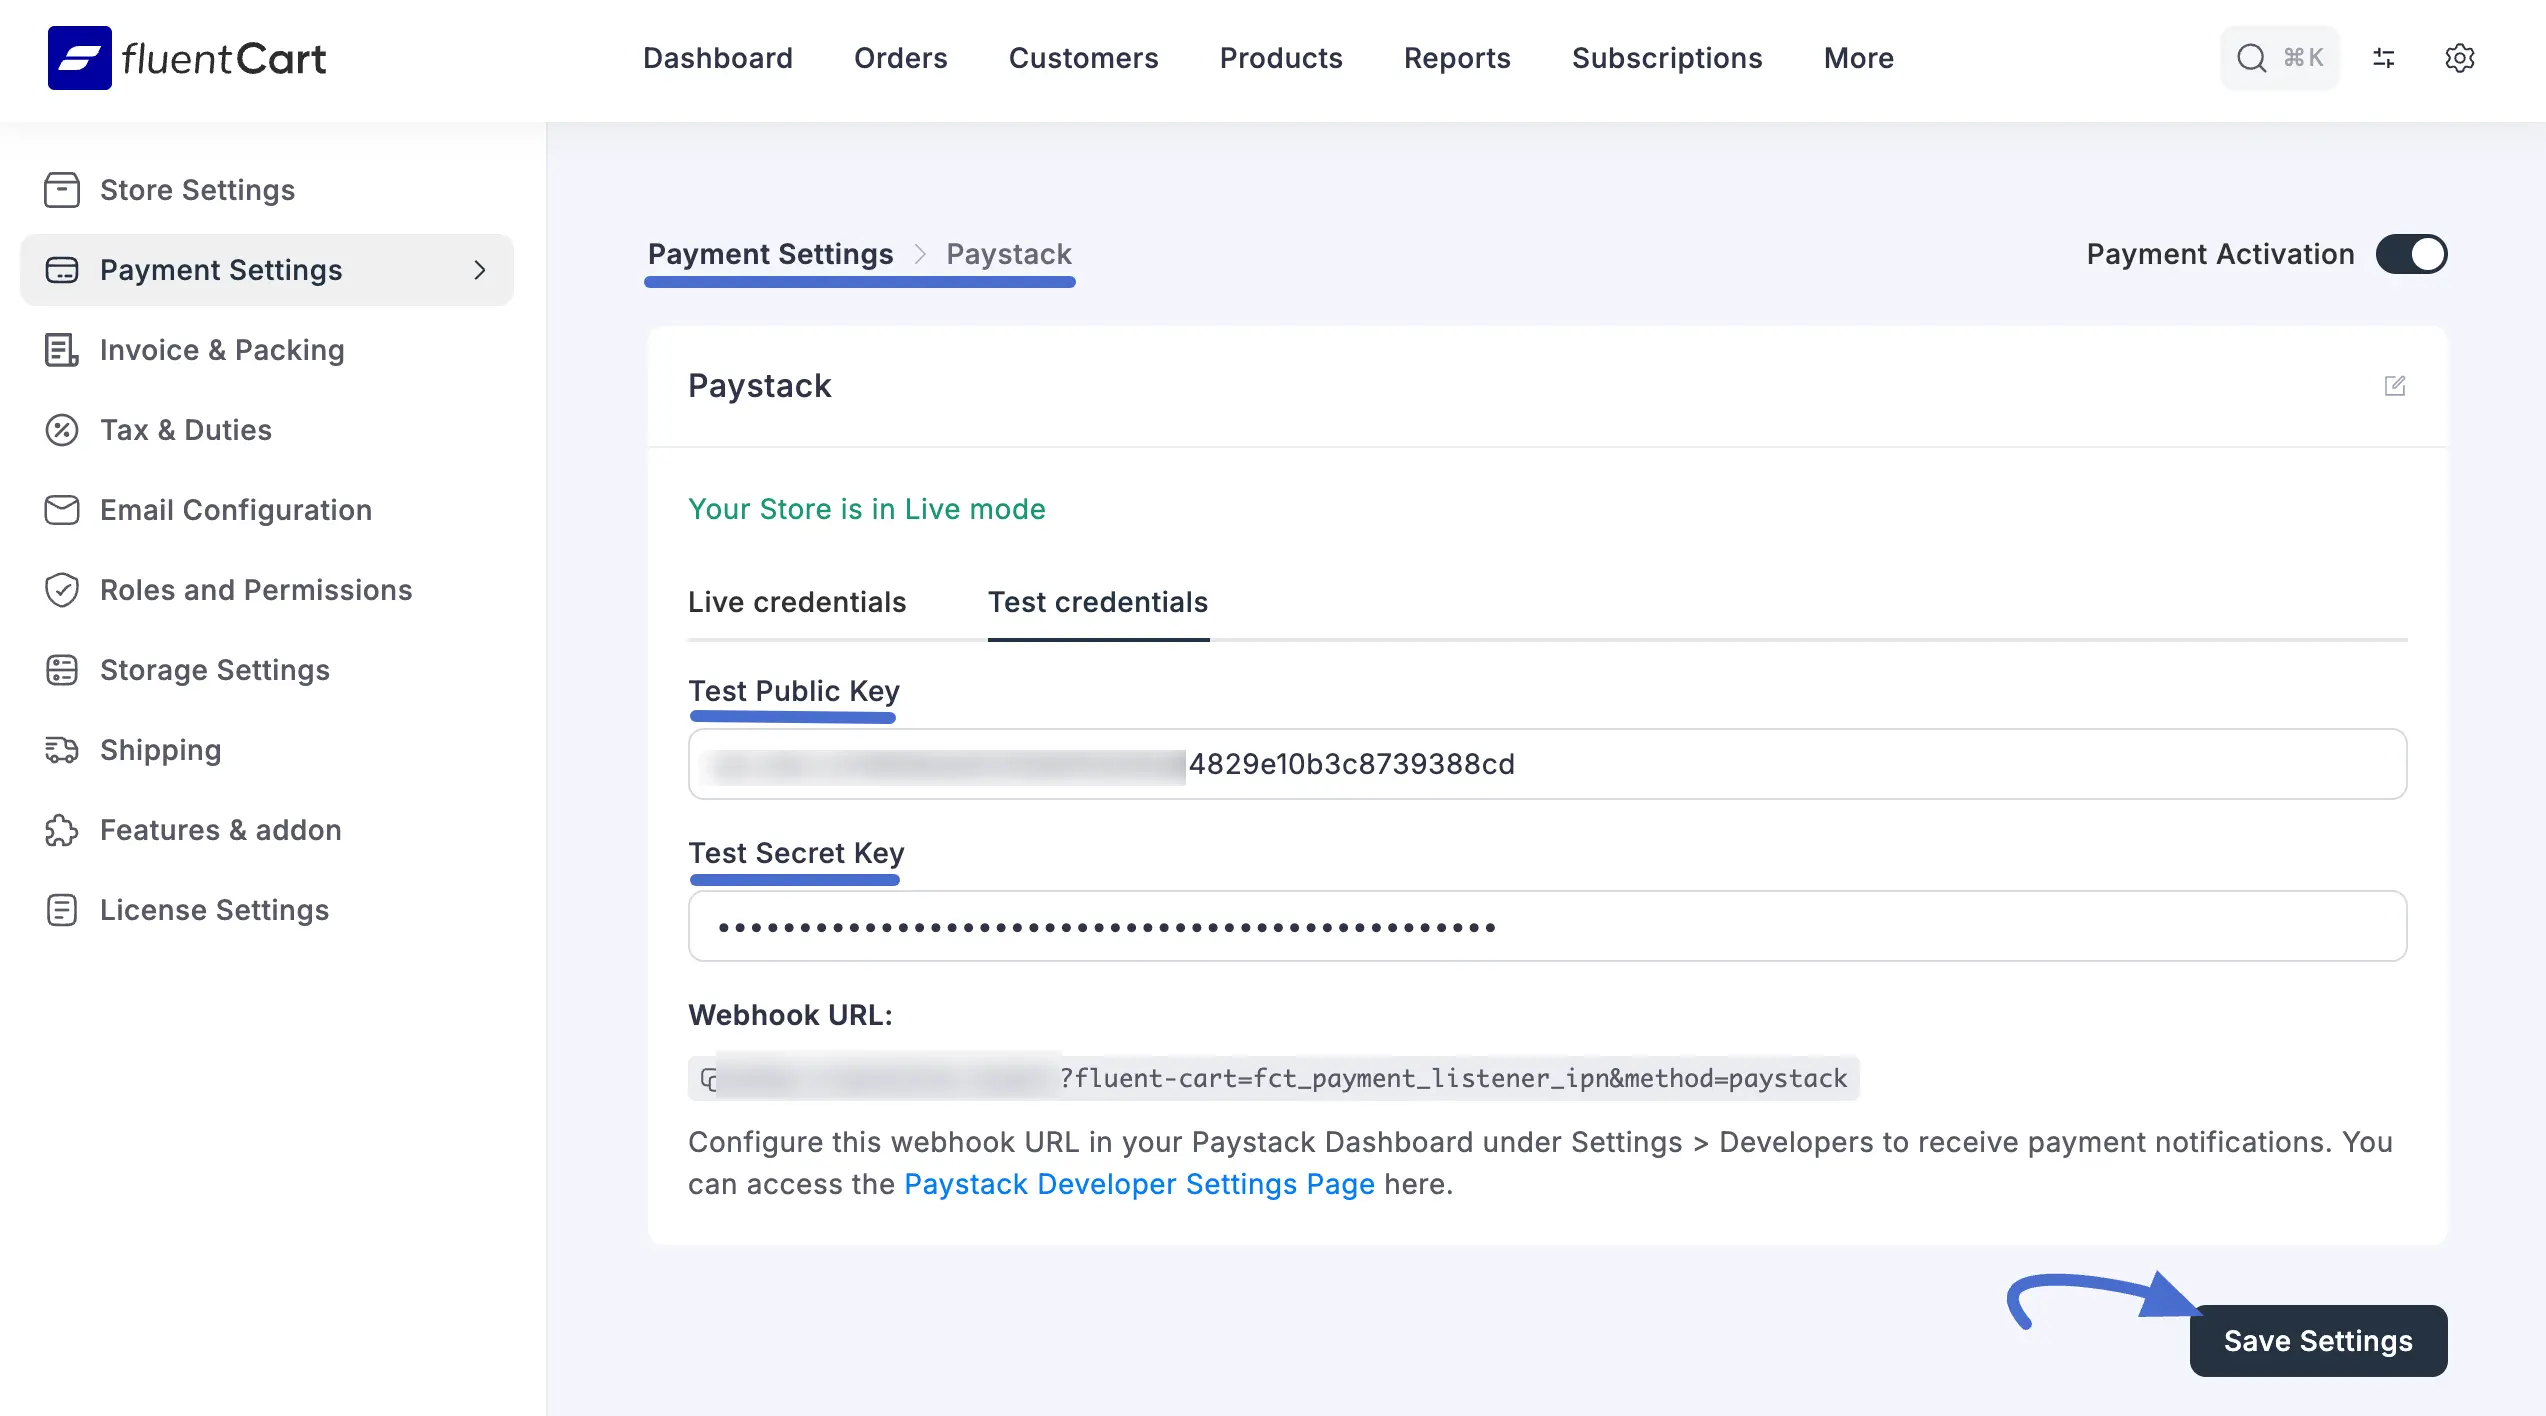
On this page, you will connect your Paystack account to FluentCart.
First, enable the payment gateway by toggling the Payment Activation switch at the top right.
You will see two tabs: Live credentials and Test credentials. It is highly recommended to start with the Test credentials to ensure everything is working correctly before accepting real payments.
On this page, you will see some fields to fill in and one URL to copy:
- Test Public Key
- Test Secret Key
- Webhook URL
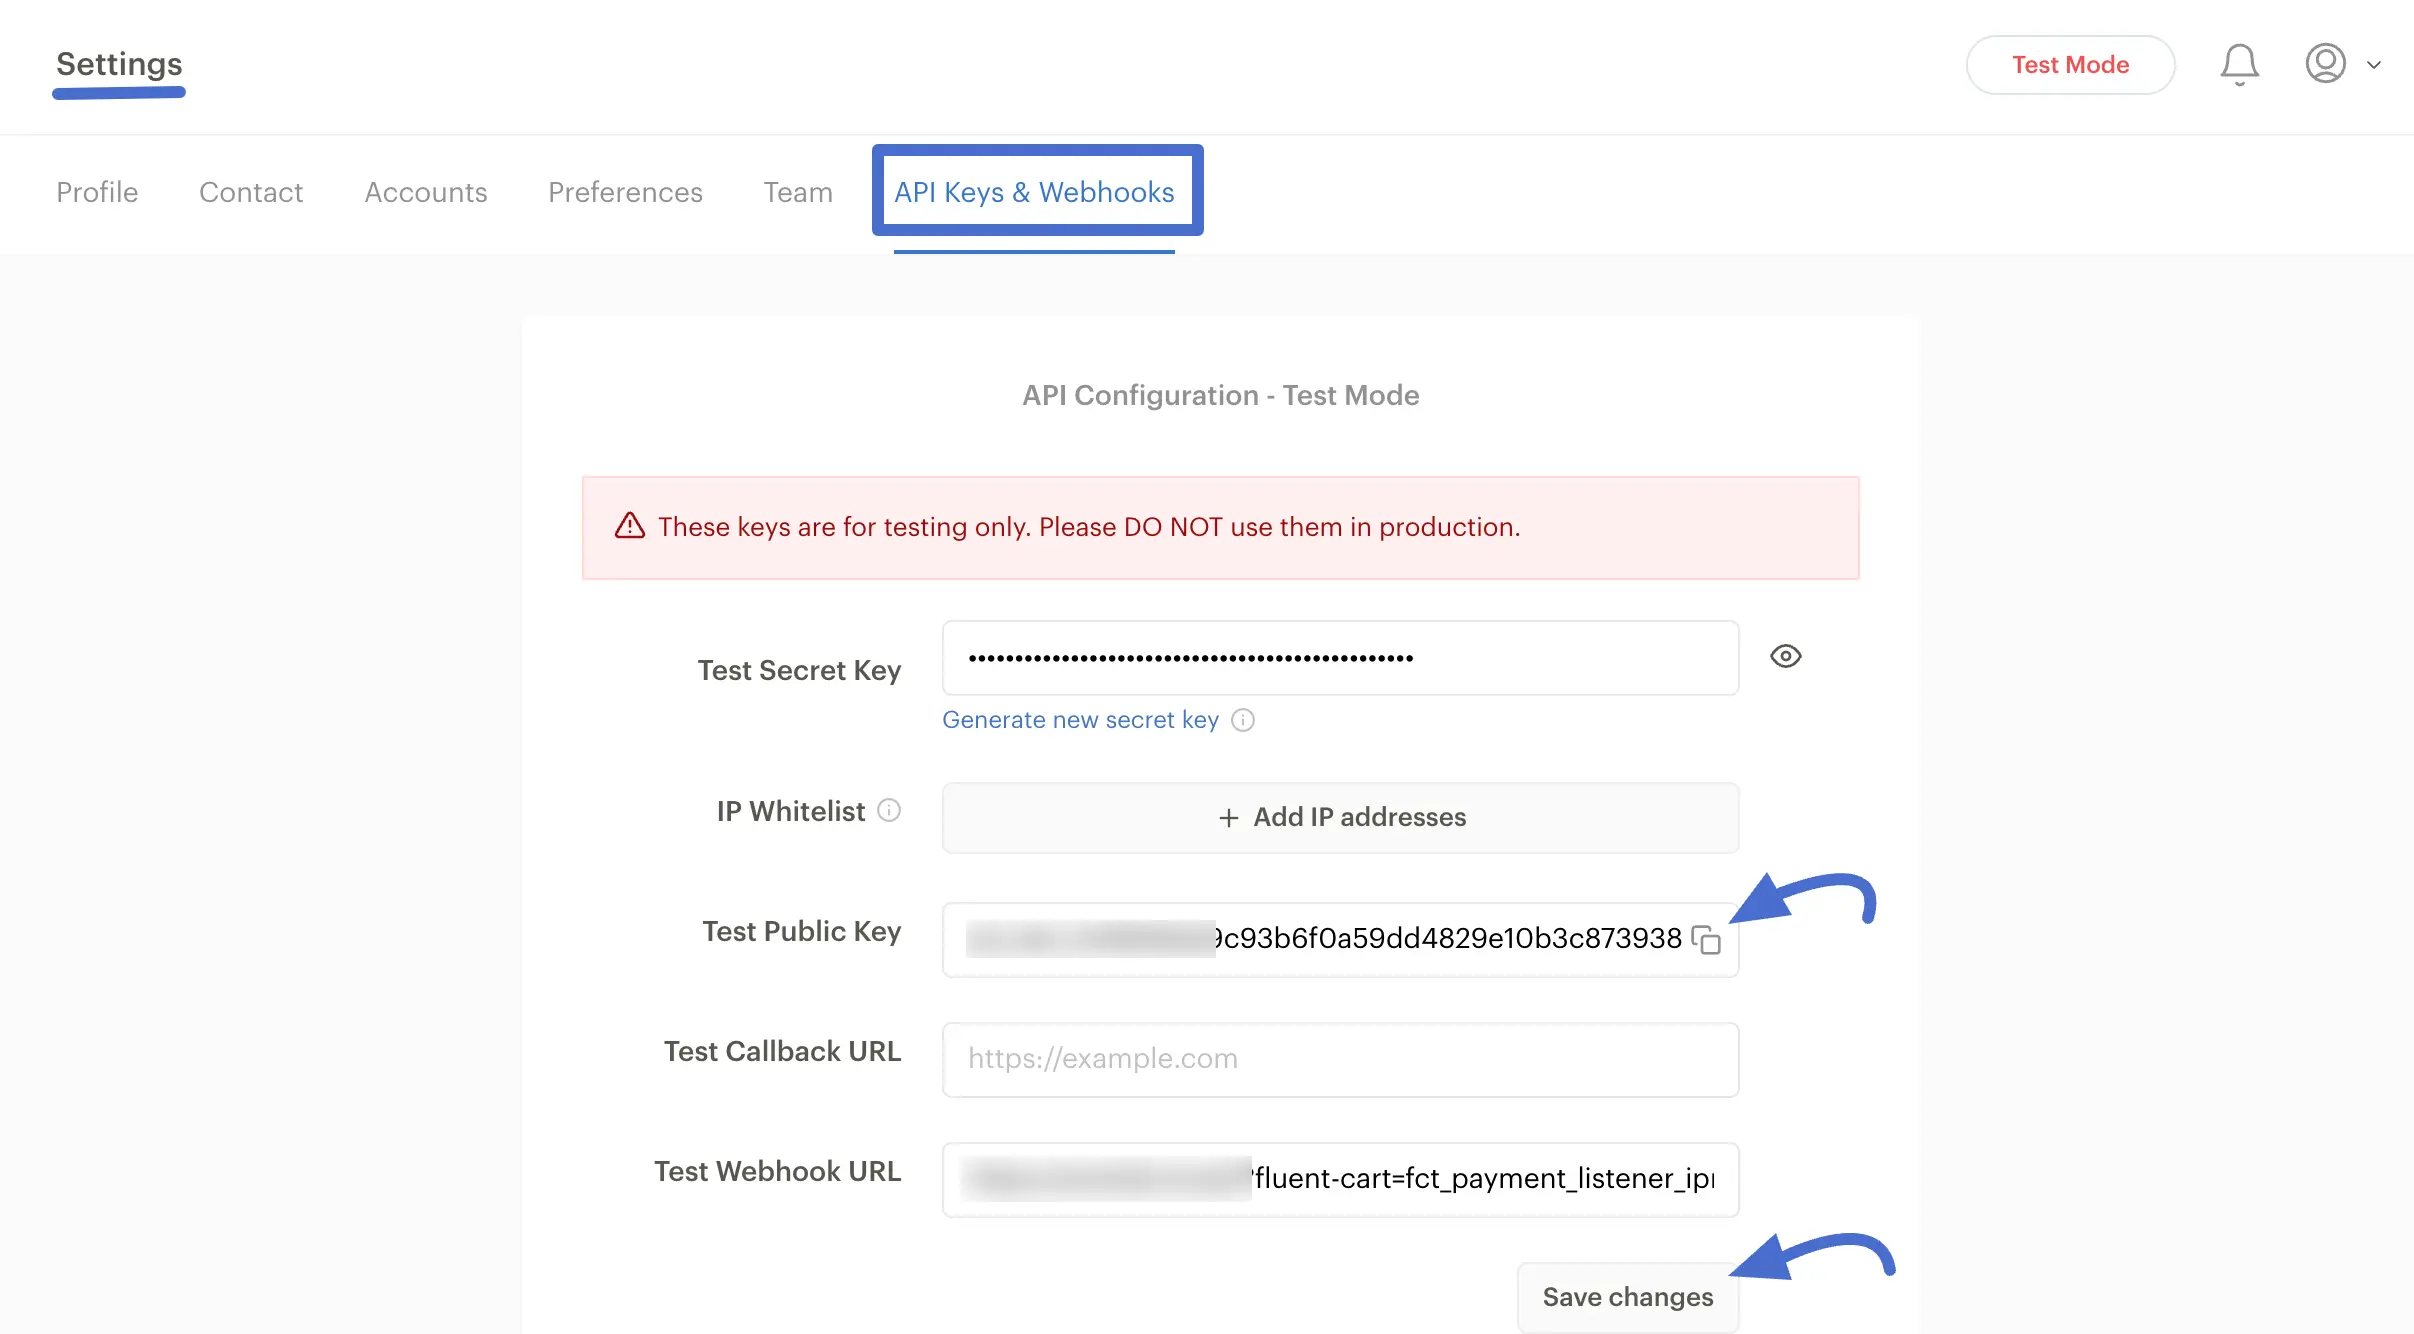
To get this information, you will need to log in to your Paystack dashboard.
Step 3: Set up Webhooks
Webhooks are essential for Paystack to send real-time updates to FluentCart, such as confirming successful payments or subscription renewals.
- Copy the Webhook URL: In your FluentCart Paystack settings, copy the entire Webhook URL provided.

Step 4: Get the Credential from Paystack
Now, open a new tab and log in to your Paystack dashboard. Go to Settings > Developers (or Settings > API Keys & Webhooks). You can access the Paystack Developer Settings Page.
- Paste the Webhook URL: Find the Test Webhook URL field. Paste the URL you just copied from FluentCart into this field.
- Copy Your API Keys: On this same page, you will find your Test Public Key and Test Secret Key. Click the "copy" icon next to each key.
- Paste Keys into FluentCart: Now, go back to your FluentCart settings page. Paste the Test Public Key and Test Secret Key into their matching fields.
- Save Changes: Click Save changes in your Paystack dashboard, and then click the Save Settings button in your FluentCart dashboard.
Your Paystack integration is now complete and in Test Mode. We recommend running a test transaction with a Paystack test card to ensure the connection is working.
To go live, simply repeat Step 3 using the Live credentials tab in FluentCart and the Live API Keys and Live Webhook URL fields in your Paystack dashboard.
If you have any questions or need further assistance, feel free to reach out to our support team.