Appearance
Configuring Shipping Zones
Shipping zones are geographical regions that allow you to define specific shipping methods and rates for your customers. By creating zones, you can customize shipping options for different countries or areas. This guide will walk you through setting up a new shipping zone.
How to Add and Manage Shipping Zones
1. Navigate to Shipping Settings
To begin, you must navigate to the shipping configuration area within FluentCart.
- From the main WordPress dashboard, locate the FluentCart section in the left-hand navigation menu and click on Settings.
- On the Settings page, select the Shipping tab from the left menu.
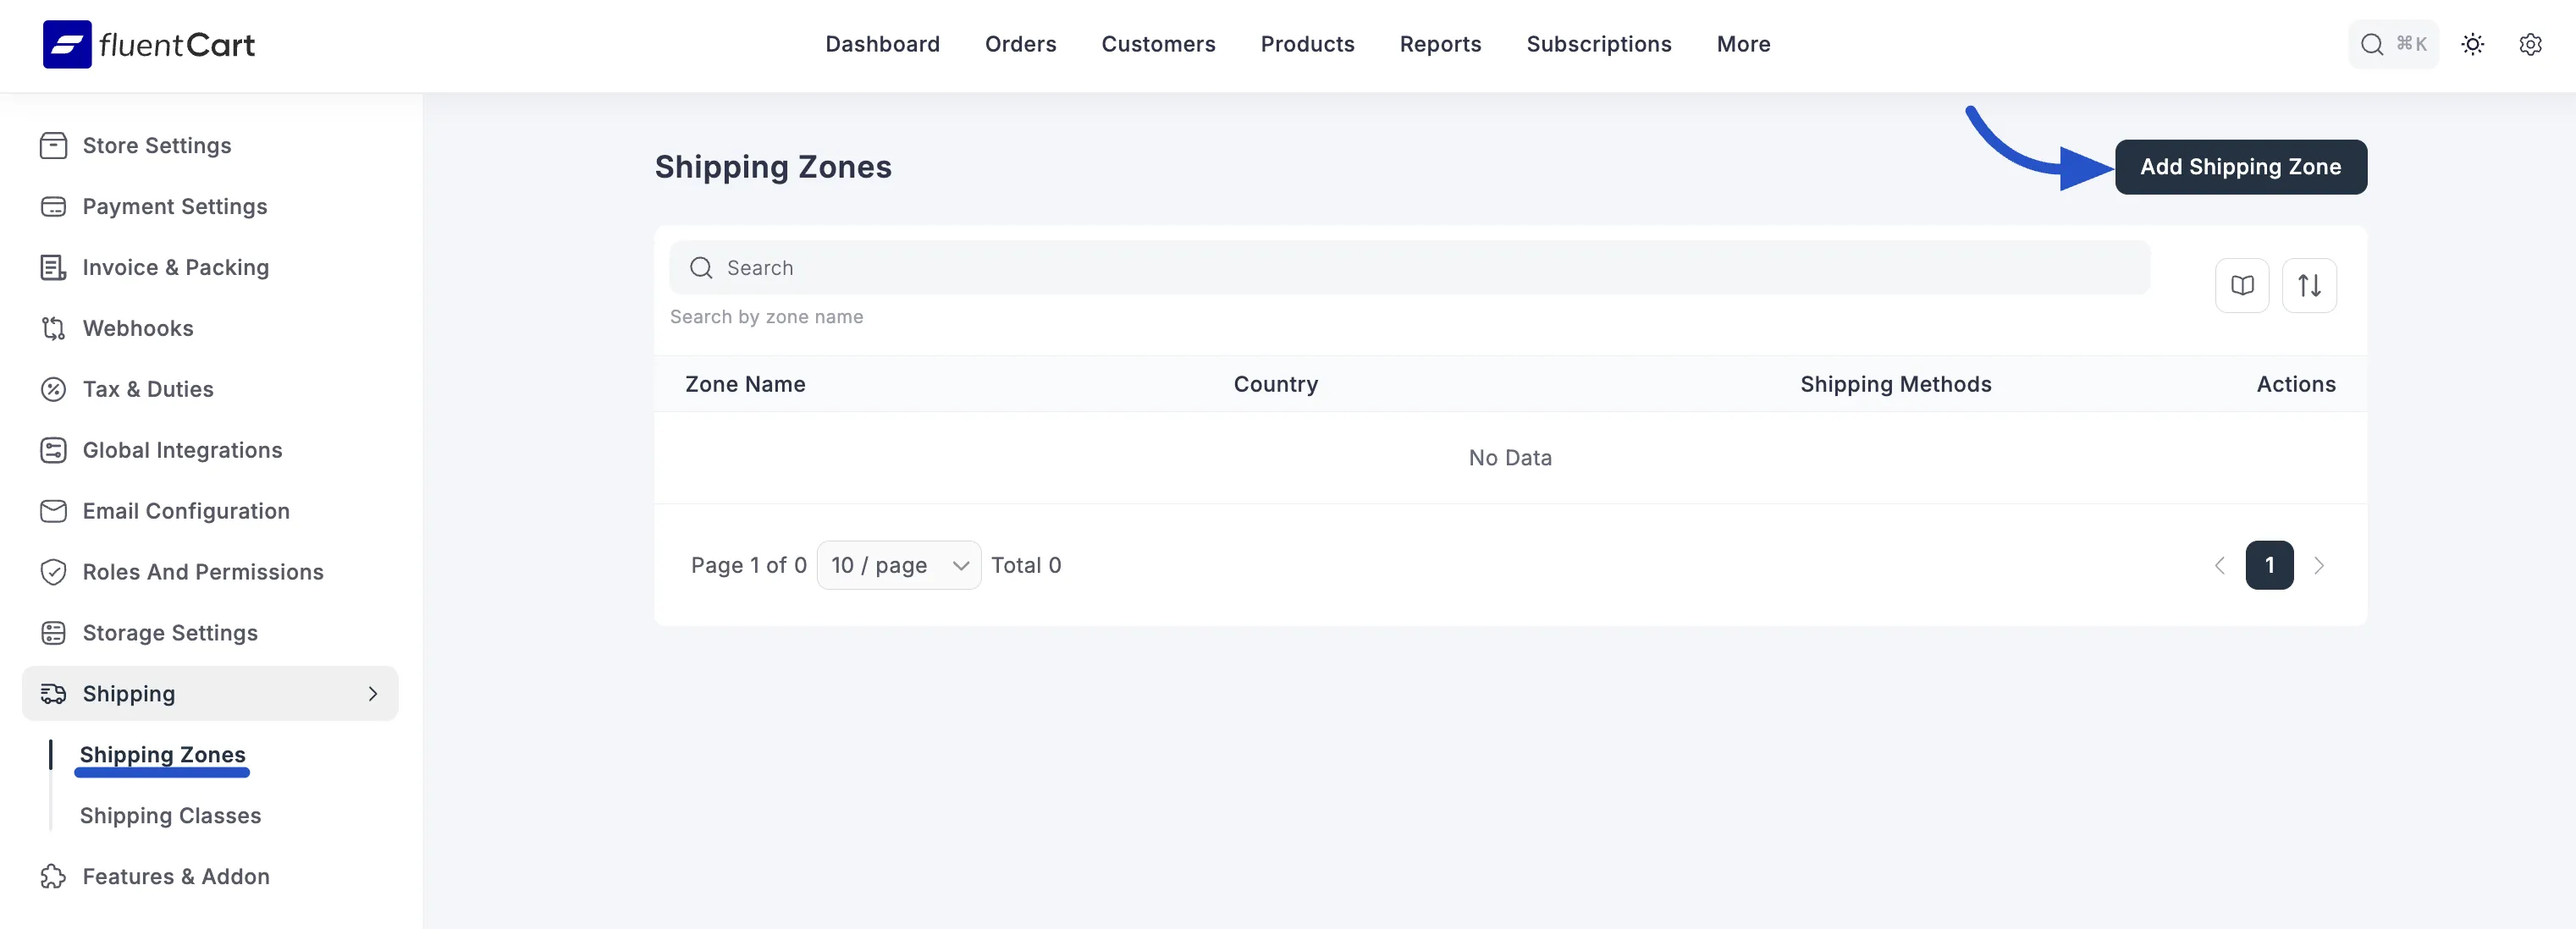
- Ensure the Shipping Zones sub-tab is selected. This screen will display a list of all your existing shipping zones.
2. Add a New Shipping Zone
- Click the dark Add Shipping Zone button located at the top right of the screen.
- You will be taken to the "Add Shipping Zone" setup page.
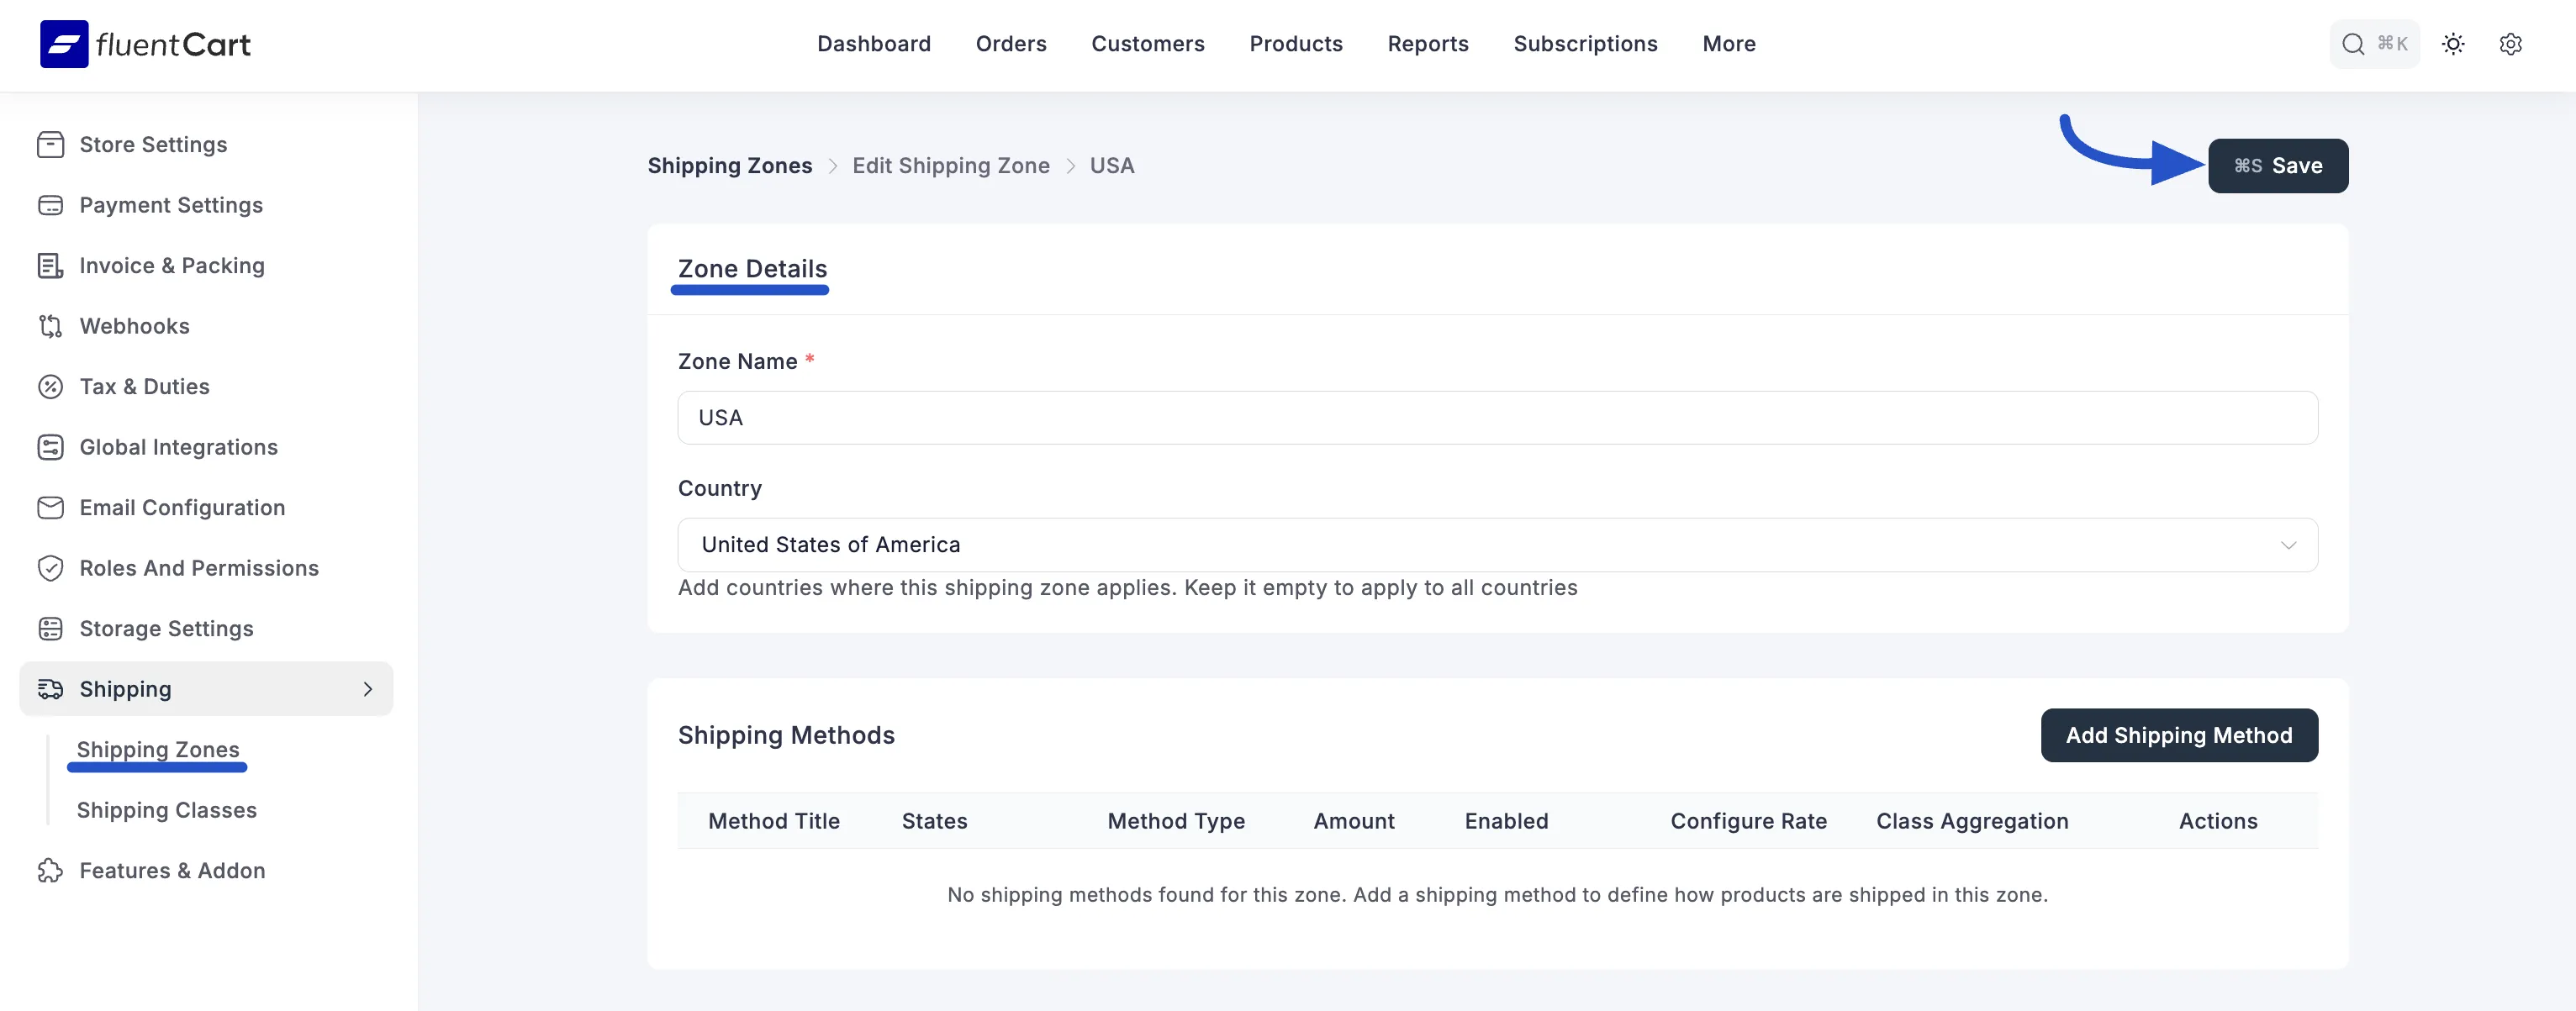
3. Name Your Zone and Define Coverage
Now you are on the setup page for your new zone. Here, you will name your zone and precisely target where it applies using the new coverage settings:
Zone Name: Give your zone a descriptive name that is easy for you to remember internally. For example, "North America," "Europe," or "Local Customers."
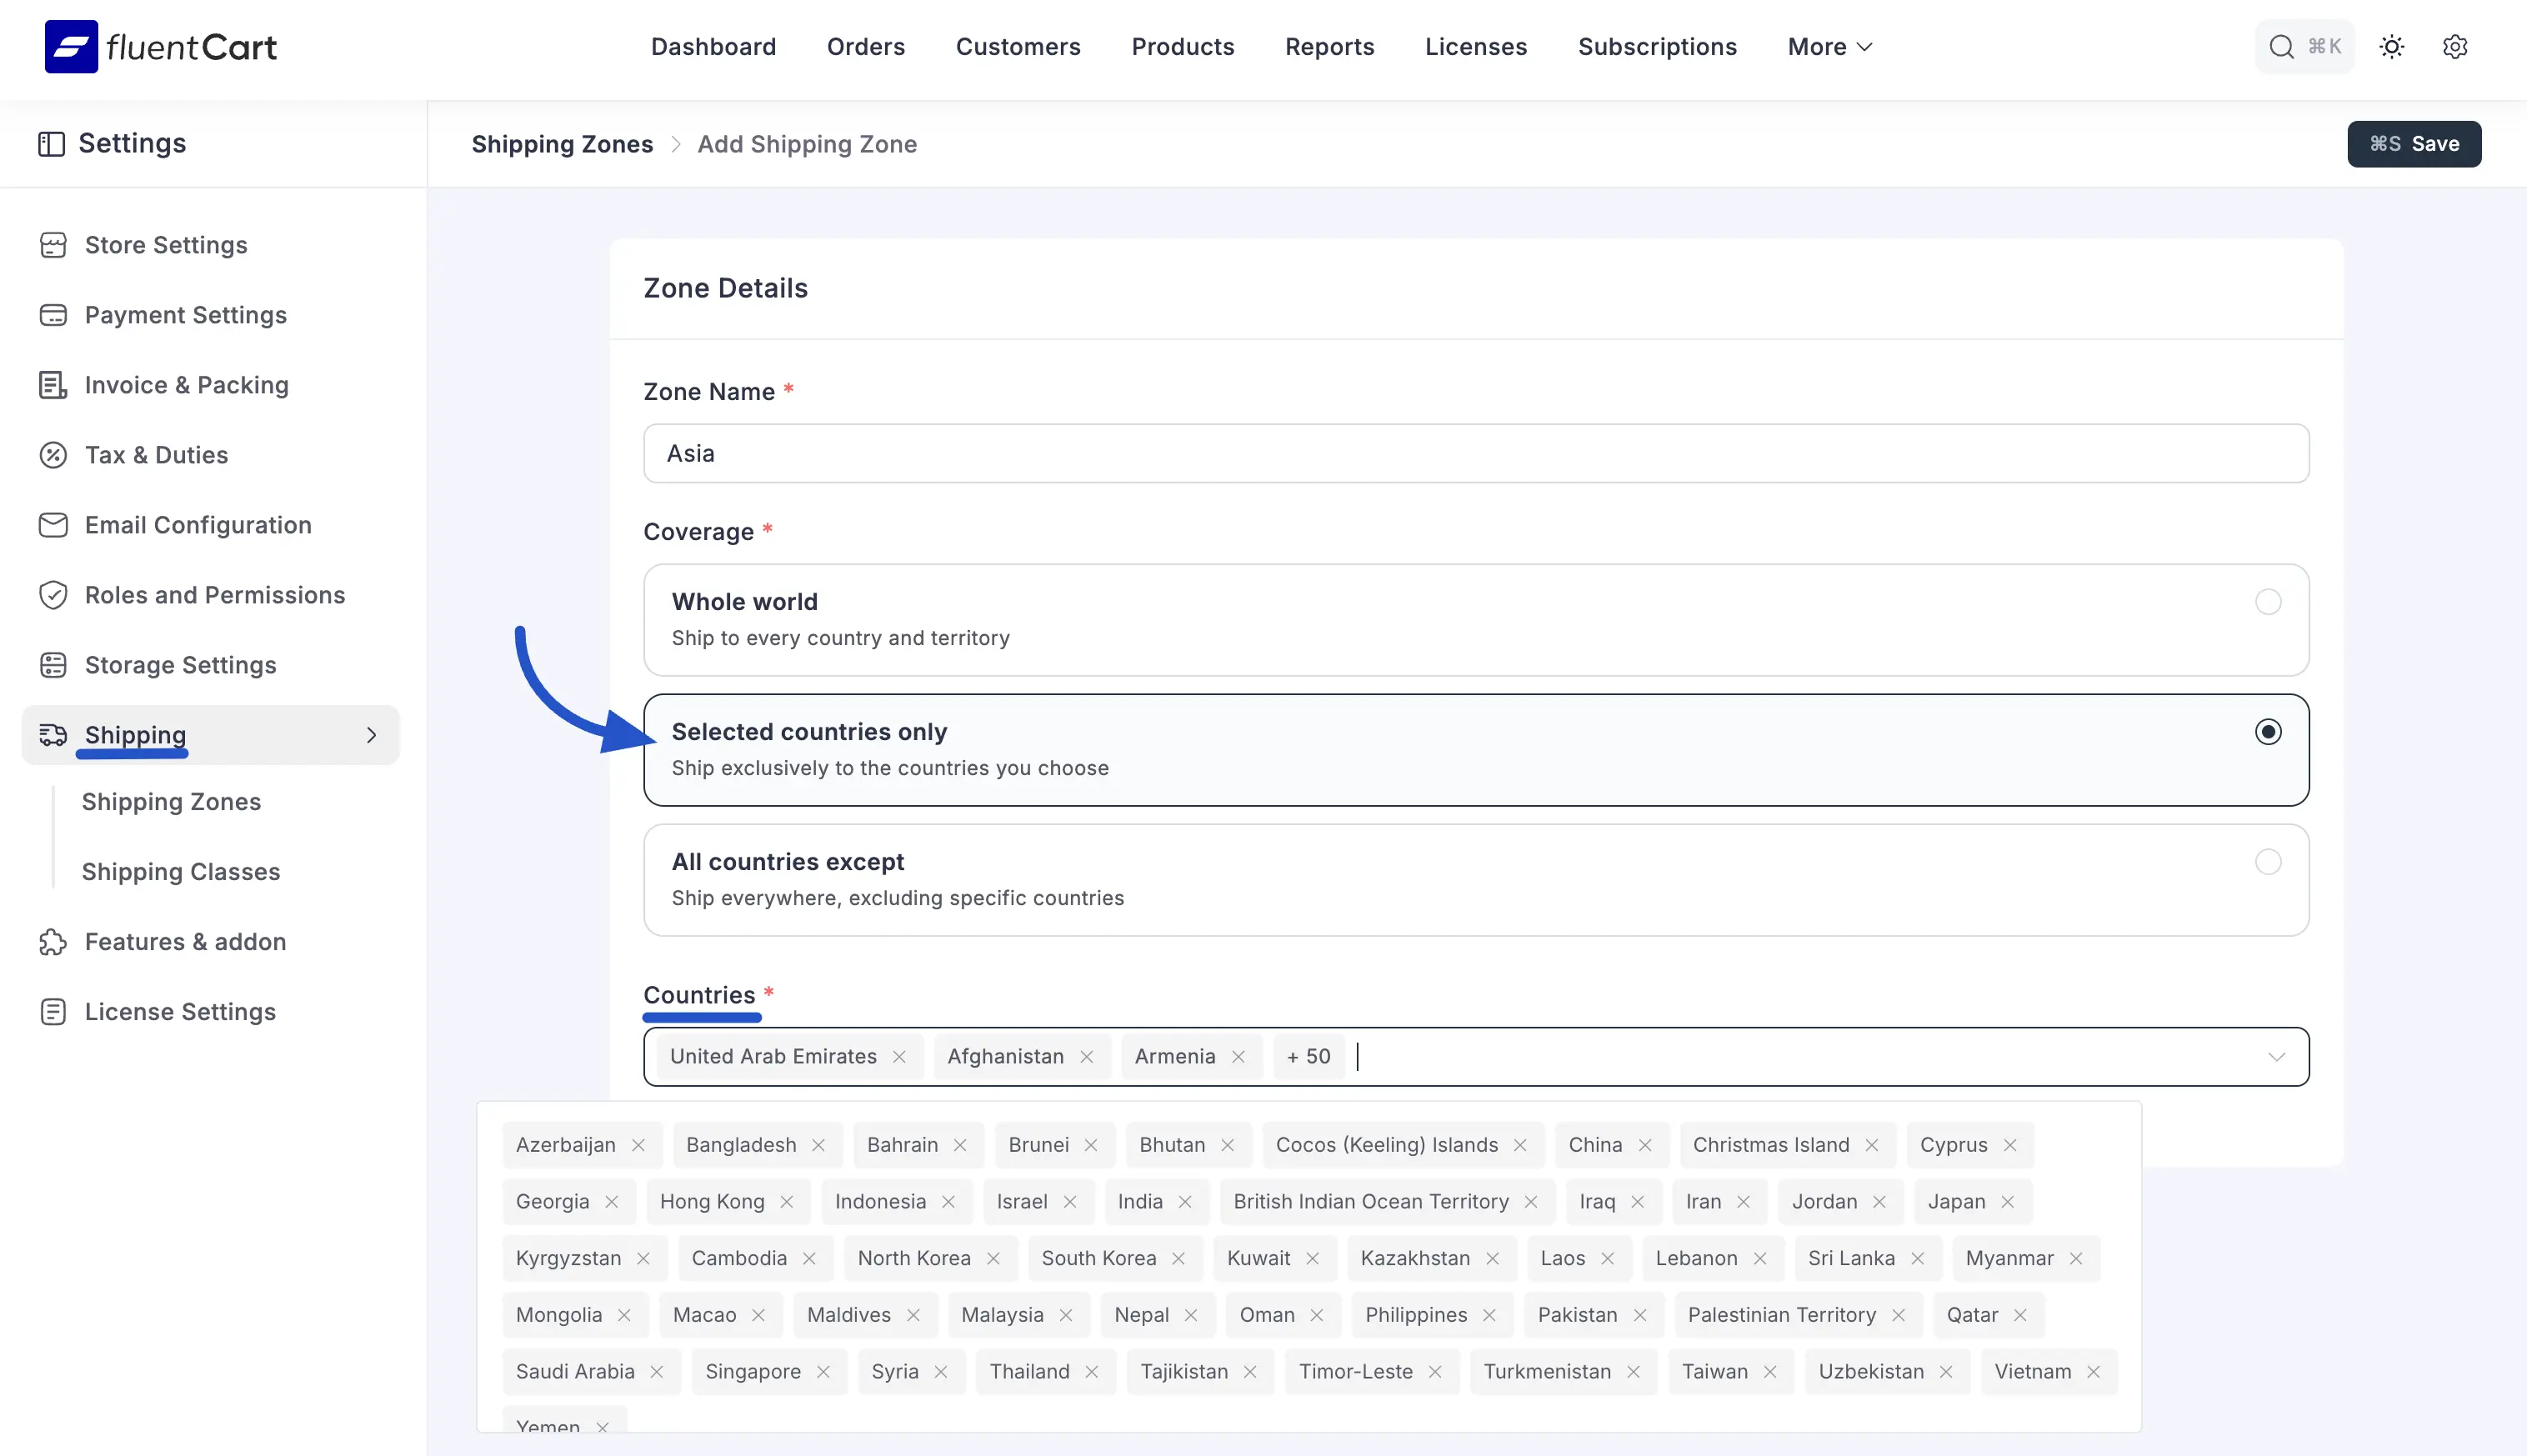
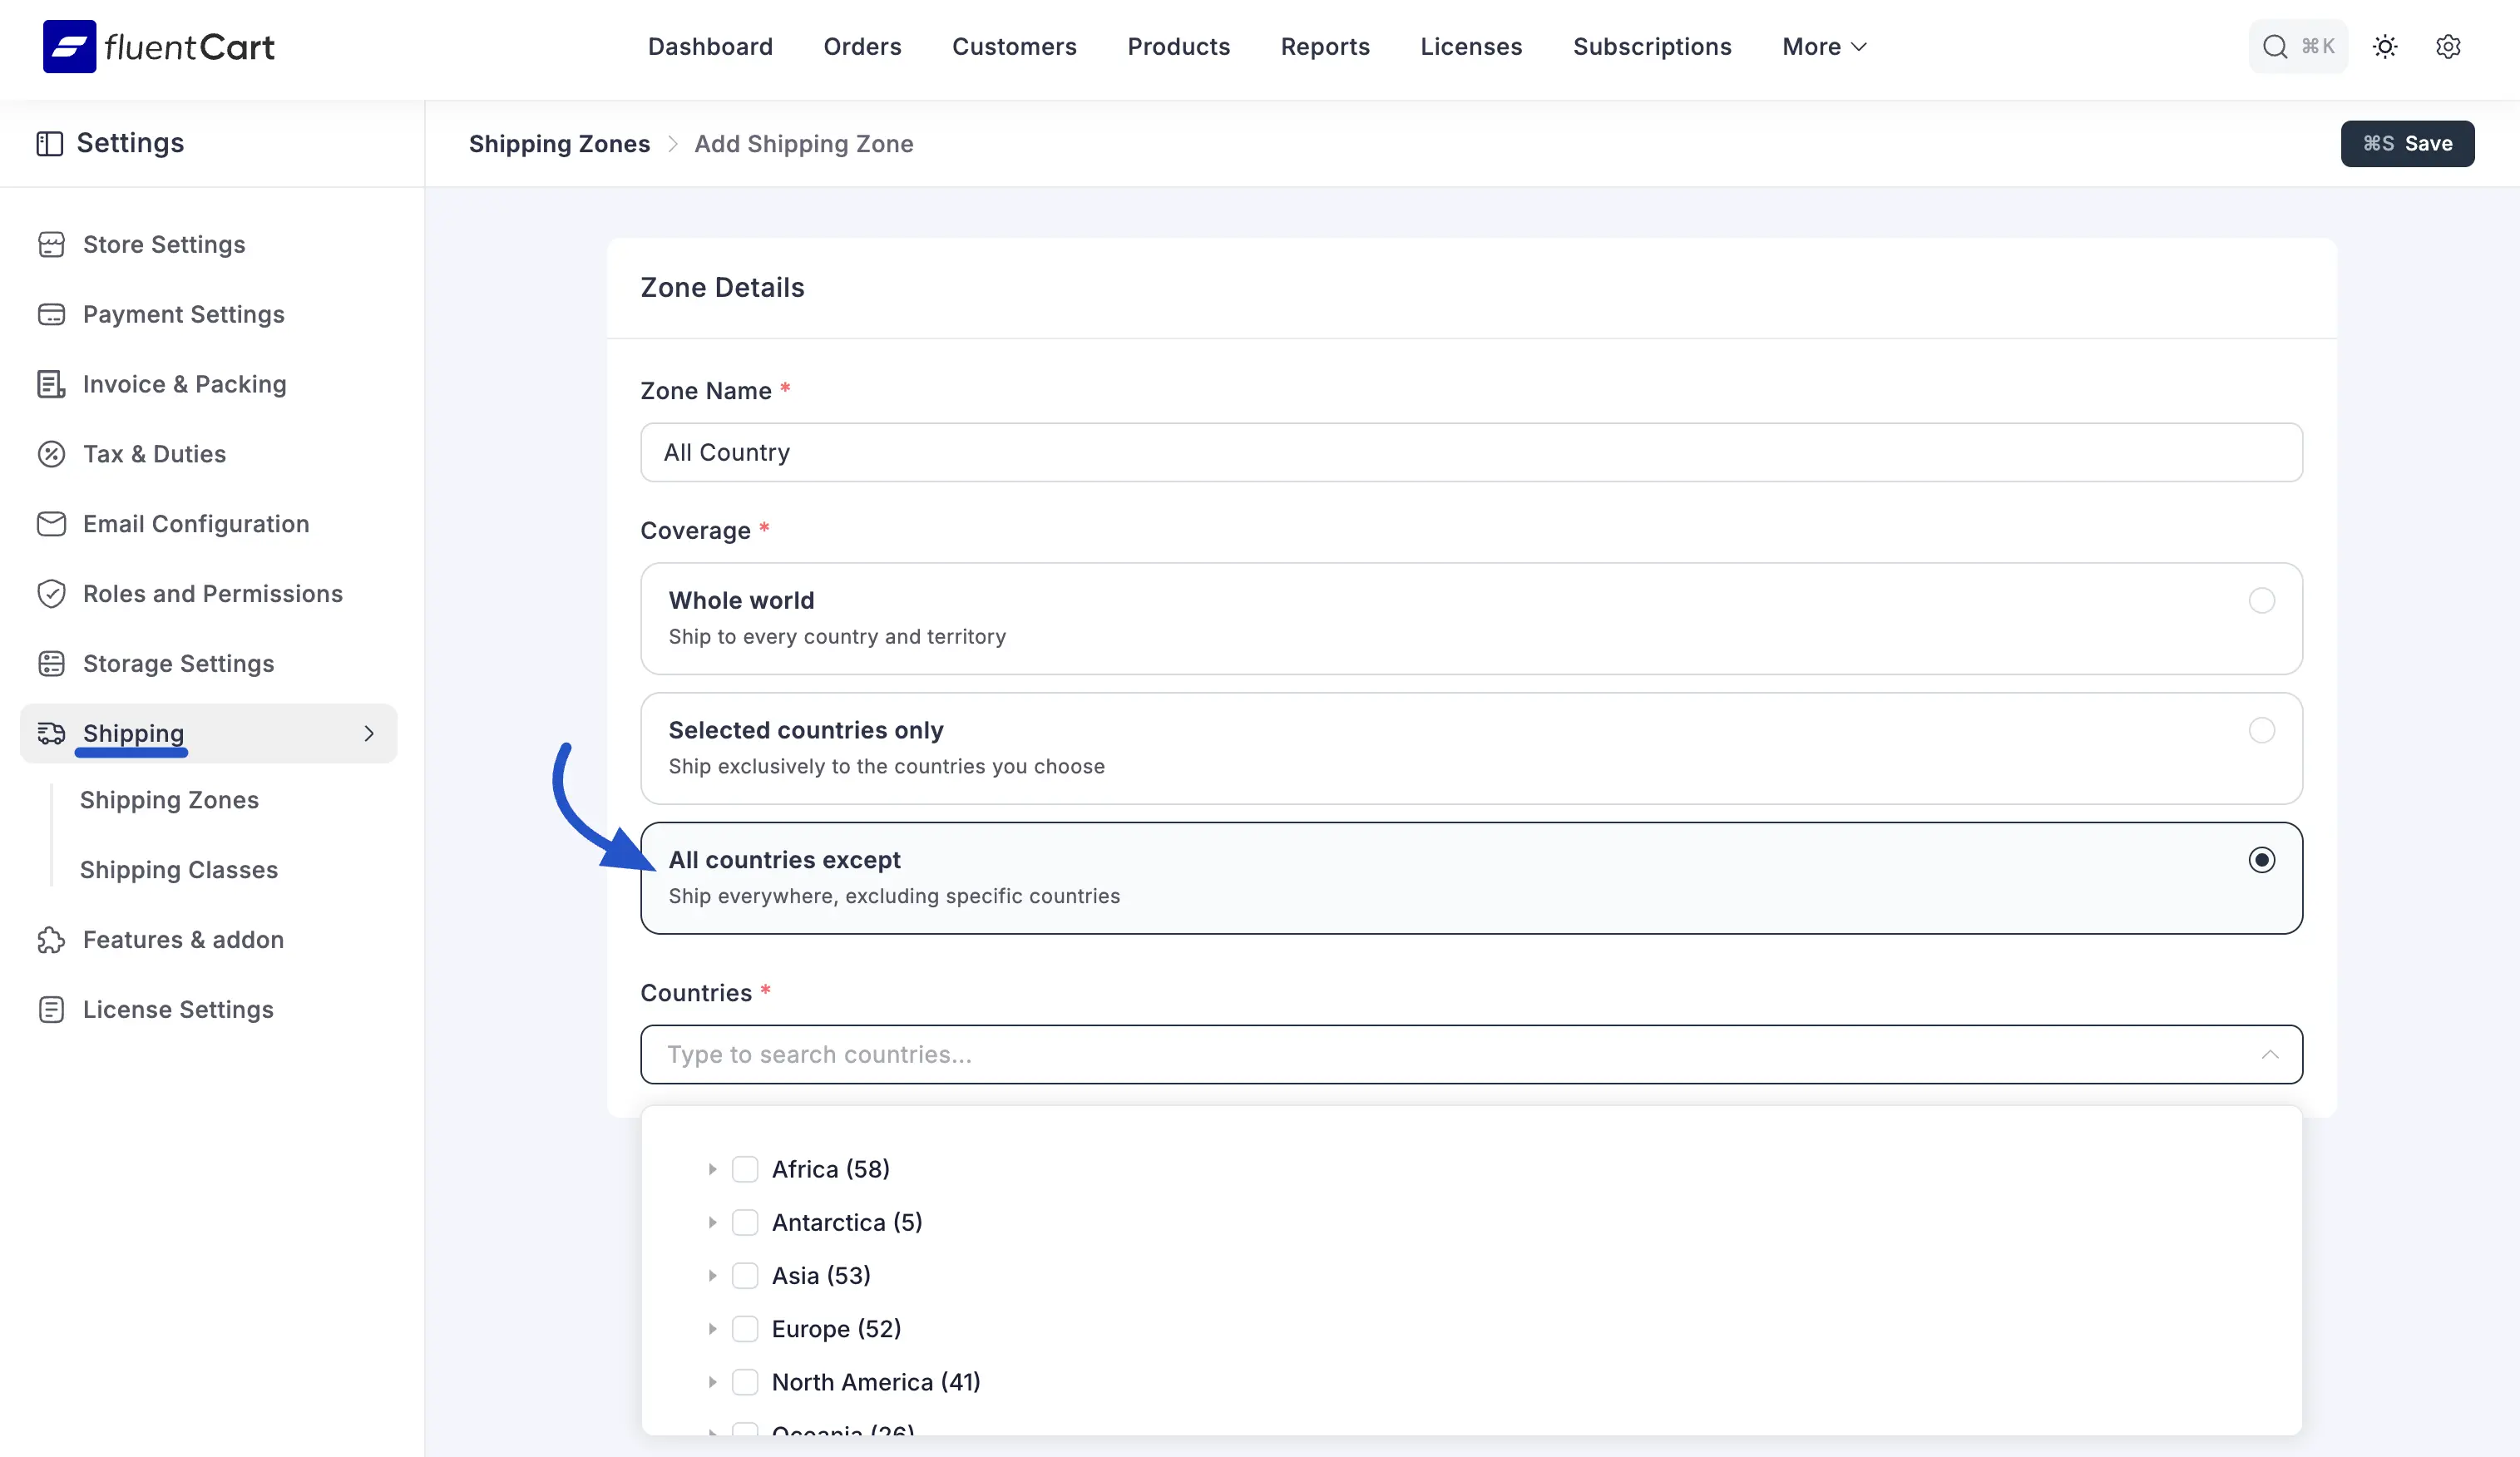
Coverage: This powerful setting determines exactly which countries belong to this shipping zone. You have three flexible options to choose from:
- Whole world: Select this if the shipping methods in this zone apply globally to every single country and territory.
- Selected countries only: Select this to ship exclusively to specific countries. A Countries dropdown box will appear below. You can search and check the boxes next to the specific countries you want to include (e.g., just the United States and Canada).
- All countries except: Select this if you ship globally but want to exclude a few specific places. Use the Countries dropdown box to search and select the regions where you do not want to offer these shipping methods.
4. Save Your Zone
Once you are happy with the name and the coverage regions you have configured, simply click the Save button at the top right of the screen.
Your new shipping zone will now appear in your list of zones, and you can proceed to add specific shipping methods and rates to it!
INFO: Customers will only see the shipping methods that are applicable to the zone their shipping address falls into during checkout.