Appearance
Store Settings
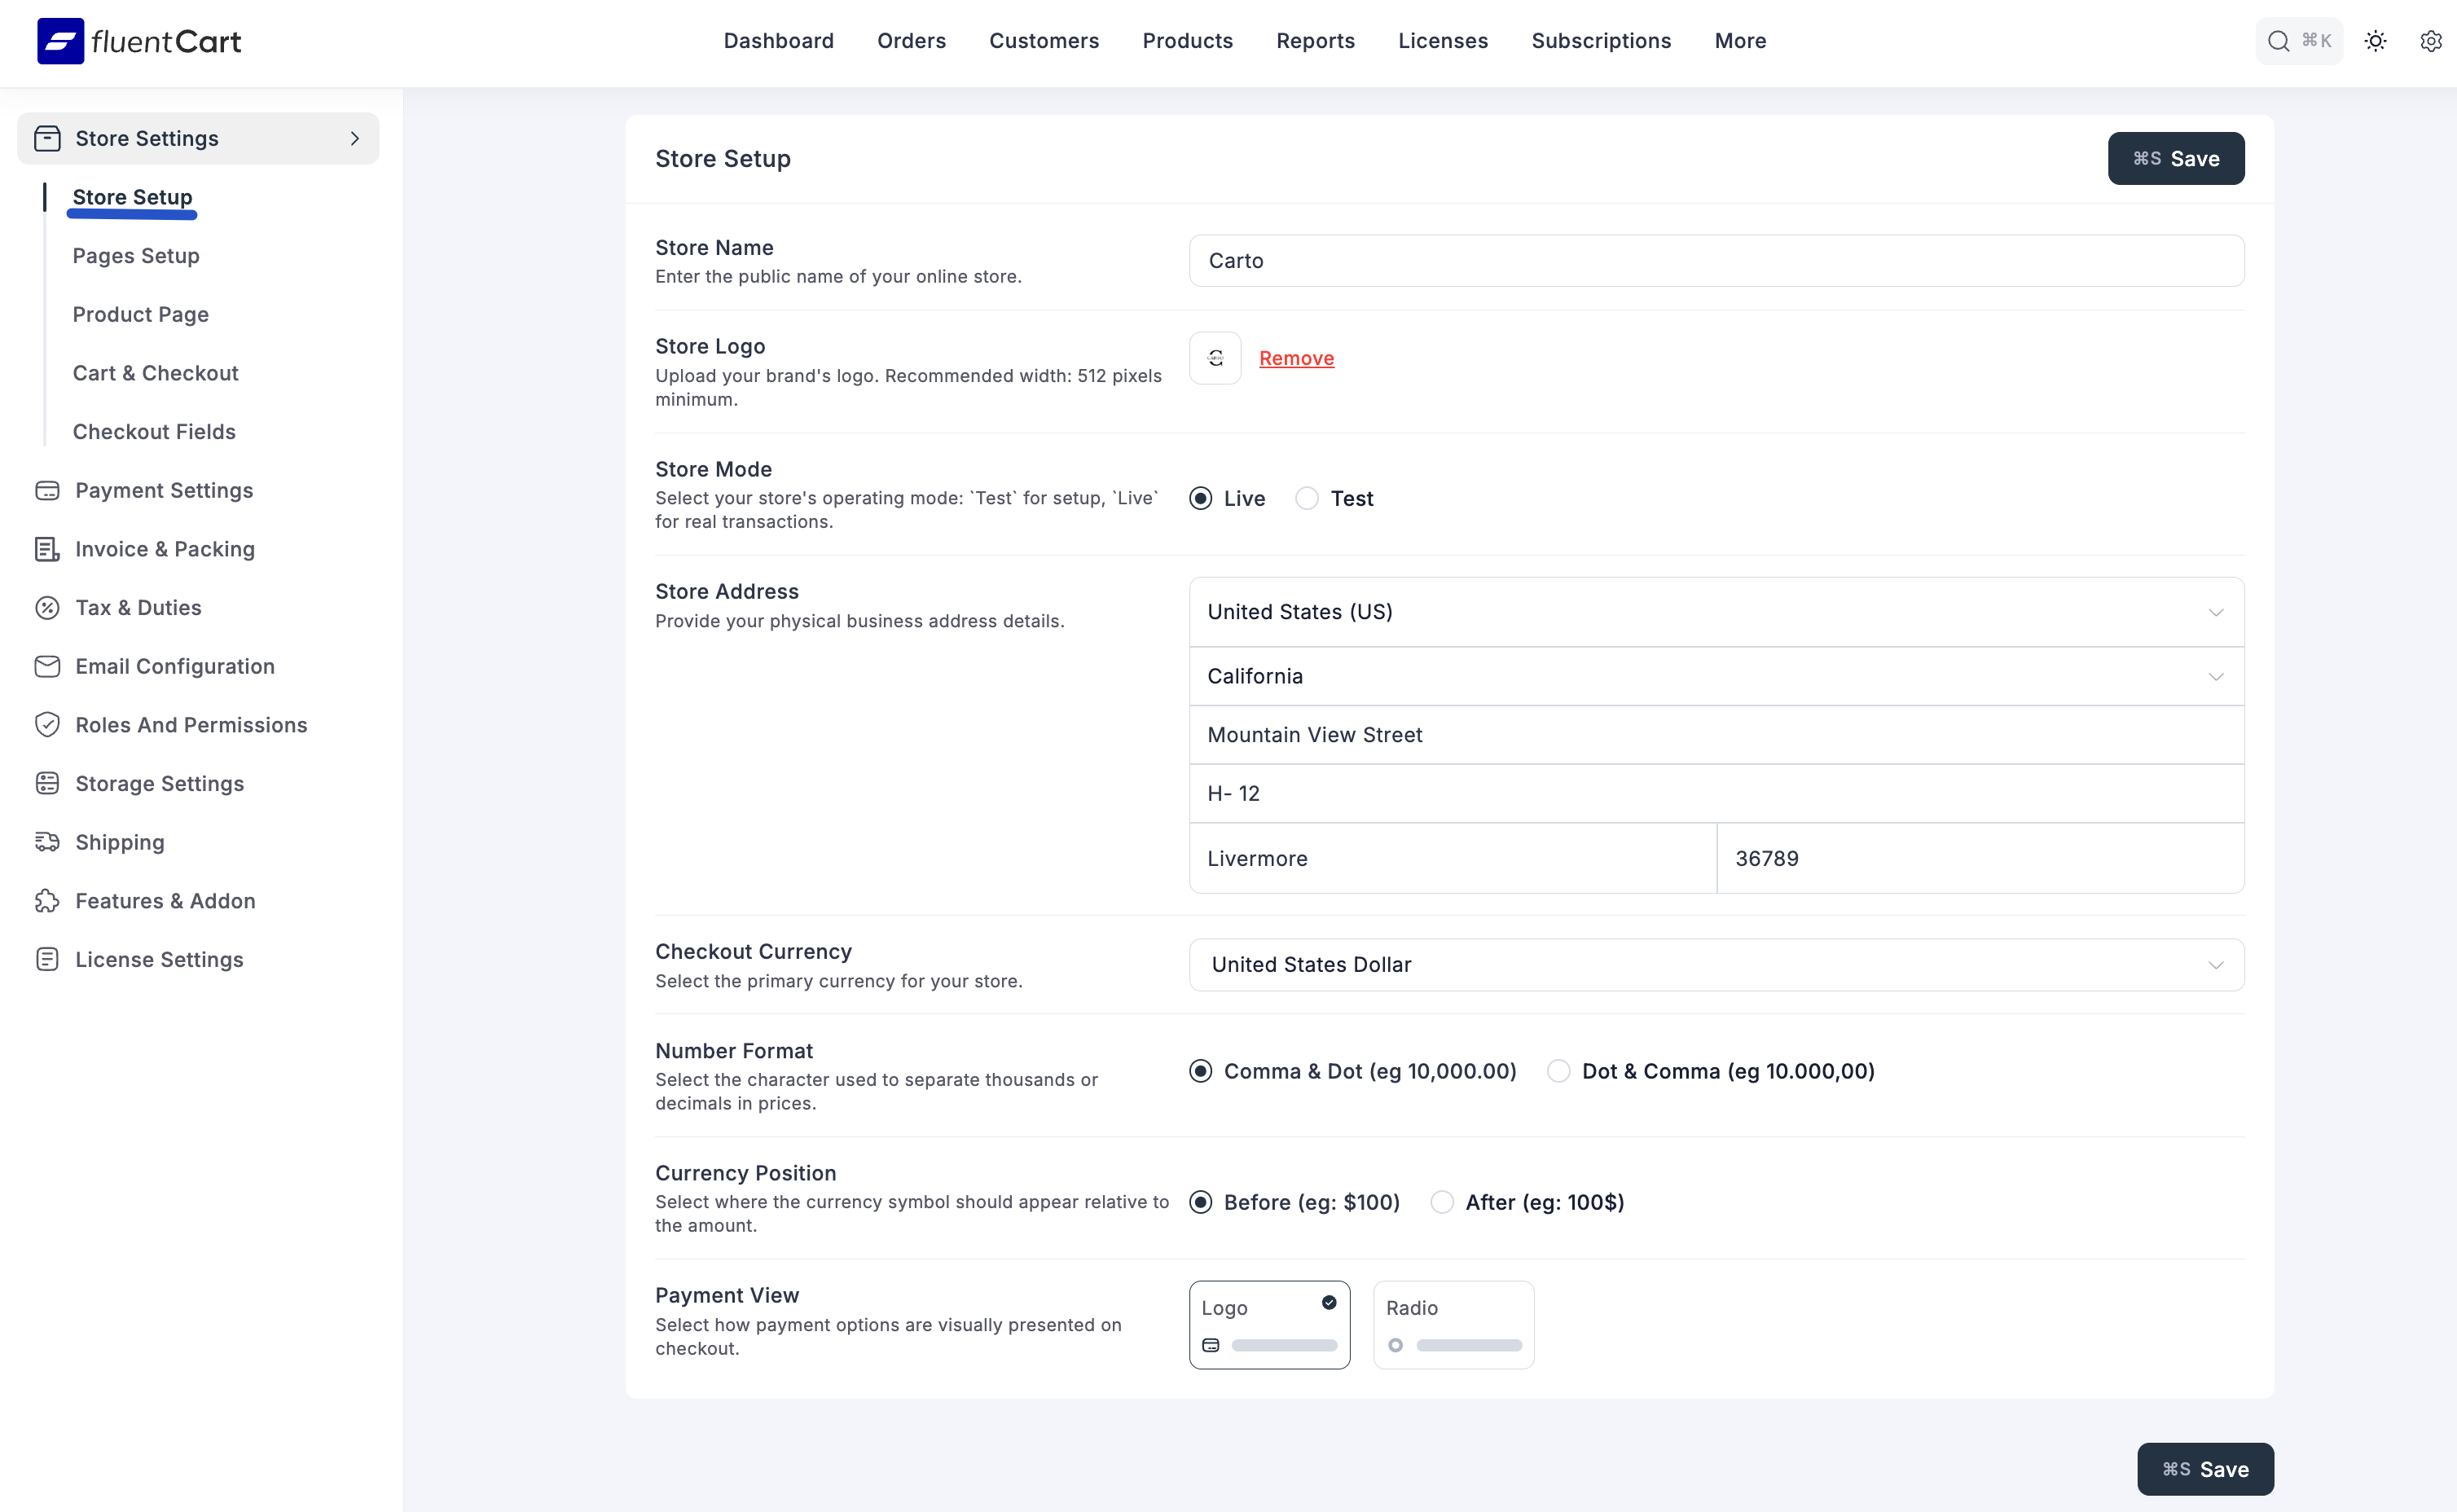
The Store Setup tab is where you configure the fundamental information about your FluentCart store: your store's name, logo, physical address, business details, currency, payment view, and units of measurement. These values feed into receipts, emails, checkout, shipping calculations, and tax handling, so it's the first screen to configure on a fresh install.
Accessing the Store Setup Tab
- From your WordPress dashboard, go to FluentCart > Settings.
- In the left-hand menu, click Store Settings. The group expands.
- Click Store Setup to open the tab.
Configuring Your Store Details
1. Store Name and Logo
- Store Name: The public name of your online store. This name appears in your storefront header, transactional emails, receipts, and reports.
- Store Logo: Click Add Media to upload your brand's logo. Recommended width is 512 pixels minimum. The logo is used in receipts, invoices, and other store documents.
2. Store Mode
Select your store's operating mode. This is a critical setting that controls whether your store processes real payments.
- Live: The standard mode for an active store. In Live mode, all transactions are real and your payment gateways process actual payments.
- Test: Designed for setup, development, and rehearsal. In Test mode you can place dummy orders without any money changing hands.
INFO
This setting is directly linked to your payment gateways. When you set the store to Live, your payment methods also switch to their live credentials. When you switch to Test, your payment gateways automatically use their sandbox credentials.
3. Store Address
Provide your physical business address. FluentCart uses this for PayPal verification, default shipping calculations, tax base lookups, and as the address displayed on receipts and other store documents.
- Country: Select your store's country from the dropdown. This is the default country for shipping and tax calculations.
- State / Region: Pick the state, province, or region from the dropdown. The options shown depend on the country you selected.
- Street Address: The primary street name and number for your business location.
- Apt, suite, unit: Any secondary address information such as an apartment number, suite, or unit.
- City: The city or town where your business is located.
- Postcode: The postal or ZIP code for your business address.
4. Business Details
Below the address fields you'll find the Business Details block — your legal business identity, used on receipts, invoices, and anywhere FluentCart needs to display official store information for compliance.
- Company Name: Your registered business name as it should appear on receipts and invoices.
- Legal Registration ID: Your company registration number (Companies House number in the UK, state filing number in the US, etc.). Shown on PDF receipts where local rules require business identification.
- Seller VAT ID: Your store's EU VAT registration number. Appears in PDF receipts and is rendered into the
{{order.store_vat_display}}smart tag for email templates. Use this field if you collect EU VAT — see Configuring European Union (EU) VAT for how the VAT ID ties into reverse-charge handling.
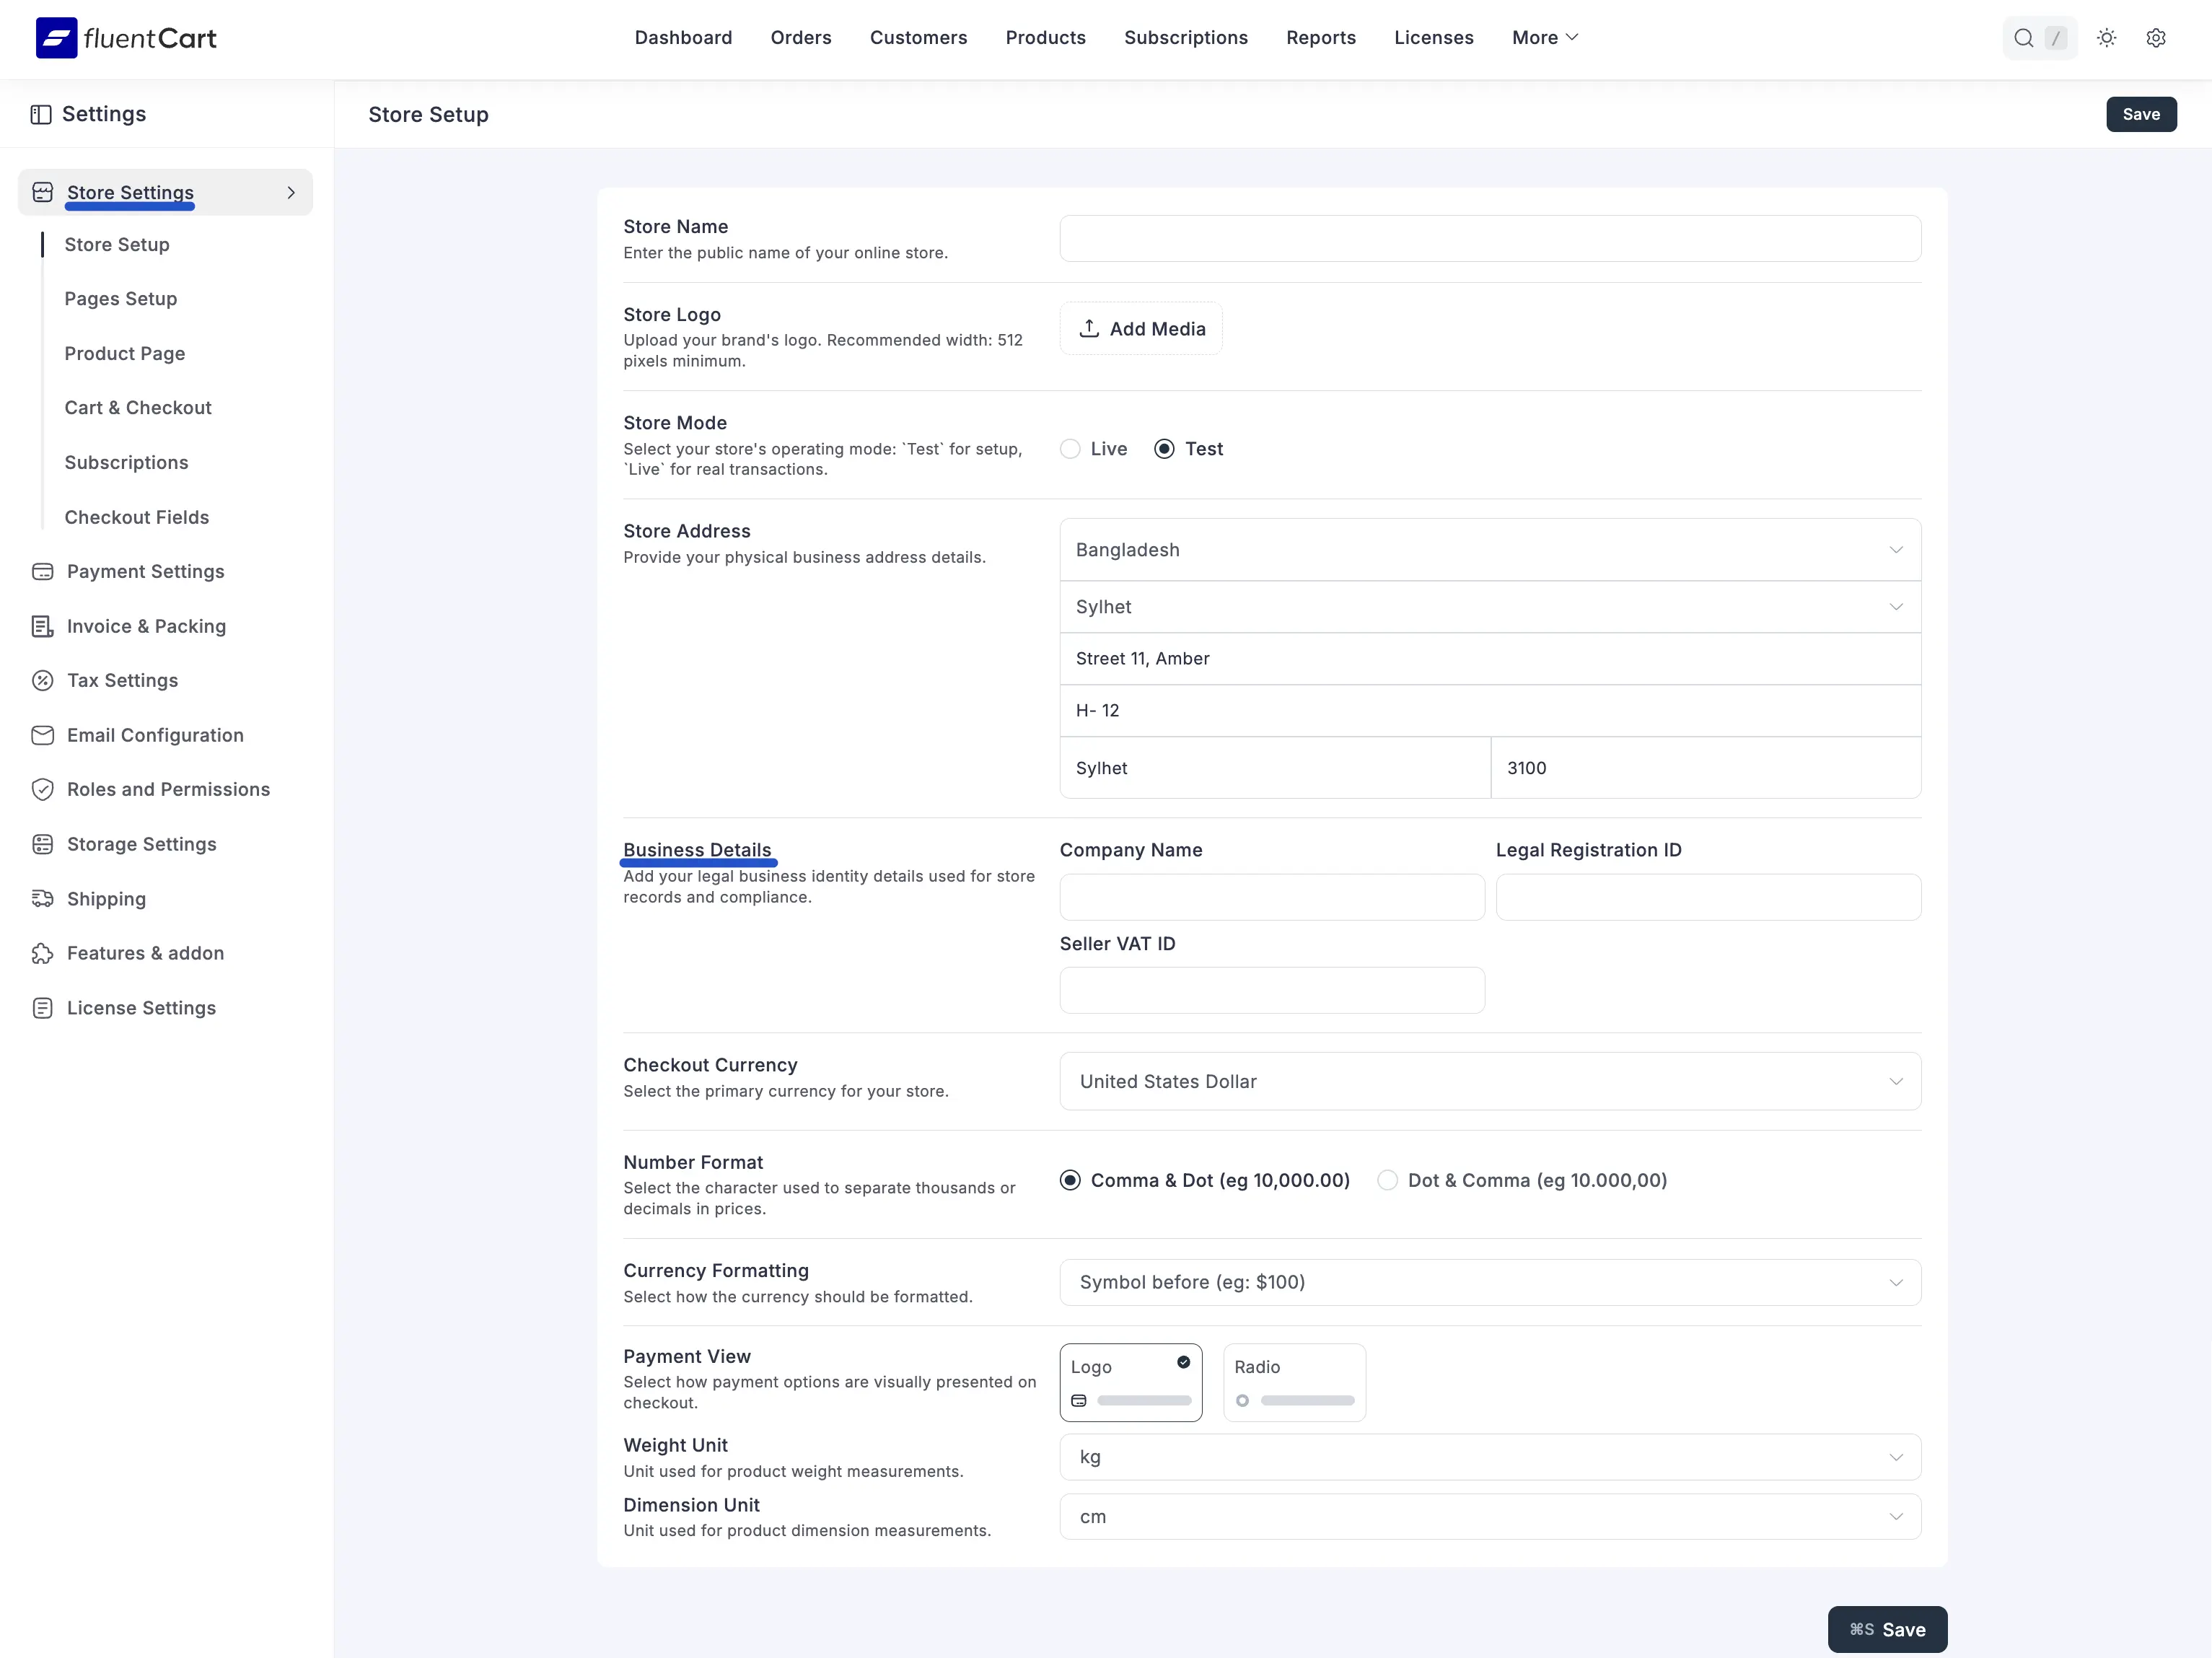
5. Currency
Configure the currency settings for your store's transactions.
- Checkout Currency: The primary currency your products are priced in and payments are processed in. Pick from the dropdown.
- Number Format: Controls how numbers (especially prices) are displayed. Choose between Comma & Dot (eg 10,000.00) or Dot & Comma (eg 10.000,00) to match your locale.
- Currency Formatting: Controls where the currency symbol or code appears relative to the amount. The dropdown includes options like Symbol before (eg: $100), symbol after, and currency code formatting.
6. Payment View
The Payment View setting controls how payment methods appear to customers on the checkout page. Pick between two visual styles:
- Logo: Displays each payment method as its brand logo (for example, the PayPal logo rather than the word "PayPal"). Best for visually rich checkouts.
- Radio: Displays each payment method as a labelled radio button. Cleaner and more compact, useful when you want the checkout to stay text-driven.
7. Units of Measurement
These two units are used across the product editor, package definitions, and shipping calculations.
- Weight Unit: The unit used for product weight measurements. Choose from the dropdown (e.g.
kg,lb,g,oz). Setting this consistently ensures carrier rates and shipping labels stay accurate. - Dimension Unit: The unit used for product dimension measurements (length, width, height). Choose from the dropdown (e.g.
cm,mm,m,in).
INFO
Changing these units does not retroactively convert values you've already entered on existing products or packages. Pick the right units early in your setup so you don't have to re-enter measurements later.
Saving Your Settings
Click the Save button at the top right of the screen to apply your changes. You can also press Cmd+S (macOS) or Ctrl+S (Windows/Linux) to save without leaving the keyboard.