Appearance
Tax Configuration
The Tax Configuration screen is the control center for your store's tax behaviour. Here you decide whether tax is collected at all, how prices are interpreted (inclusive or exclusive of tax), which customer address is used for tax calculations, how the breakdown appears at checkout, and how VAT reverse-charge is handled for EU customers.
Getting these settings right is the foundation for accurate calculations everywhere else: rates, EU VAT, per-product overrides, receipts.
Accessing Tax Configuration
- From your WordPress dashboard, go to FluentCart > Settings.
- In the left-hand menu, click Tax Settings > Configuration.
INFO
You can also set the basics during the install Onboarding Wizard's Tax step. It writes to the same settings, so anything you choose there shows up here and can be edited later.
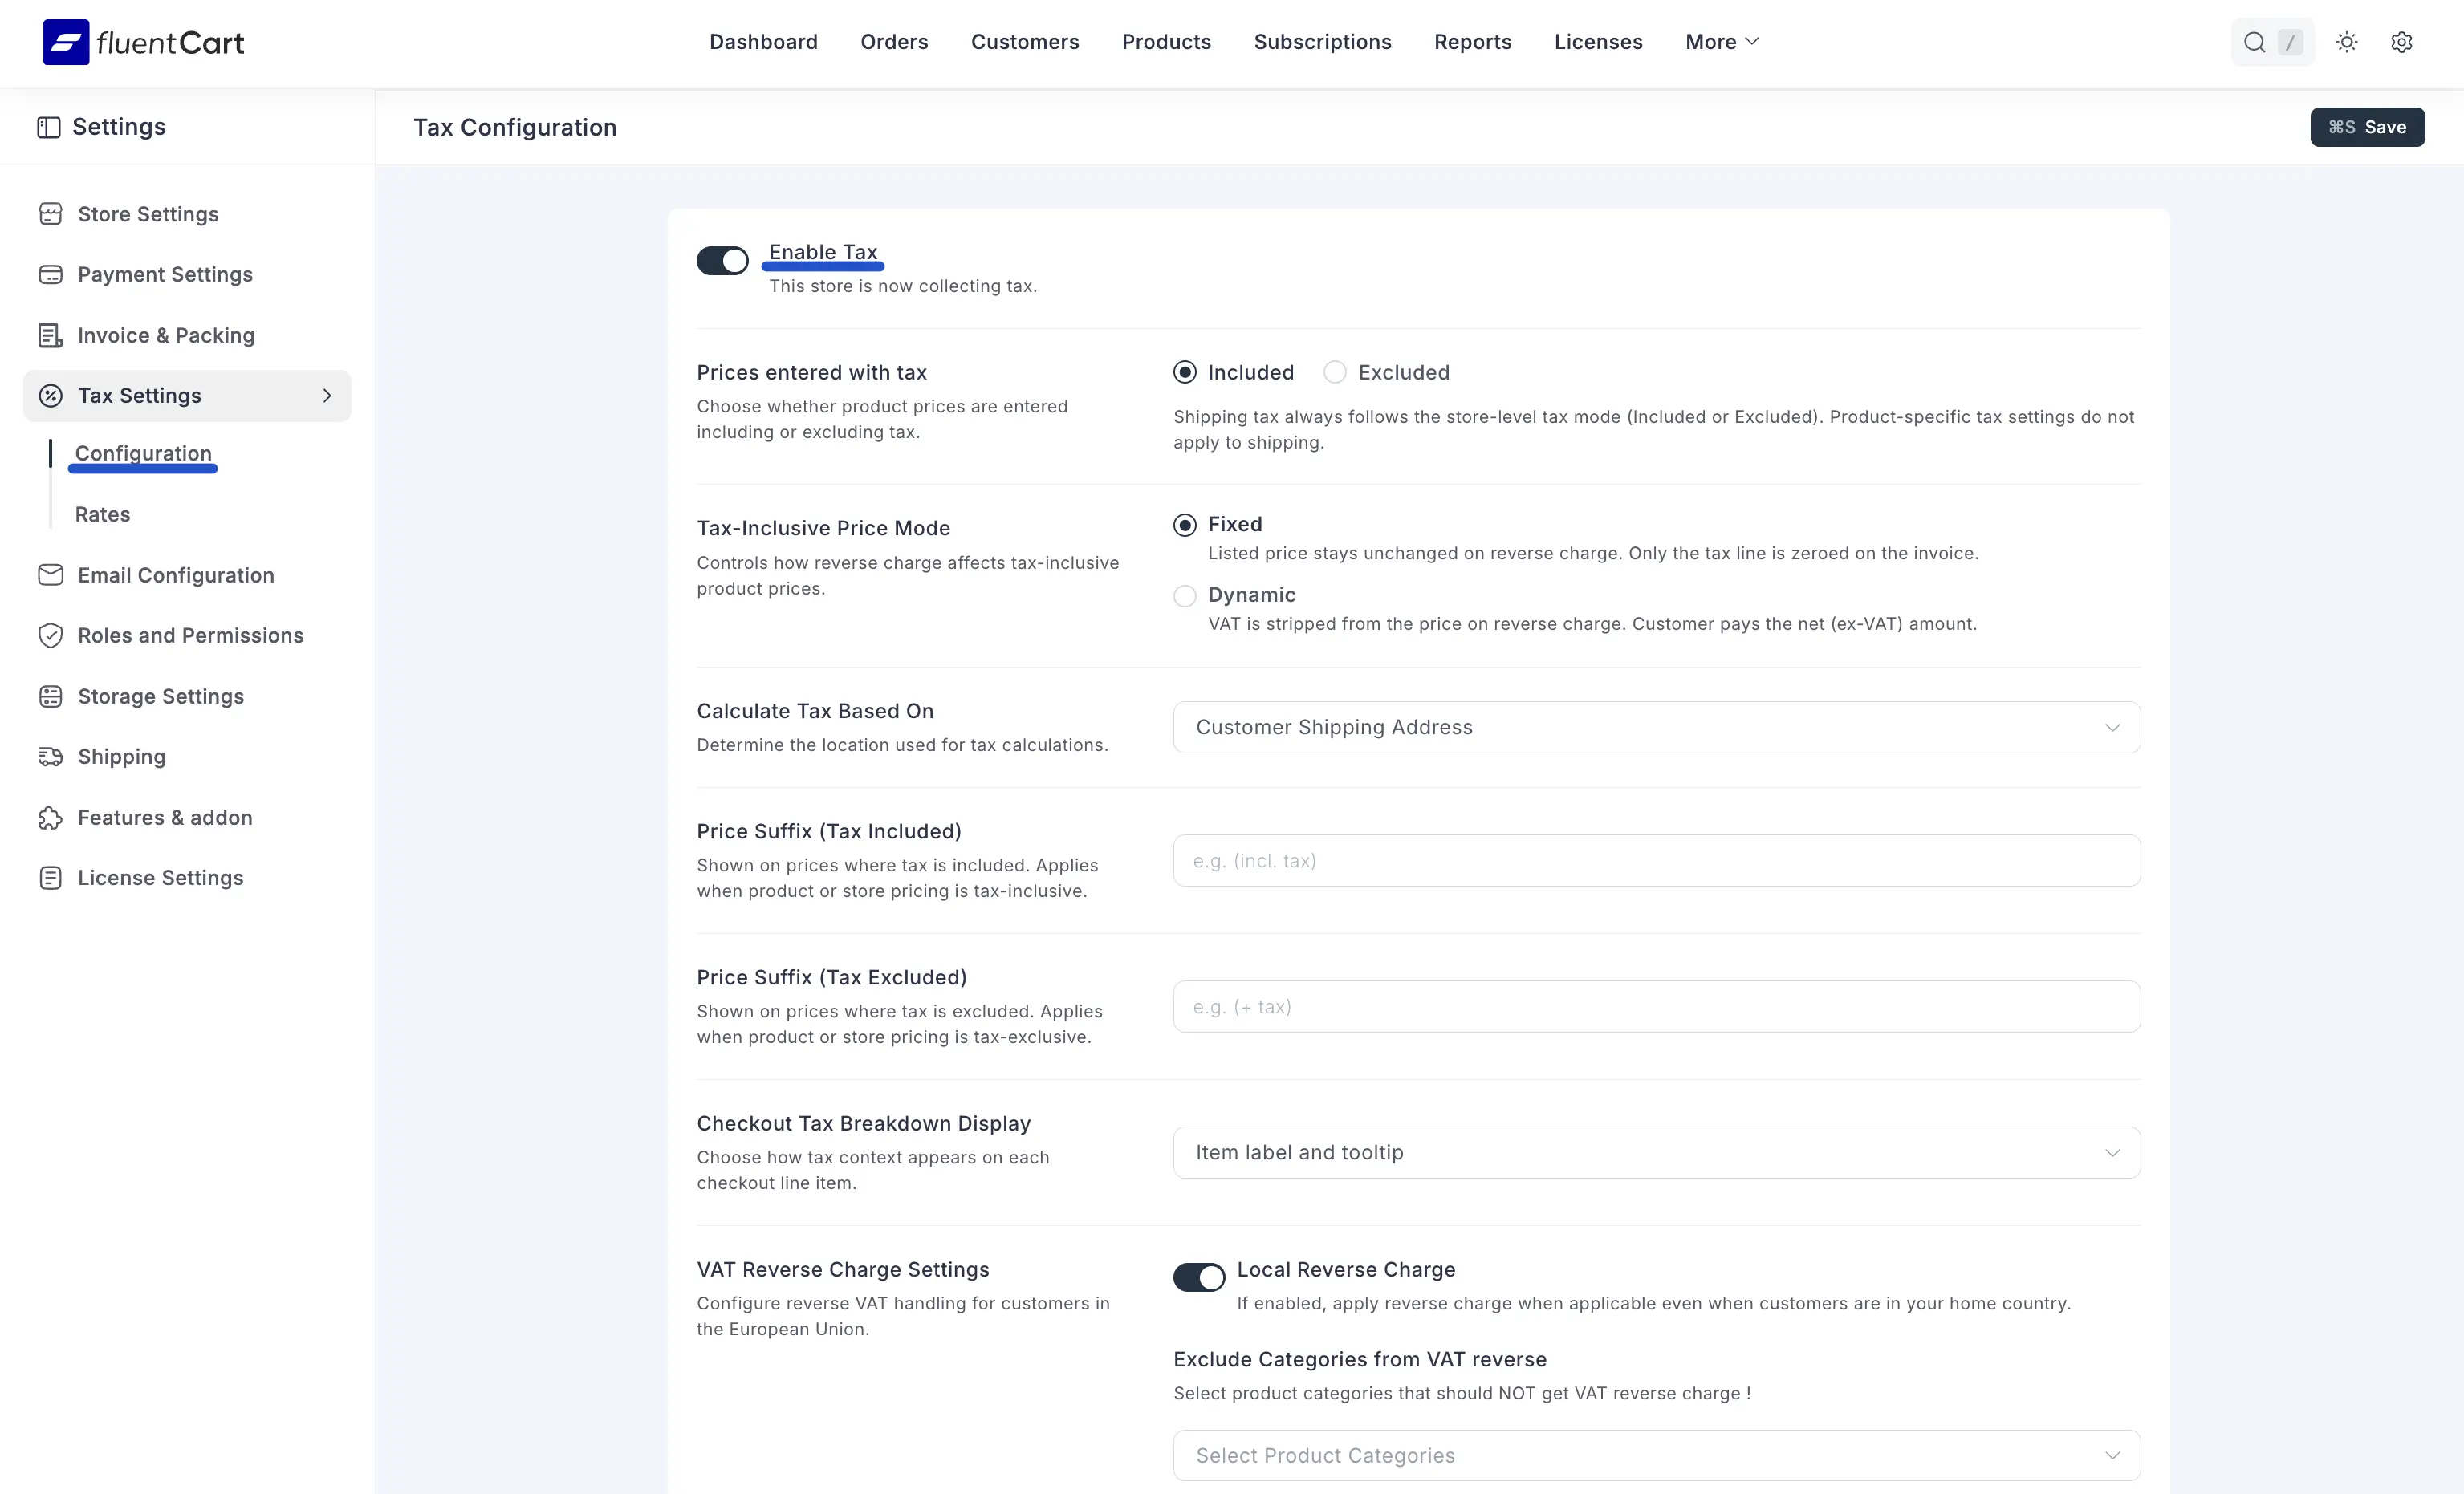
Tax Configuration Settings
This block holds the global rules that govern tax across your entire store.
Enable Tax
The master switch. When on, FluentCart applies your tax rules at checkout and a confirmation reads "This store is now collecting tax." When off, no tax is calculated and all per-variation tax controls are hidden.
Prices entered with tax
Tells FluentCart how your product prices are entered:
- Included: the price you set on a product already contains tax. At checkout, FluentCart splits the tax out for reporting, but the customer pays the same number you see in the product editor.
- Excluded: the price you set excludes tax. At checkout, tax is added on top.
This single choice has the biggest downstream effect on what customers see, so set it deliberately. Individual variations can override this; see Per-Variation Tax Settings.
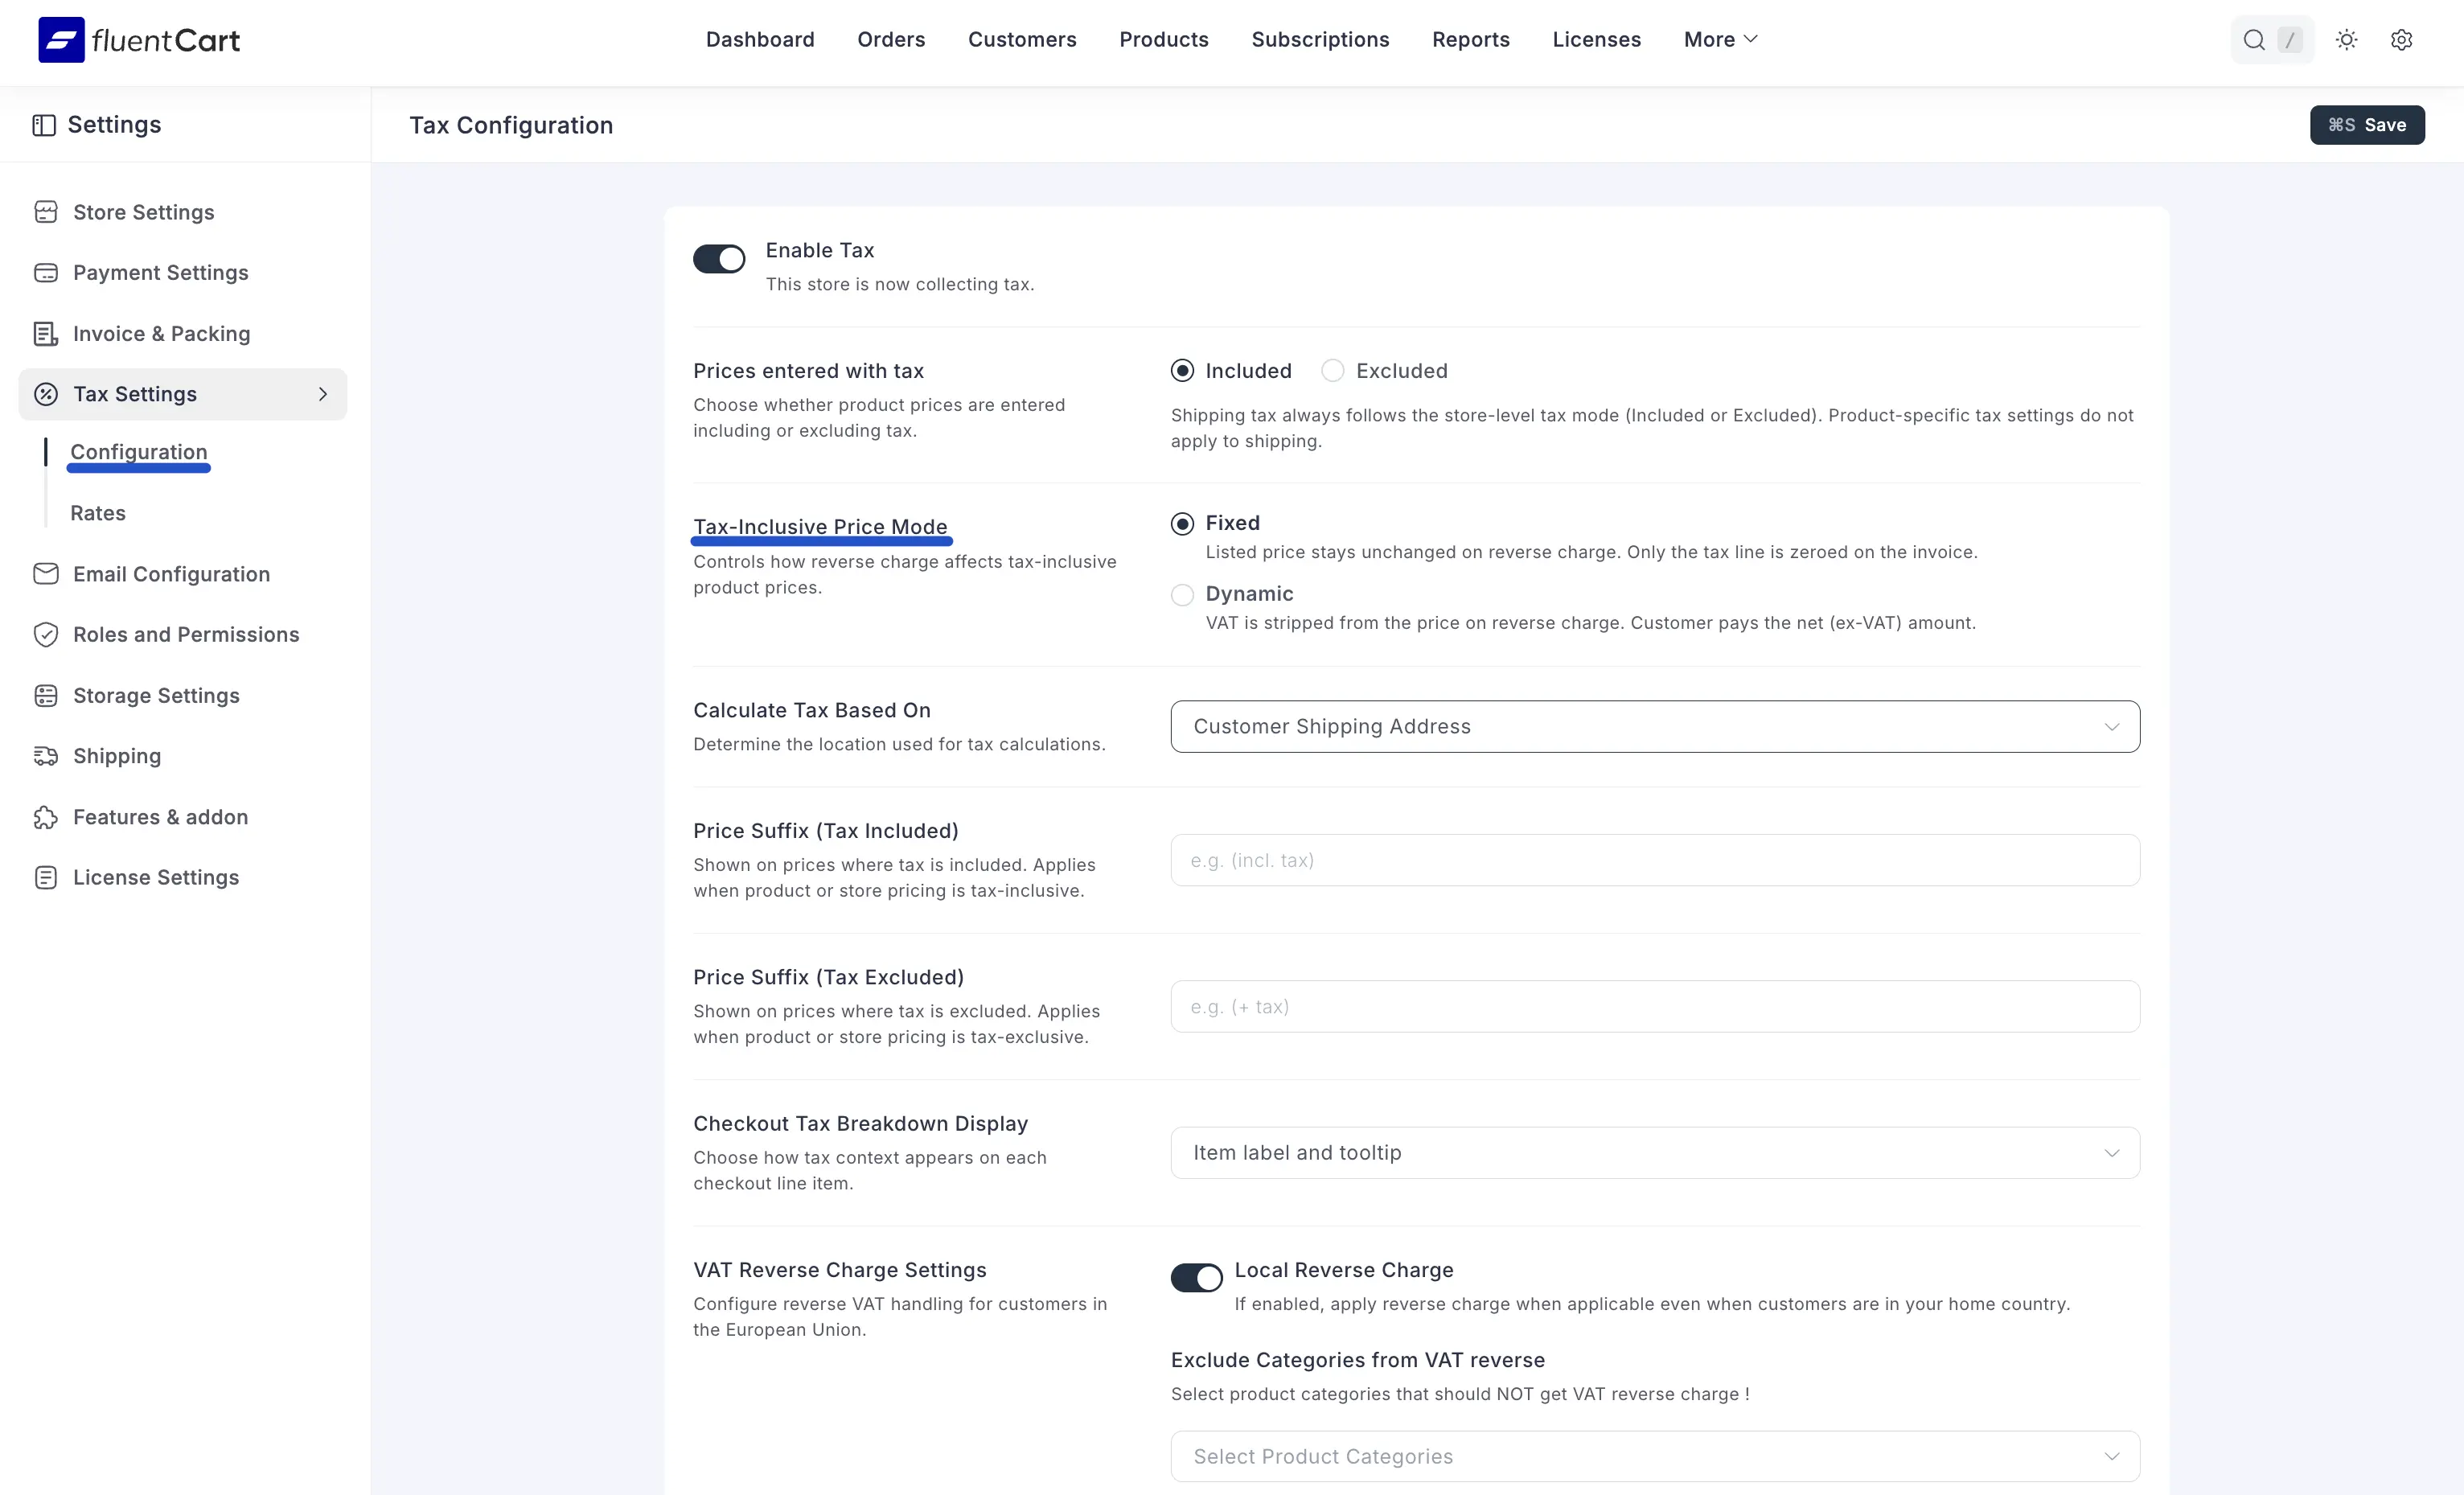
Tax-Inclusive Price Mode
Visible only when Local Reverse Charge is on. Controls how a reverse charge affects products whose price was entered tax-inclusive:
- Fixed: the listed price stays the same. The invoice shows the same total, but the tax line is zeroed.
- Dynamic: VAT is stripped from the price. The customer pays the net (ex-VAT) amount.
Practical example. A €120 inclusive price (€100 net + €20 VAT) sold to a B2B EU buyer with reverse charge:
- In Fixed mode, buyer is invoiced €120 with a €0 VAT line.
- In Dynamic mode, buyer is invoiced €100 net.
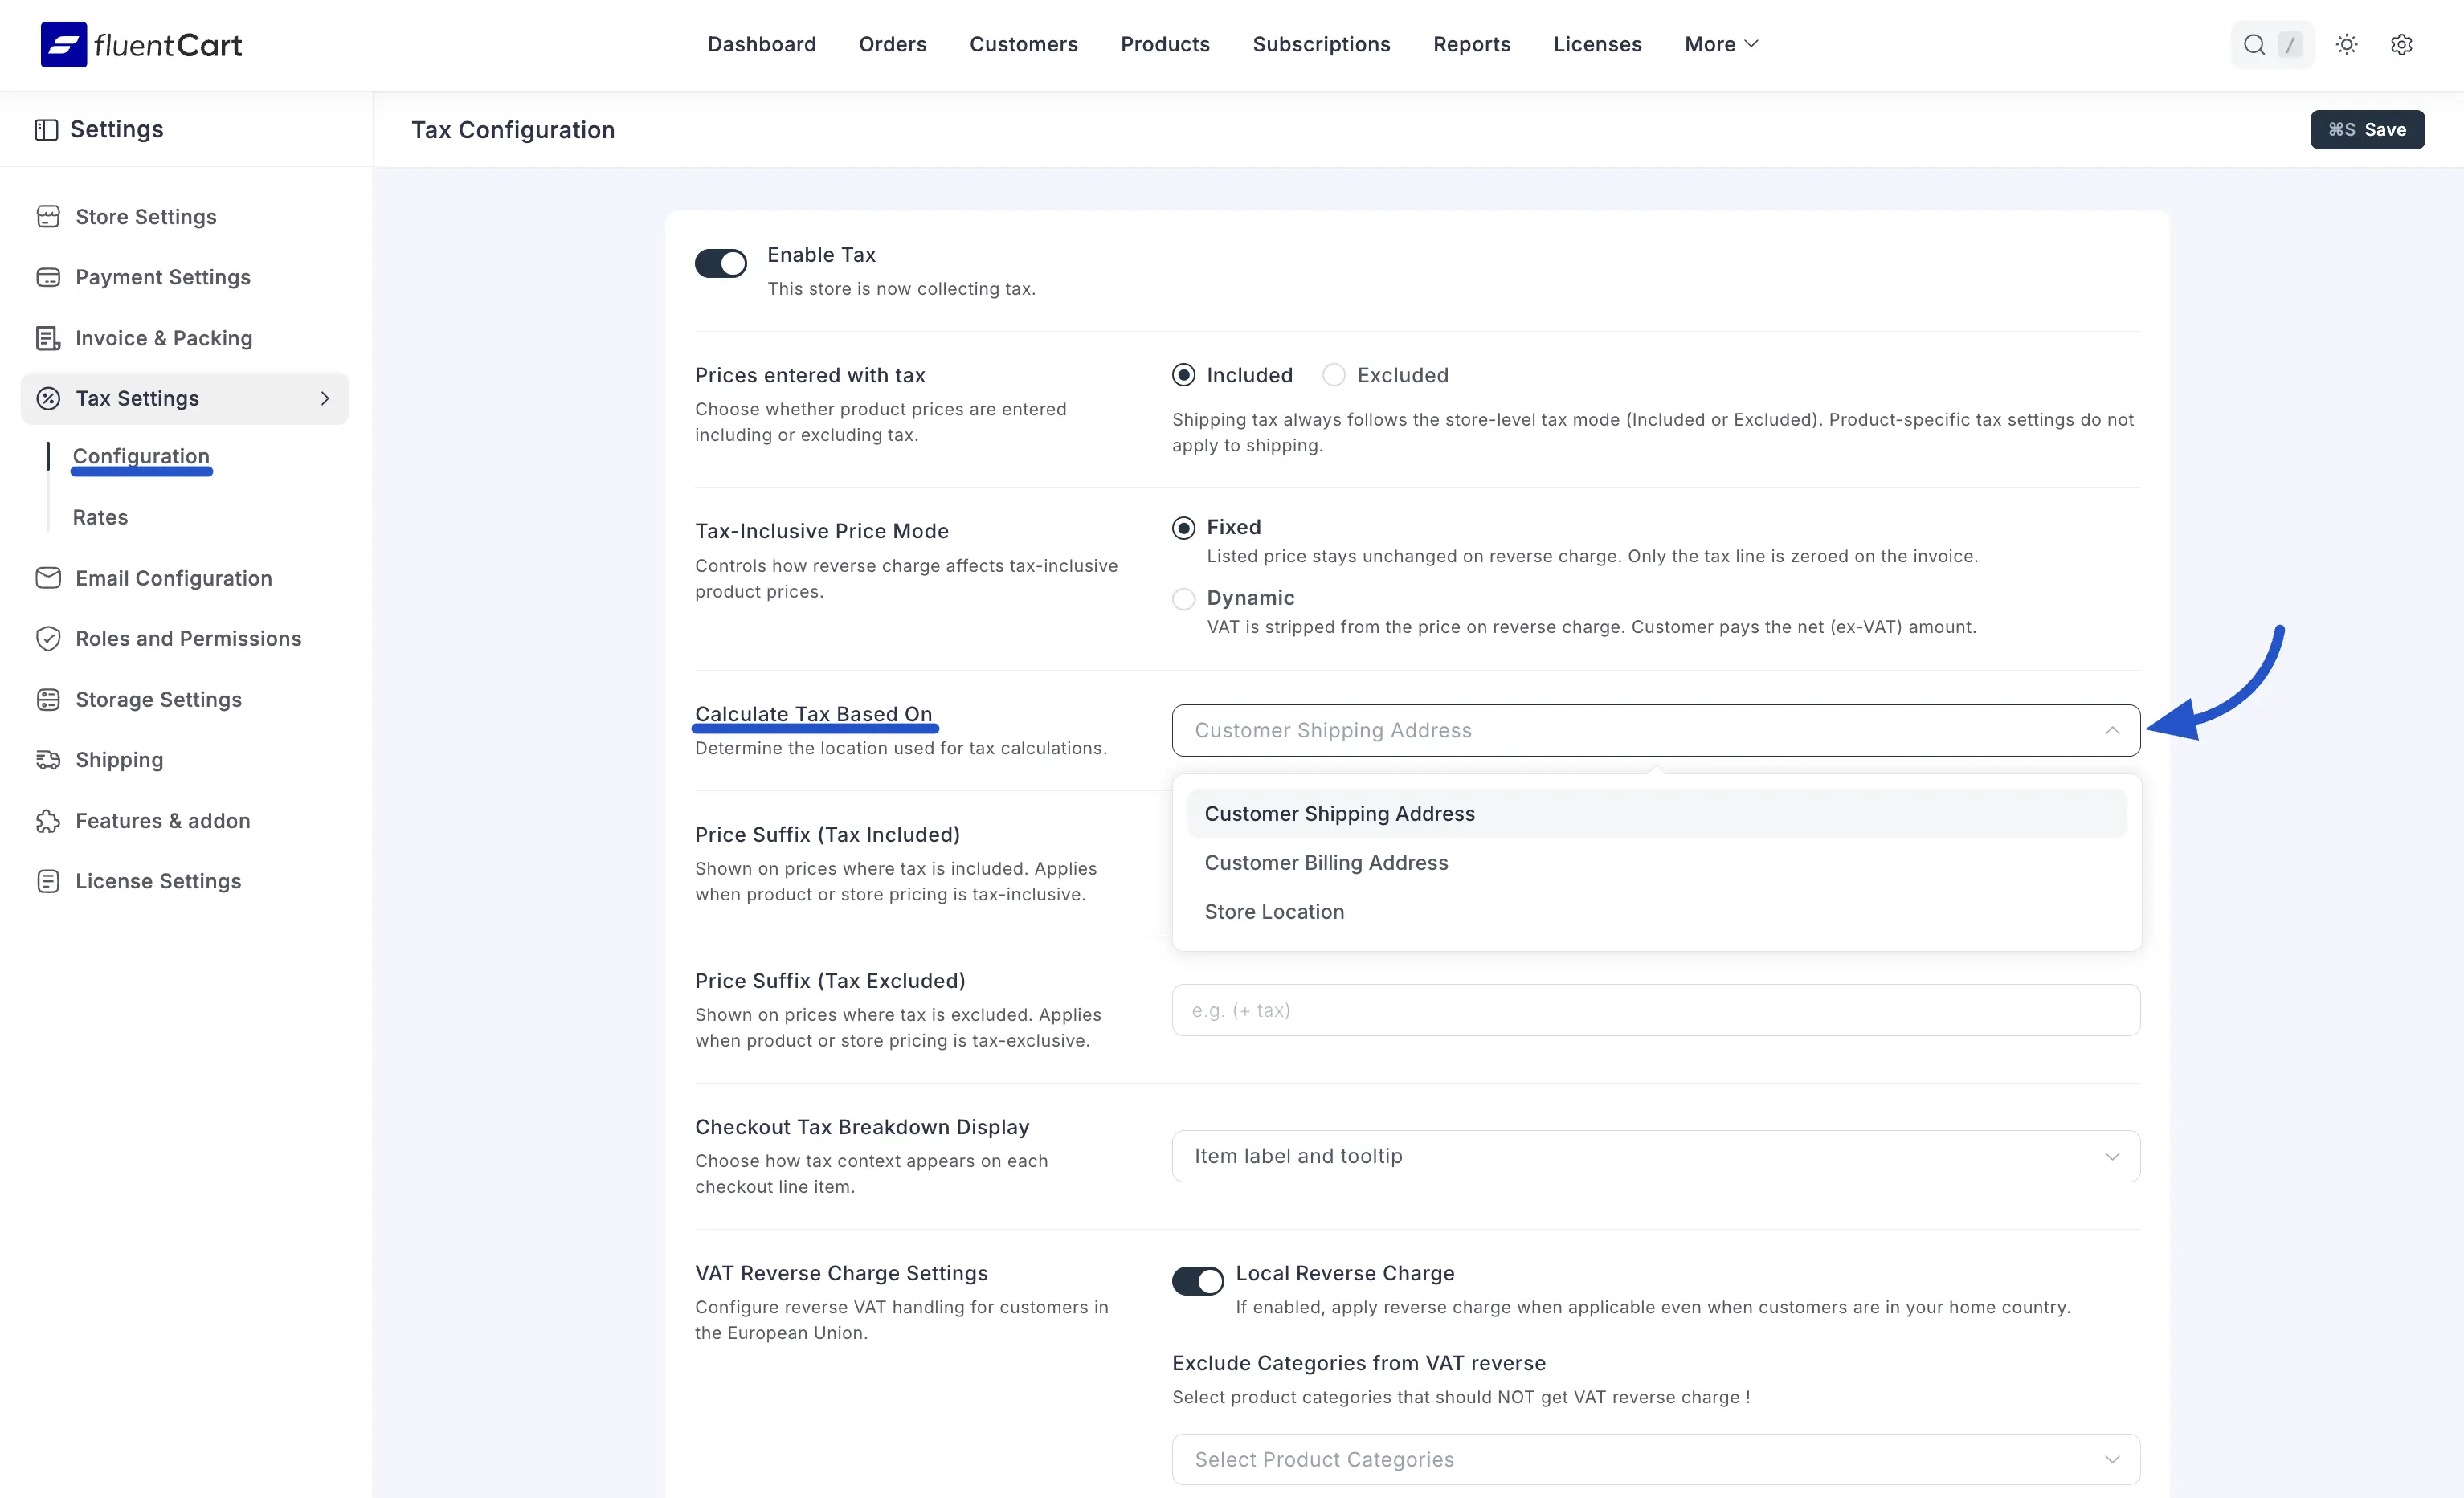
Calculate Tax Based On
Picks the address used to look up the right tax rate for an order:
- Customer Shipping Address (typical default for physical stores)
- Customer Billing Address (often correct for digital-only stores)
- Store Location (uses your store's address; common in jurisdictions that tax at origin)
Price Suffixes
Short pieces of text shown next to your prices on the storefront, to make tax handling transparent. There are two independent fields so you can show different copy depending on how each price was entered:
- Price Suffix (Tax Included): shown on prices that already include tax. Example:
(incl. tax). - Price Suffix (Tax Excluded): shown on prices that exclude tax. Example:
+ tax.
Leave either field blank to skip its suffix.
Checkout Tax Breakdown Display
Controls how the per-line tax context appears on the checkout summary:
- Item label and tooltip: shows the tax label on each line item and a hover tooltip with the breakdown.
- Item label only: shows just the label.
- Tooltip only: shows only the hover tooltip.
Choose the option that fits the busyness of your checkout layout.
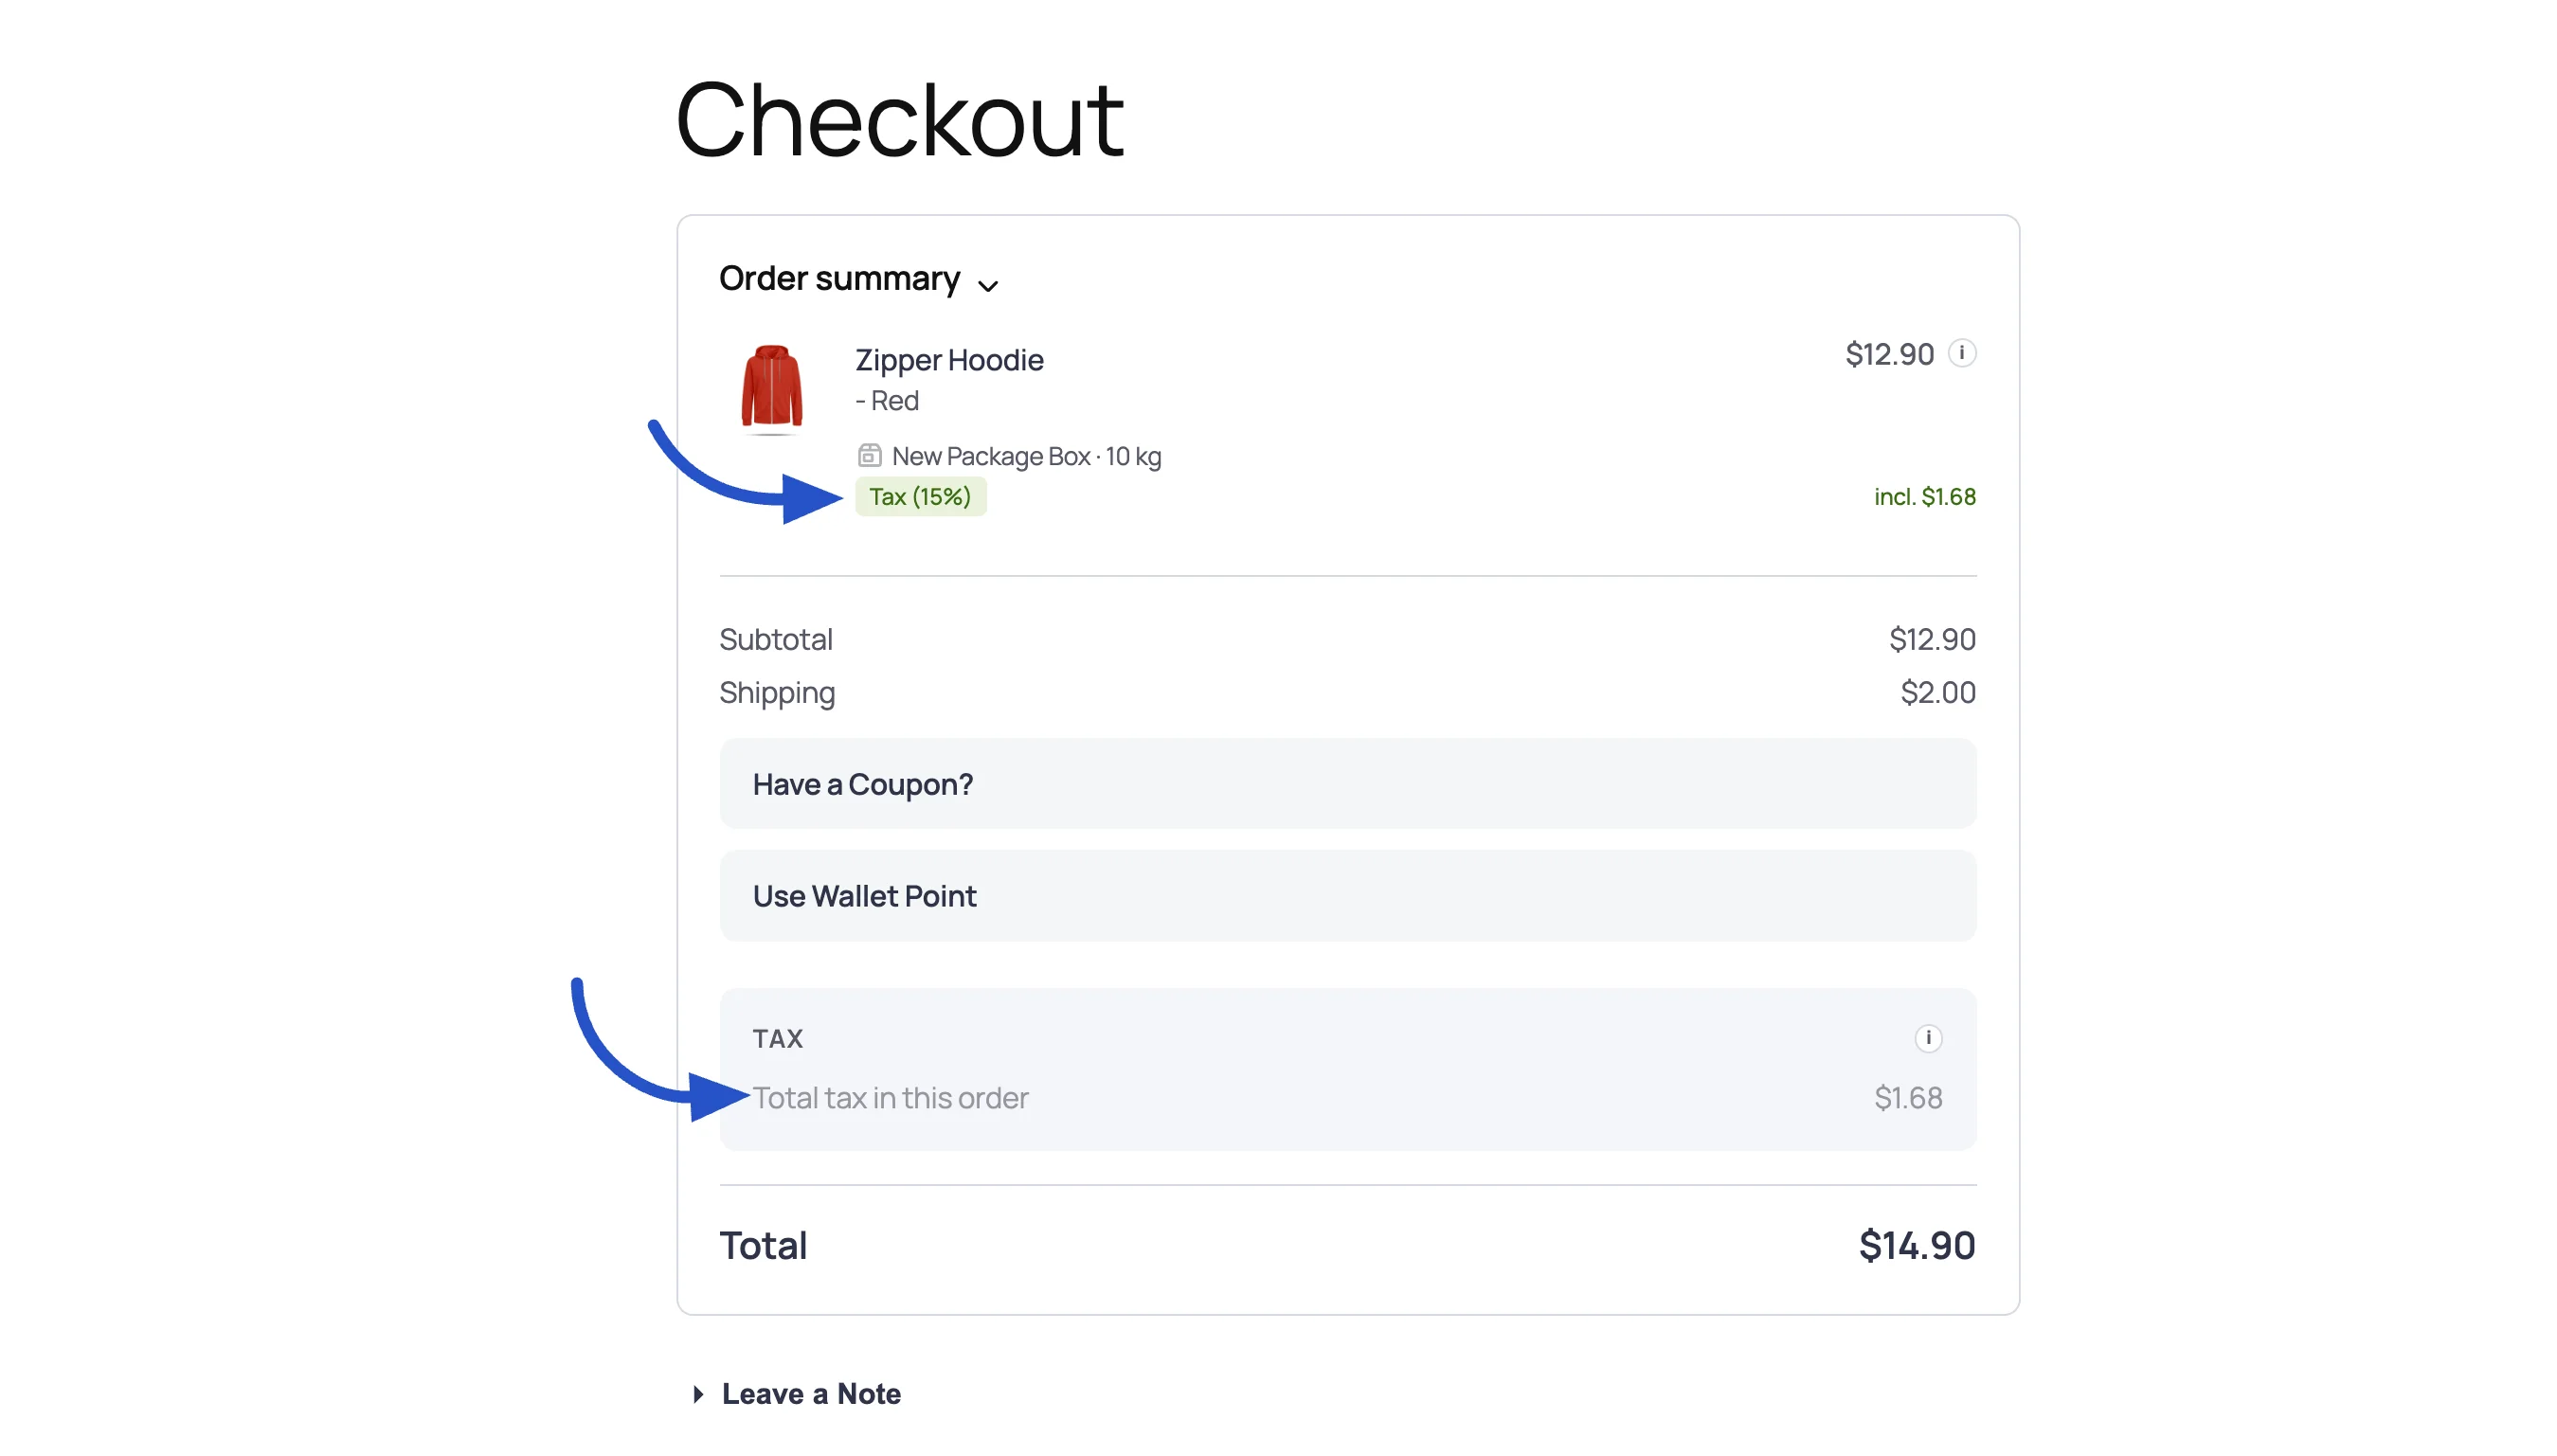
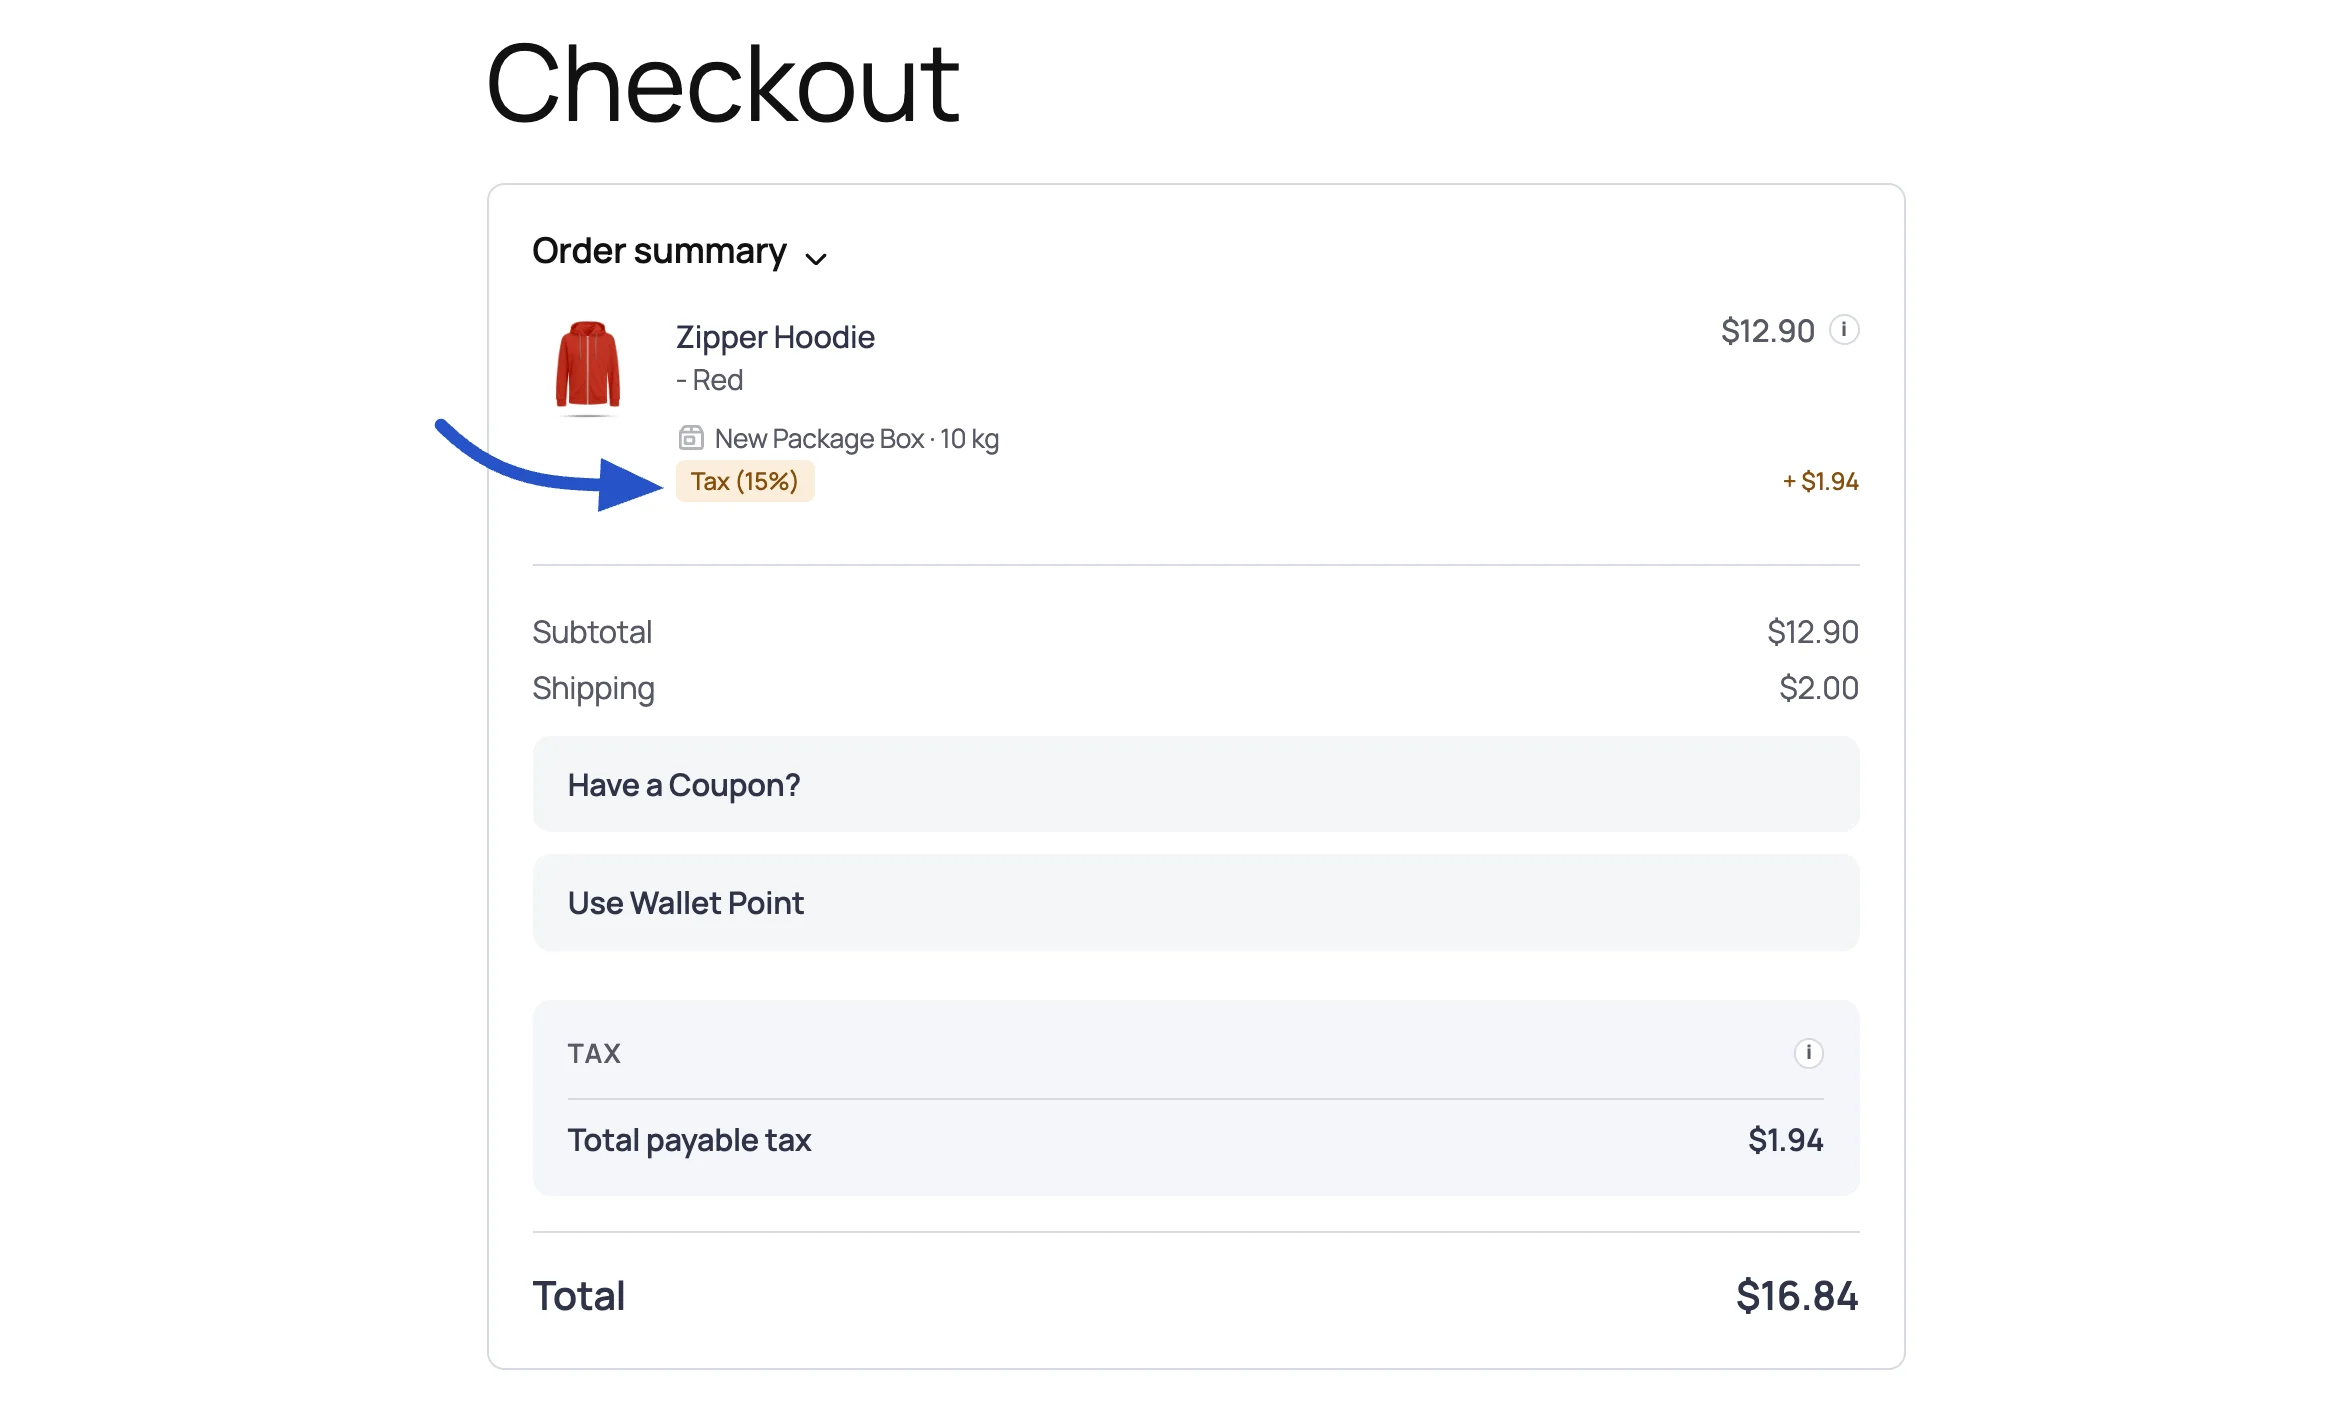
How tax appears at checkout
With a breakdown option selected, your customers see the tax context directly in the Order summary on the checkout page. Each taxable line item carries a tax label badge (for example Tax (15%)), and a dedicated TAX block totals the tax for the whole order. Exactly how this reads depends on your Prices entered with tax setting.
When prices Tax Include, the line badge shows the tax already contained in the price (for example incl. $1.68) and the TAX block reads Total tax in this order. The order total stays the same, because tax was already part of the price.
When prices Tax Excluded, the line badge shows the tax added on top (for example + $1.94) and the TAX block reads Total payable tax. This amount is added to the order total.
INFO
When an order mixes items taxed at different rates, FluentCart shows one tax line per rate (with the rate percentage and its amount) instead of a single combined figure. This per-rate breakdown appears everywhere the order is rendered: the checkout summary, order emails, receipts, PDF invoices, and the order views in both the admin area and the customer dashboard. Orders placed before FluentCart 1.5.2 keep their original single-line tax total.
Saving Your Settings
Click Save in the top-right corner to apply changes. You can also use the keyboard shortcut Cmd+S (macOS) or Ctrl+S (Windows/Linux), handy when you're tweaking several fields in a row.
VAT Reverse Charge Settings
If you sell to business customers in the European Union, you'll likely need to handle the reverse-charge mechanism, where the buyer is responsible for self-accounting VAT instead of paying it to you. This sub-section configures that behaviour.
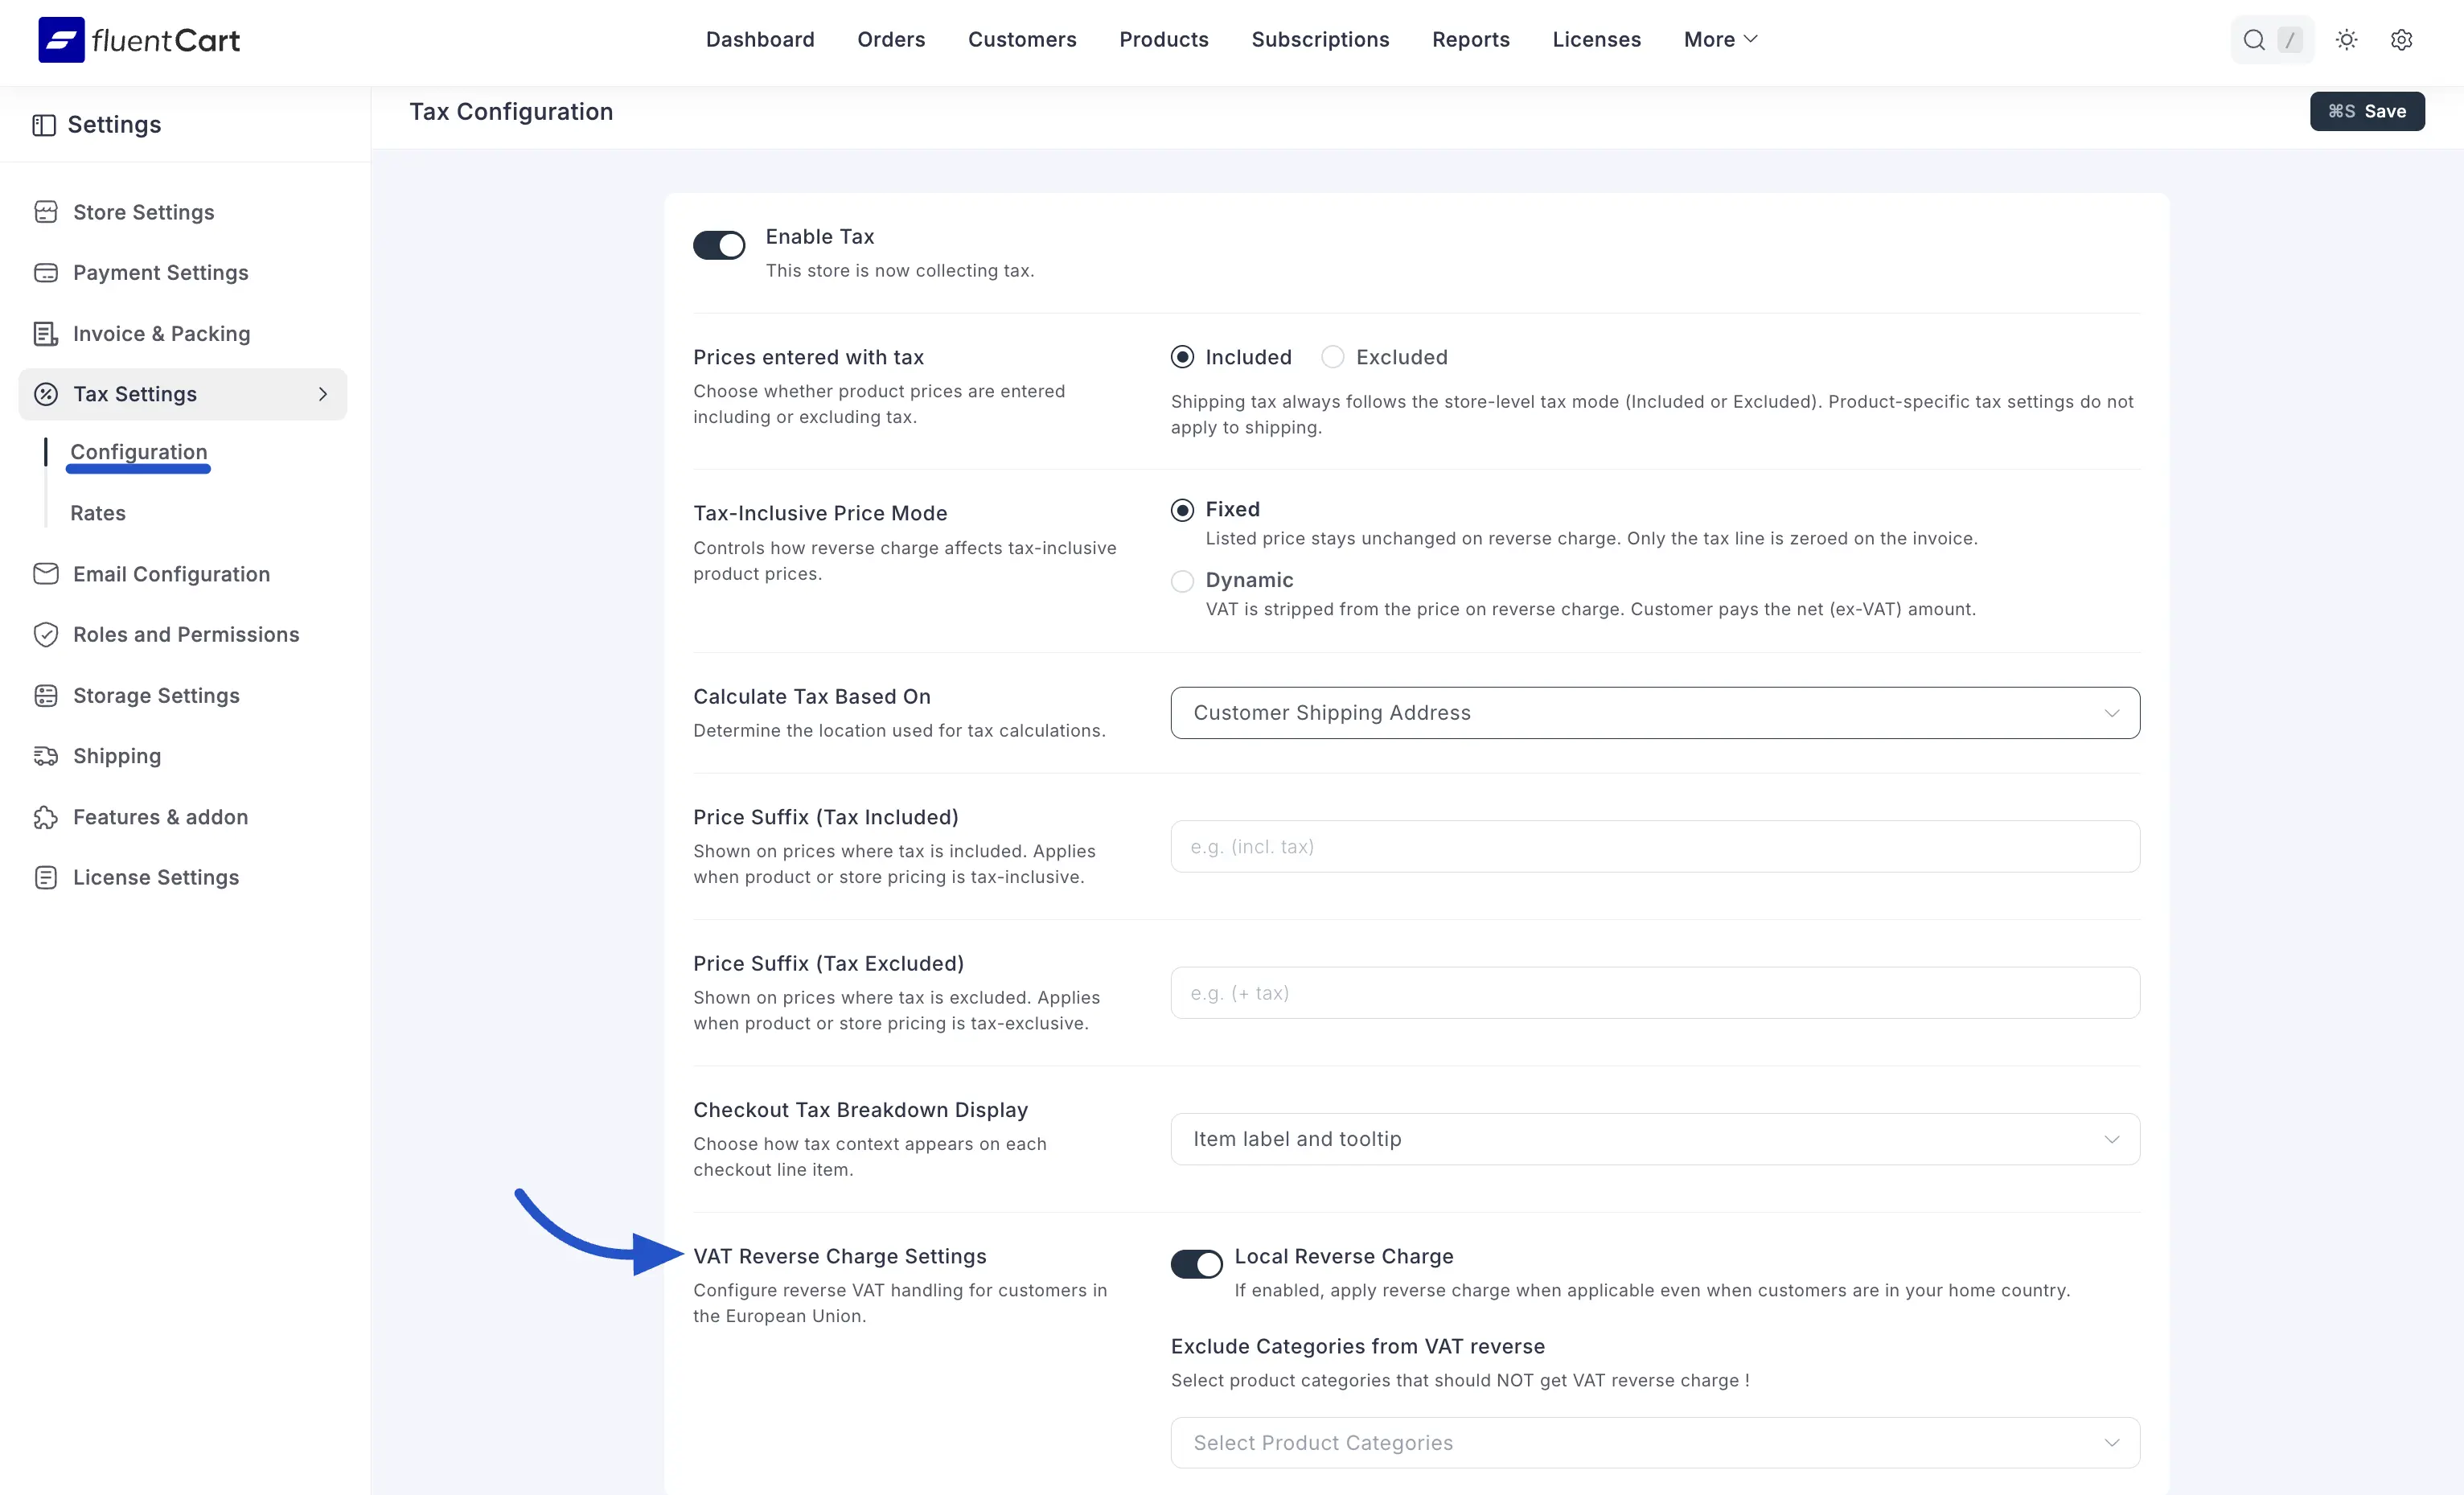
Local Reverse Charge
Toggle. Default: off. There are no other settings for this option.
- On: home country reverse charge applies when the customer is in your home country (some jurisdictions require this; check with a tax advisor).
- Off: home country reverse charge does not apply. Reverse charge still applies when the customer is in a different EU country than your home country.
Exclude Categories from VAT Reverse
A multi-select product-category picker. Any category you select here is never reverse-charged: VAT is always added, even when the customer has a valid EU VAT ID. Use this for product types that are explicitly outside reverse-charge scope.
Pick the one that matches how your accounting and contracts are written.