Appearance
Translating FluentCart
Making your store available in different languages helps you connect with a wider, global audience and provide a better shopping experience for your customers.
FluentCart is fully translatable, so you can change the button, label, and message to fit your needs. In this guide, we'll use the popular Loco Translate plugin to get this done.
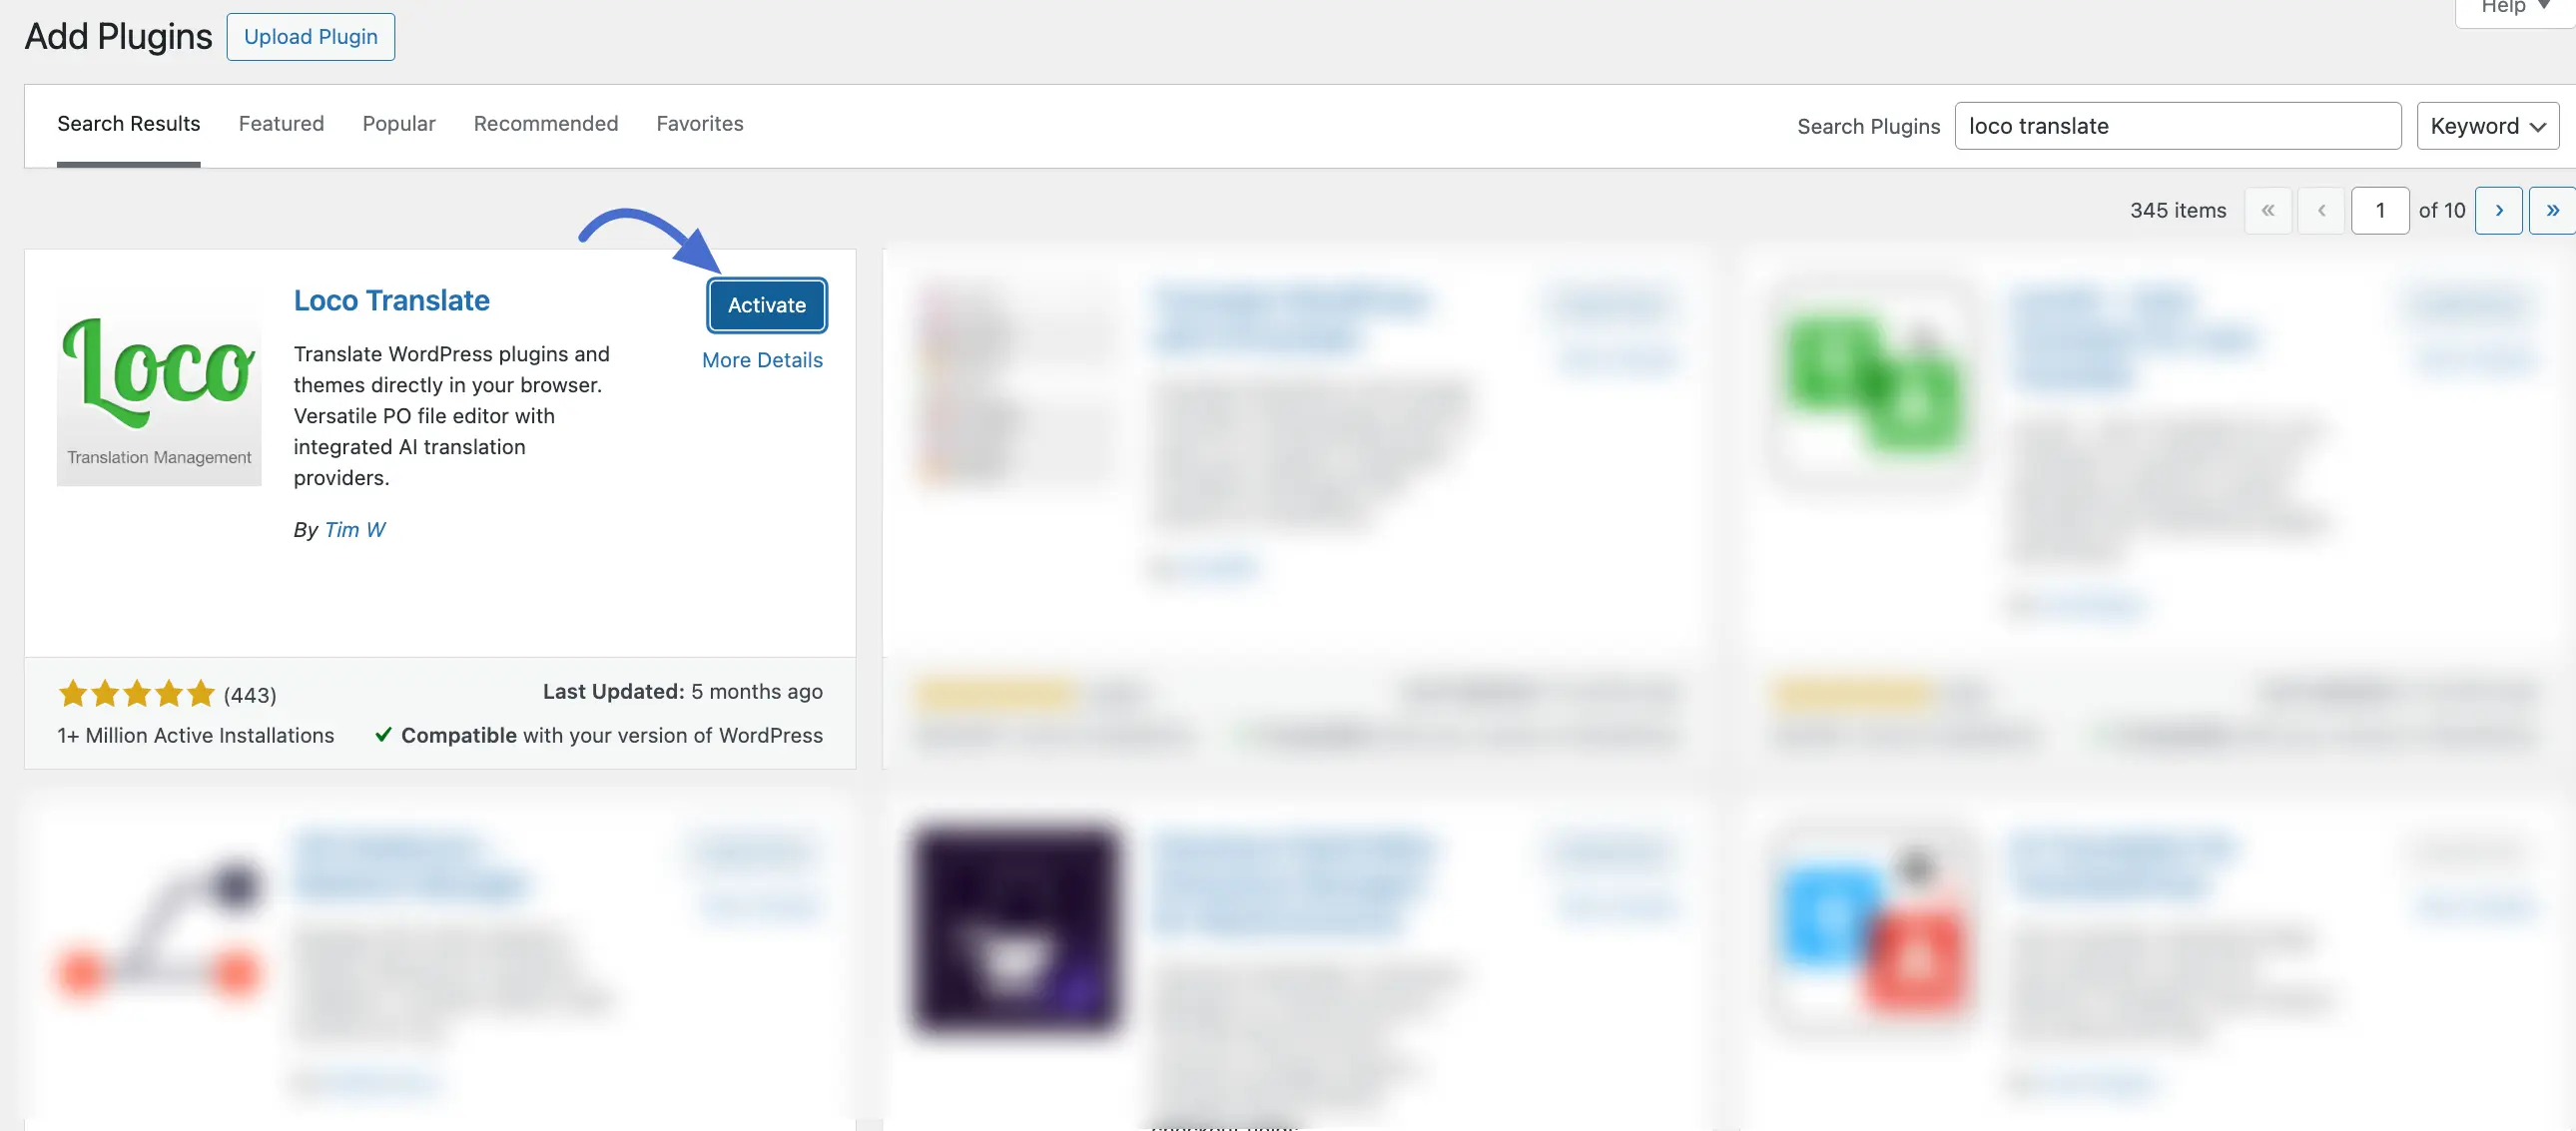
Step 1. Install the Loco Translate Plugin
First, you'll need to install the tool that will help you translate the plugin text.
- Go to Plugins → Add New from your WordPress dashboard.
- In the search bar, type "Loco Translate".
- Find the plugin in the search results and click Install Now.
- Once it's installed, click the Activate button.
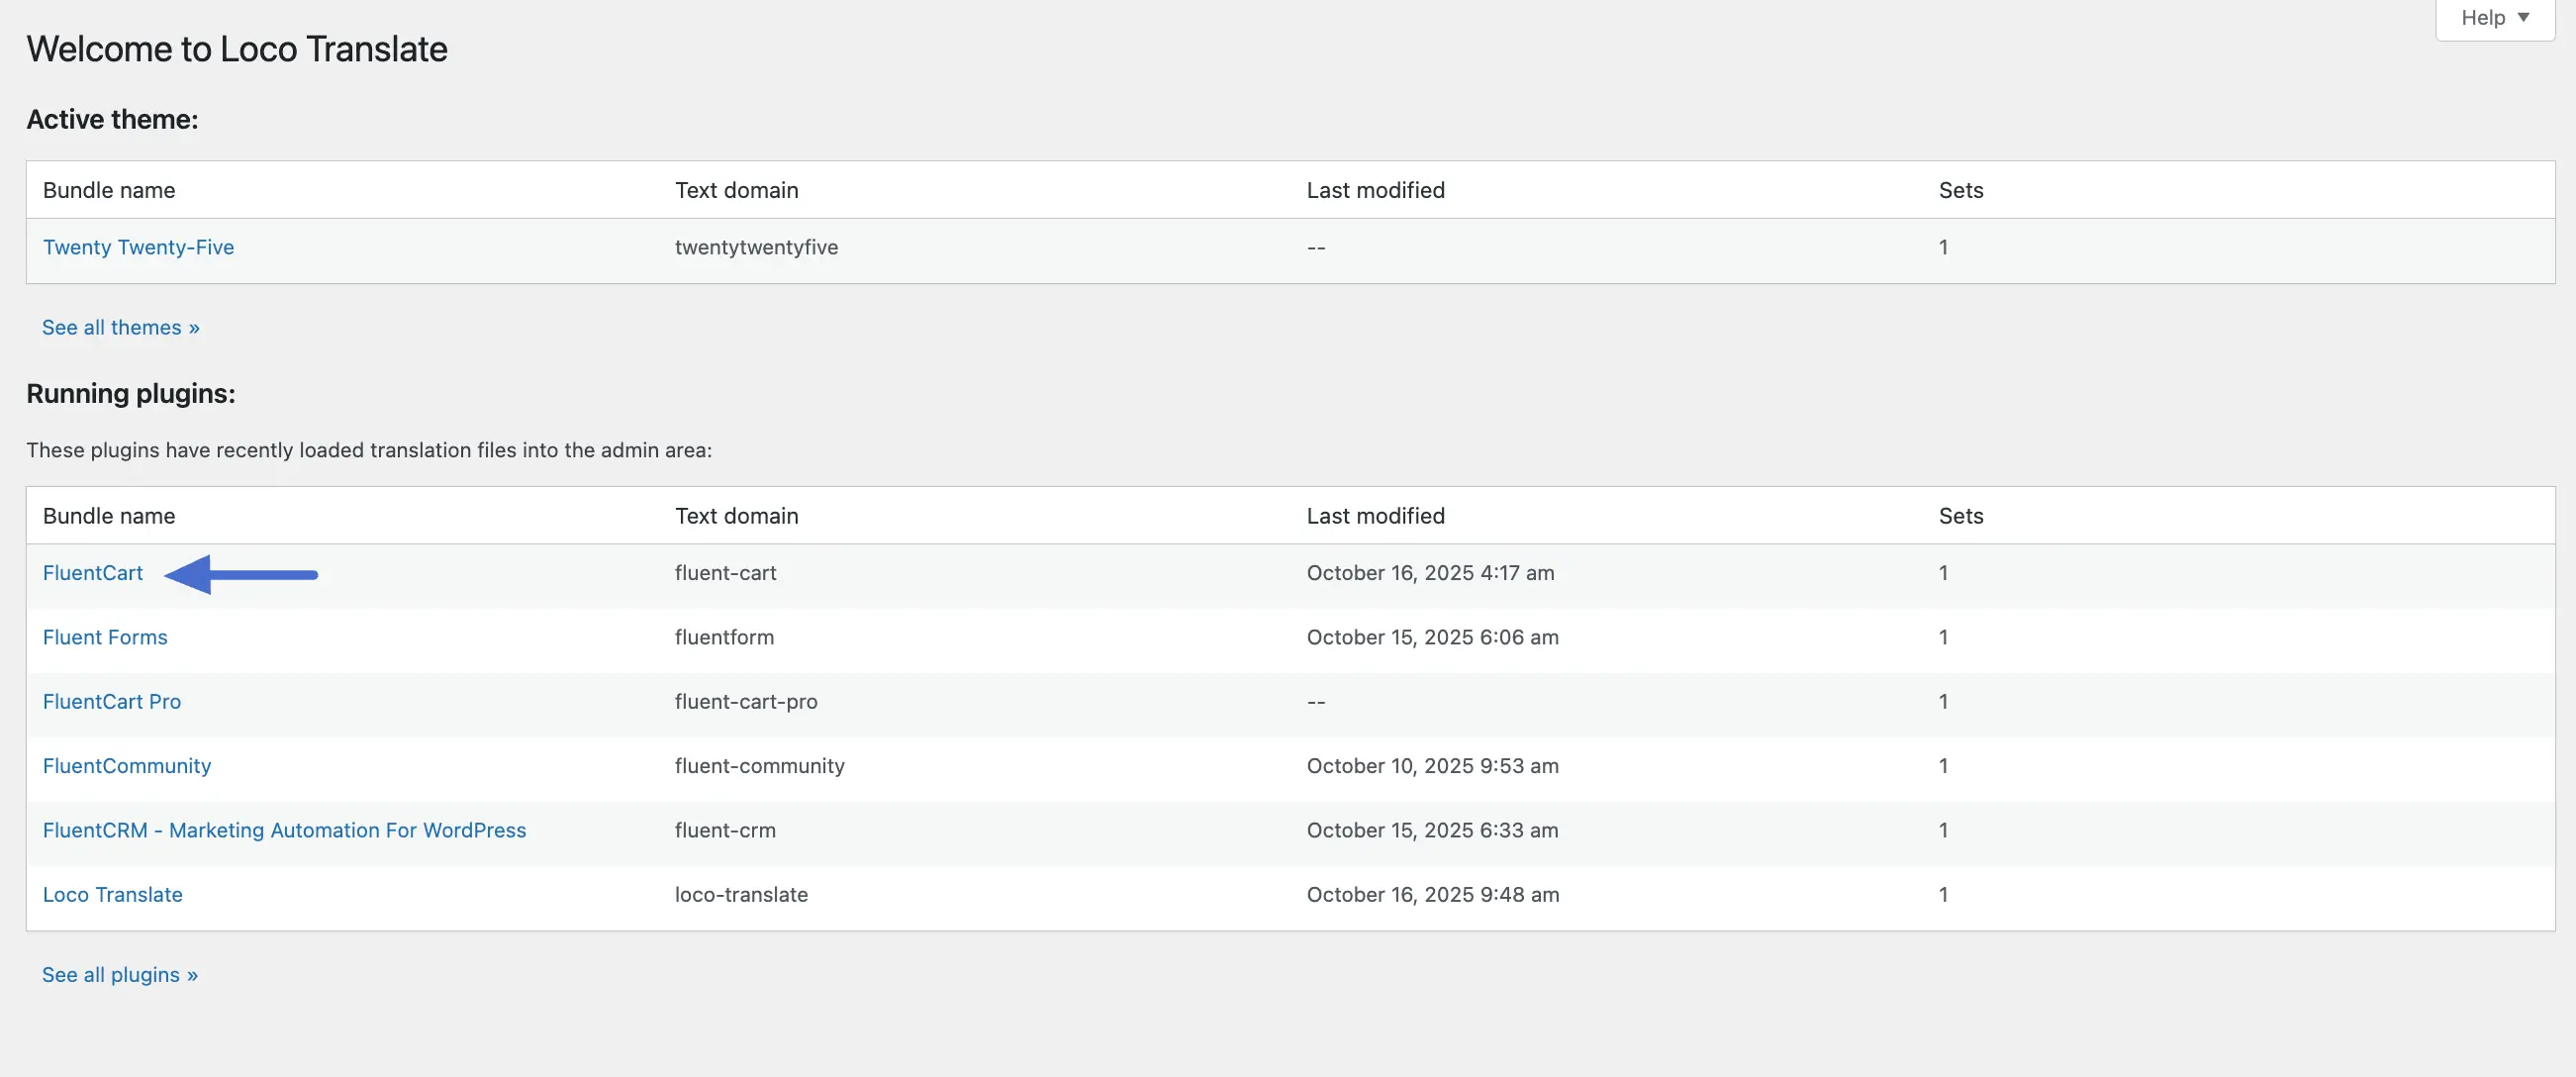
Step 2. Translate FluentCart and FluentCart Pro
Now you are ready to start translating. It's important to translate both the free FluentCart plugin and the FluentCart Pro add-on for a complete translation.
Navigate to the new Loco Translate menu in your dashboard sidebar and click on Plugins.
You will see a list of all your installed plugins. Click on FluentCart to begin. (You will repeat these steps for FluentCart Pro later.)
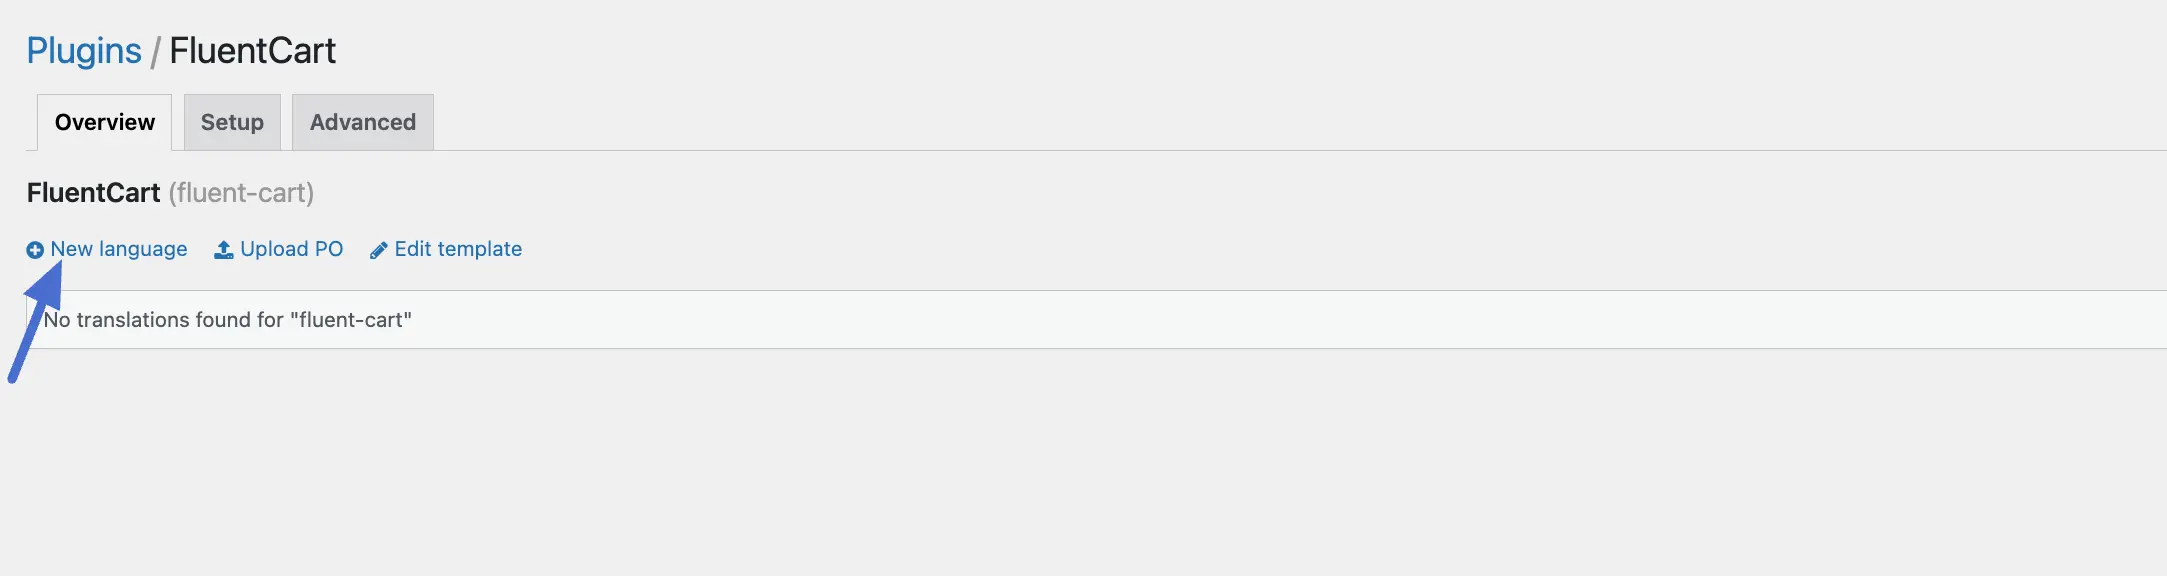
Click the + New language link to add your translation file.
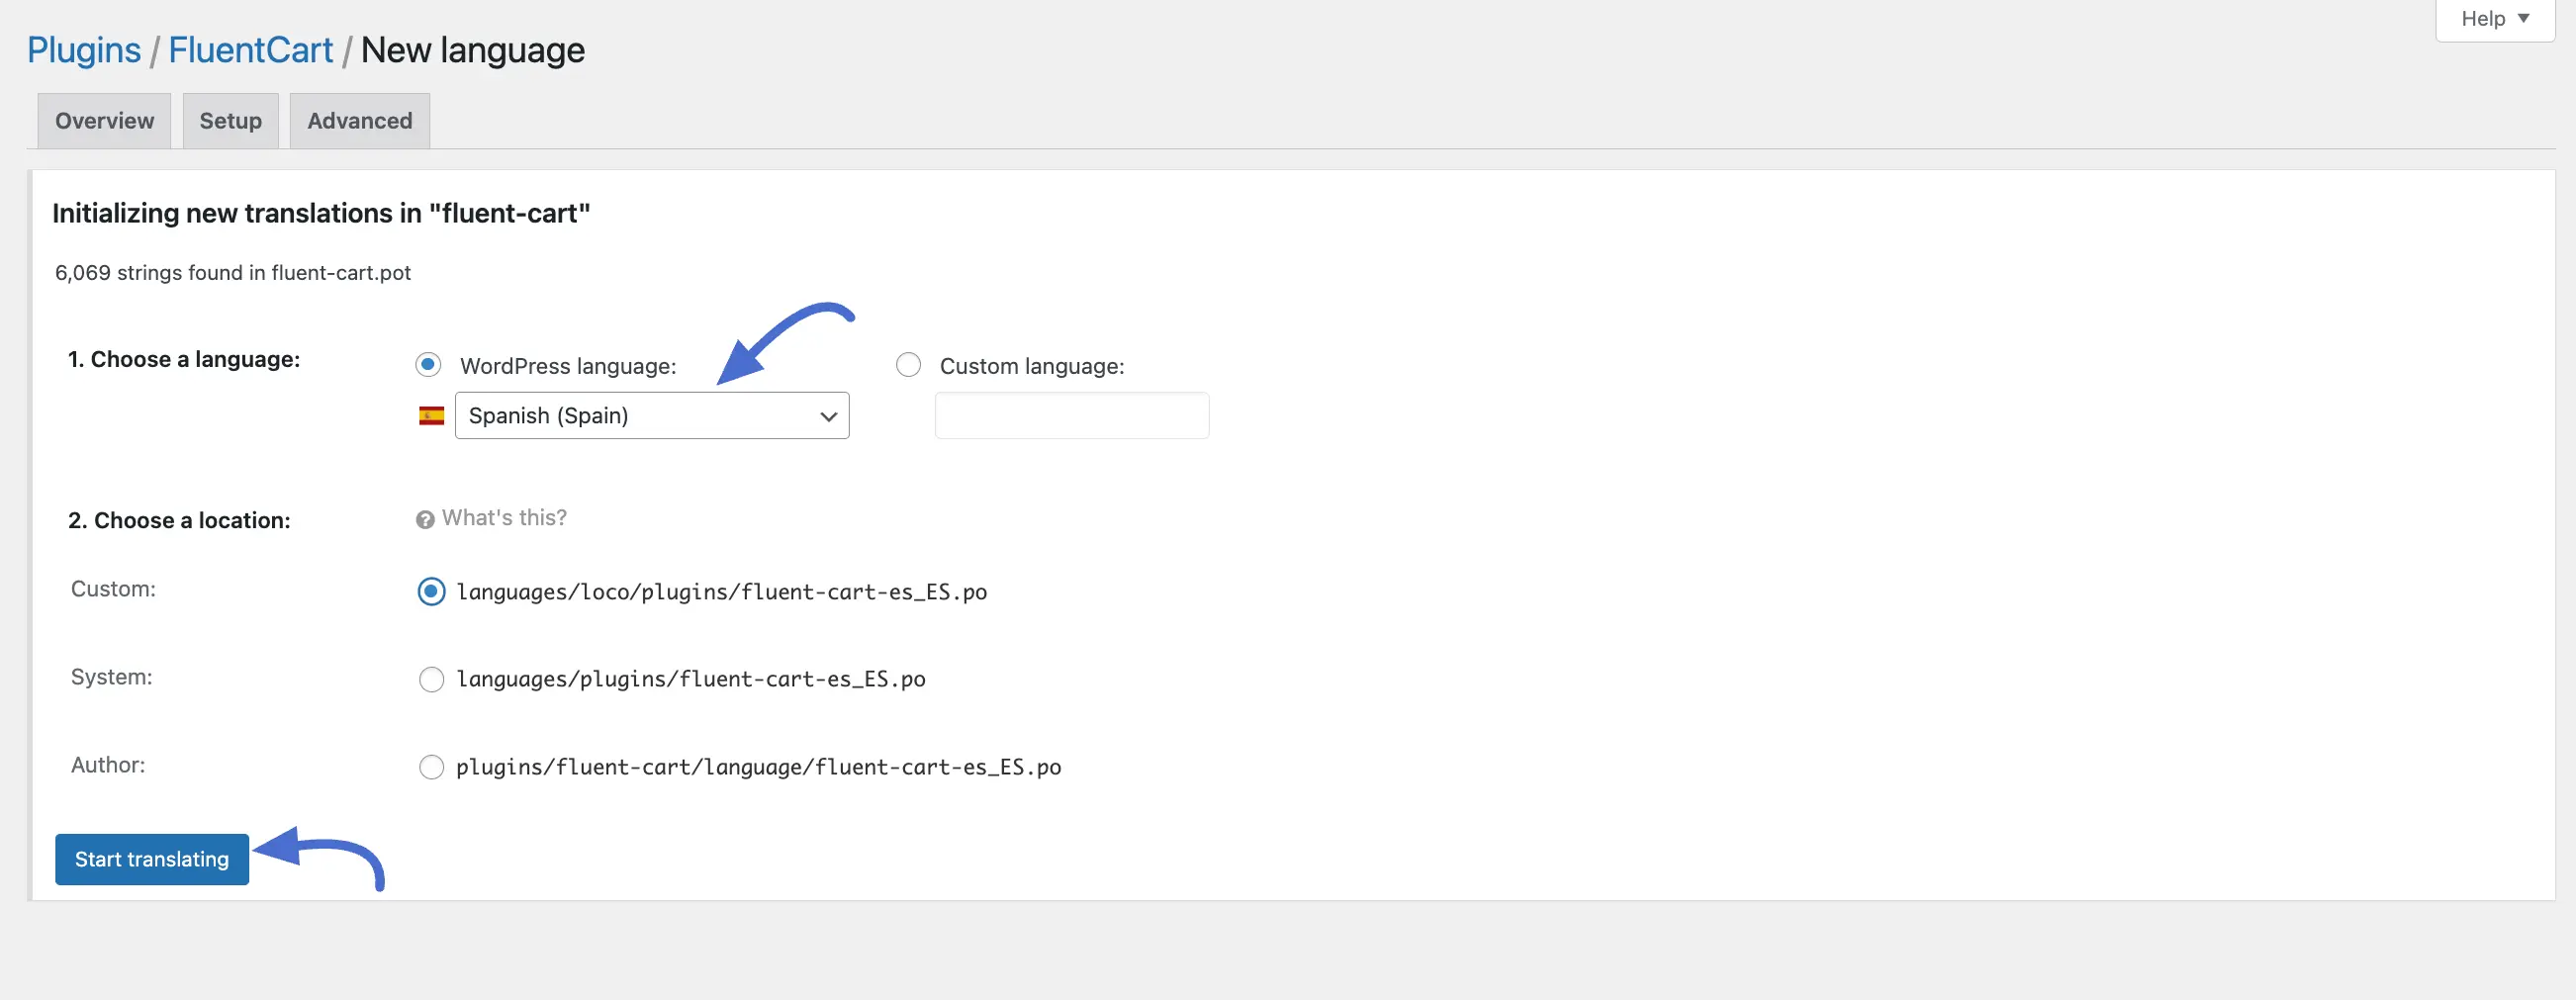
On the next screen, you will need to configure your new language file.
- Choose a language: Choose the language that matches your WordPress General Settings language.
- Choose a location: Next, you need to decide where to save your translation files. You will see a few options.
INFO
We highly recommend choosing the "Custom" location. Files saved here are protected from being overwritten when you update the FluentCart plugin. If you choose the "Author" location, your custom translations could be lost during an update.
Click the Start translating button.
You will now be on the editor screen. Here you'll see a list of all the English text ("Source text") from the plugin.
- Click on any English string from the list.
- In the box below (e.g., "Spanish translation"), type your translation.
- Click the Save button in the top left.
- Repeat this process for all the text you wish to translate.
Once you have finished translating the free version, go back to Loco Translate → Plugins and repeat the same steps for FluentCart Pro to ensure all features are translated.

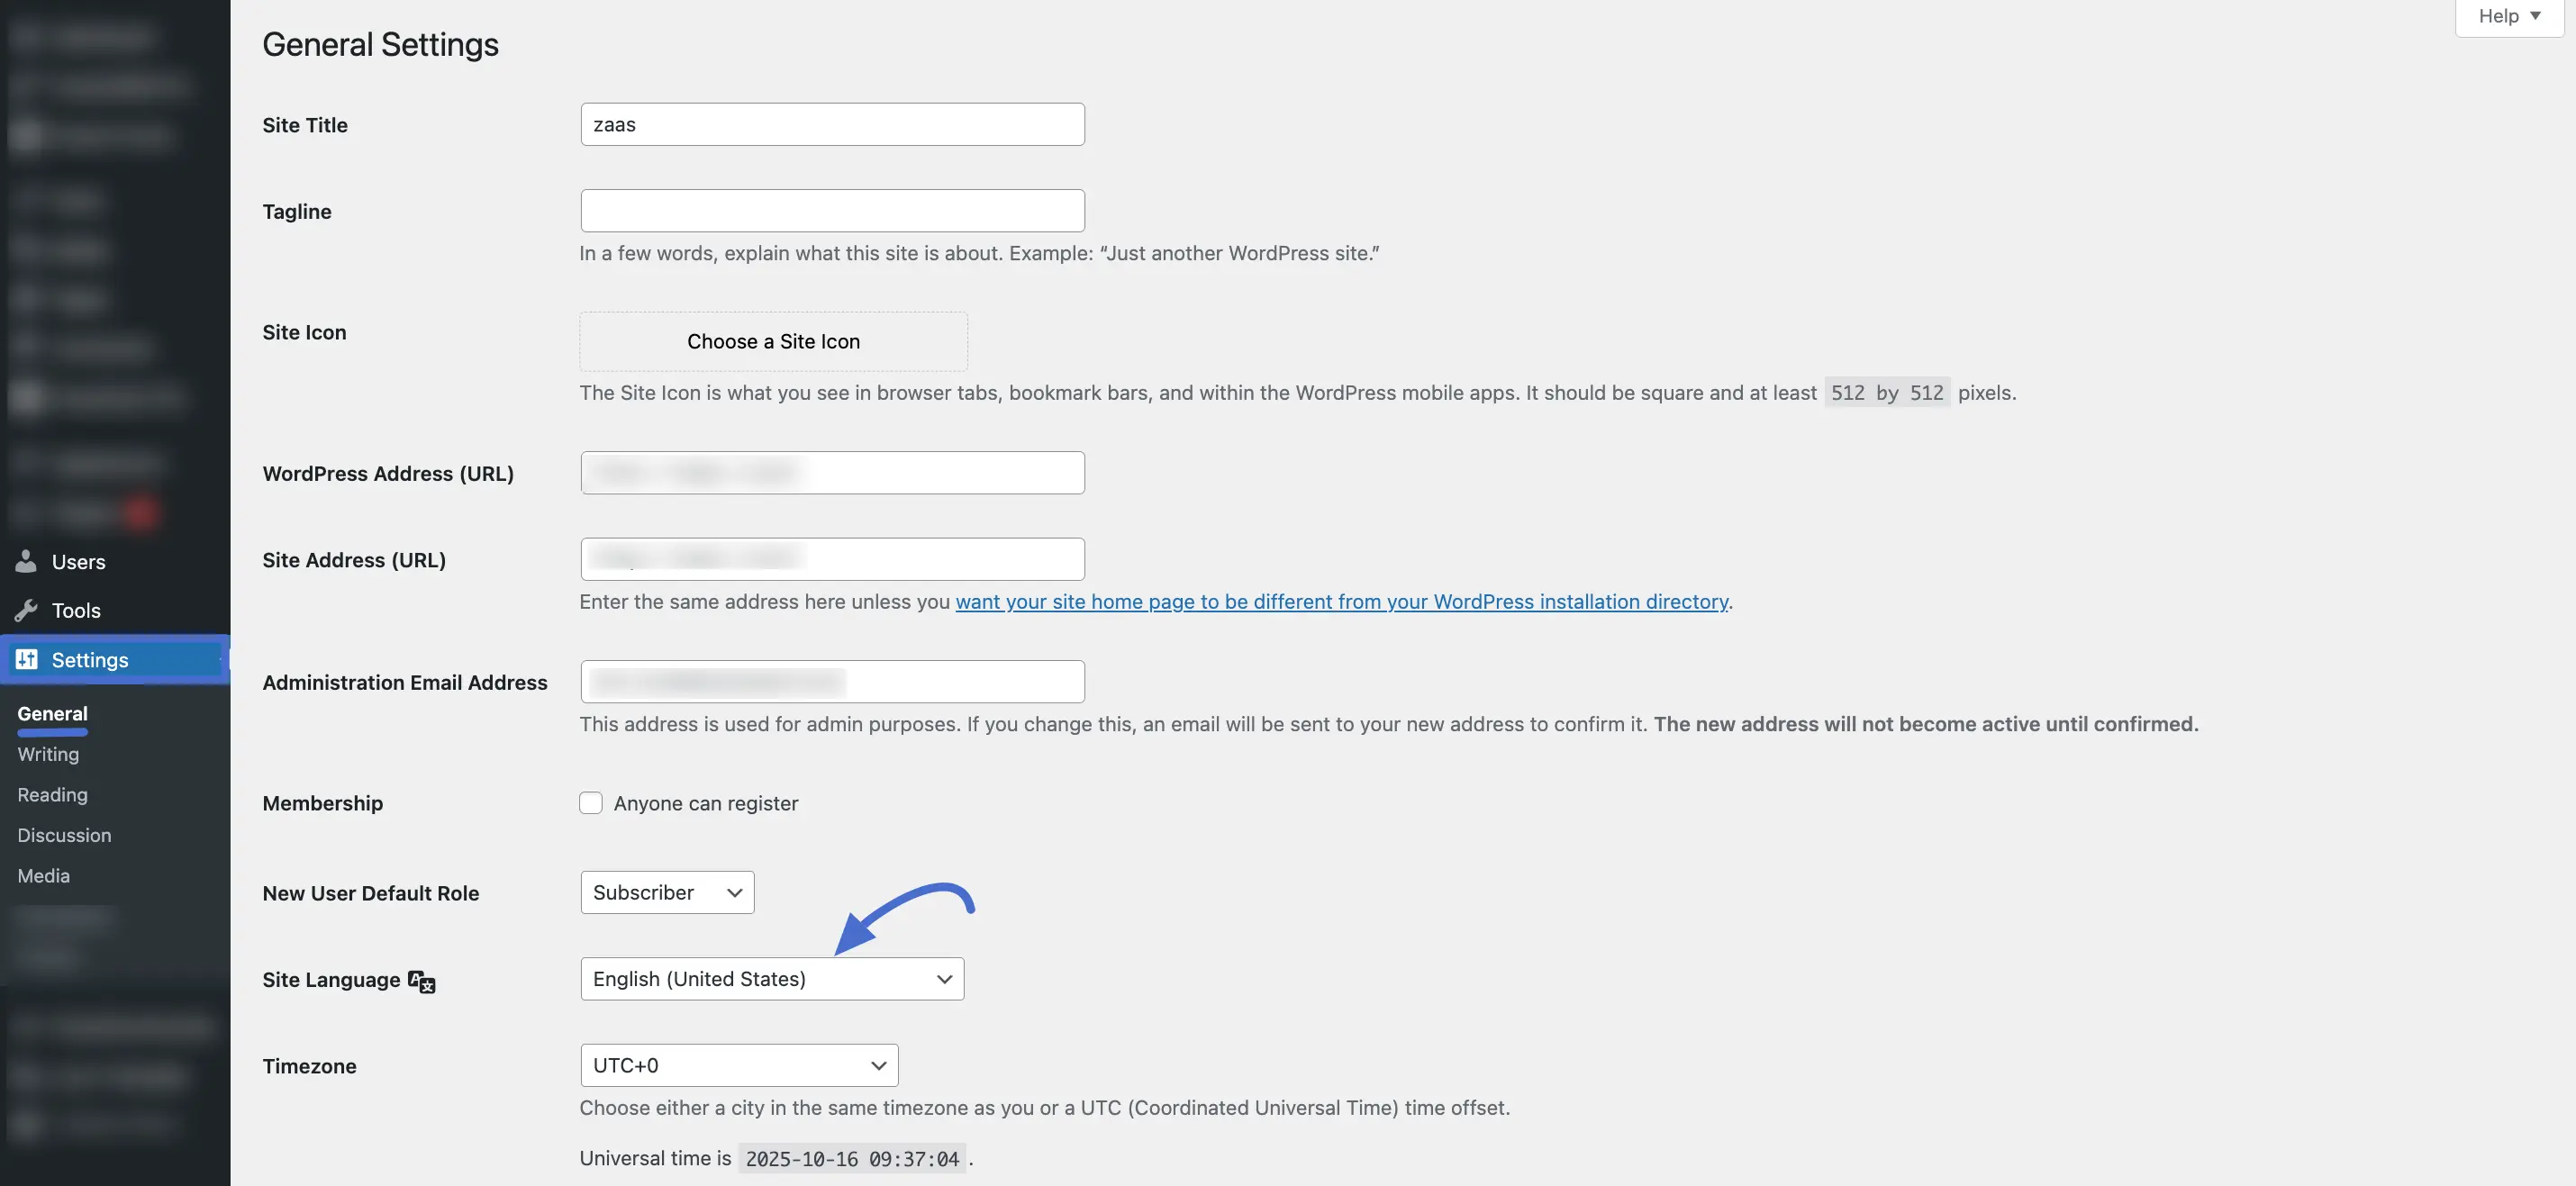
Step 3. Set Your WordPress Site Language
For your translations to appear, you must tell WordPress which language your website should use.
- From your WordPress dashboard, navigate to Settings → General.
- Find the Site Language dropdown menu.
- Select your desired language from the list.
- Scroll to the bottom of the page and click the Save Changes button.
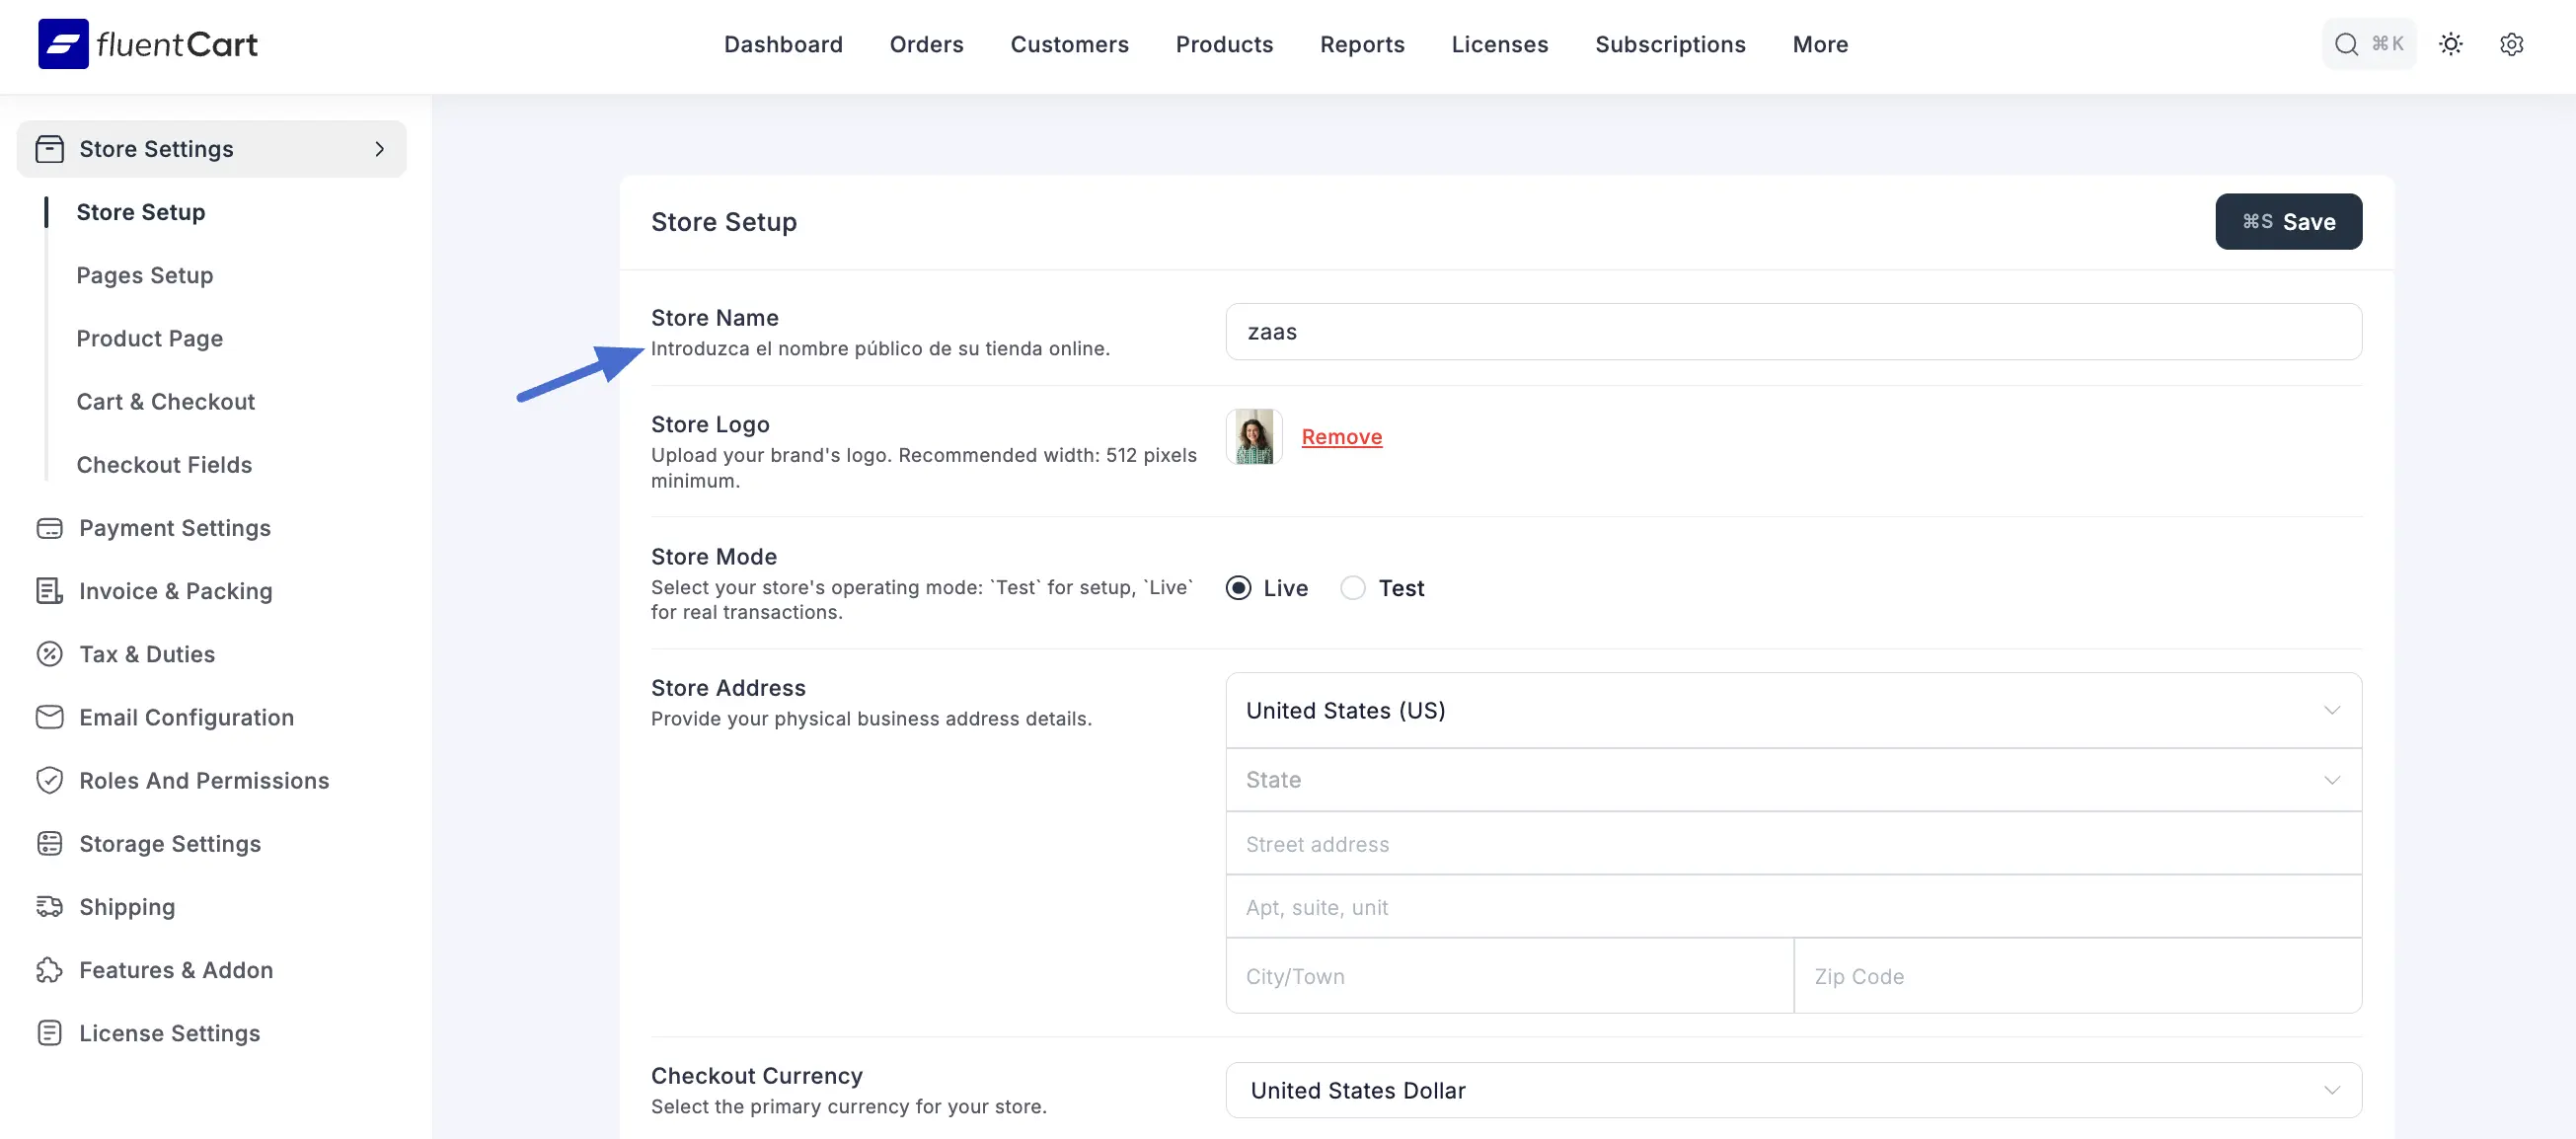
Previewing Your Translations
After you save a translation, you can instantly see the changes on your site. There’s no need to log out or refresh anything except the page you’re viewing.
For example, let’s say you translated the helper text for the Store Name field as shown below.
Now, go to FluentCart Pro → Settings → Store Setup. You’ll notice that the text under the Store Name field now appears in your translated language. You can use this same method to preview any string you translate.
Keeping Your Translations Up-to-Date
When FluentCart is updated, new text strings might be added. To find and translate these new strings, simply open your language file in Loco Translate and click the Sync button. This will automatically add any new text to your list so you can translate it.
Troubleshooting Common Issues
If your translations aren't behaving as expected, here are a few common issues and their solutions.
My translations are not showing up.
- Check Site Language: Make sure the language you are translating into in Loco Translate is the exact same language you have set as the Site Language under WordPress → Settings → General.
- Check File Location: Ensure you saved your translation file in the Custom location (
languages/loco/plugins/). If you saved it in the "Author" or "System" location, it may be overwritten or not loaded properly. - Clear Your Cache: Your browser or a caching plugin might be showing an older, untranslated version of your site. Clear all caches and reload the page.
Some text is still in English (e.g., on the Checkout page). This often happens with text that is saved to the database, like the names of payment methods or shipping options. If you set these up when your site was in English, they won't automatically change when you switch the site's language. To fix this, you must translate these items manually in the FluentCart settings where you created them.
Untranslatable Characters and Placeholders You may see strings that contain special characters or codes like
%s,&, or numbers. These are often dynamic placeholders that the system replaces with a value, like a name, a number, or a date. Do not translate these placeholders. Instead, include them in your translated sentence. For example, a source text ofAuto renews on %sshould be translated around the placeholder, likeSe renueva automáticamente el %s.