Appearance
Tax Filing Feature
Keeping accurate records of the taxes you've collected is essential for accounting and filing your tax returns. FluentCart's Tax Filing feature simplifies this process by providing a detailed log of every tax collected and a tool to mark them as "Filed" once you've reported them. It also allows you to download a CSV report for your records.
This guide will show you how to use this feature to make your tax season much easier to manage.
Accessing the Taxes Screen
- From your WordPress dashboard, navigate to FluentCart Pro.
- Hover over the More menu item in the top navigation bar.
- Click on Taxes.
This will take you to the main Taxes screen, where you'll see a comprehensive table of all the taxes your store has collected.

Reviewing Your Collected Taxes
The main screen displays a detailed, line-by-line log of every individual tax collected. This serves as your primary record when it's time to file your returns.
Here’s a breakdown of the columns:
- Order ID: The ID of the order the tax was applied to. You can click this ID to navigate directly to the full order details page.
- Tax Country, Region, Zip Code: The location details used for the tax calculation.
- Tax Name: The name of the specific tax rule that was applied (e.g., "State Tax," "VAT").
- Tax Rate: The percentage rate of the tax.
- Sale Taxes: The total monetary amount of tax collected for that specific order line.
- Filed: This is an internal marker to help you stay organized. A "No" status means the tax is still waiting to be reported. A "Yes" status means you have already included it in a tax filing.
How to Use the Tax Filing Feature
Once you are ready to file your taxes for a specific period, you can use the Tax Filing feature to generate a report and mark the relevant taxes as "Filed."
Step 1: Select the Taxes to File
Before clicking the main button, you must select which tax records you want to include in your filing.
- Go through the list and check the box next to each individual tax record you want to process.
- To make this easier, you can use the Quick Filters (e.g., "Not Filed") and the Advanced Filter to narrow down the list to a specific country, region, or date range first.
Step 2: Tax Filing
Once you have selected the desired tax records, click the Tax Filing button at the top right of the screen.

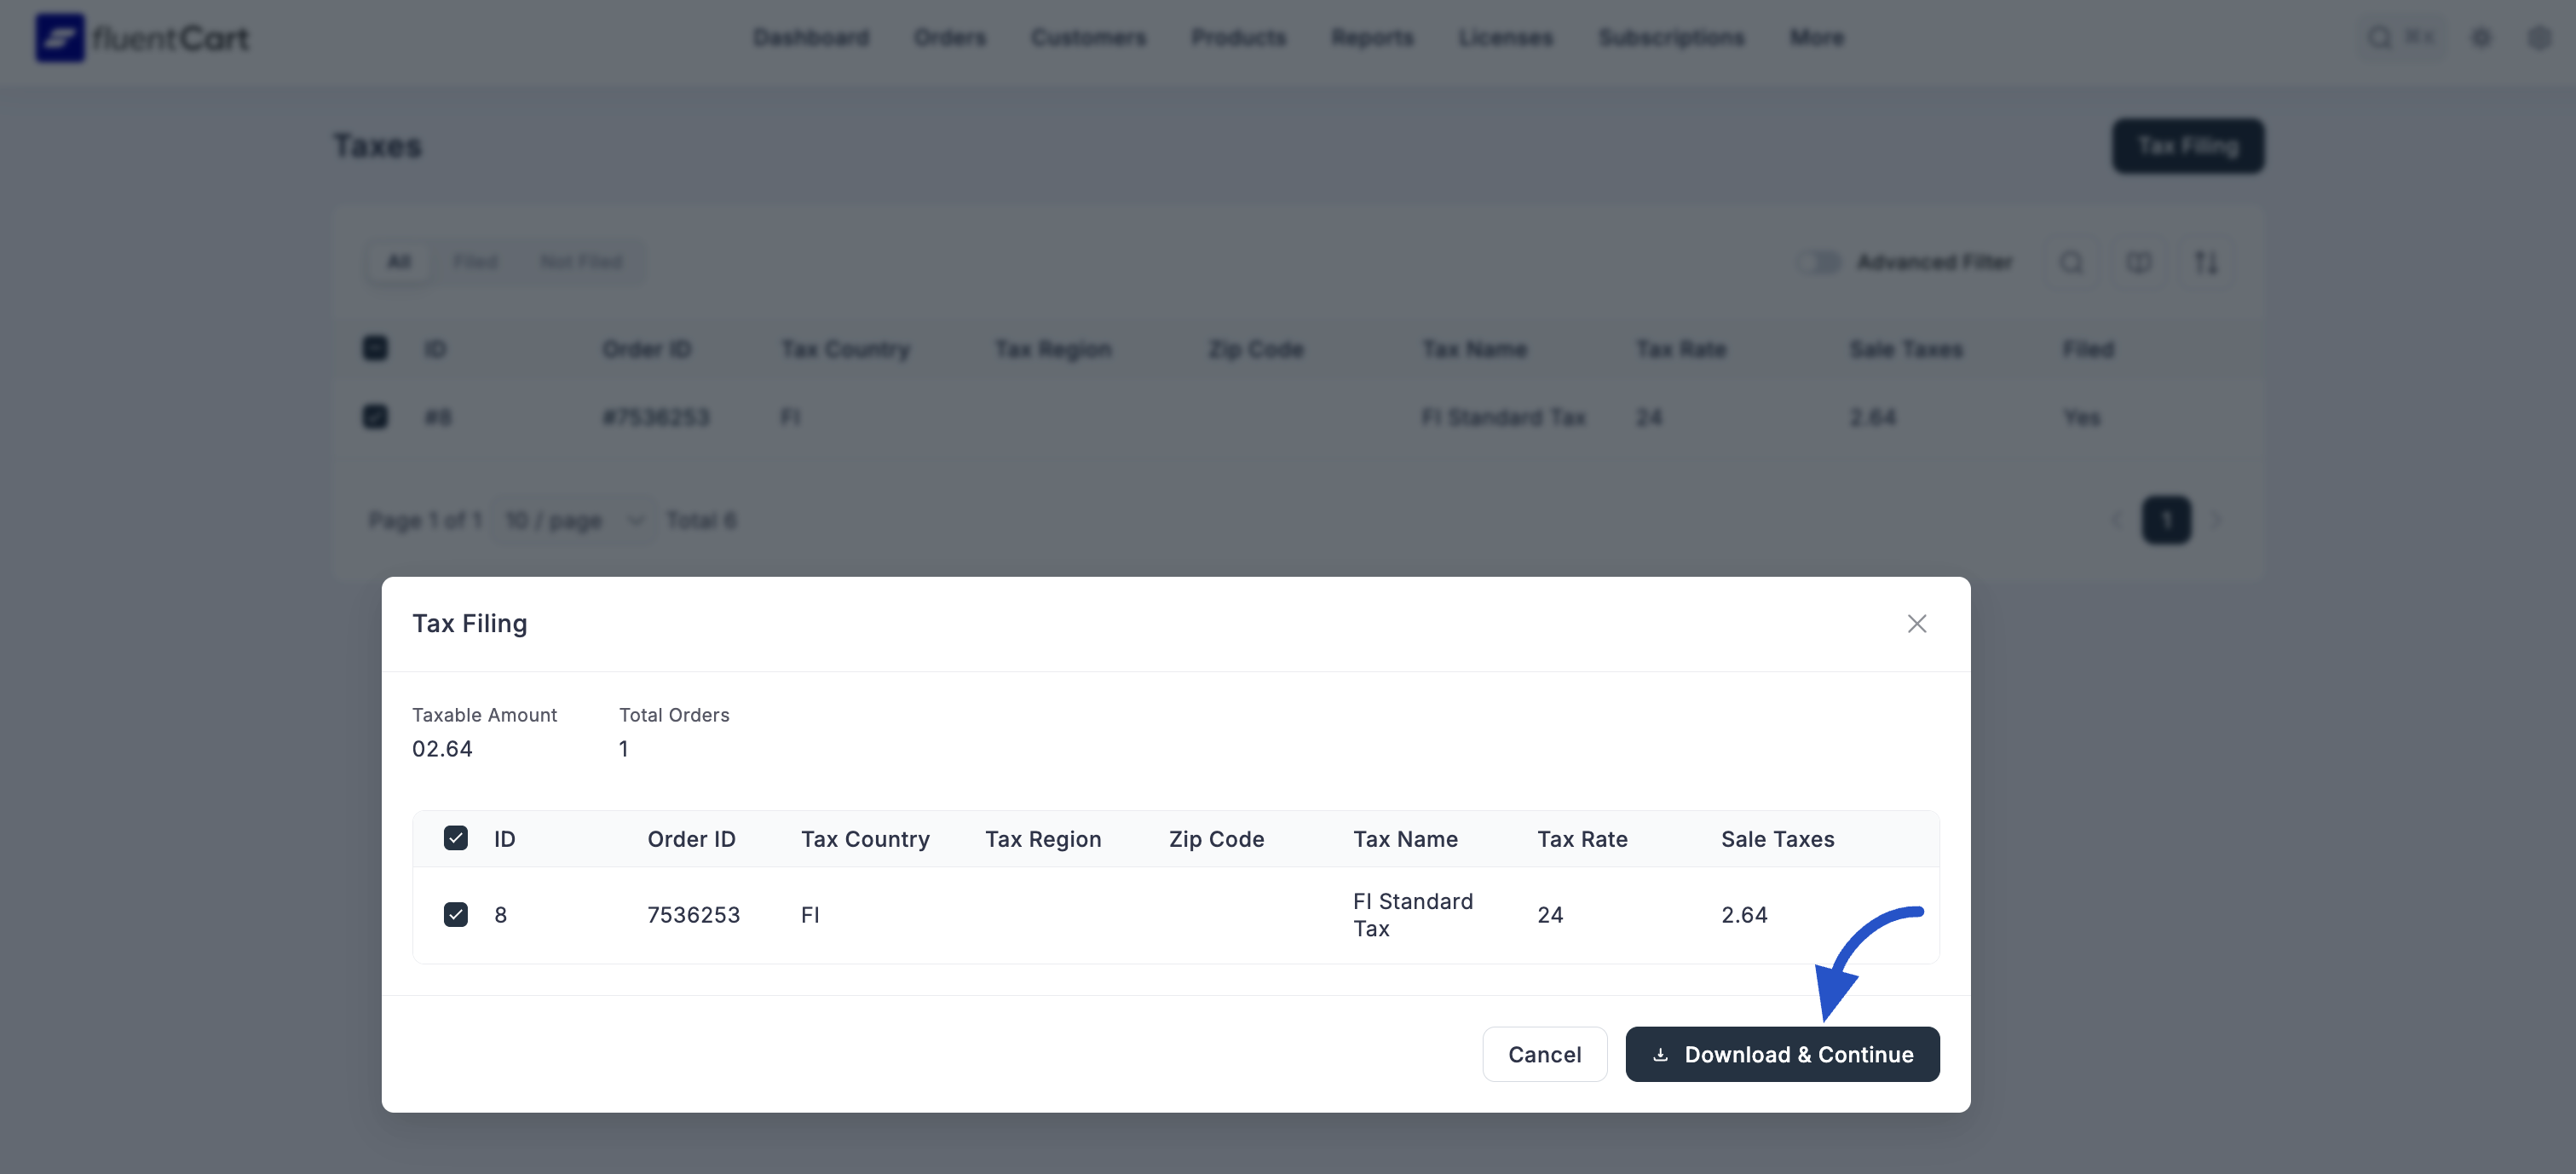
A pop-up window will appear, showing a summary of the taxes you have selected.
Step 3: Review and Download
In the pop-up, you will see:
- Taxable Amount: The total sum of the "Sale Taxes" for all the records you selected.
- Total Orders: The number of unique orders included in your selection.
- A list of the specific tax records you are about to process.
Review this information to ensure it is correct.
Step 4: Download & Continue
Click the Download & Continue button. This action performs two important tasks simultaneously:

- It downloads a CSV file to your computer. This file contains a detailed breakdown of all the tax records you selected, which you can use for your accounting or to file your tax returns with the relevant authorities.
- It marks all the selected tax records as "Filed" within FluentCart. Their "Filed" status will change to "Yes," so you know they have been processed.
This workflow helps you keep your financial records clean, prevents you from accidentally reporting the same taxes twice, and provides you with the necessary documentation for your tax filings.
