Appearance
Managing Global Integrations
The Global Integrations section is your central dashboard for managing powerful, event-driven automations that connect your FluentCart store to other essential services. These automations, often called "feeds," are triggered by specific events in your store, such as a new order being created or a subscription being renewed.
Accessing Global Integrations
From your WordPress dashboard, navigate to FluentCart Pro > Settings.
Click on the Global Integrations tab.

The Global Integrations Dashboard
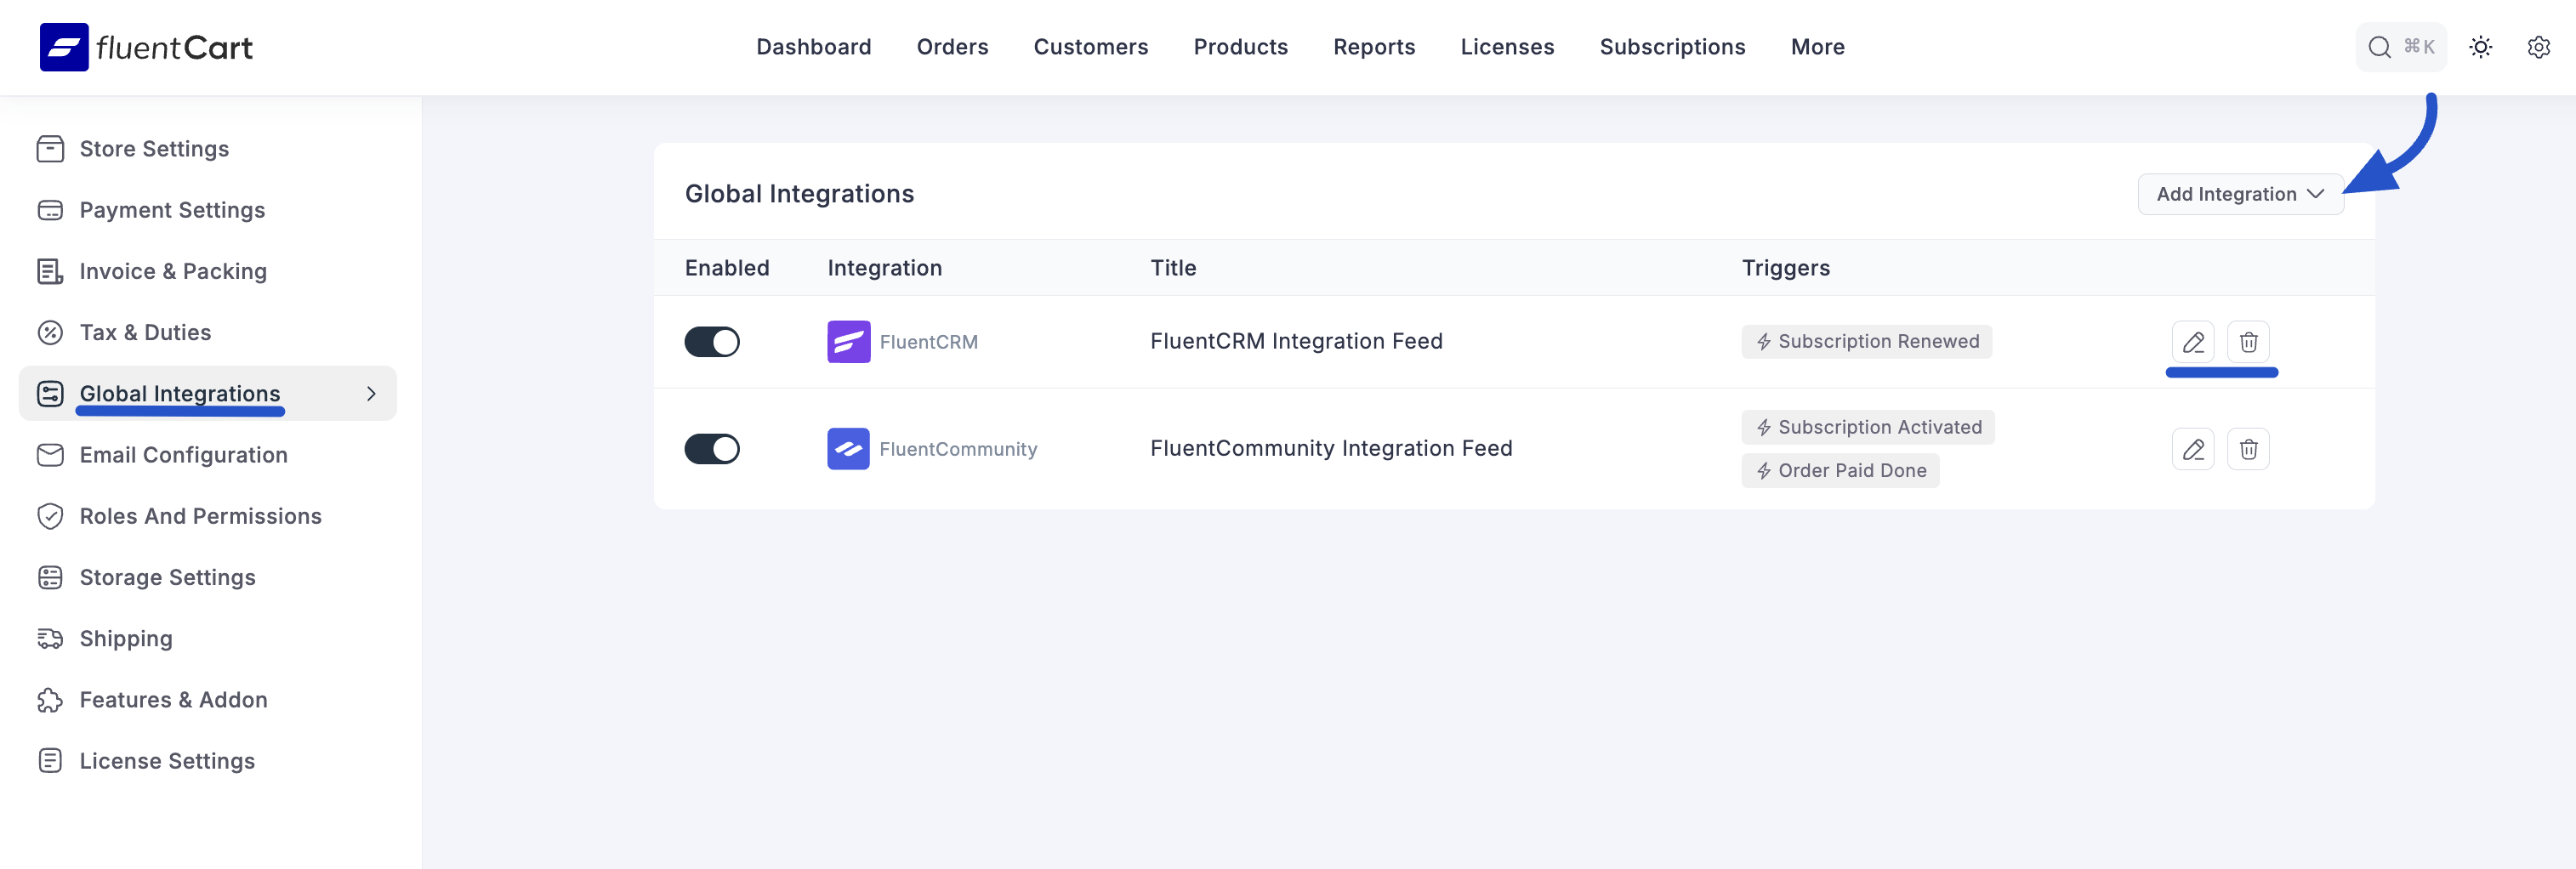
This screen provides a comprehensive overview of all the integration feeds you have configured, serving as your command center for all connected services.
Integration List: Displays all your feeds in a table, giving you an at-a-glance view of your automations:
- Integration: Shows the icon and name of the integrated service (e.g., FluentCRM), making it easy to identify the platform you are sending data to.
- Title: The custom name you gave to the integration feed for your own internal reference, helping you distinguish between different automations for the same service.
- Triggers: Lists the specific store event(s) that will trigger this automation. This is crucial for understanding exactly when your data is being sent.
- Enabled: Shows the current status of the feed, indicating whether it is active or inactive.
Management Actions: On the right-hand side of each feed, you will find several options for easy management:
- Enable/Disable Toggle: Use this switch to quickly activate or deactivate a feed without deleting its configuration. This is perfect for temporarily pausing an automation during testing or promotional periods.
- Edit (Pencil Icon): Click this to open the configuration screen and make changes to the feed's settings, such as adding new triggers or modifying data mappings.
- Delete (Trash Can Icon): Click this to permanently delete the integration feed. This action cannot be undone.

Adding a New Integration
To create a new automation, you can add a new integration feed. This is the starting point for connecting your store to a new service.
- From the Global Integrations dashboard, click the Add Integration button at the top right.
- A dropdown menu will appear, listing all the available integrations, here you can configure Webhook, FluentCRM and FluentCommunity.
- Select the integration you wish to add from the list.
- You will be taken to the dedicated configuration screen for that specific integration. Here, you will set up the specific rules for the automation, such as defining the triggers, mapping data fields, and configuring any service-specific options.
