Appearance
Using FluentCart Blocks & Templates
FluentCart provides a powerful set of dedicated blocks for the WordPress block editor (Gutenberg), allowing you to build and customize your e-commerce pages with ease. Instead of being limited to predefined layouts, you can use these blocks to create a fully custom shop page, display specific products, and add e-commerce functionalities anywhere on your site.
This guide will walk you through the different methods you can use to design your shop, product, and checkout pages.
Building with FluentCart Blocks
The easiest and most flexible way to build your store is with FluentCart's dedicated blocks. These act like building bricks, allowing you to add e-commerce features to any page or post in the WordPress editor.
Accessing FluentCart Blocks
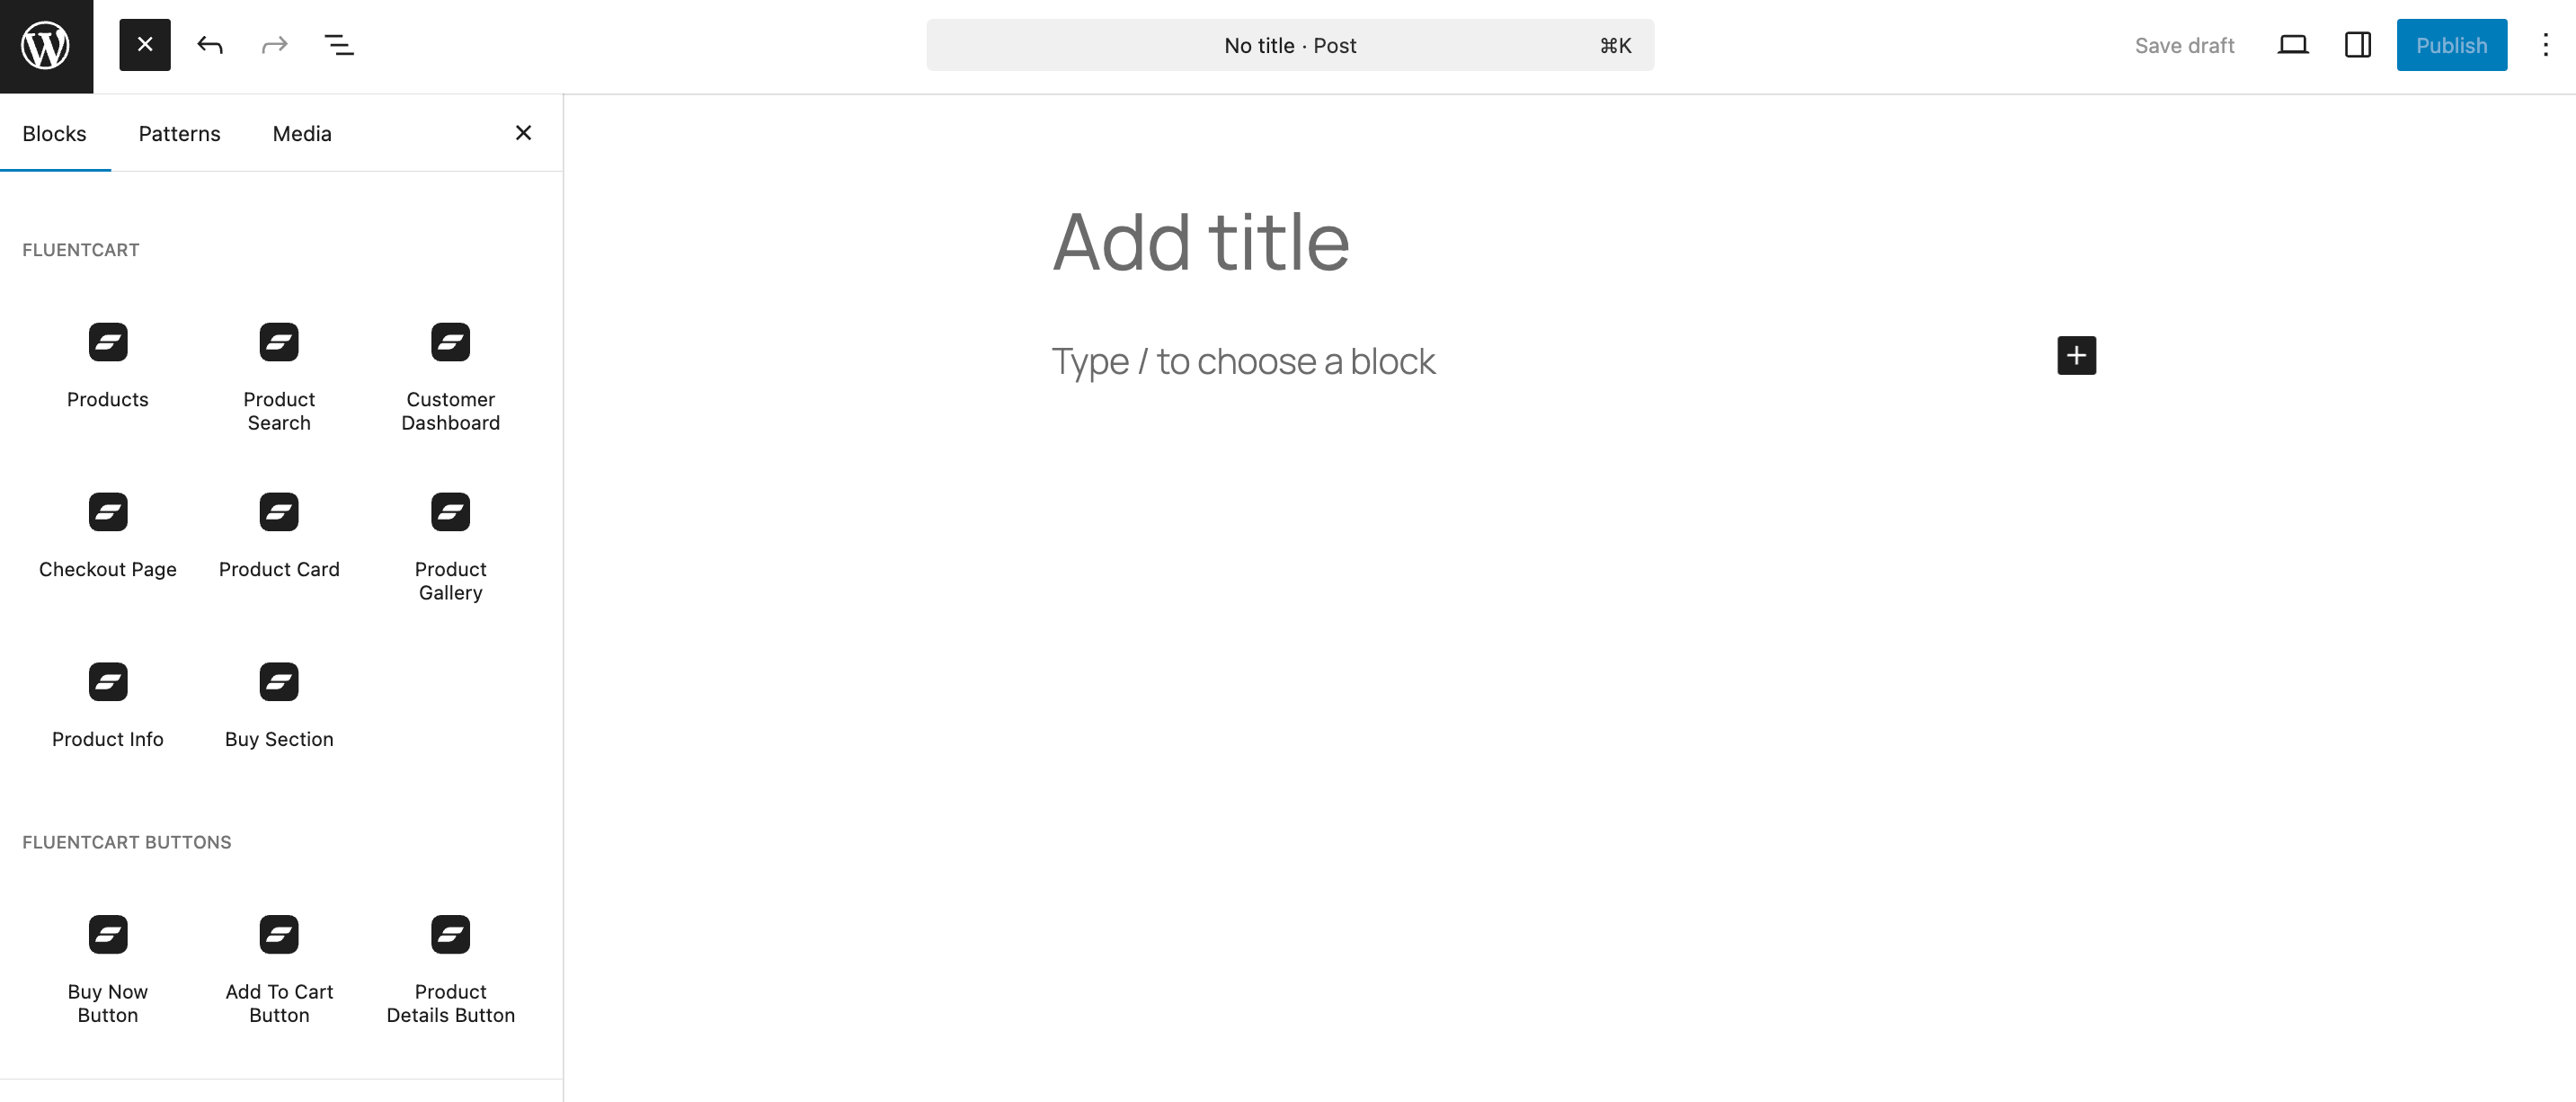
- From your WordPress dashboard, open any page or post.
- Click the plus icon (+) to open the block inserter.
- Scroll down to find the FluentCart and FluentCart Buttons categories, or simply search for the block you need.
Understanding the Core Blocks
- Products: This is the cornerstone block for building your shop. It displays a dynamic and fully customizable grid of your products. Use it to create your main /shop page, or place it on your homepage to feature new arrivals or best-sellers. In the block settings, you can filter which products appear based on categories, tags, and more.
- Product Search: This block adds a clean and simple search bar to your page. It's designed to search only within your FluentCart products, making it a powerful tool to help customers find exactly what they're looking for, especially in stores with a large inventory.
- Customer Dashboard: Use this block on a single page to create a dedicated "My Account" area. It automatically provides a secure dashboard where logged-in customers can view their purchase history, manage active subscriptions, download files, and update their personal details.
- Checkout Page: This block is essential for your store to function. Add it to a blank page to designate it as your official checkout page. It will automatically render the entire secure checkout form, including fields for customer information, shipping options, and payment methods.
- Product Card: Perfect for highlighting a single item. This block displays one specific product in a visually appealing card format. It's ideal for featuring a "Product of the Week" on your homepage, embedding an item within a blog post review, or creating a focused landing page for a promotion.
Understanding the Button Blocks
- Buy Now Button: This button is designed for speed and higher conversions. When a customer clicks it, they are taken directly to the checkout page with that single item in their cart, completely bypassing the cart page. It's perfect for sales pages or for reducing the steps to purchase.
- Add To Cart Button: This is the standard shopping button. It adds the selected product to the customer's cart, allowing them to continue browsing and add more items before they are ready to check out. Use this for your general product listings.
- Product Details Button: Use this button to encourage discovery. It links directly to the full product page for a specific item, inviting customers to see more images, read the full description, and view different variations before making a decision.
NOTE
Every FluentCart block comes with its own set of customization options. After adding a block, be sure to check the block settings sidebar on the right to fine-tune its appearance and functionality.
Advanced Layout Control: A Practical Example
The Products block is not just a static grid—it's a flexible container with smaller, nested blocks inside it. This allows you to completely change the layout of your product listings without any code.
Example: Moving the Price Above the Image
Let's say you want to create a unique look for your shop by displaying the price before the product image.
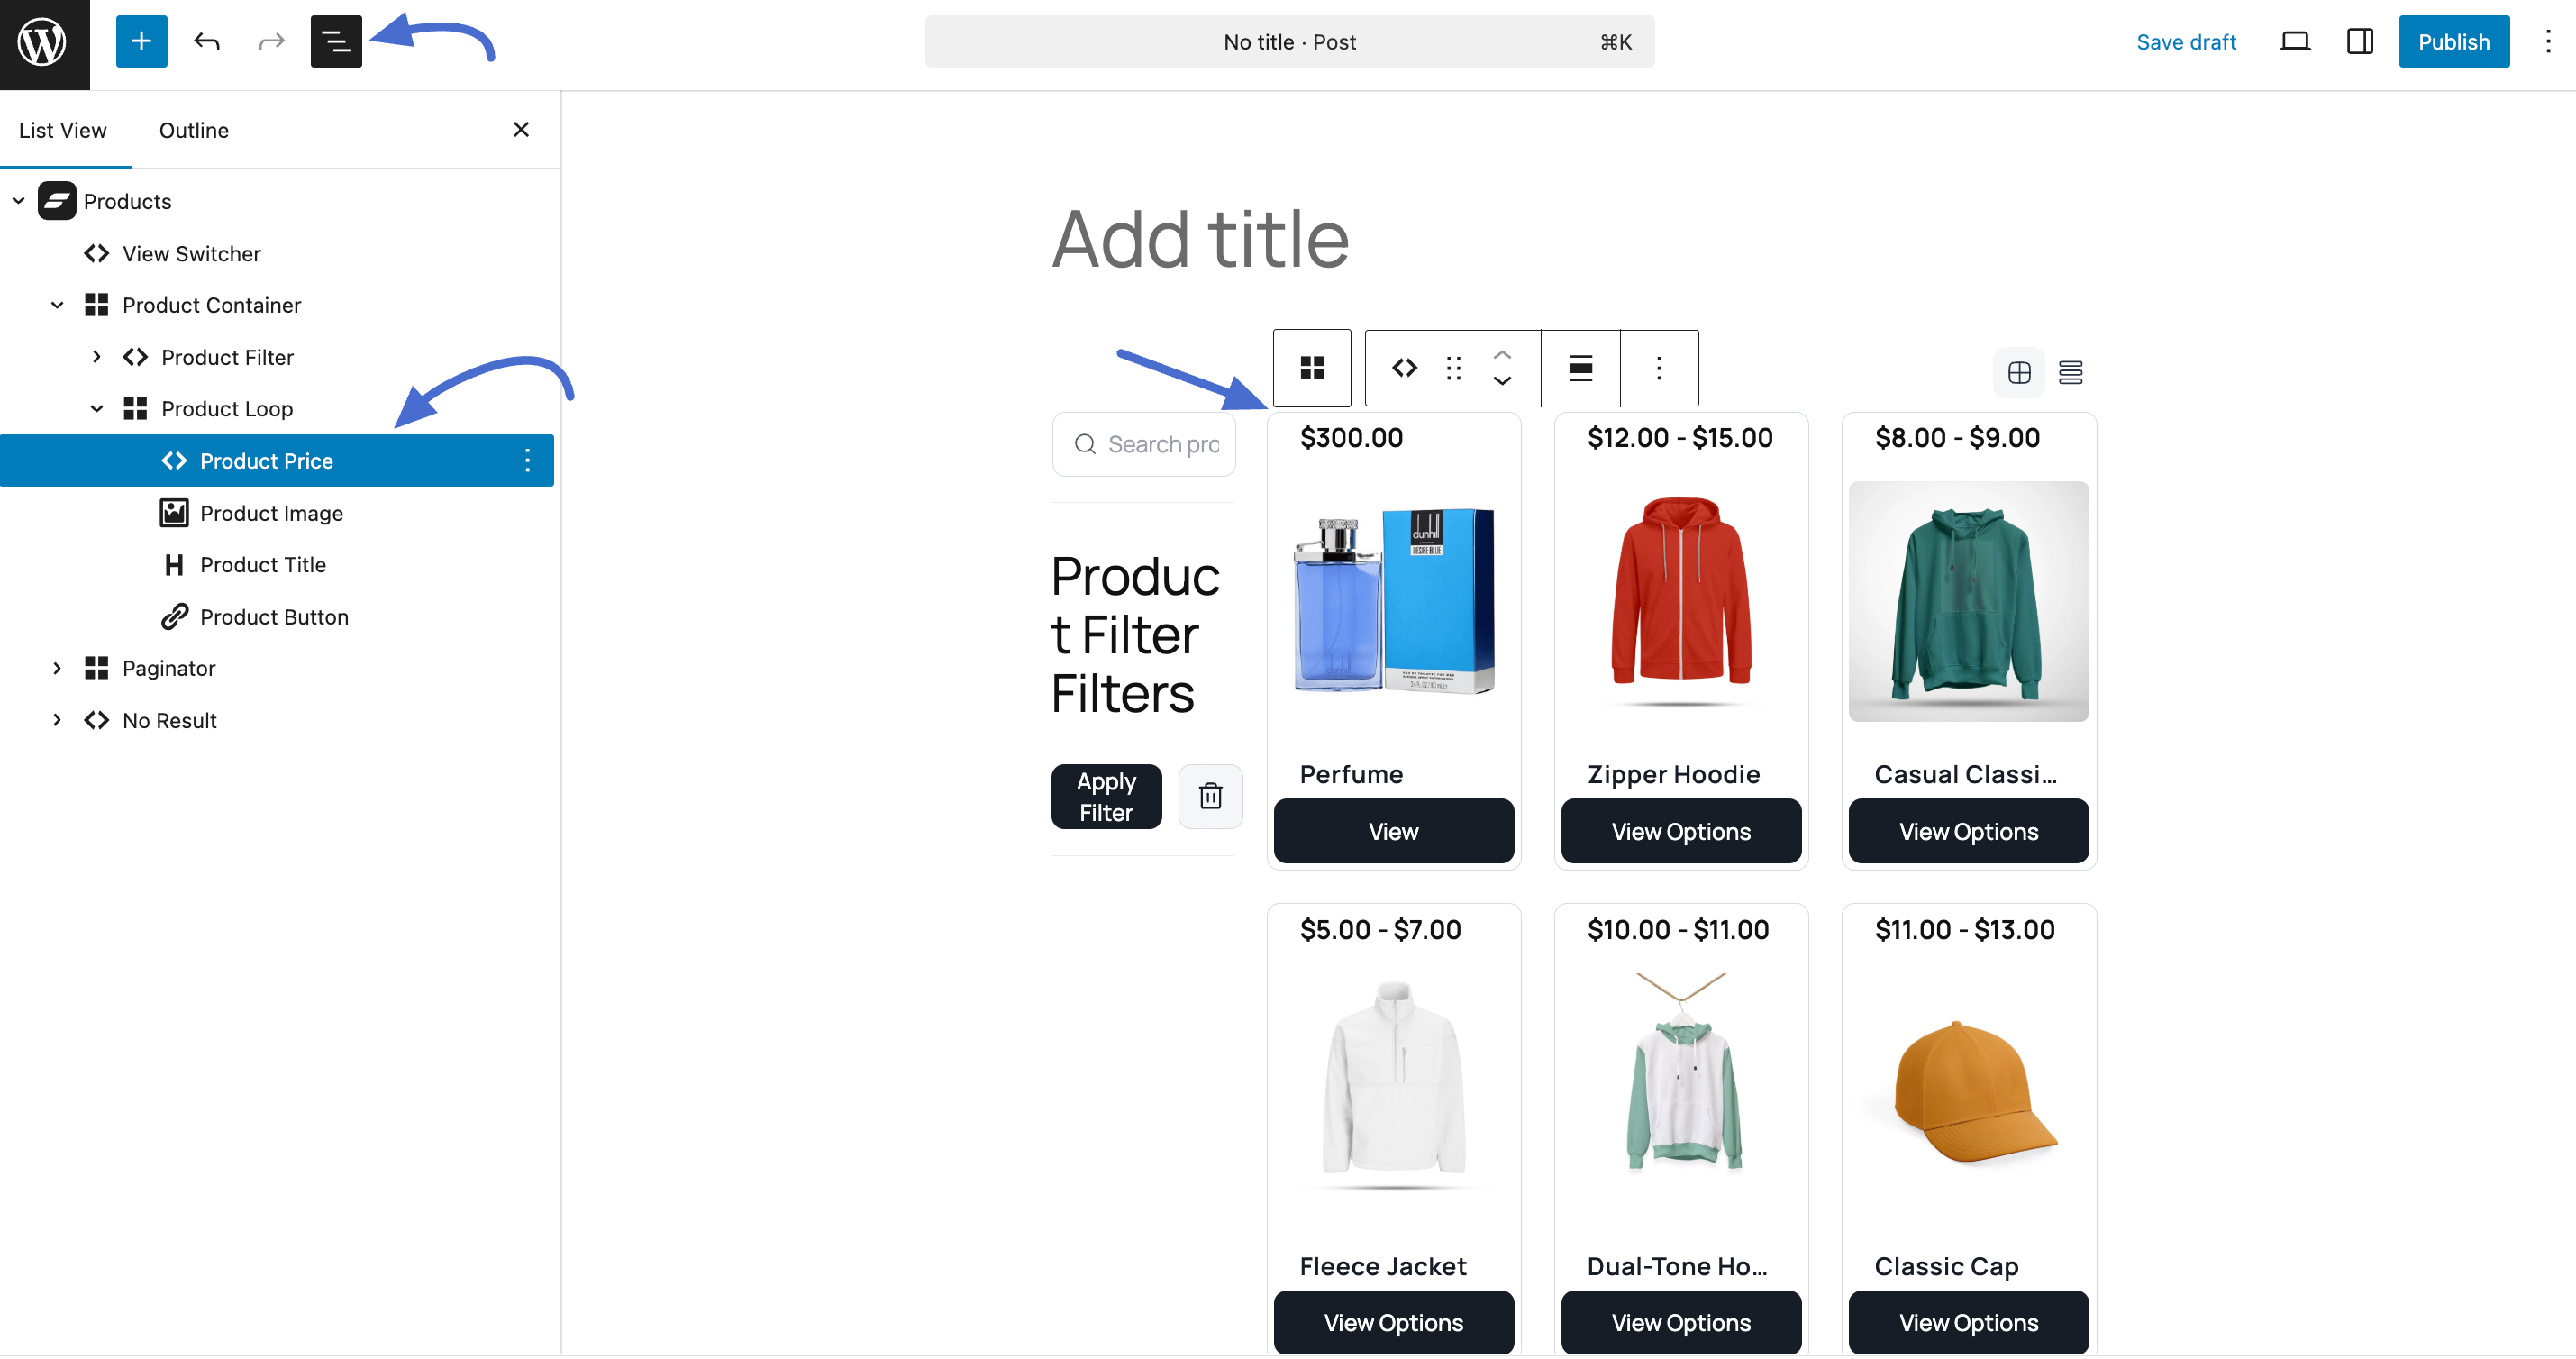
- Add the Products block to your page.
- Select the block, and in the toolbar at the top of the editor, click the List View icon.
- In the List View panel, expand the Products block to see its nested structure. You will find blocks like Product Image, Product Title, and Product Price.
- Simply click and drag the Product Price block and move it above the Product Image block.
Just like that, you have changed the layout for every product in the grid. You can reorder, remove, or customize any of the inner blocks to create the perfect design for your store.
Customizing Core Layouts with Templates (for Block Themes)
If you are using a modern, block-based WordPress theme, you can edit FluentCart's core templates directly. This gives you control over the fundamental design of your product and archive pages.
Accessing FluentCart Templates
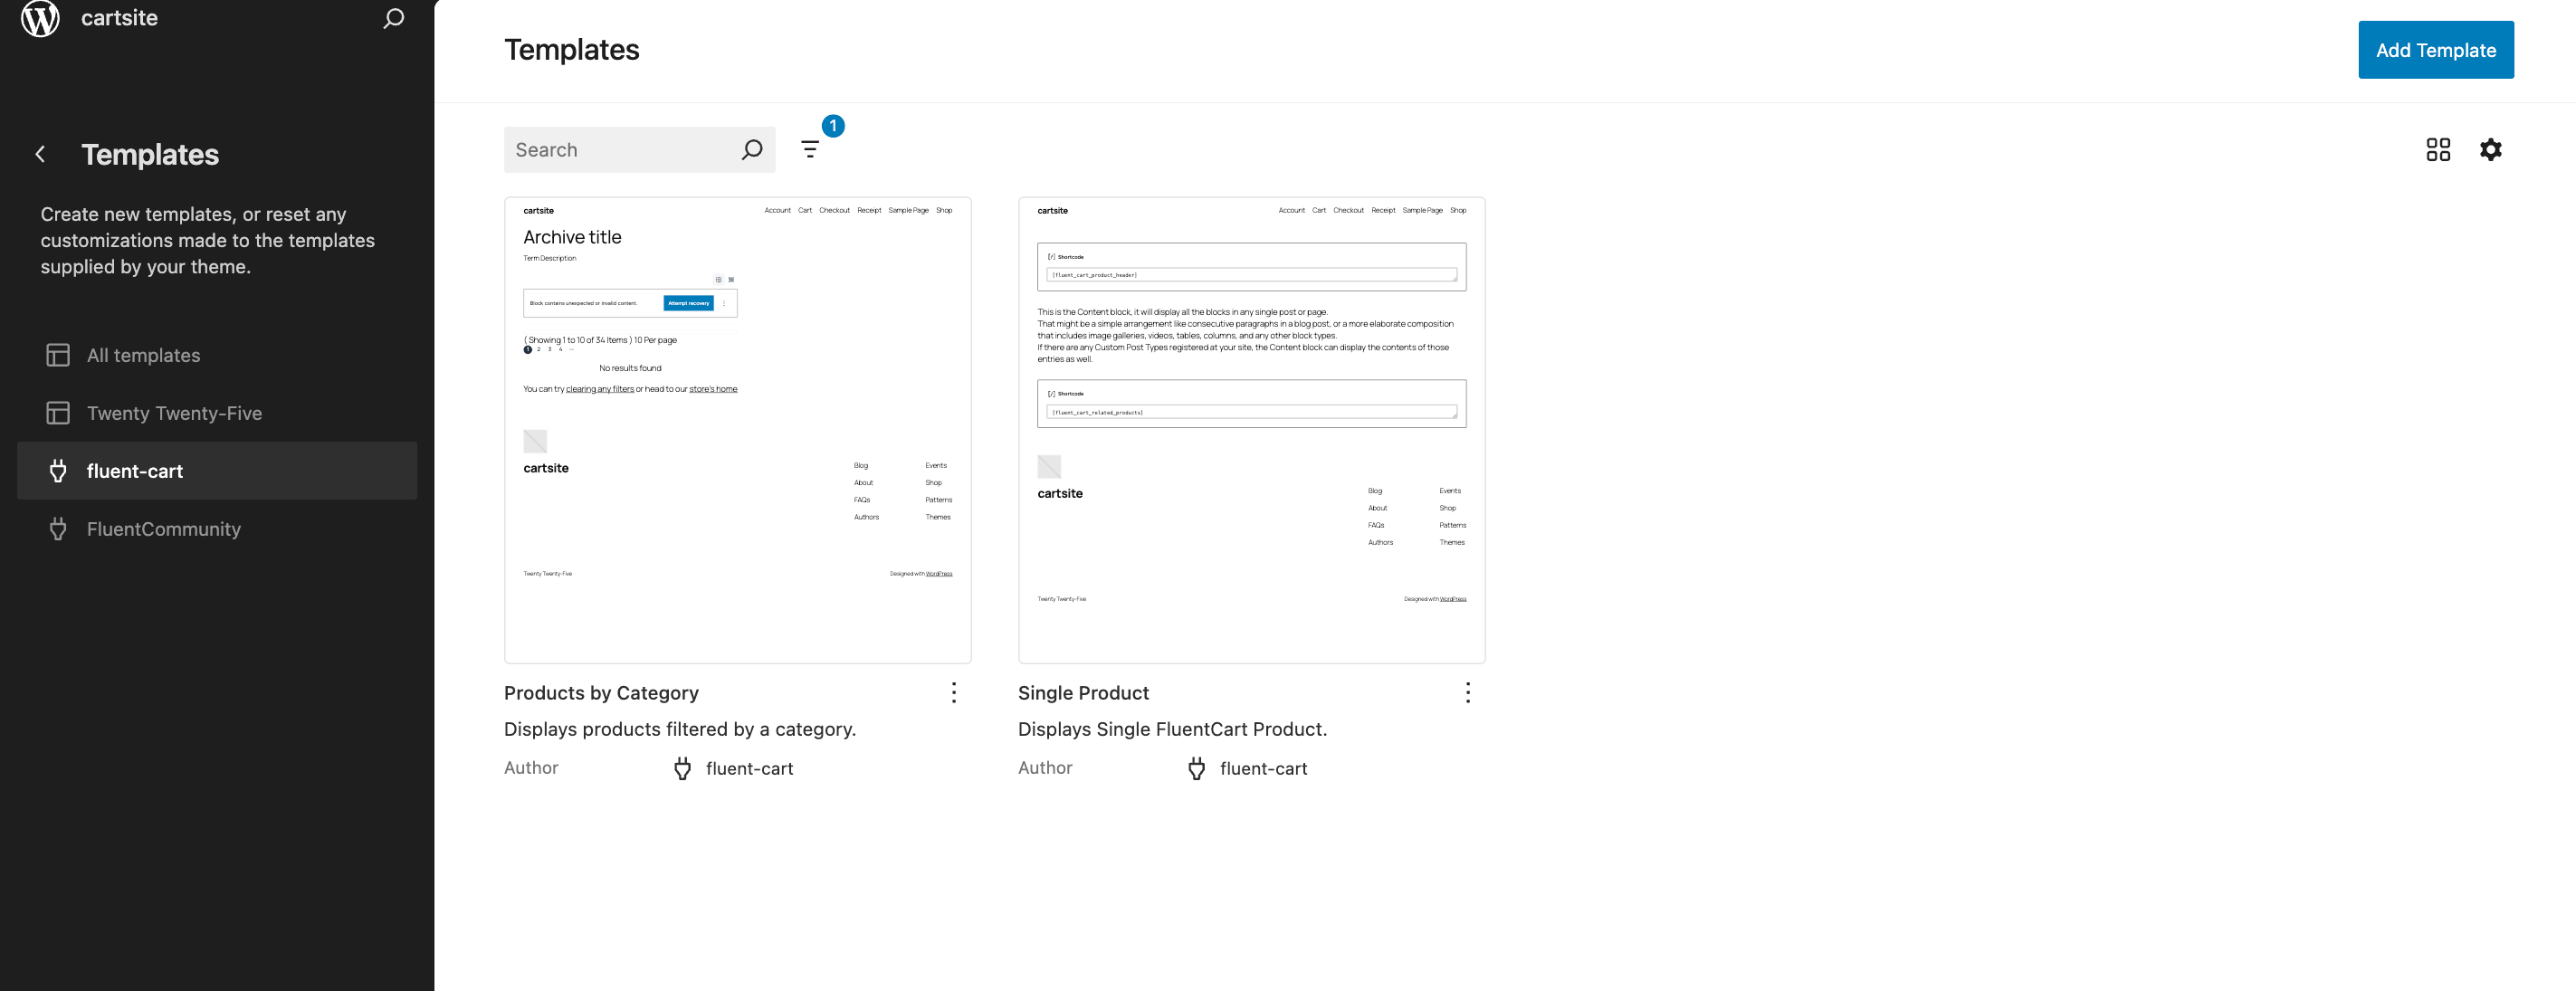
- From your WordPress dashboard, go to Appearance > Editor.
- In the Site Editor, select Templates.
- Look for the FluentCart templates.
- Single Product: This template controls the design of your individual product pages. Edit this to change the layout of the product title, image, description, and price for all products at once.
- Products by Category: This template controls the design of your category pages (the pages that list all products in a category).
Integrating with Page Builders like Bricks
FluentCart's blocks are also fully compatible with popular page builders like Bricks Builder. This allows you to seamlessly integrate FluentCart's e-commerce power with the advanced design capabilities of Bricks. You can use the FluentCart blocks directly within the Bricks editor just as you would in the standard WordPress editor, giving you the best of both worlds.
For other builders that may not have direct block support, FluentCart also provides shortcodes as a flexible way to add product grids and buttons to any design.
TIP
You can always return later to make changes. The Block Editor is flexible, so feel free to experiment without worrying about messing up your layout.
Save Your Changes
When you’re done making changes, click the Save button at the top right. Your customized template will now be live on your site.