Appearance
Configuring Webhooks
Webhooks are a powerful tool for developers and advanced users that allow you to send real-time data from your FluentCart store to external applications and services. When a specific event occurs in your store (like a new order), FluentCart can automatically send a notification containing relevant data to a URL you specify.
This is useful for creating custom integrations, connecting to services that aren't natively supported, or building your own data processing workflows. This guide will walk you through setting up a new webhook.
Step 1: Navigate to Webhooks
- From your WordPress dashboard, navigate to FluentCart Pro > Settings.
- Click on the Webhooks tab from the left-hand menu.
Step 2: Add a New Webhook
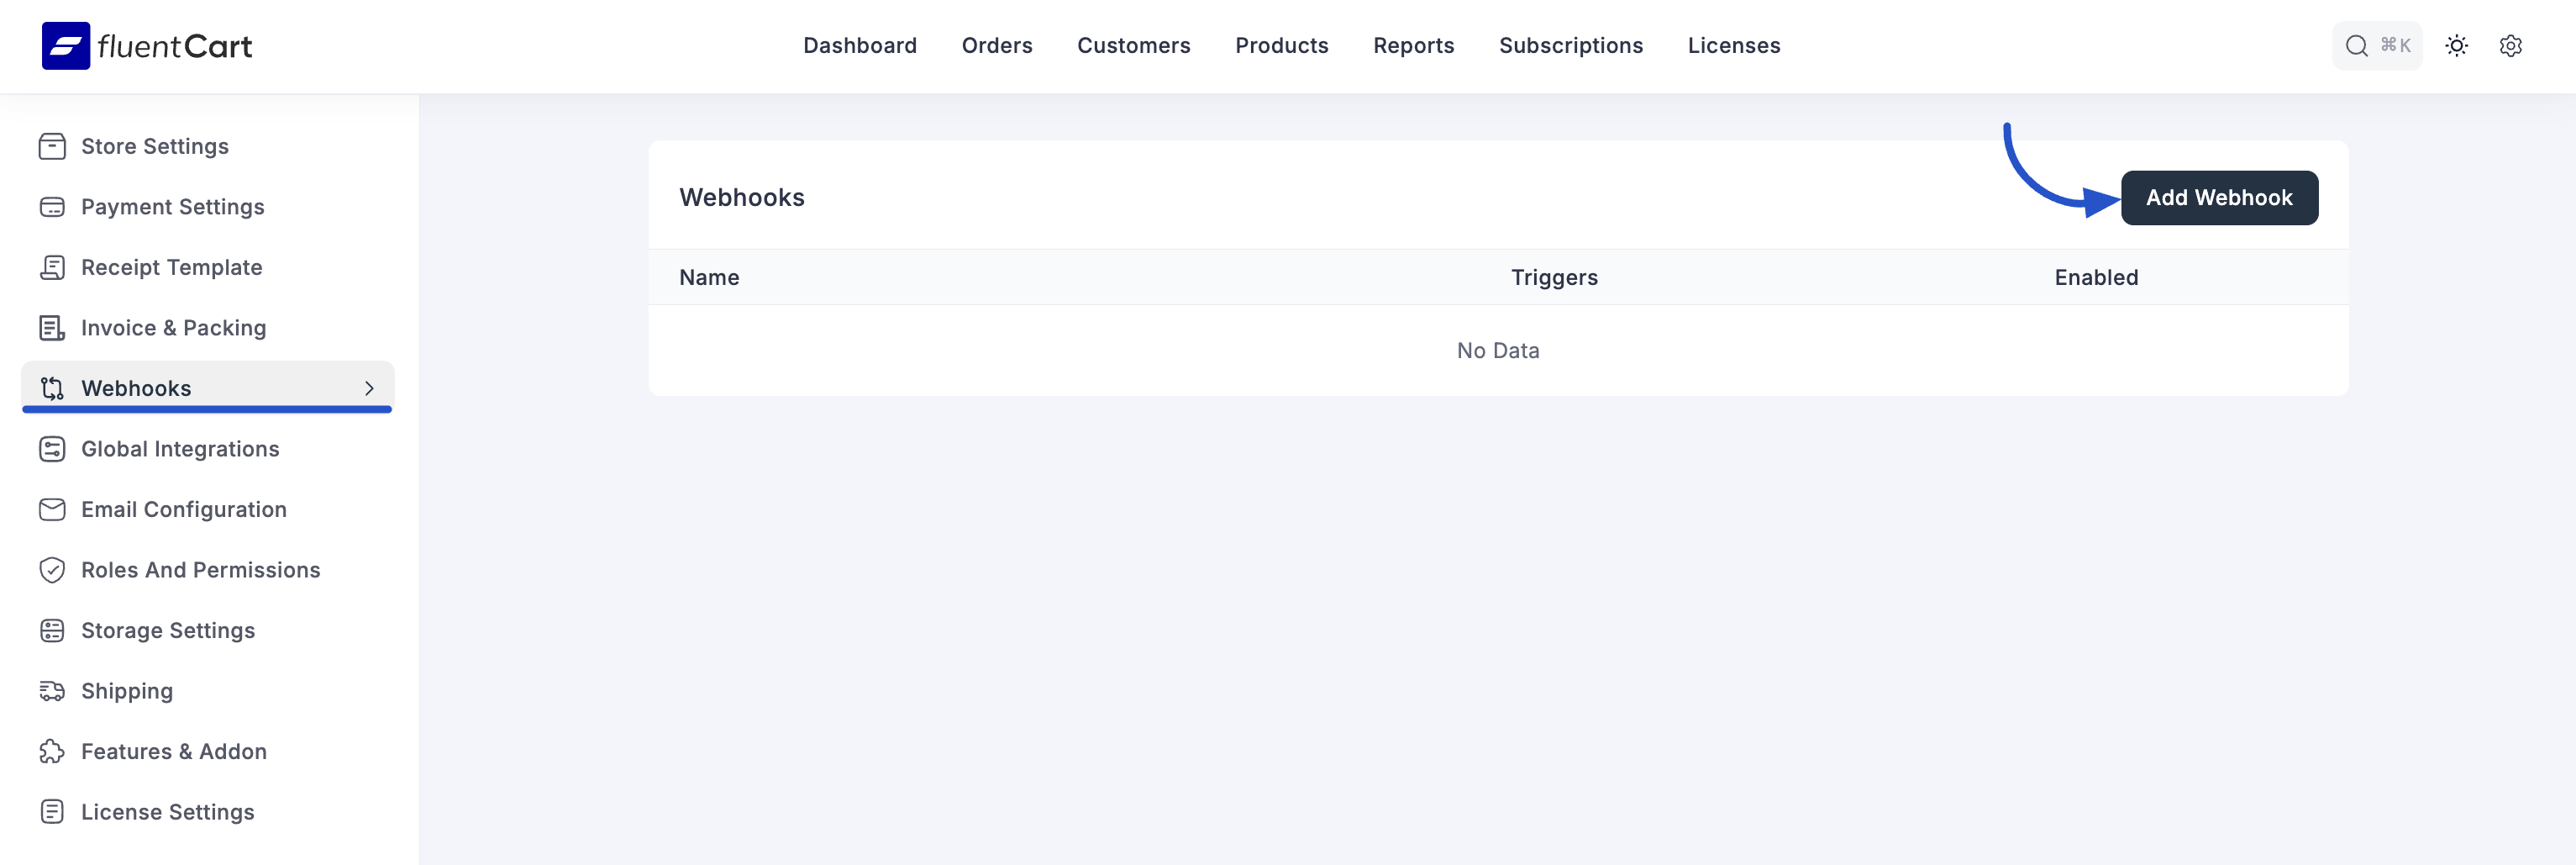
On the Webhooks screen, you will see a list of any webhooks you have already created.
- To create a new one, click the Add Webhook button at the top right of the page. This will take you to the configuration screen.
Step 3: Configure the Webhook Feed
This screen contains all the settings required to define what data is sent, where it's sent, and what triggers it.
1. Basic Configuration
- Name: Give your webhook a descriptive name for internal reference (e.g., "Send New Orders to Accounting App").
- Request URL: This is the most important field. Enter the unique URL provided by the external service that will receive the data.
2. Request Settings
- Request Method: Choose the HTTP method for the request. POST is the most common method for sending data, but GET, PUT, PATCH, and DELETE are also available for different use cases.
- Request Format: Select the format for the data payload. JSON is the modern standard and is recommended for most integrations.
3. Request Headers (Optional)
- Headers are used to send extra information with the request, often for authentication (like an API key). You can choose:
- No Headers: If the receiving service doesn't require any.
- With Headers: To add custom key-value pairs.
4. Request Body
This section defines the actual data that will be sent in the webhook payload.
- All Data: Select this to send the complete, default data object associated with the trigger event.
- Selected Fields: Choose this option for more control. You can specify exactly which data points to send by providing a Field Name and a corresponding Field Value. Click the plus icon (+) to add more fields.
5. Event Trigger
This is where you select the specific store event(s) that will fire this webhook.
- Click into the Select event triggers box to see a dropdown list of available triggers. You can select one or more events.
- Available Triggers include:
- Orders:
Order Created,Order Completed / Paid,Order Canceled,Order Refunded - Subscriptions:
Subscription Canceled,Subscription Renewed,Subscription Expired - Products:
Product Shipped
- Orders:
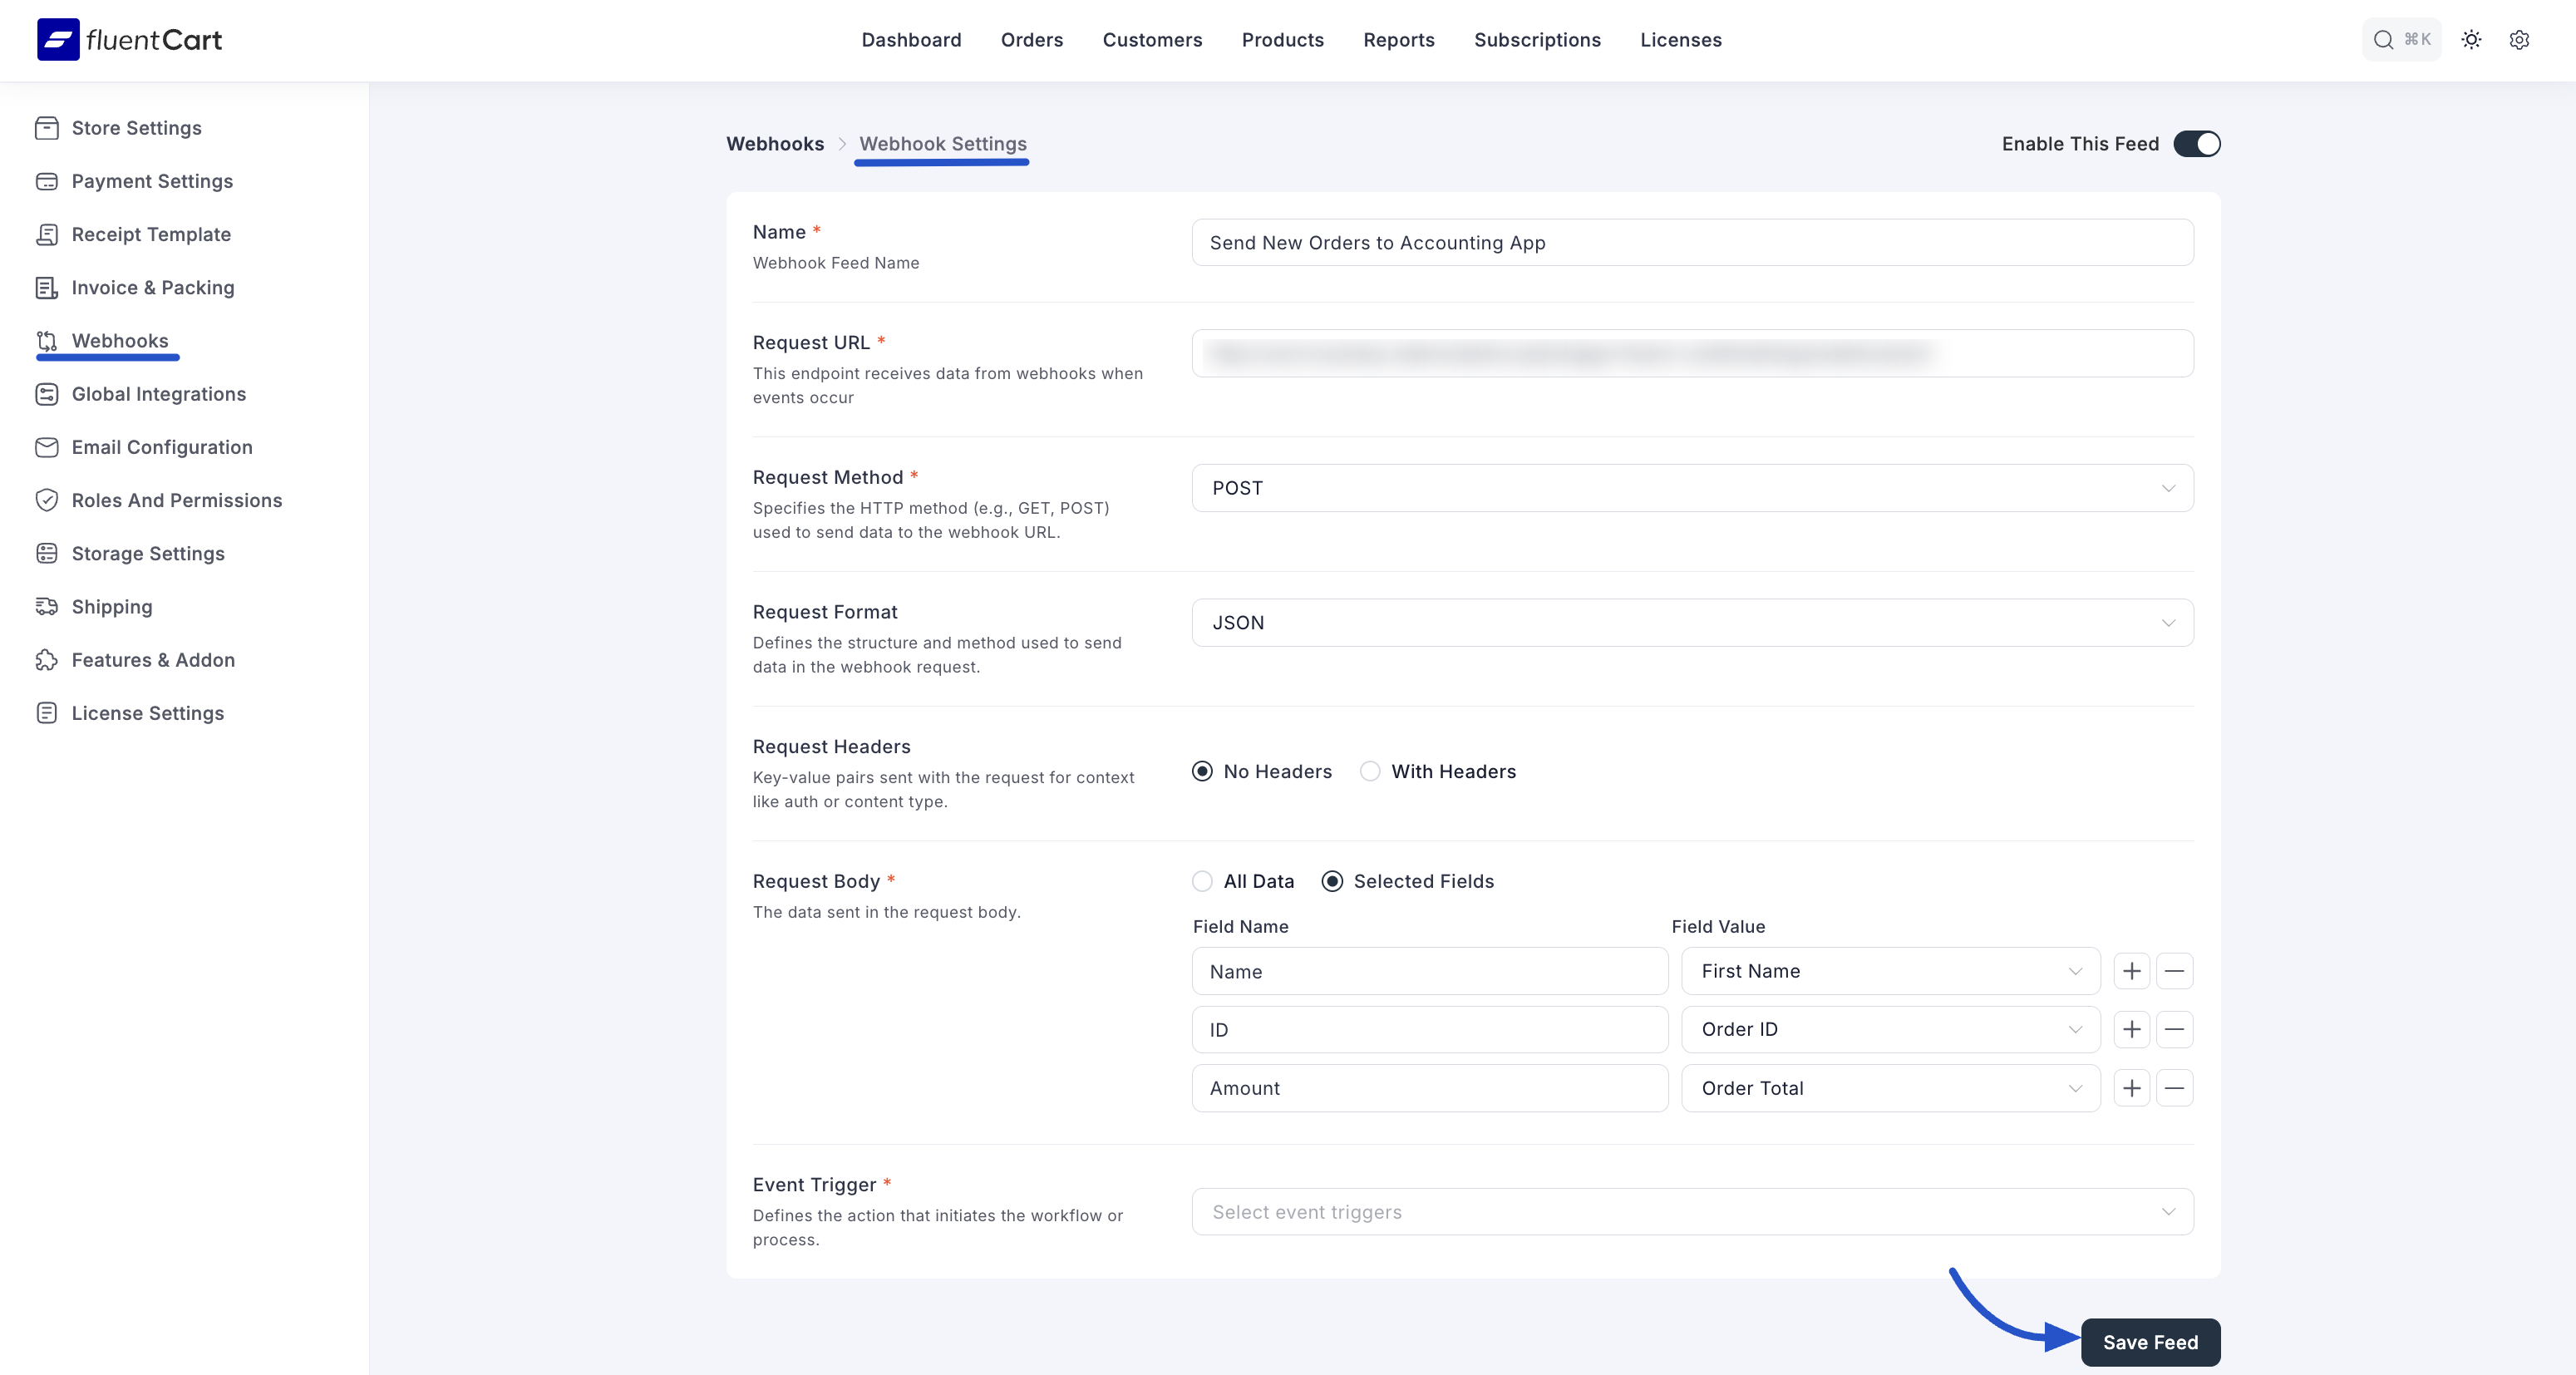
Step 4: Save and Activate the Webhook
- Enable This Feed: At the top right of the screen, ensure the toggle is switched on to make the webhook active.
- Click the Save Feed button at the bottom to save your configuration.
Your webhook is now live. When one of the selected trigger events occurs in your store, FluentCart will automatically send the configured data to your specified Request URL.
Managing Your Webhooks
After creating a webhook, it will appear in a list on the main Webhooks screen. This dashboard provides a clear overview of all your webhooks and allows you to manage them easily.
For each webhook in the list, you can see its Name, the Triggers it's assigned to, and several management options:
- Enable/Disable Toggle: Use the toggle switch in the "Enabled" column to quickly activate or deactivate a webhook without deleting it.
- Edit: Click the pencil icon to open the configuration screen and make changes to the webhook's settings.
- Delete: Click the trash can icon to permanently delete the webhook. A confirmation will be required.
