Appearance
Integrating with Mailchimp
FluentCart offers a direct and powerful integration with Mailchimp, one of the world's leading email marketing platforms. By connecting your store to Mailchimp, you can automate your marketing efforts, build relationships with your customers, and grow your business more effectively. This integration allows you to automatically add new customers to your Mailchimp audience, segment them with tags based on their purchase behavior, and sync their data, all without any manual effort.
This comprehensive guide will walk you through the entire process, from getting your Mailchimp API key to creating and configuring your first automation feed.
Step 1: Get Your Mailchimp API Key
Before you can connect your store, you first need to retrieve your API Key from your Mailchimp account. An API Key is a unique code that acts like a password, granting FluentCart permission to access your Mailchimp audience and add contacts.
- Log in to your Mailchimp account.
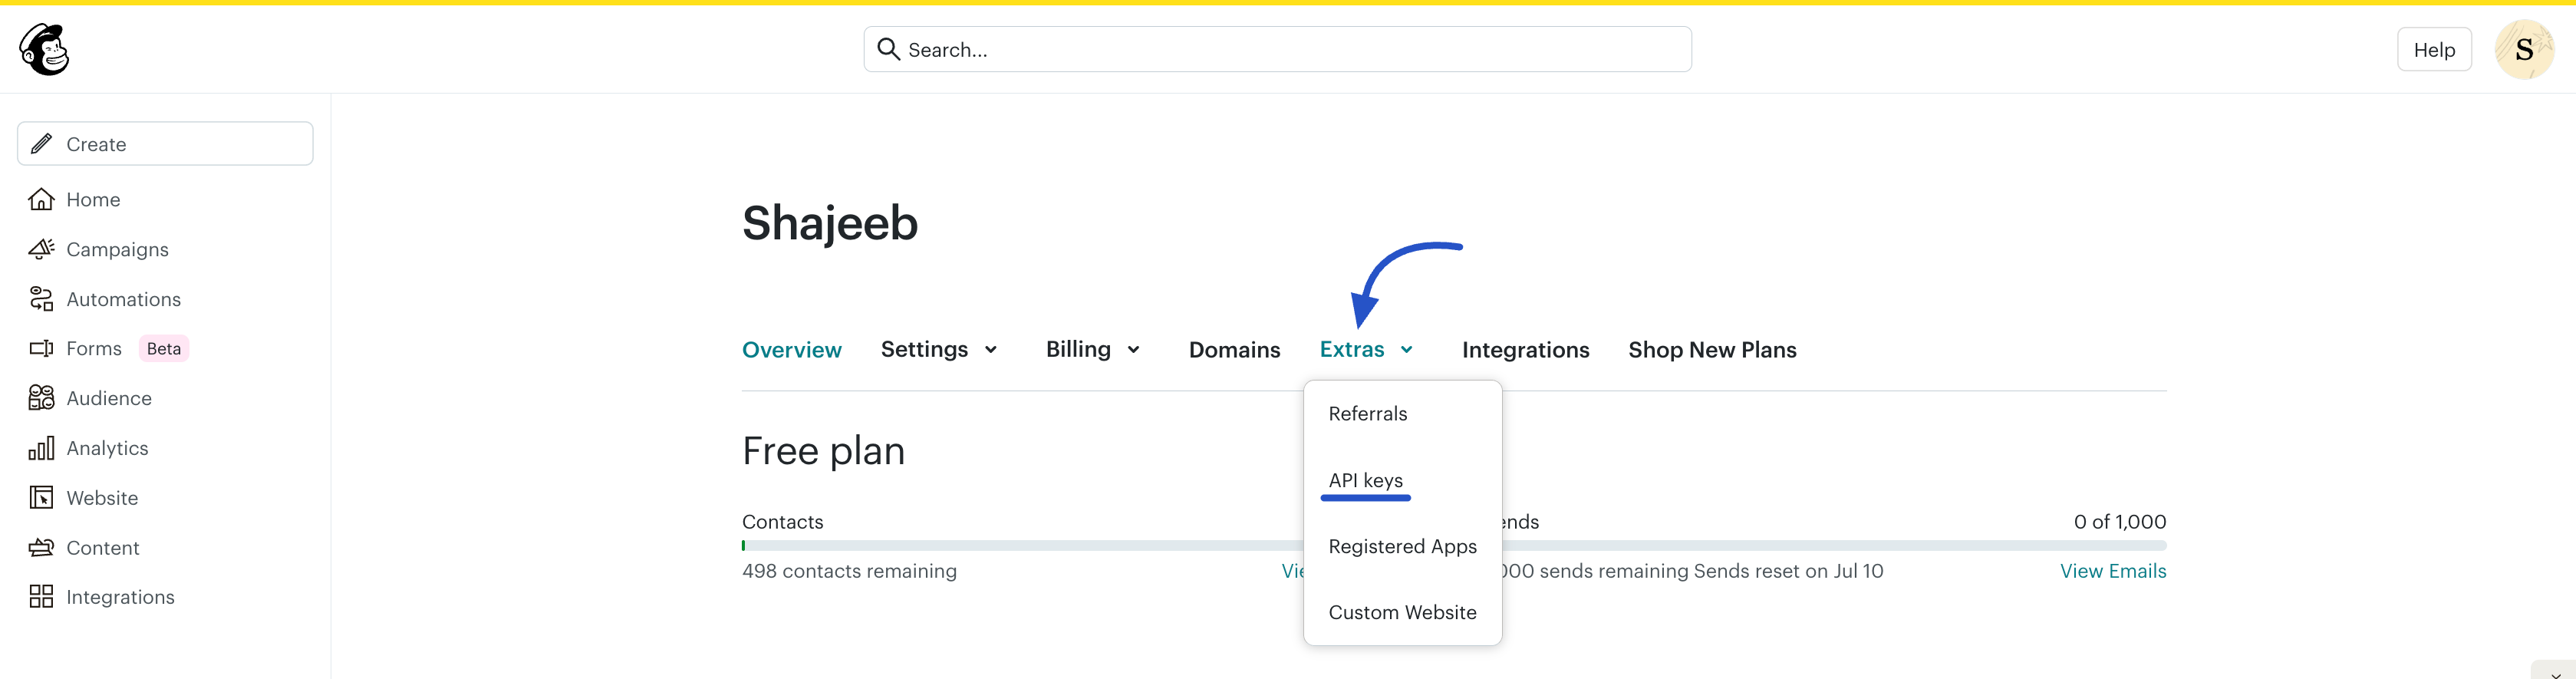
- Click on your profile icon at the bottom left of the screen and navigate to Account & billing > Extras > API keys.
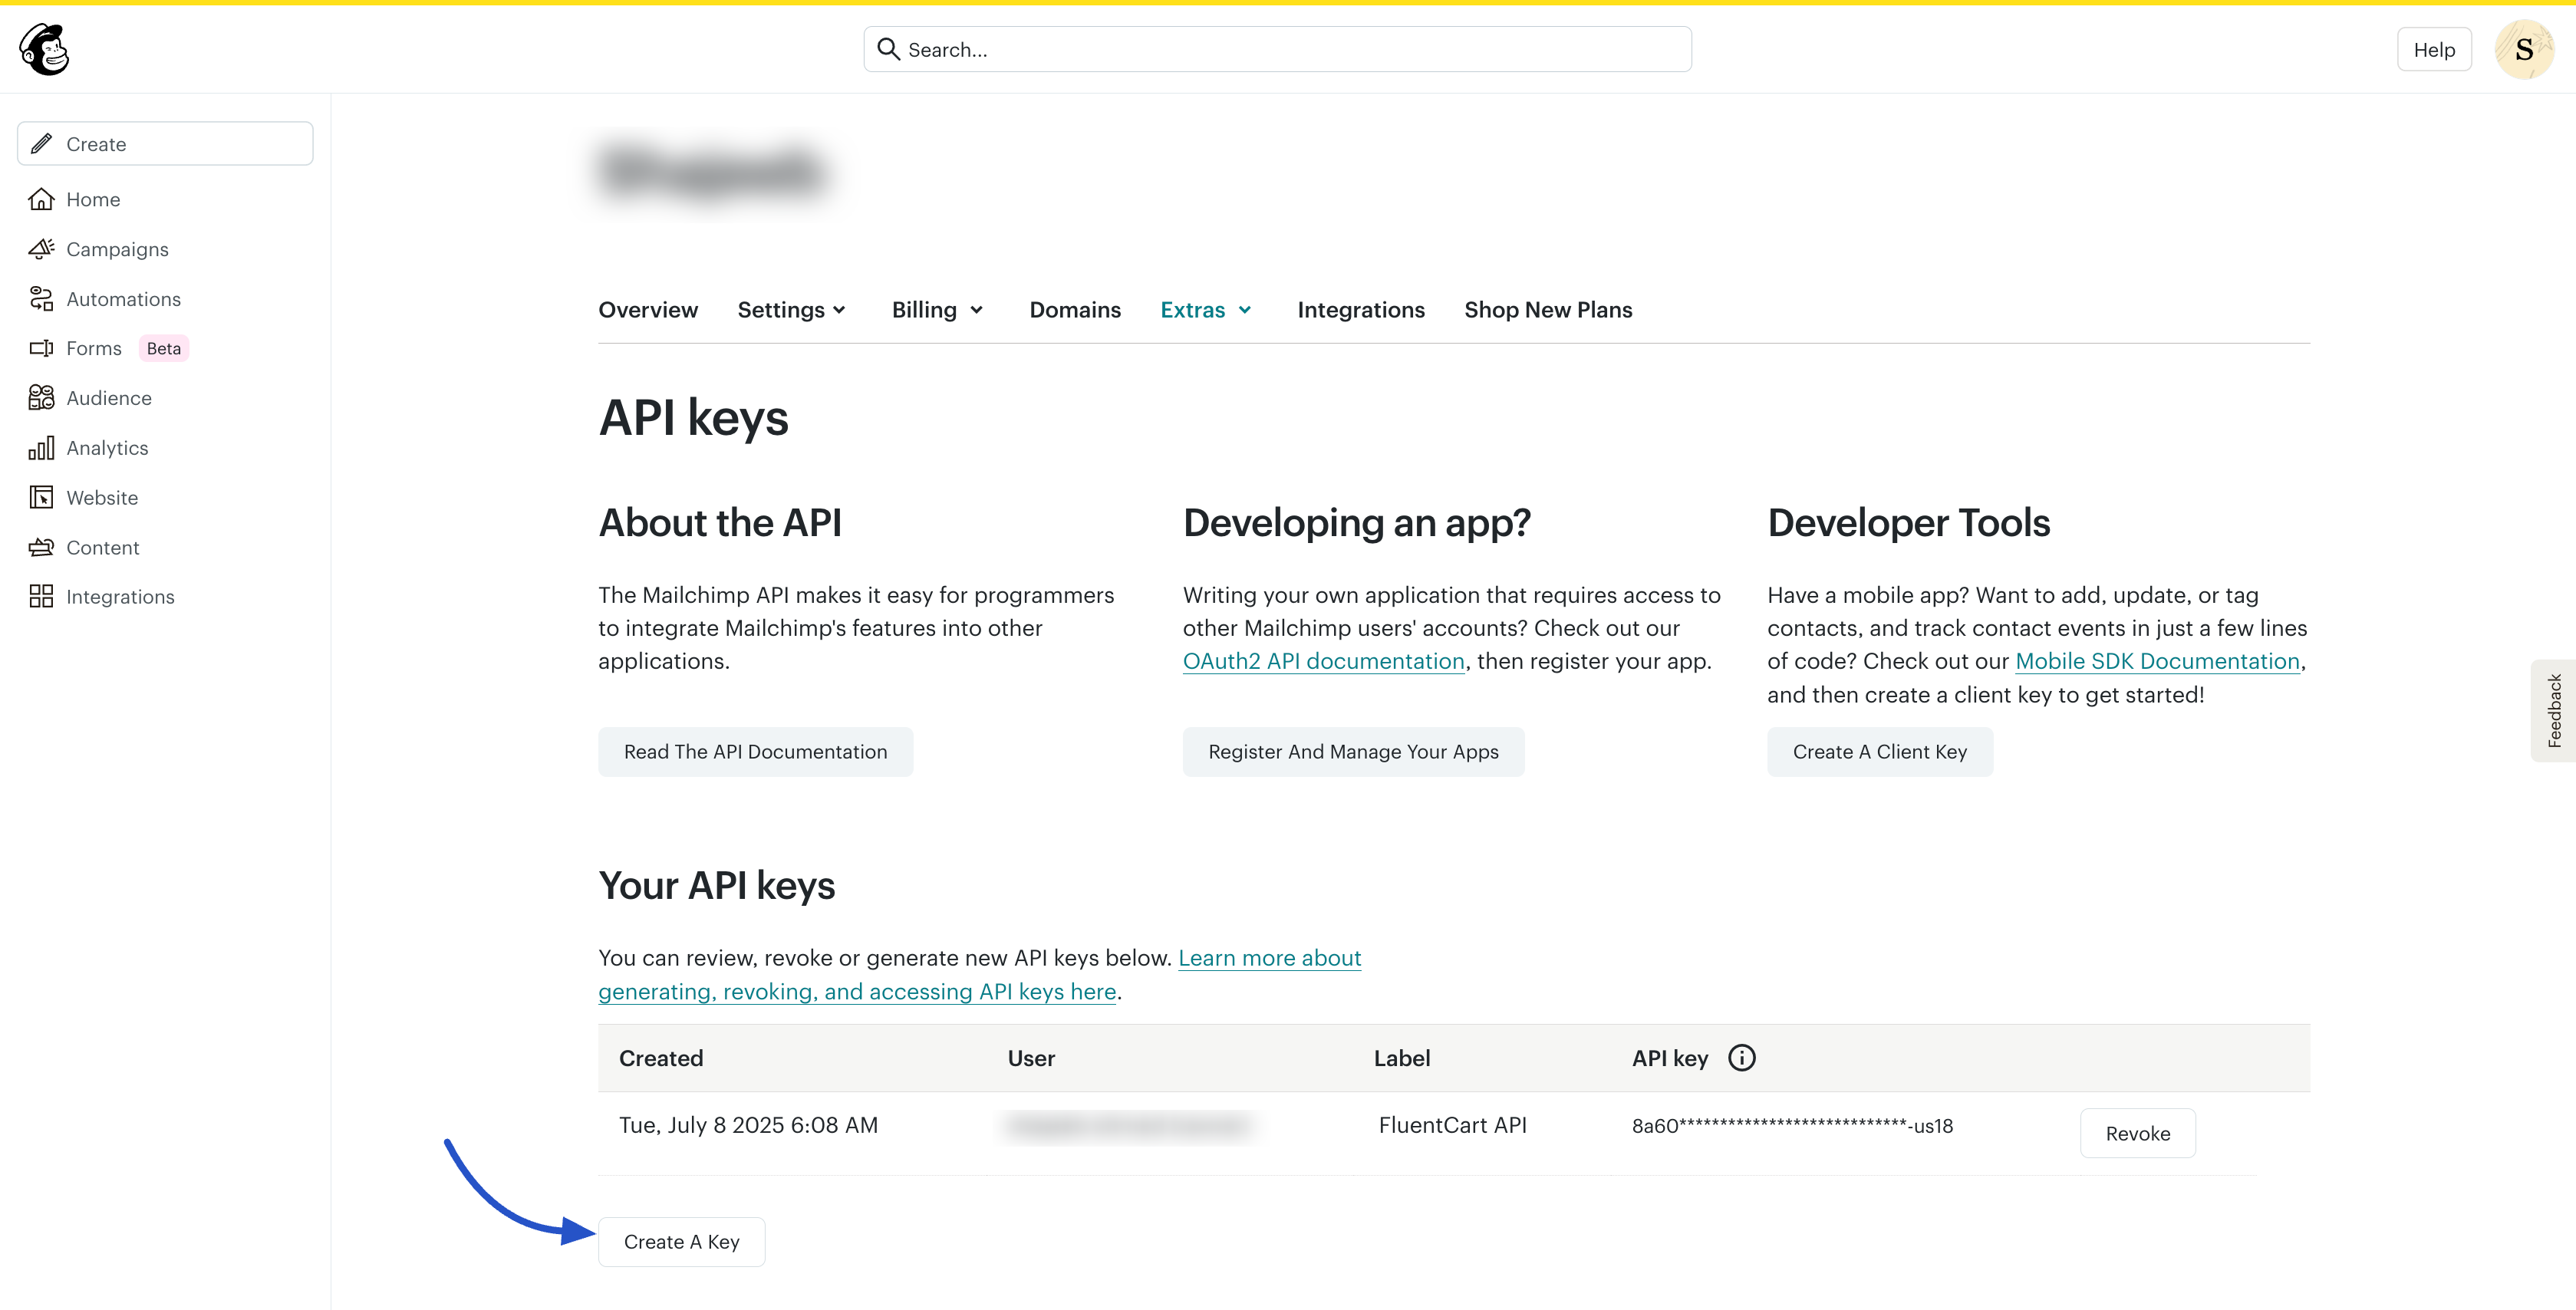
- If you want to create a new API key, click the Create A Key button.
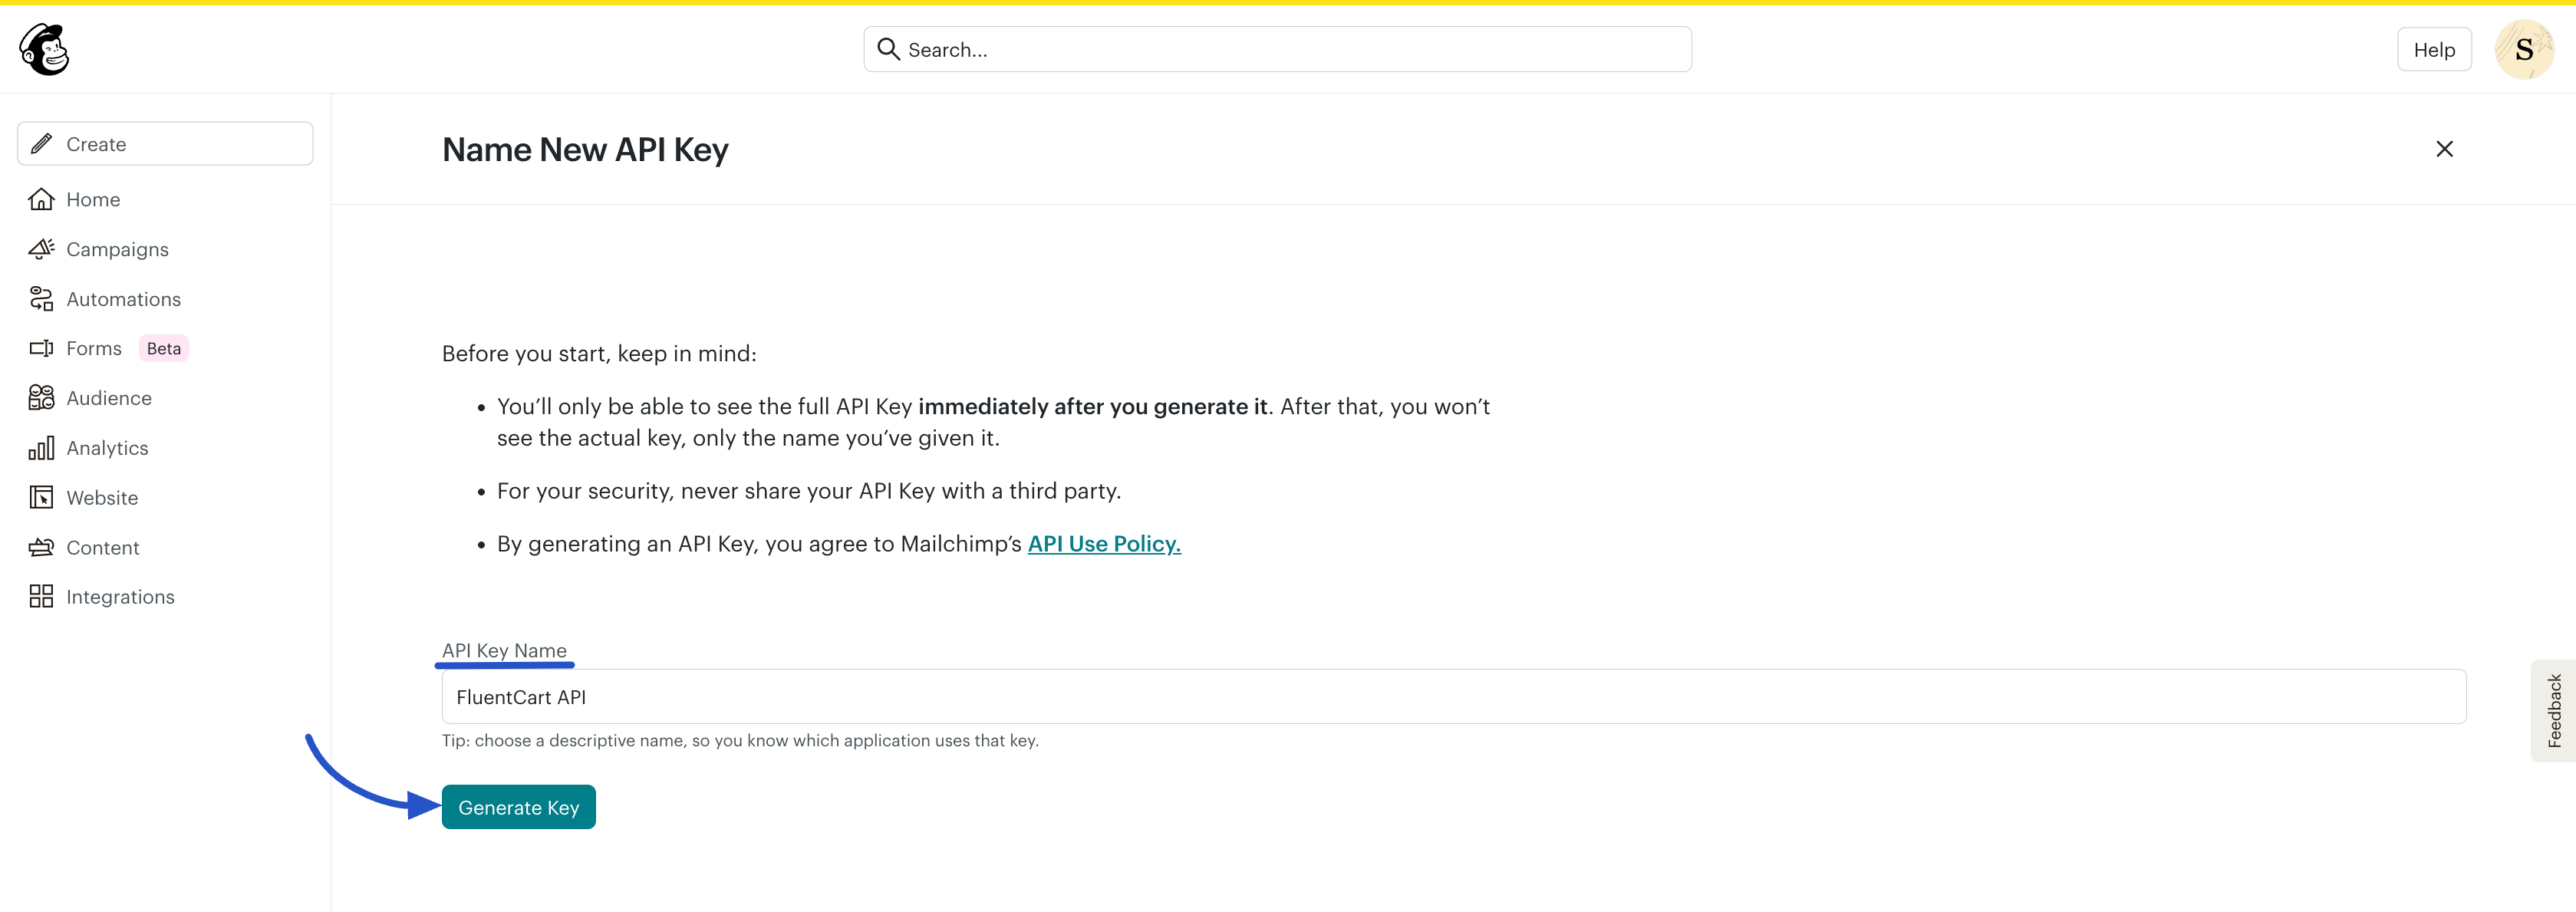
- Give the key a descriptive name that you will recognize, such as "FluentCart Store," and click Generate Key.
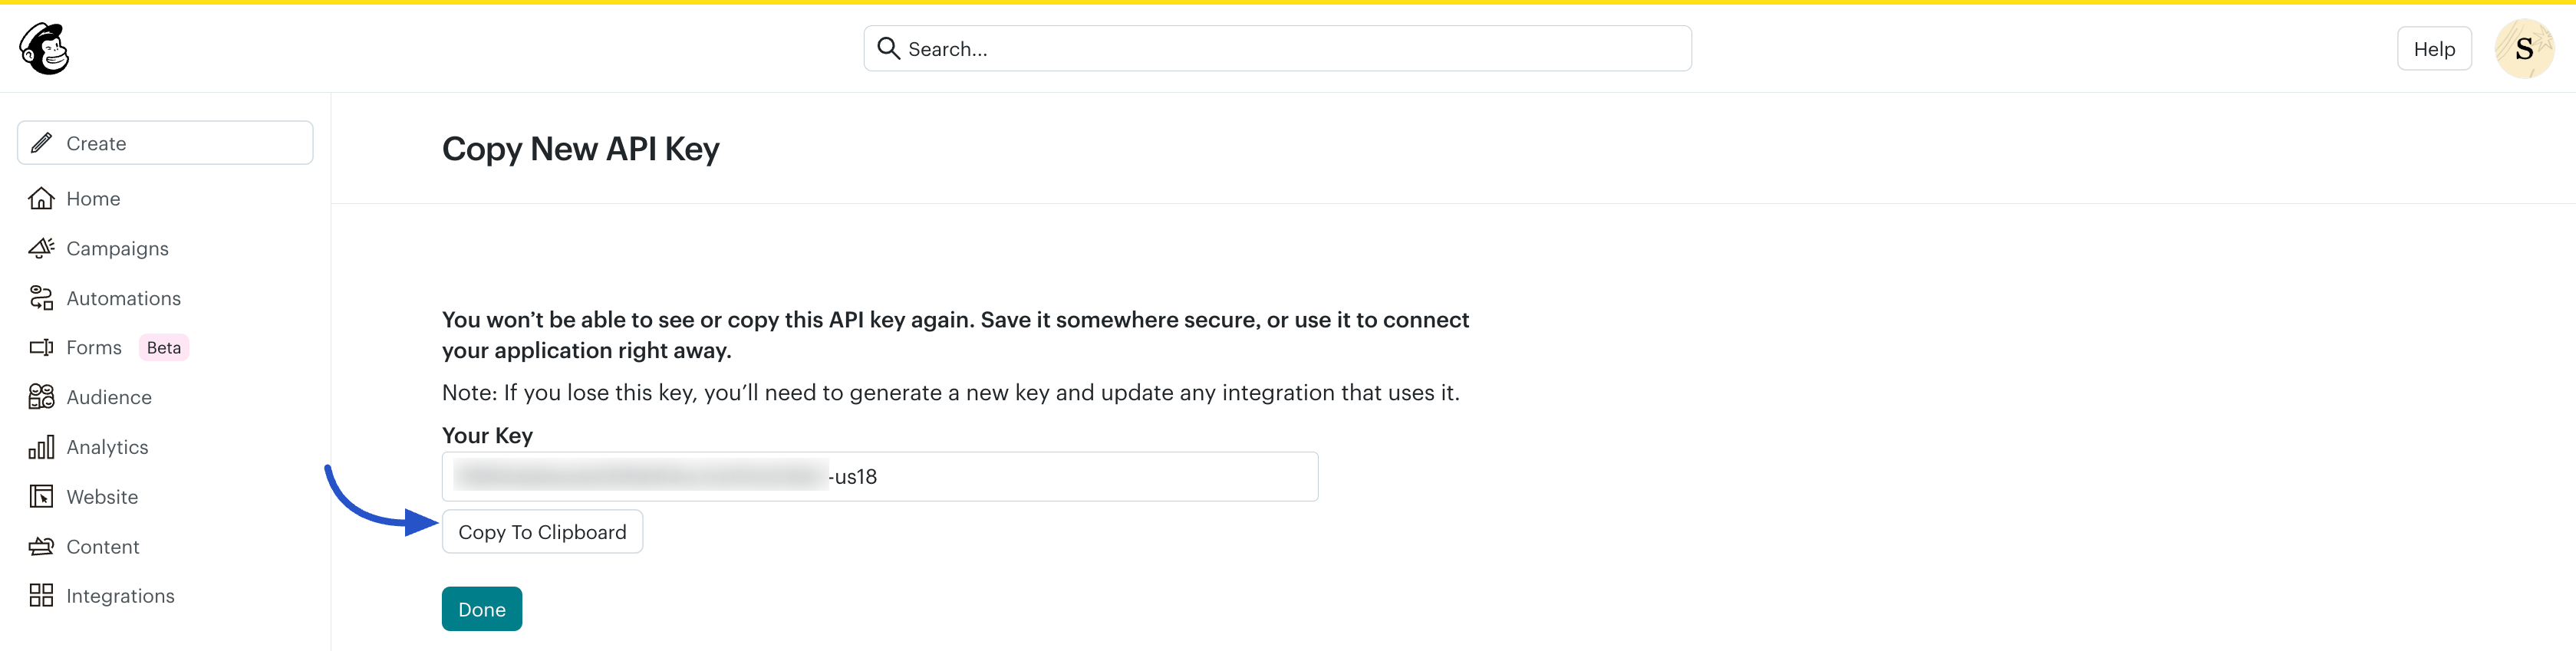
- Mailchimp will display your new API key one time only. It is crucial to click Copy To Clipboard and save it in a secure location immediately, as you will not be able to view or copy it again.
Step 2: Connect Mailchimp to FluentCart
With your API key copied, you can now return to your WordPress dashboard to enable the module and establish the connection between the two platforms.
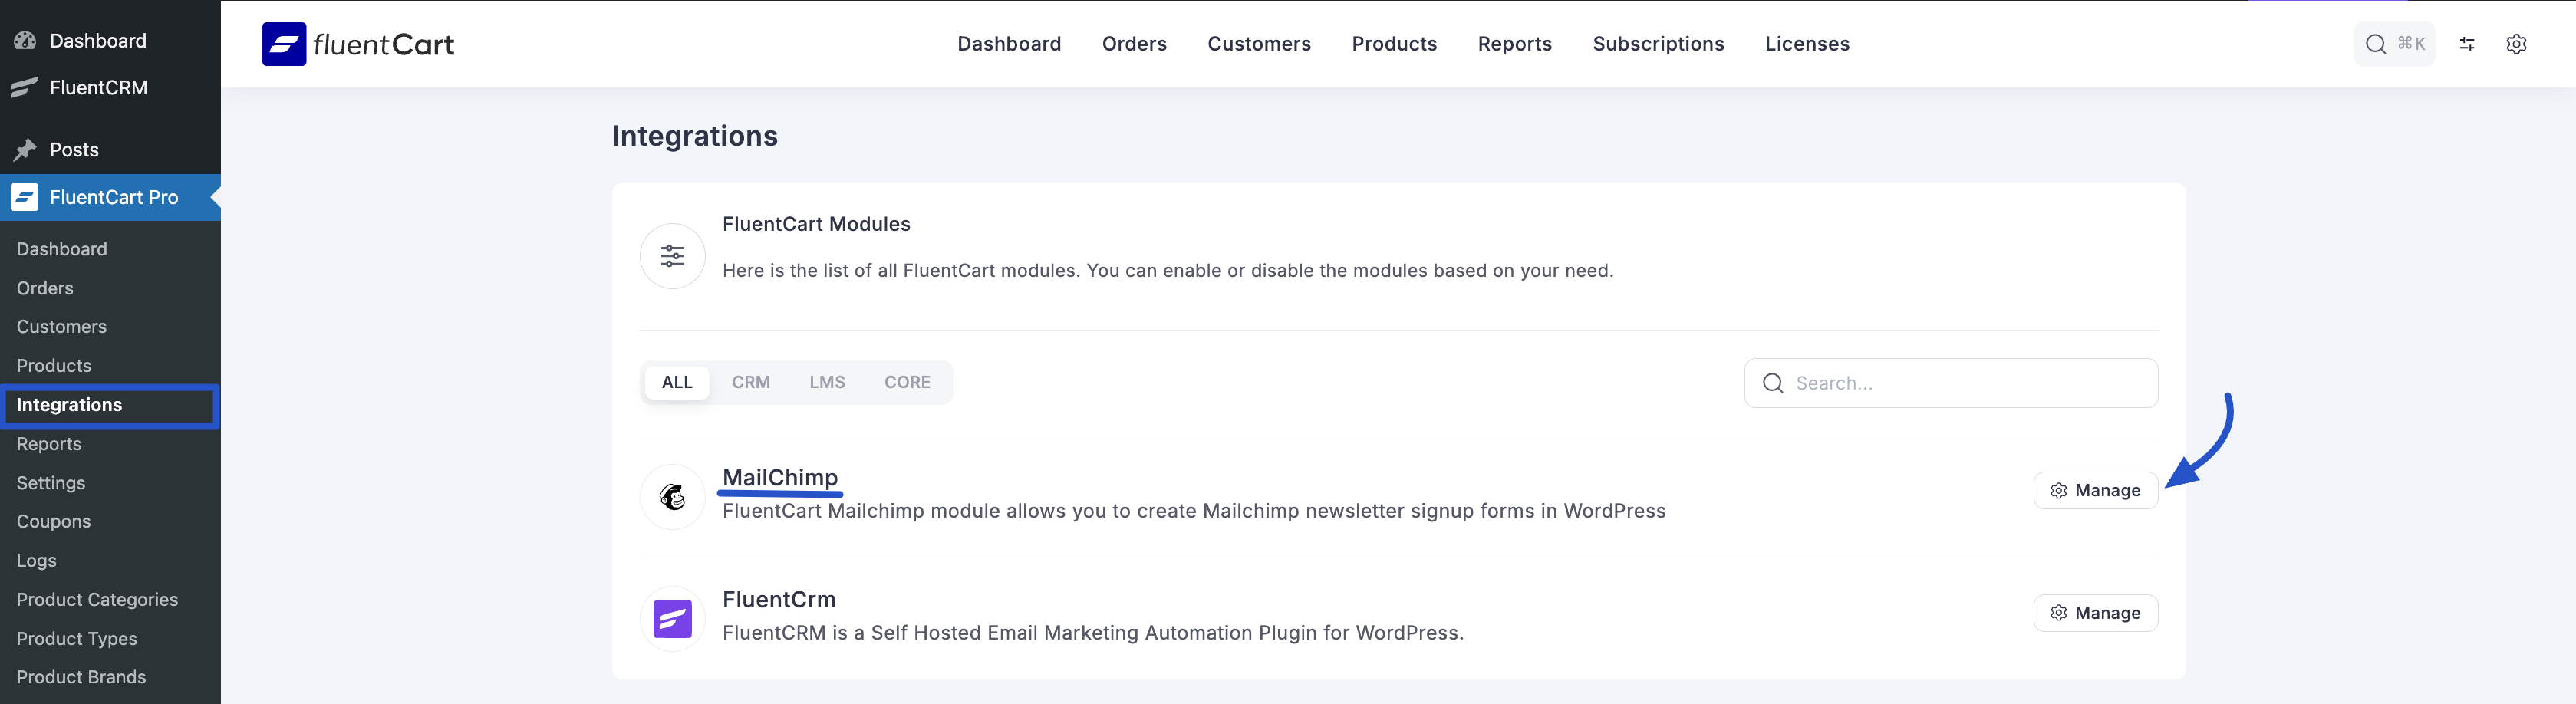
- From your WordPress dashboard, navigate to FluentCart Pro > Integrations.
- Find Mailchimp in the list of available FluentCart Modules and click the Manage button.
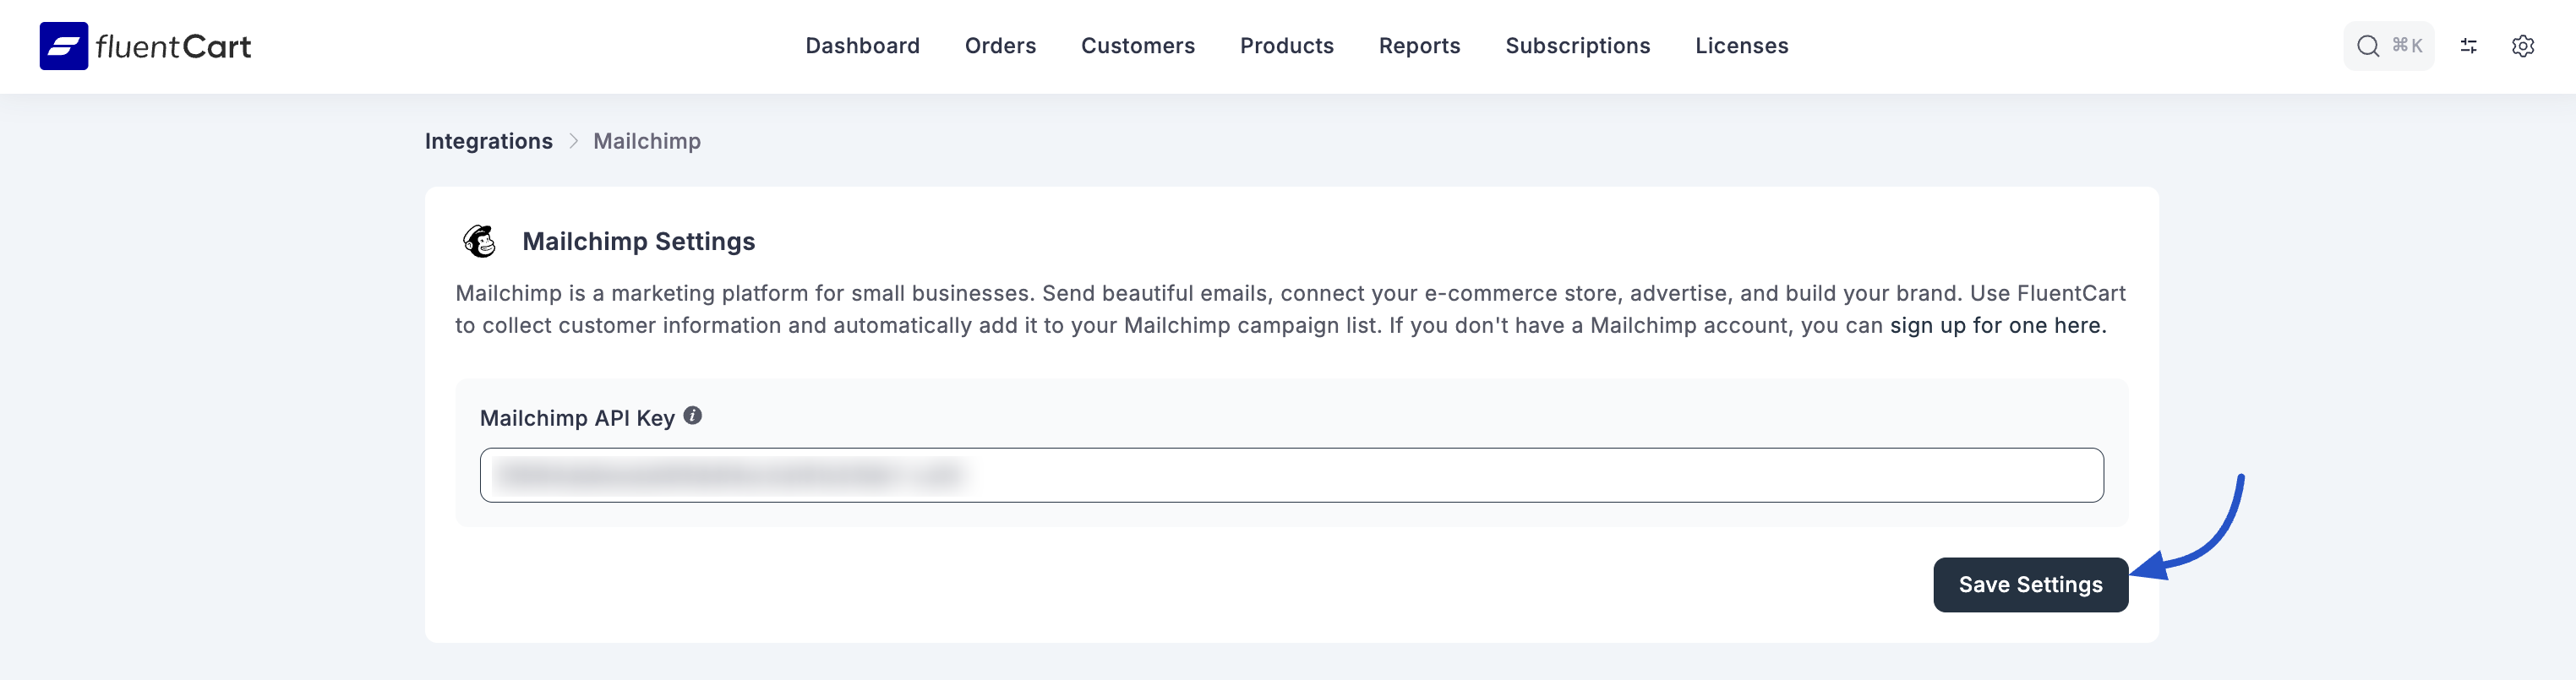
- Paste your copied Mailchimp API Key into the designated field.
- Click the Save Settings button. If the key is correct, you will see a success message confirming that the integration is active.
Step 3: Create a New Mailchimp Feed
Once the global connection is established, you can create specific automation "feeds." A feed is a single, configured rule that tells FluentCart what data to send to Mailchimp and when to send it. You can create multiple feeds for different purposes.
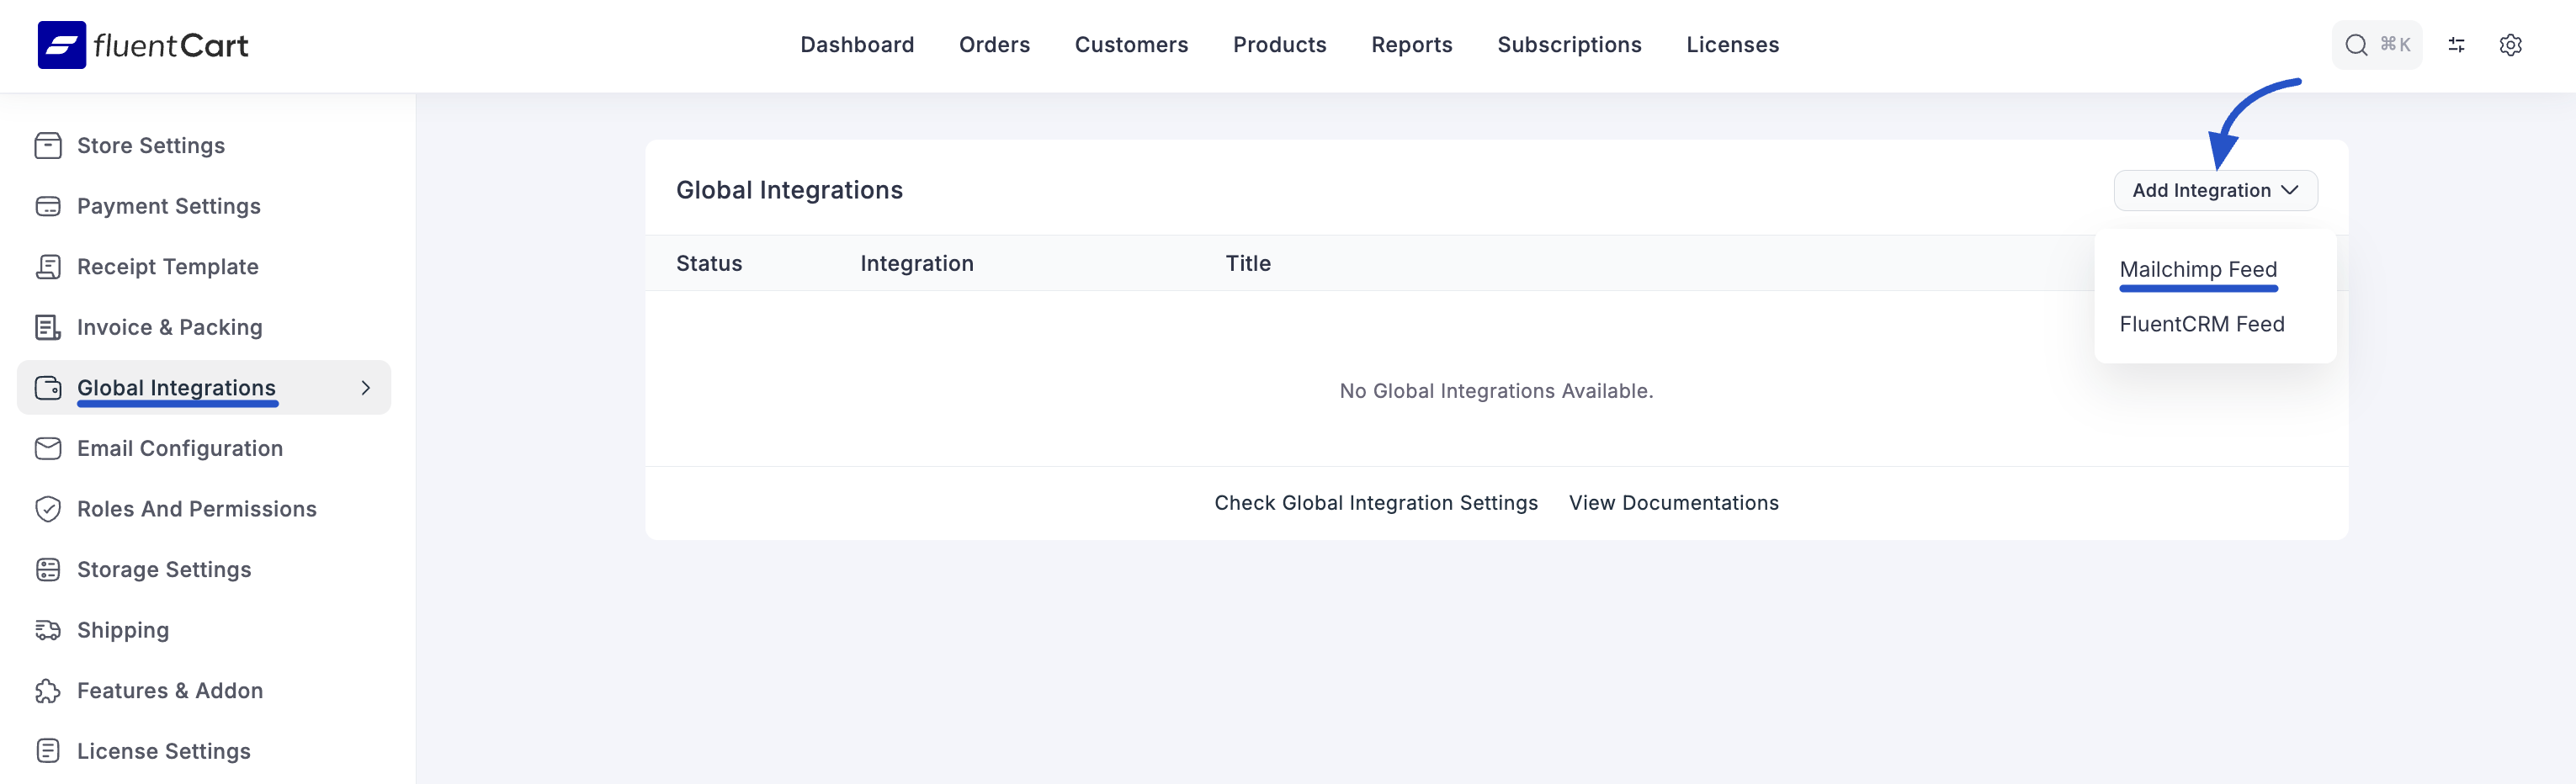
- From your WordPress dashboard, navigate to FluentCart Pro > Settings.
- Click on the Global Integration tab.
- Click the Add Integration button at the top right of the screen and select Mailchimp Feed from the dropdown menu.
Step 4: Configure the Mailchimp Feed
This screen is where you will define the specific rules for your automation.
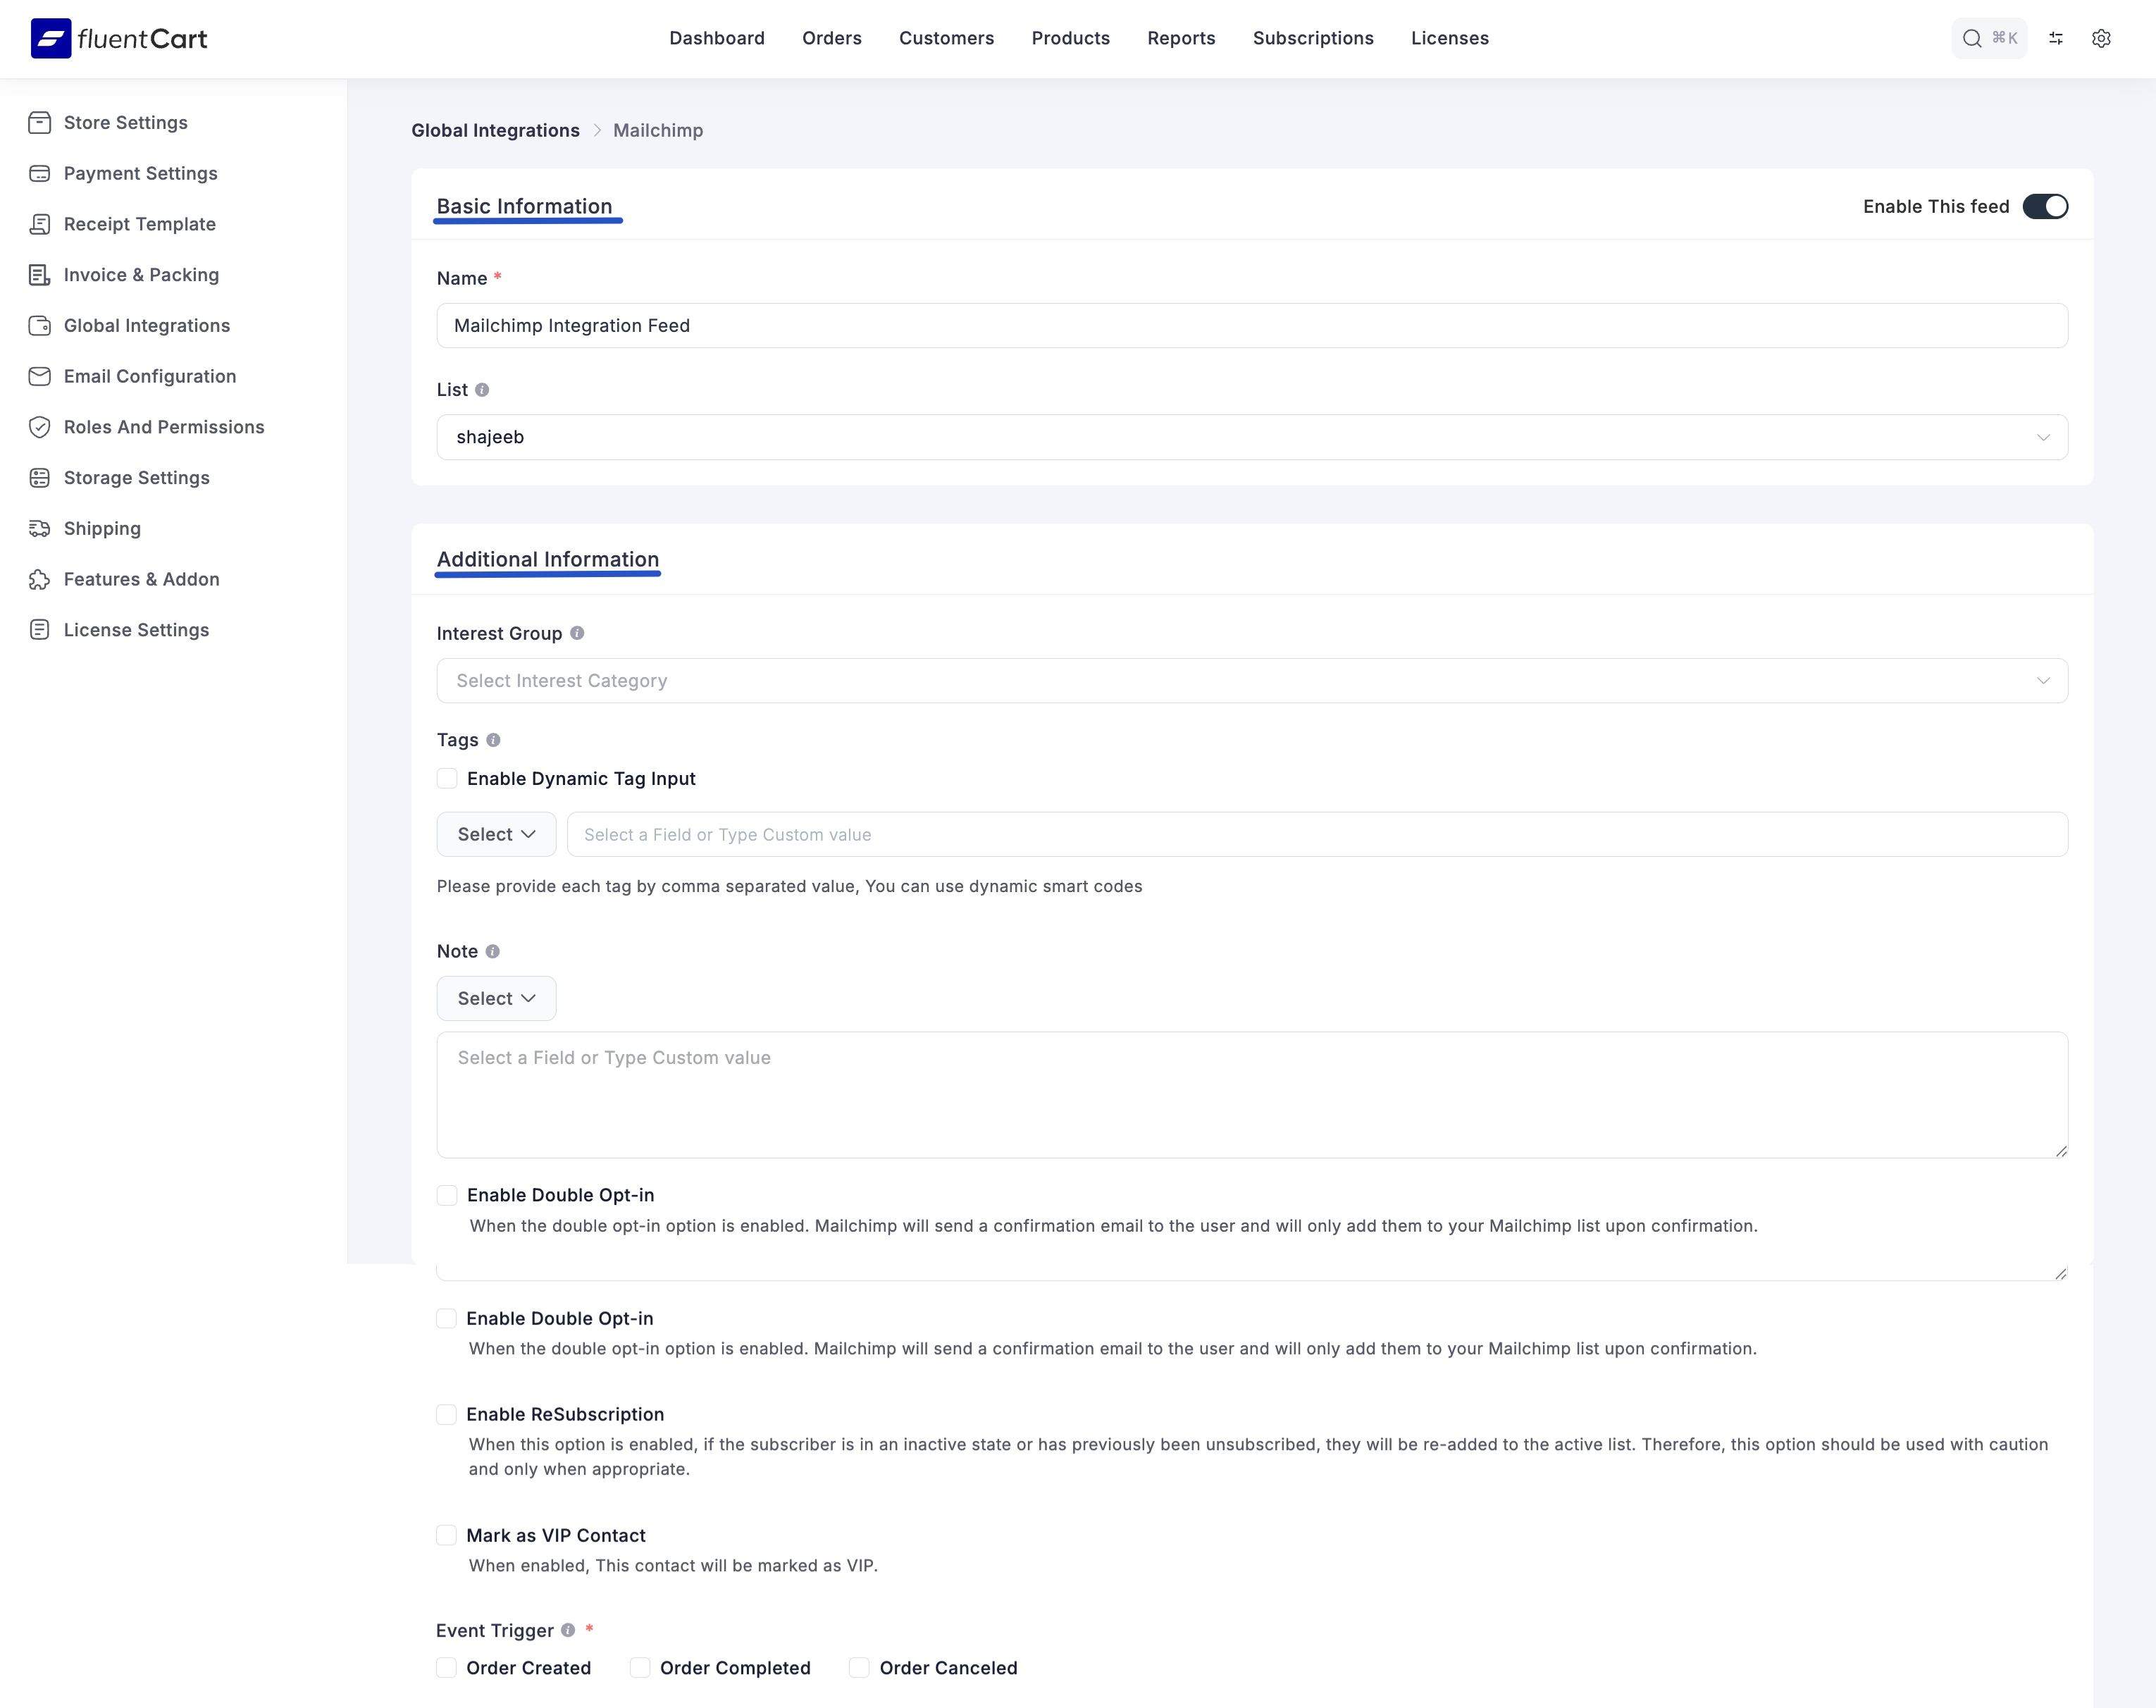
1. Basic Information
- Name: Give your feed a clear and descriptive name for your own reference. For example, "Add New Customers to Newsletter" or "Tag High-Value Buyers."
- List: From the dropdown menu, select the Mailchimp audience (formerly known as a list) where you want to add the new subscribers from your store.
2. Additional Information
This section provides advanced options to help you segment and manage your subscribers effectively.
Interest Group: If you use interest groups (groups within an audience) in Mailchimp, you can select one here to automatically assign new subscribers to a specific group for more targeted marketing.
Tags: Apply one or more tags to contacts when they are added. You can type static tags (separated by commas) or use the Select dropdown to insert dynamic tags using shortcodes from the order data.
You can also enable Dynamic Tag Inputs to apply tags conditionally, such as tagging a customer based on the city they live in.
Note: Add a note that will be attached to the contact's profile in Mailchimp. This is for internal use. You can type a static note or use the Select dropdown to insert dynamic information from the order using shortcodes.
Enable Double Opt-in: It is highly recommended to keep this option enabled. When checked, Mailchimp will send a confirmation email to the user, and they will only be added to your audience after they click the confirmation link. This is a best practice for GDPR compliance, improves your list quality, and reduces spam complaints.
Enable ReSubscription: If a customer has previously unsubscribed from your list, enabling this option will resubscribe them upon purchase. Use this feature with caution to ensure you are respecting your customers' preferences.
Mark as VIP Contact: Enable this to automatically mark the new contact as a VIP in Mailchimp, making it easy to identify and reward your most valuable customers.
3. Event Trigger
Here, you choose the specific store event that will trigger this automation. This gives you precise control over when the data is sent to Mailchimp.
- Order Created: The action fires immediately after an order is placed, regardless of payment status. This is useful for initial welcome sequences.
- Order Completed: The action fires only when the order status is marked as "Completed." This is ideal if you only want to add paying customers to your marketing lists.
- Order Canceled: The action fires if an order is canceled. This could be used to trigger a follow-up email asking for feedback.
4. Finalize the Feed
- Status: Ensure the Enable This feed checkbox is checked. If this is not checked, the automation will be saved but will remain inactive.
Once you have configured all the settings to your liking, click the Create Mailchimp Feed (or a similar save) button. Your integration is now live, and FluentCart will automatically send new customer data to Mailchimp based on your chosen trigger and settings.
Use Case Example: Welcoming New Customers
To better understand how this integration works in practice, let's imagine you run an online clothing store. Your goal is to automatically add every new paying customer to your main newsletter audience and send them a "Welcome" email series.
Here is how you would configure the Mailchimp feed to achieve this:
- Name:
New Customer Welcome Sequence - List:
Main Store Newsletter - Tags:
new-customer,2025-buyer - Enable Double Opt-in:
Checked(Recommended) - Event Trigger:
Order Completed - Status:
Enable This feed
Result:
With this configuration, every time an order is marked as "Completed" in FluentCart, the customer's information will be sent to Mailchimp. They will be added to your "Main Store Newsletter" audience with the tags "new-customer" and "2025-buyer."
Inside Mailchimp, you can then create an automation that triggers whenever a new contact with the "new-customer" tag is added, automatically starting your welcome email series.