Appearance
Customizing the Receipt Template
To create a branded and informative receipt for your customers, you can customize the global receipt template in FluentCart. This guide will walk you through the process from start to finish, ensuring your customers receive a professional receipt after every purchase.
Step 1: Navigate to the Receipt Template Screen
Your journey begins in the WordPress dashboard.
- First, navigate to FluentCart Pro > Settings in the left-hand sidebar.
- On the settings page, click the Receipt Template tab to open the editor.
Step 2: Edit the Template Content
You will now see the main editor, which comes pre-filled with a default layout. This is your canvas for customization.
Direct Editing: You can directly type in the editor to add custom messages (like "Thank you for your order!"), change the text formatting (bold, italics), or restructure the layout.
Advanced Editing: For more precise control over the design, you can switch from the standard Visual editor to the Code editor. This allows you to work directly with the underlying HTML of the template.
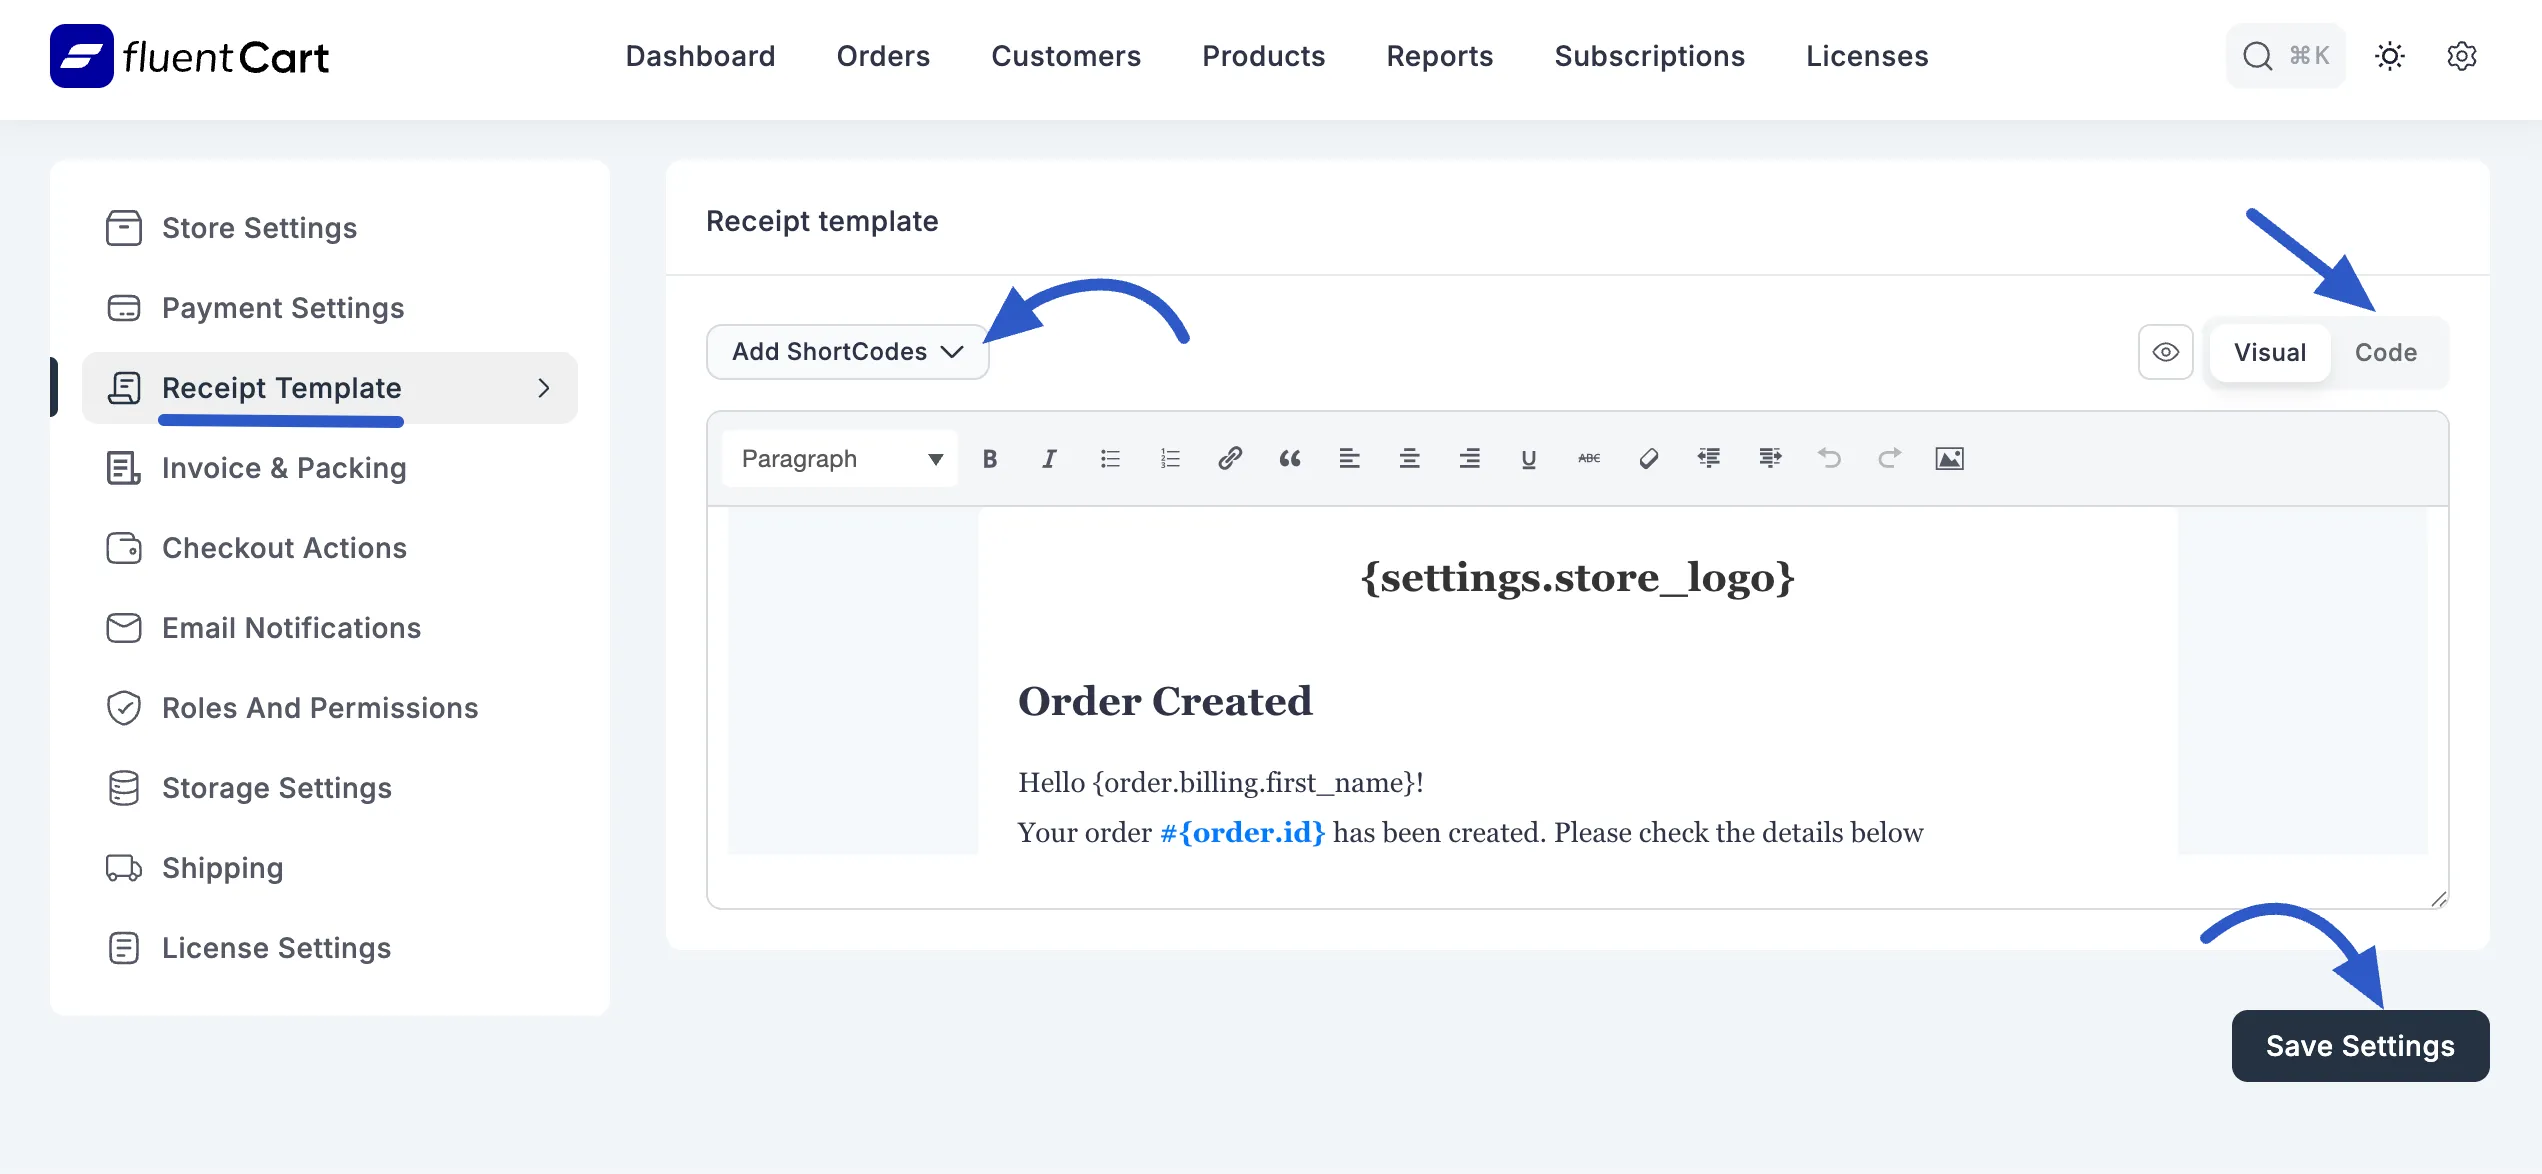
Step 3: Add Dynamic Content with Shortcodes
To ensure each receipt contains the correct, unique details for every order (like the customer's name or order ID), you will use shortcodes. A shortcode is a placeholder, like {order.id}, that FluentCart automatically replaces with the real data when generating a receipt.
To insert a shortcode:
- Decide where you want to add the dynamic information. For example, you might place your cursor after "Hello," to add the customer's name.
- Click the Add ShortCodes dropdown menu located directly above the editor's toolbar.
- Select the piece of information you need from the list (e.g., "Billing First Name"). The corresponding shortcode,
{order.billing_first_name}, will be inserted for you.
Step 4: Save Your Custom Template
After you have finished editing and are satisfied with your new receipt layout, you must save your work for it to take effect.
Scroll to the bottom of the page and click the Save Settings button. Your new template is now active and will be used for all future customer receipts.