Appearance
Adding New Roles
FluentCart's Roles and Permissions system allows you to assign specific access levels to different users within your WordPress site. This guide will walk you through attaching a predefined FluentCart role to an existing WordPress user.
Steps to Add a New Role
From your WordPress dashboard, navigate to FluentCart Pro > Settings > Roles And Permissions.
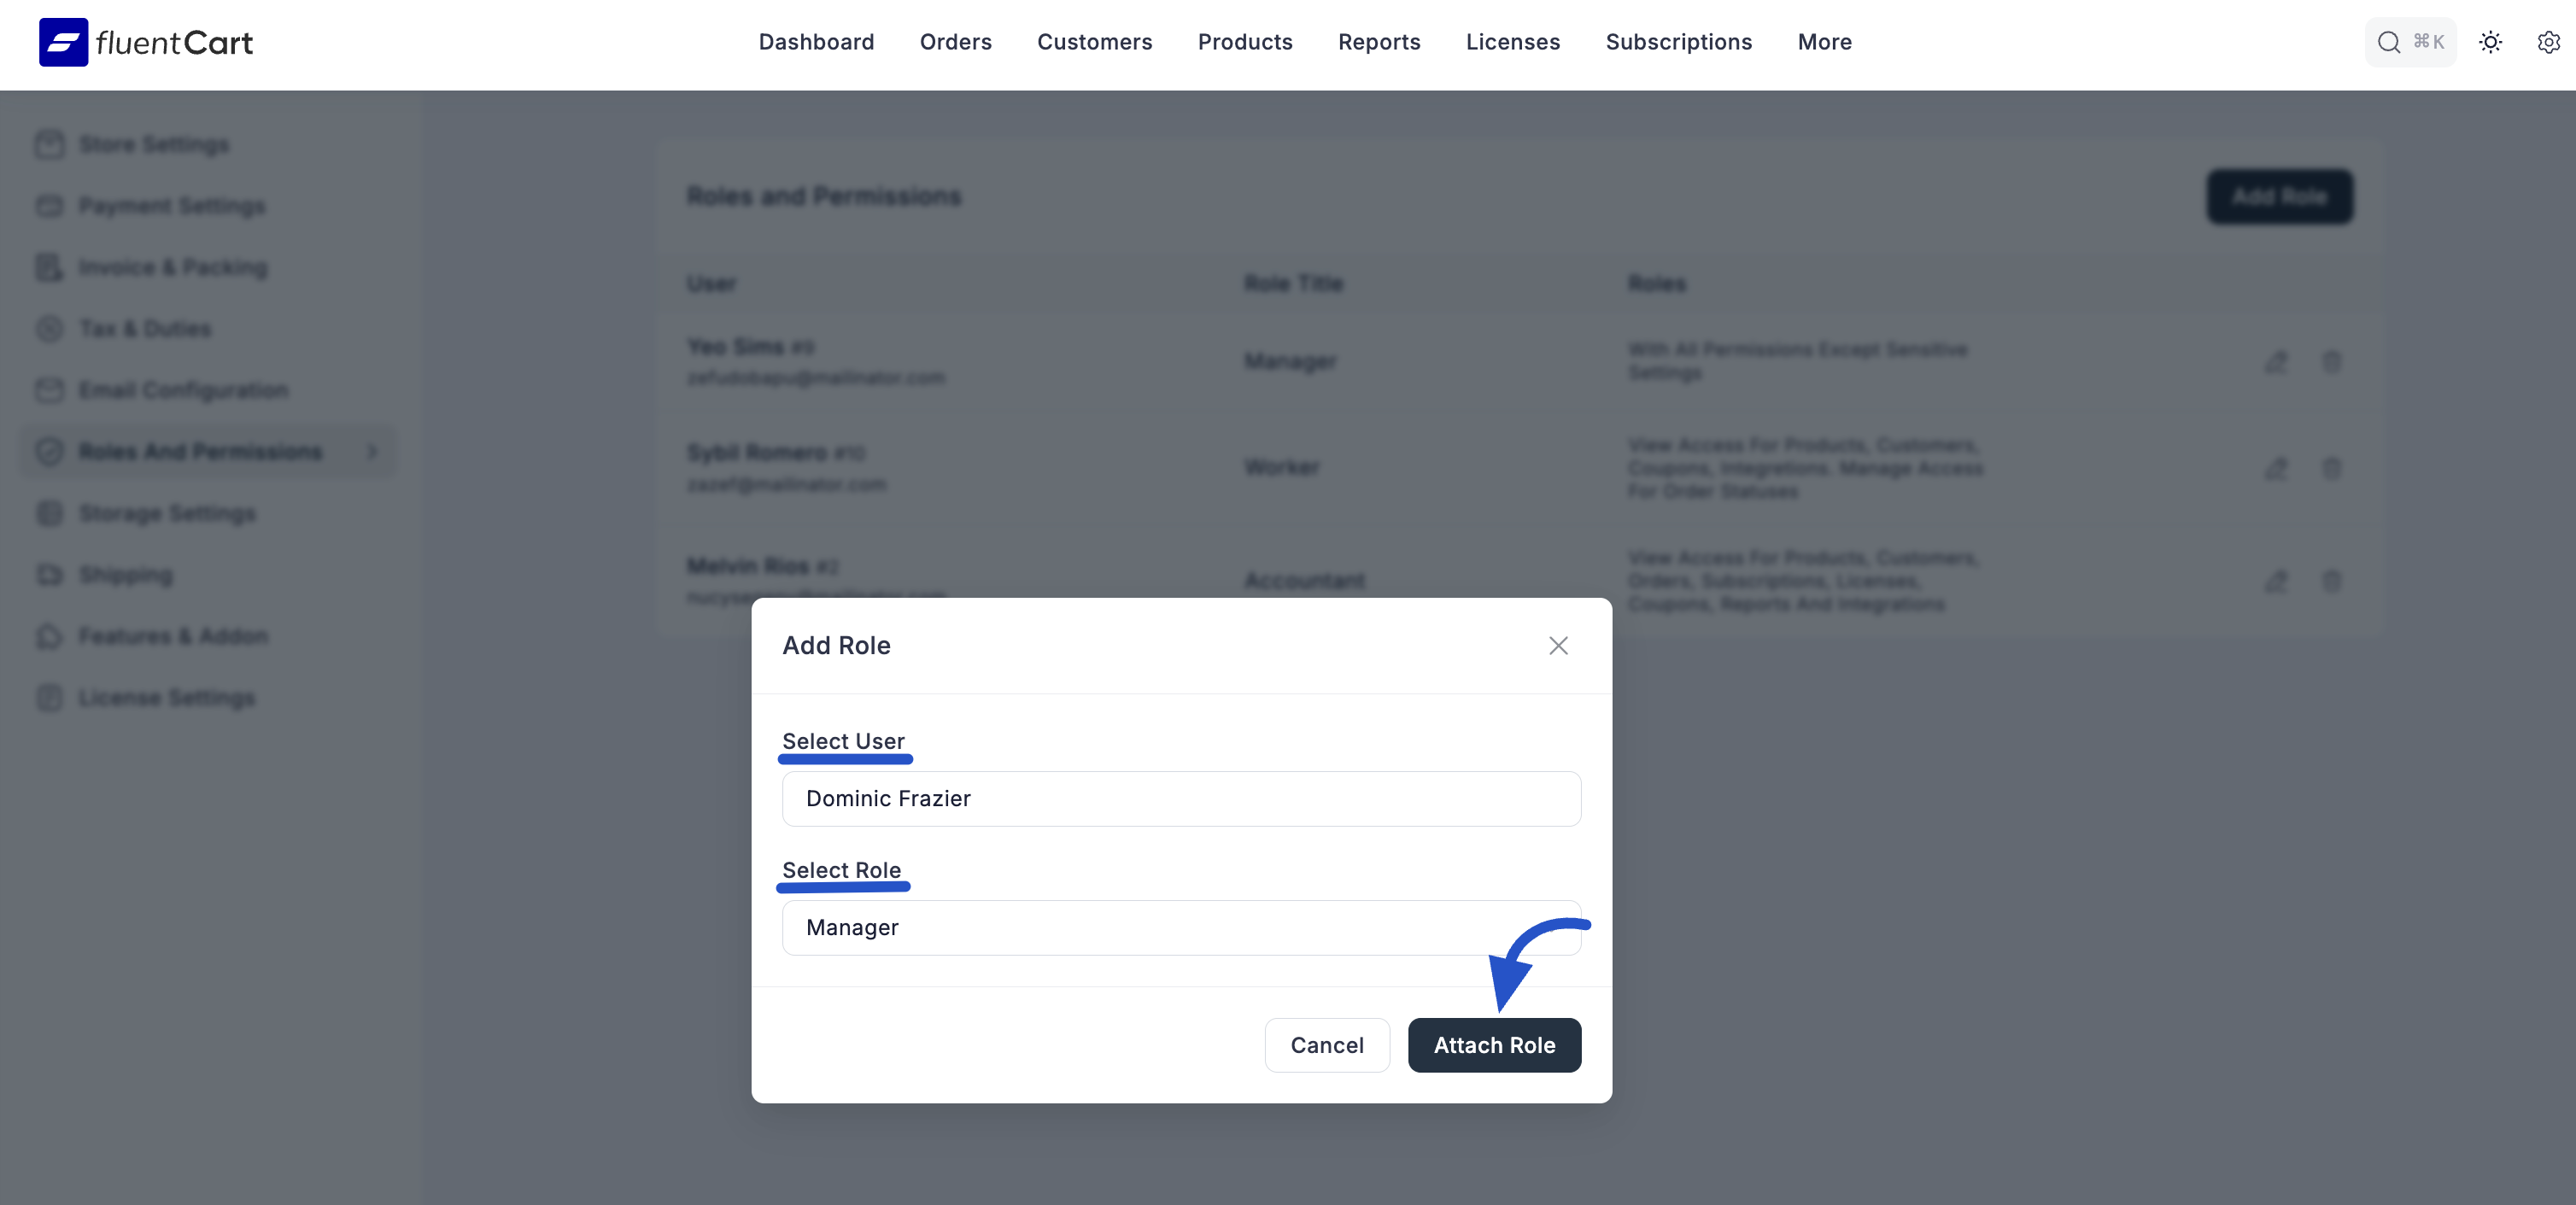
On the Roles And Permissions screen, click the "+ Add Role" button at the top right corner.

An "Add Role" modal window will appear.
Select User:
- Use the dropdown or search field labeled "Select User" to find the existing WordPress user you wish to assign a role to.
Select Role:
- After selecting a user, use the dropdown labeled "Select Role" to choose one of the predefined FluentCart roles. Each role comes with a brief description of its permissions:
- Super Admin: "With All Permissions". This role has complete control over all FluentCart functionalities.
- Manager: "With All Permissions Except Sensitive Settings". This role can manage most aspects of the store but is restricted from critical configurations.
- Worker: "View Access for products, customers, coupons, integretions." It also has "Manage Access for Order Statuses". This role is suitable for staff primarily involved in fulfillment and basic order updates.
- Accountant: "View Access for products, customers, orders, subscriptions, licenses, coupons, reports and integrations". This role is designed for users who need to view financial and sales data without making operational changes.
- After selecting a user, use the dropdown labeled "Select Role" to choose one of the predefined FluentCart roles. Each role comes with a brief description of its permissions:
After selecting both the user and the role, click the "Attach Role" button within the modal to confirm the assignment.
To cancel the process, click the "Cancel" button.
The newly assigned role will now be reflected in the Roles and Permissions list.